WCF Services can be self-hosted in a Windows console app. Here we will go through how to do this.
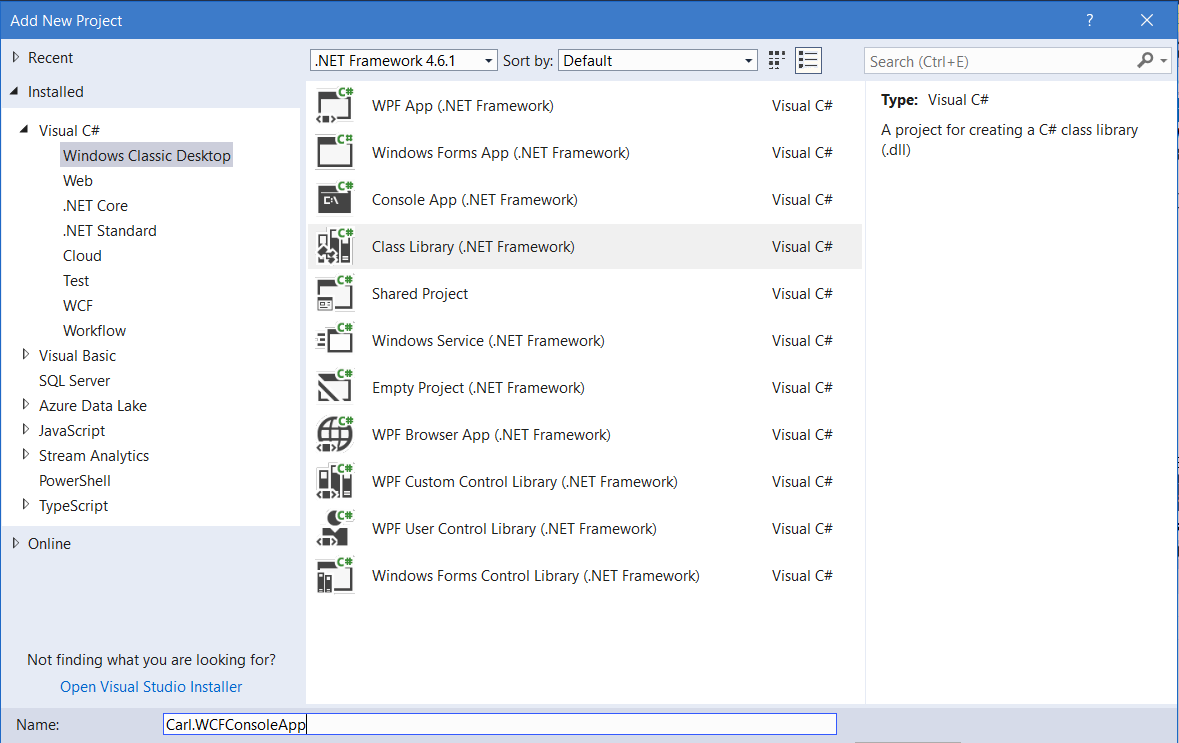
First, create a new class library project in Visual Studio:
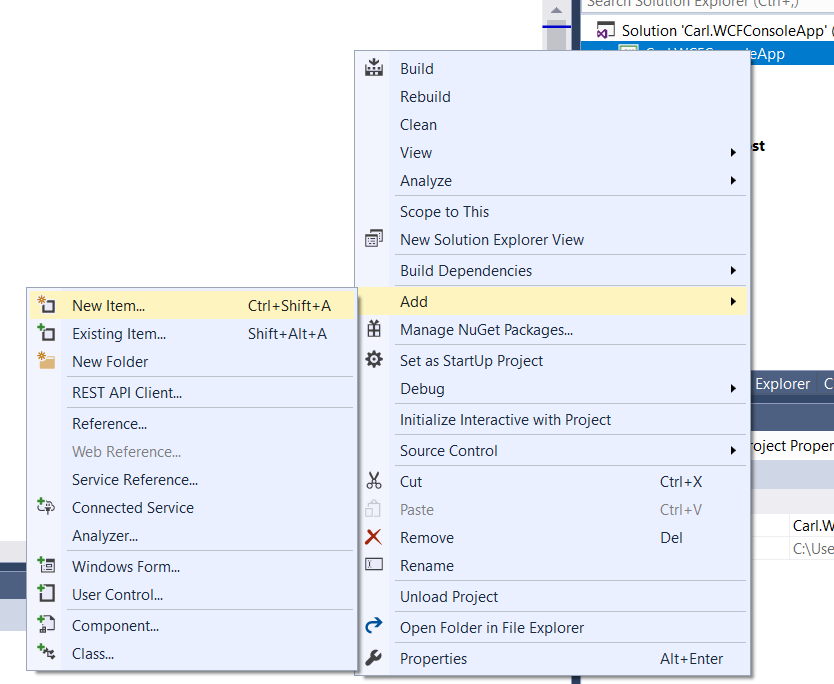
Add a new item:
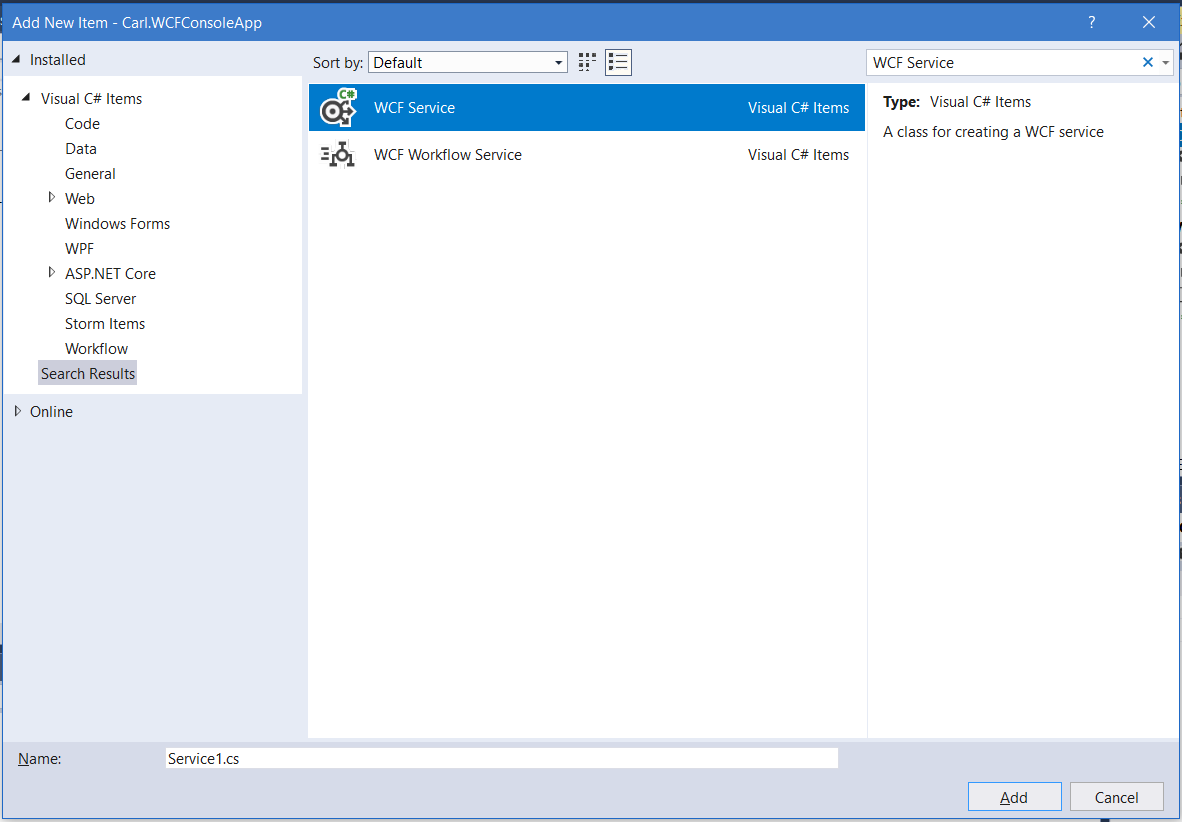
Add a new WCF Service:
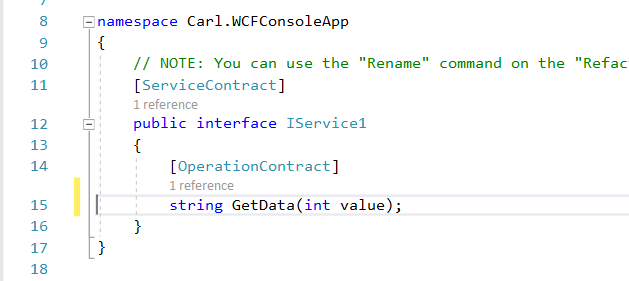
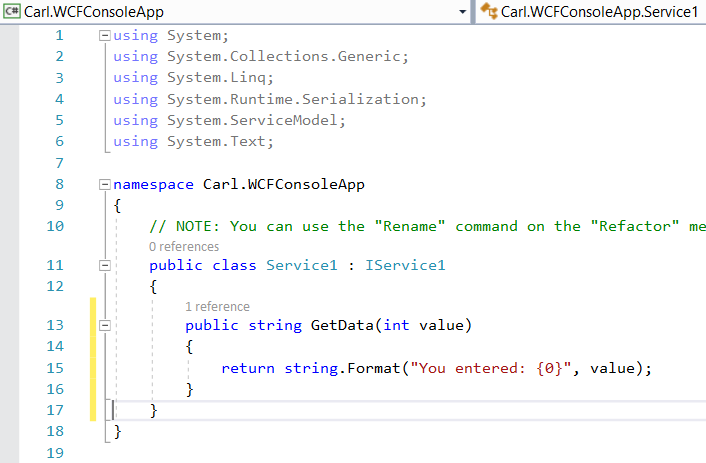
Add some code to GetData in IService.cs:
And Service1.cs:
Delete any configuration files that are part of the project. We will use the configuration in our calling app. Compile the code.
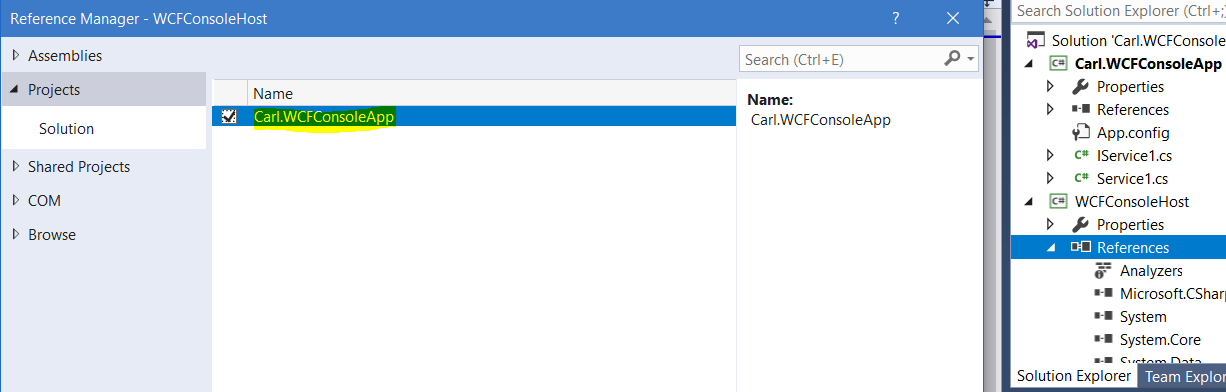
Now, add a new project of type Console App. Add a reference to the WCF service:
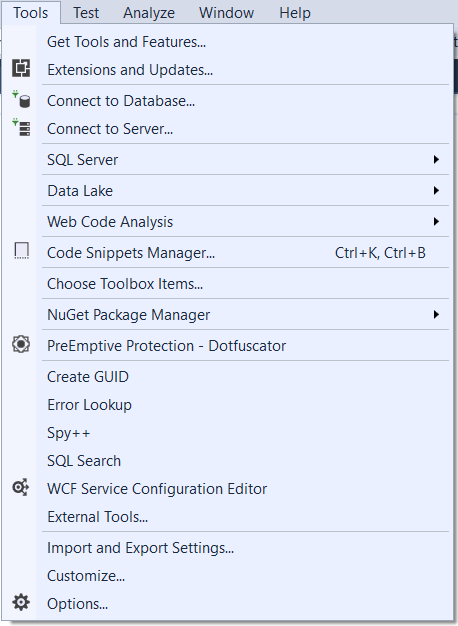
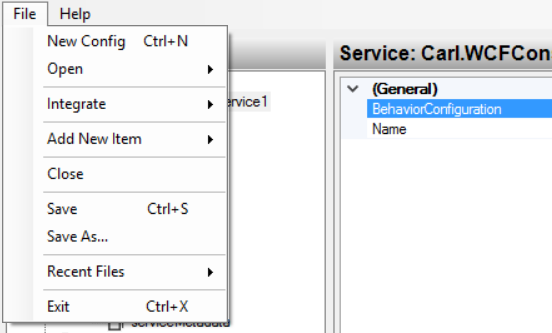
From here, we will use the WCF Service Configuration Editor to configure our service. This can be accessed by either selecting from the Tools menu and pointing to the App.Config file:
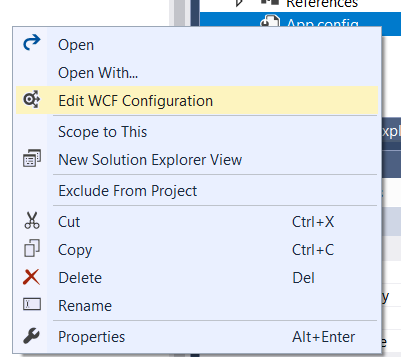
Or right clicking the App.Config file and selecting:
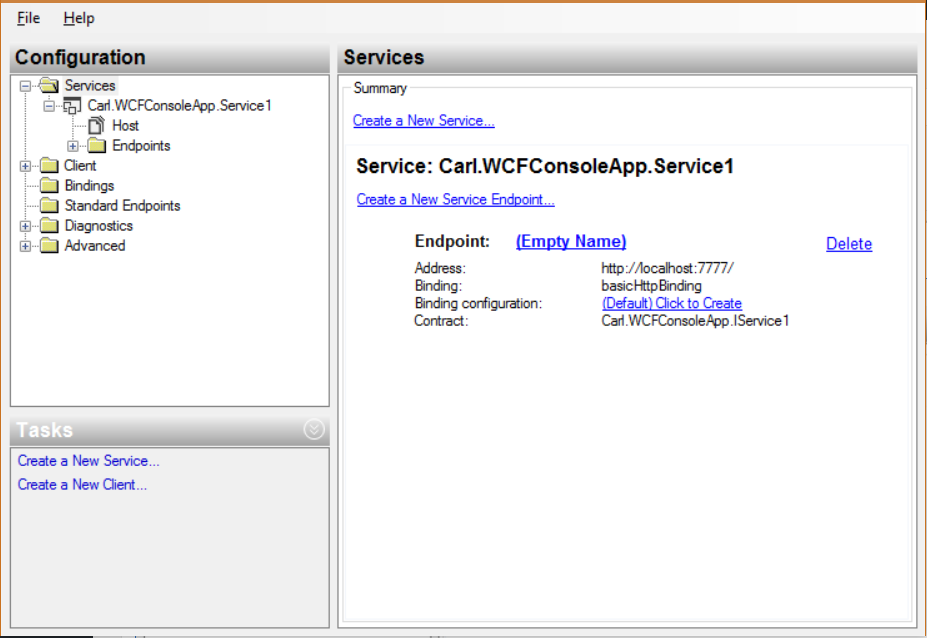
This will open:
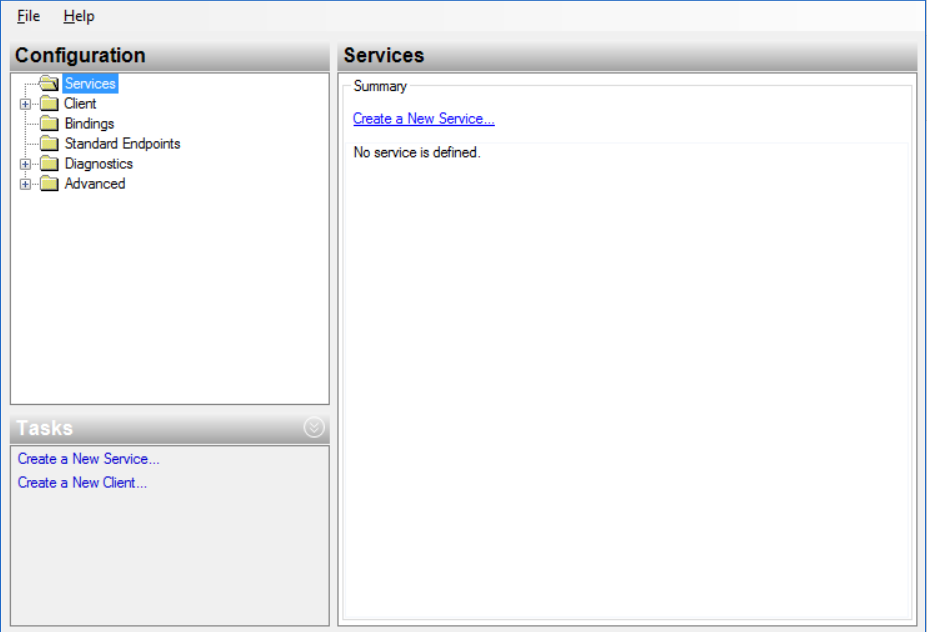
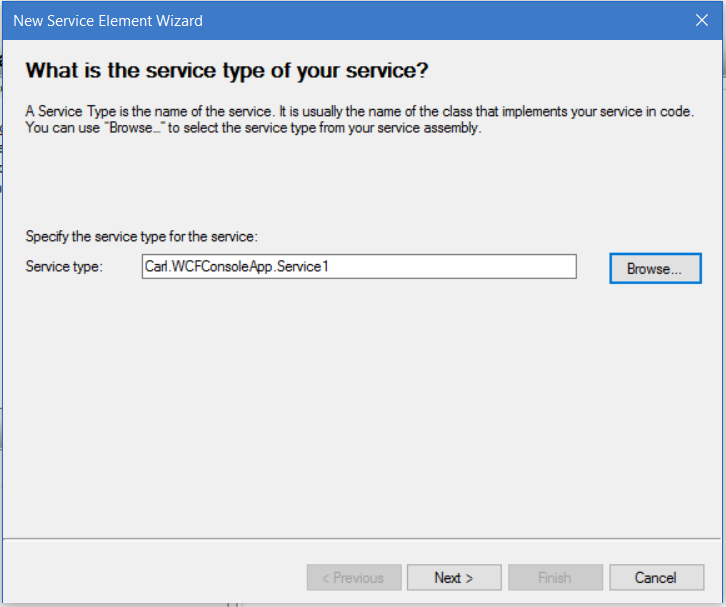
Select “Create a New Service”, browse and select the file from the WCFConsoleApp project we originally created:
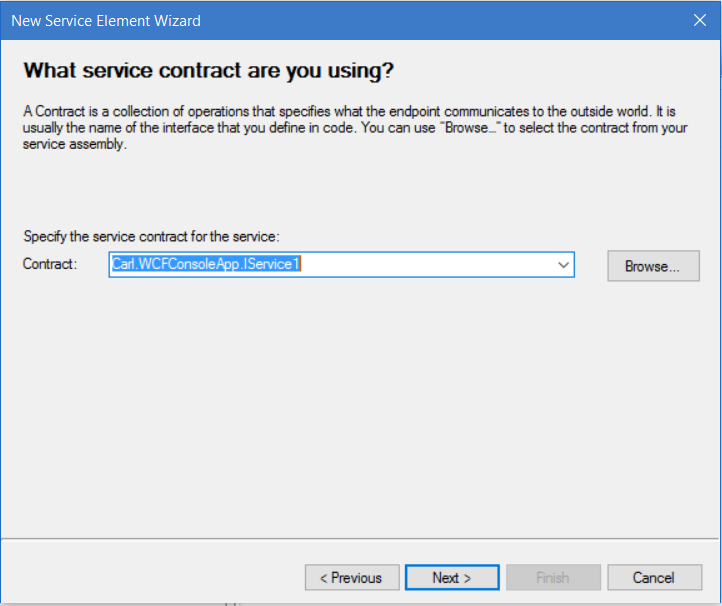
Clicking Next, you will see the contract:
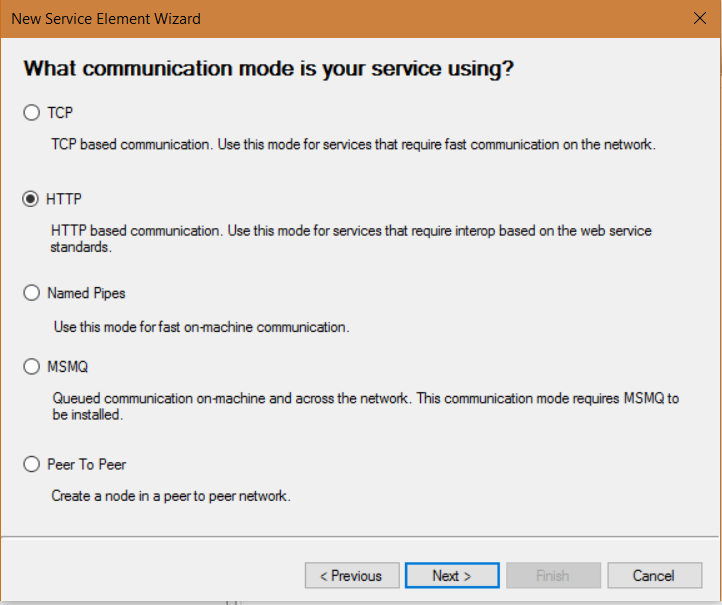
And then the binding. We will select TCP:
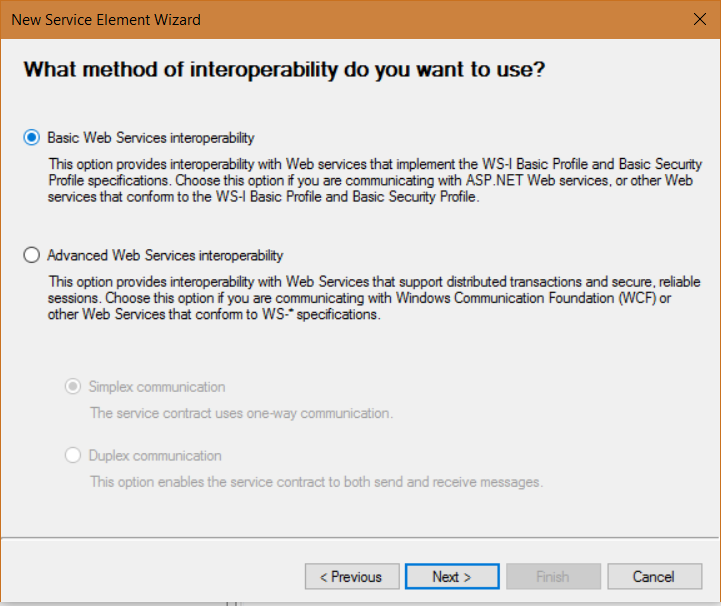
Method of interop:
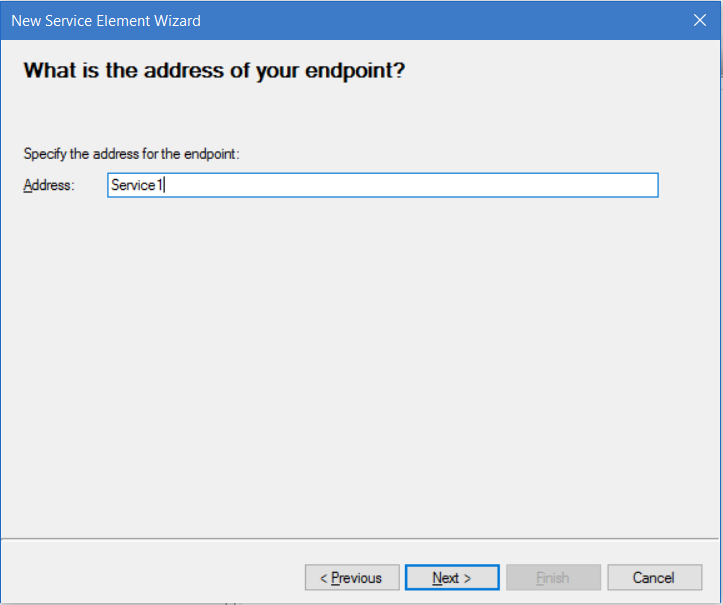
And then the endpoint:
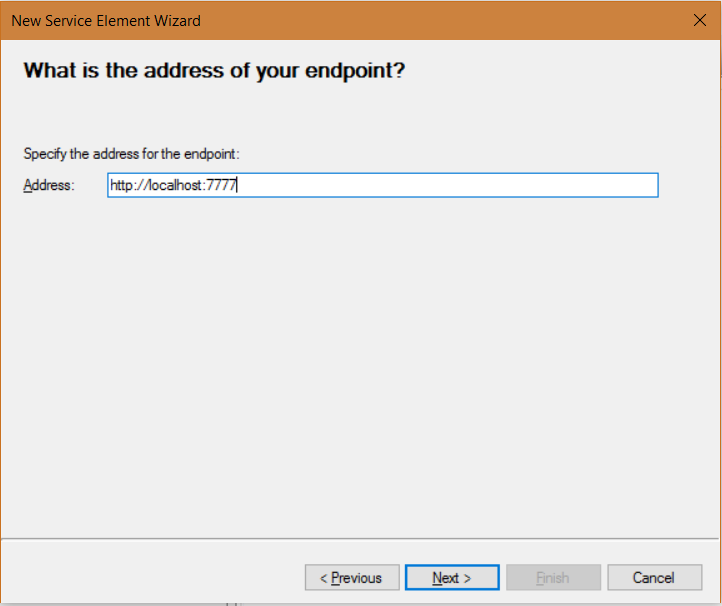
We will use a relative endpoint. Click Next:
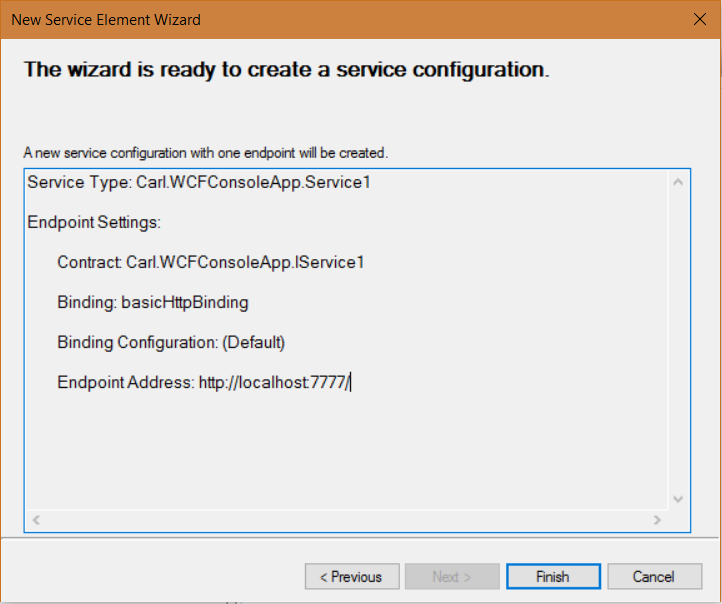
Click Finish:
We will now see:
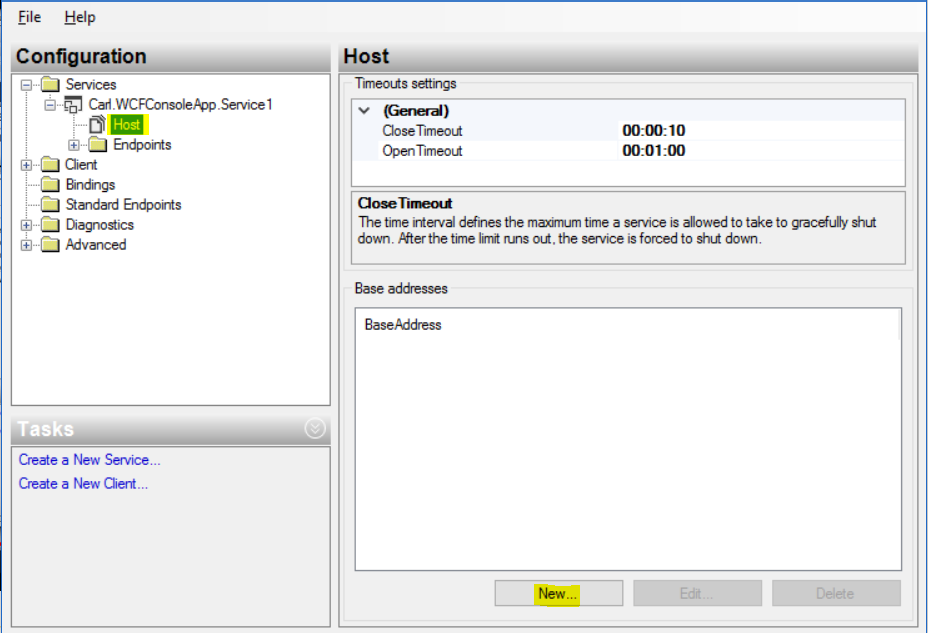
Now we will configure our base address. Click on Host and then New:
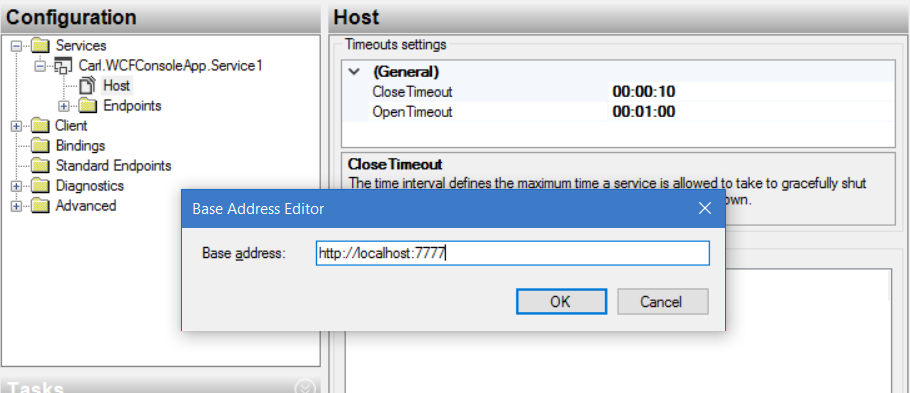
We will be adding 2 base addresses. The first will be for metadata. This will be at the address – http://localhost:7777:
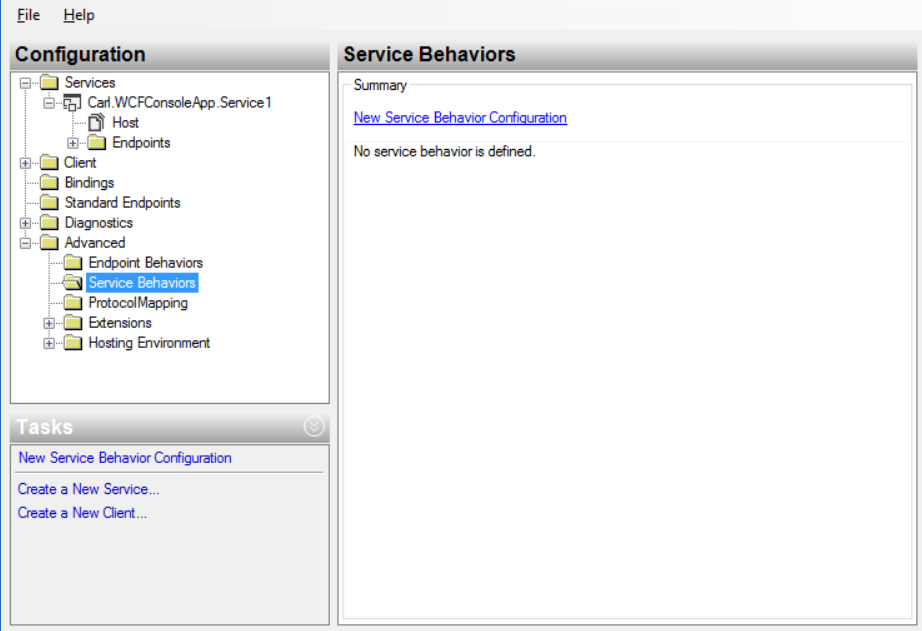
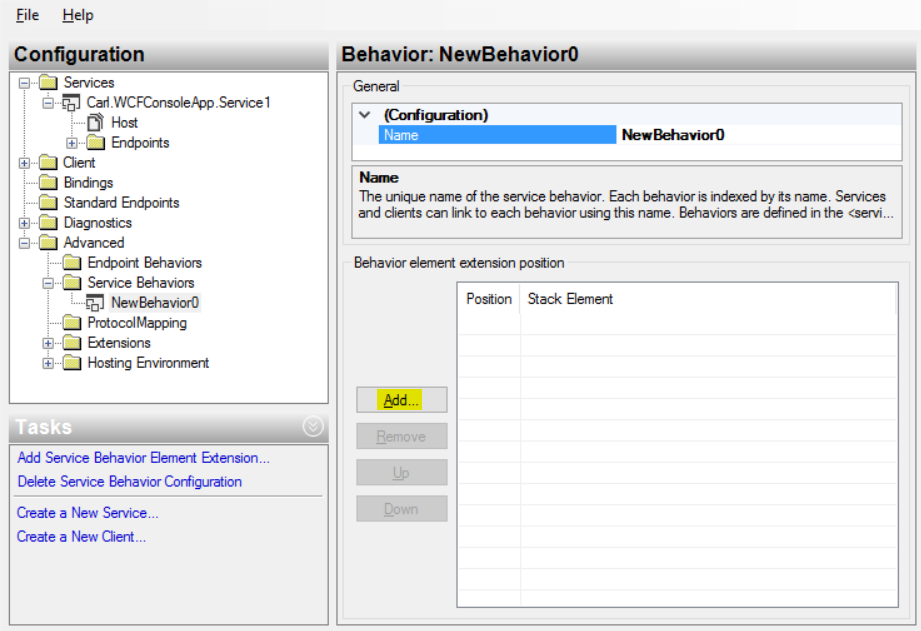
Now we can add a Service Behavior. Click on the Advanced->Service Behaviors section and click New Service Behavior Configuration:
Click Add:
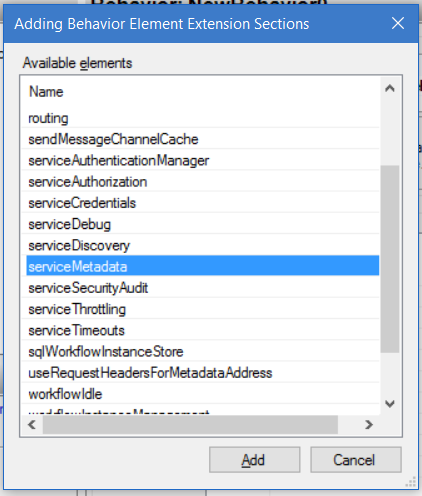
We will add serviceMetadata:
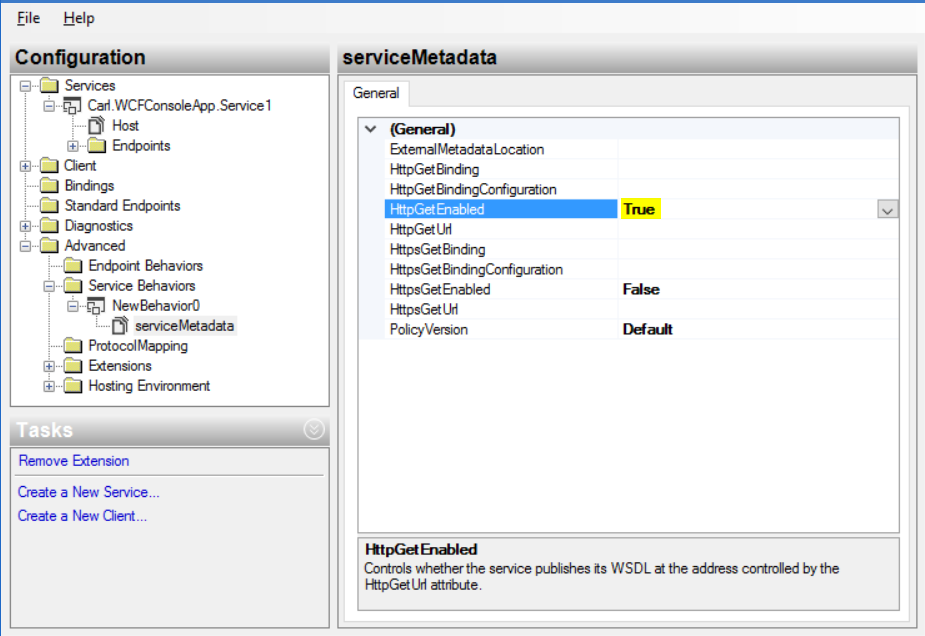
Set HttpGetEnabled to True:
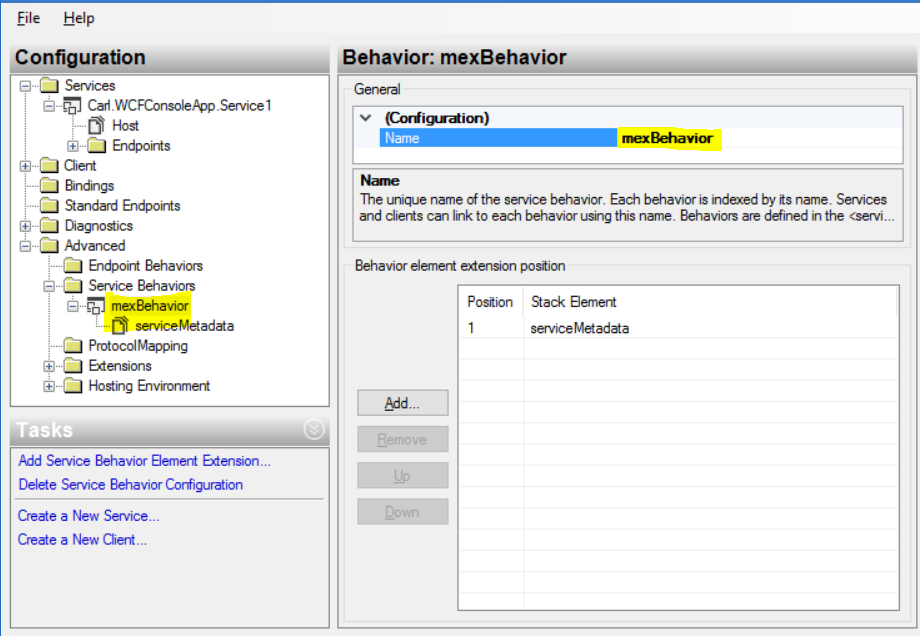
Clicing back on the NewBehavior, we will set the name to mexBehavior:
Now we need to associate the behavior with the service. Selelct the service and then select the behavior we created:
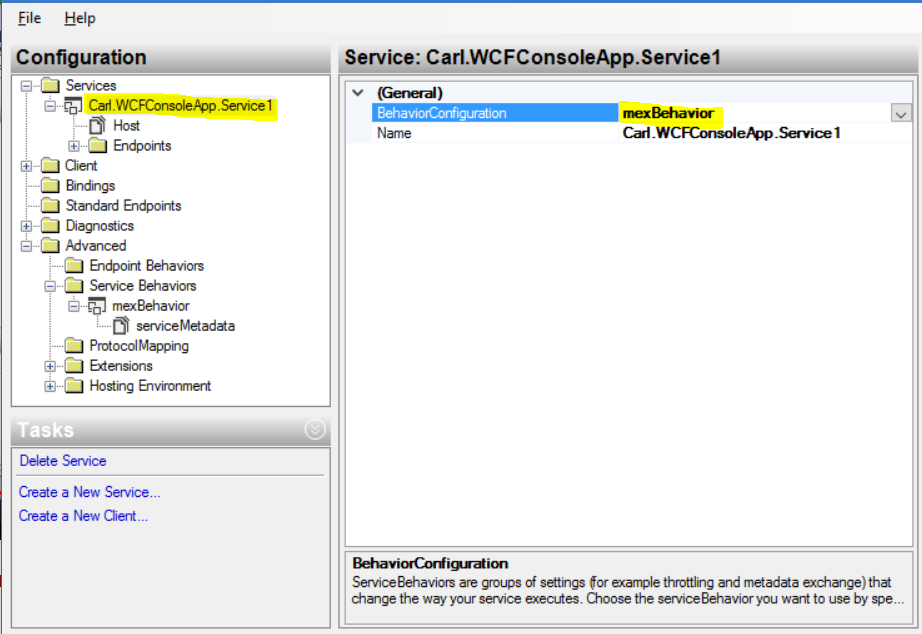
Click to Save the configuration:
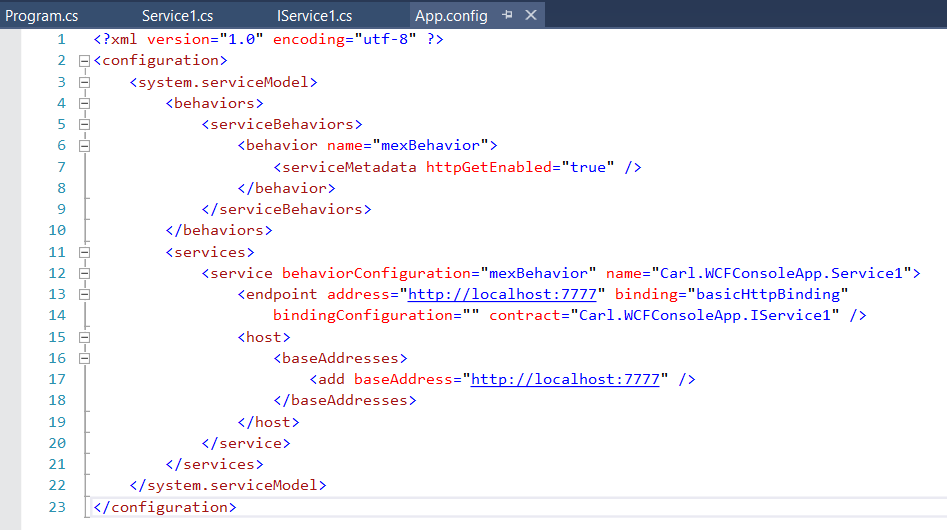
Open the App.Config and you will see the configuration tool has populated our config file:
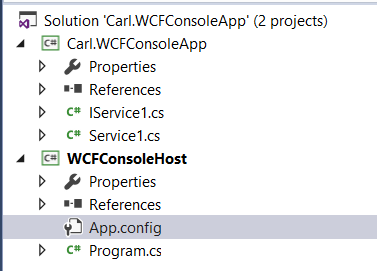
Your solution should look like this:
Now, press F5 to run the host.
You may run into this problem:
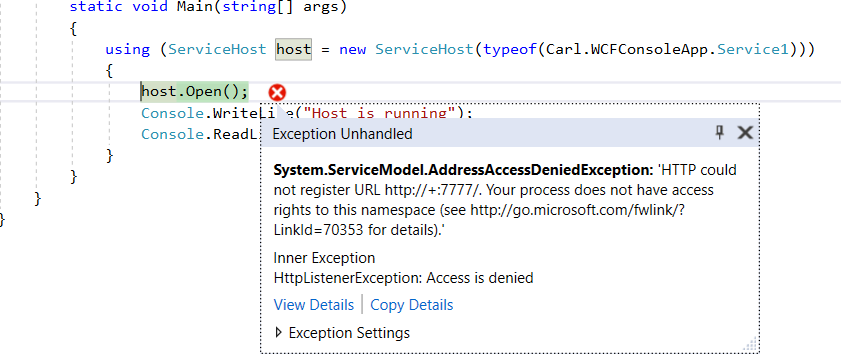
“System.ServiceModel.AddressAccessDeniedException: ‘HTTP could not register URL http://+:7777/. Your process does not have access rights to this namespace (see http://go.microsoft.com/fwlink/?LinkId=70353 for details).'”
The problem in this case, is we are not running Visual Studio as Administrator. Run as Administrator. You will now see the console app open:
![]()
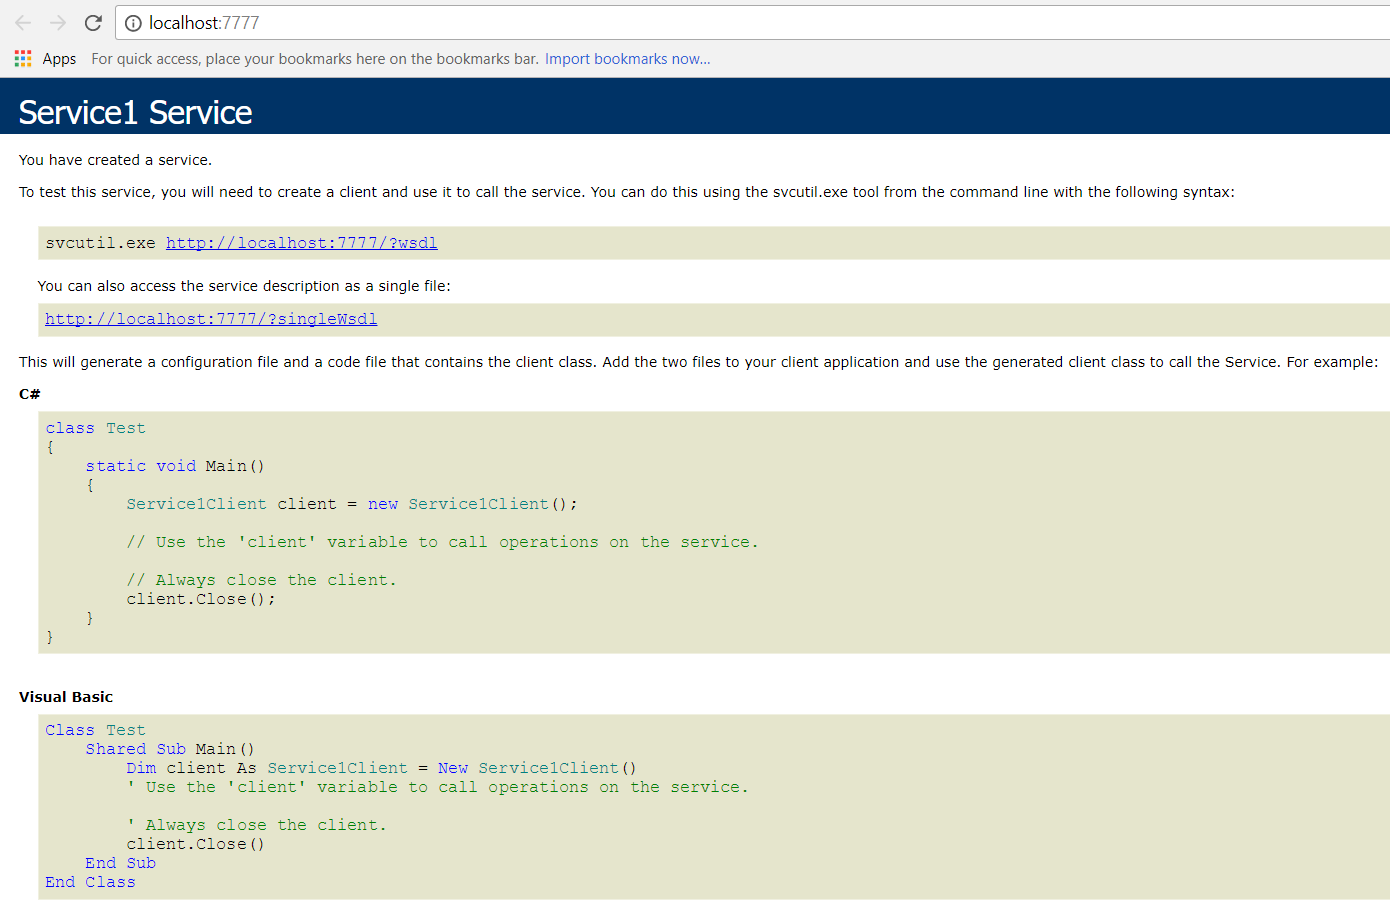
We can see the service running at http://localhost:7777/
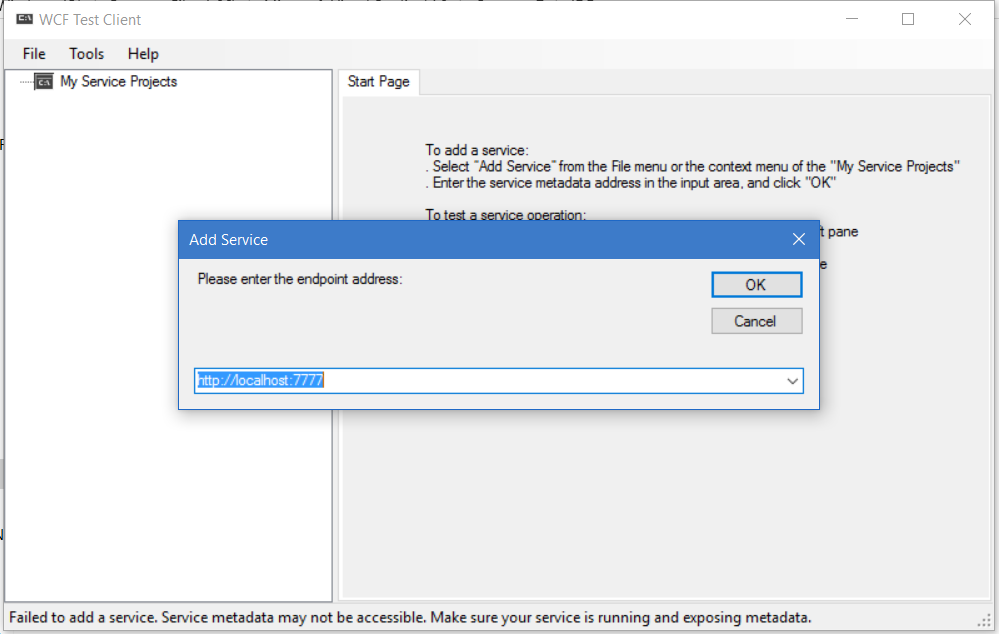
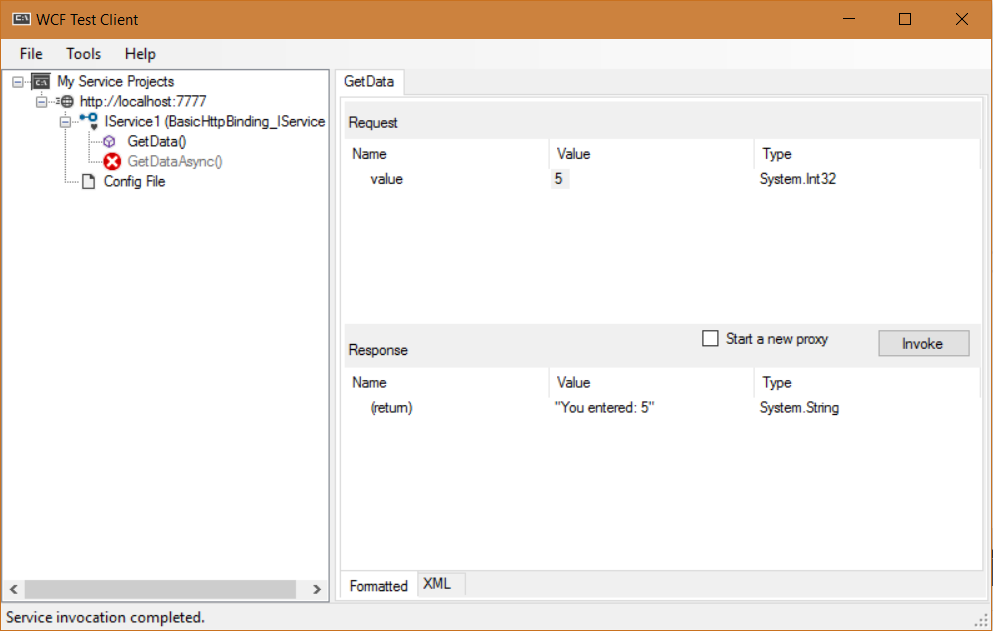
And can connect to it from WCF Test Client:
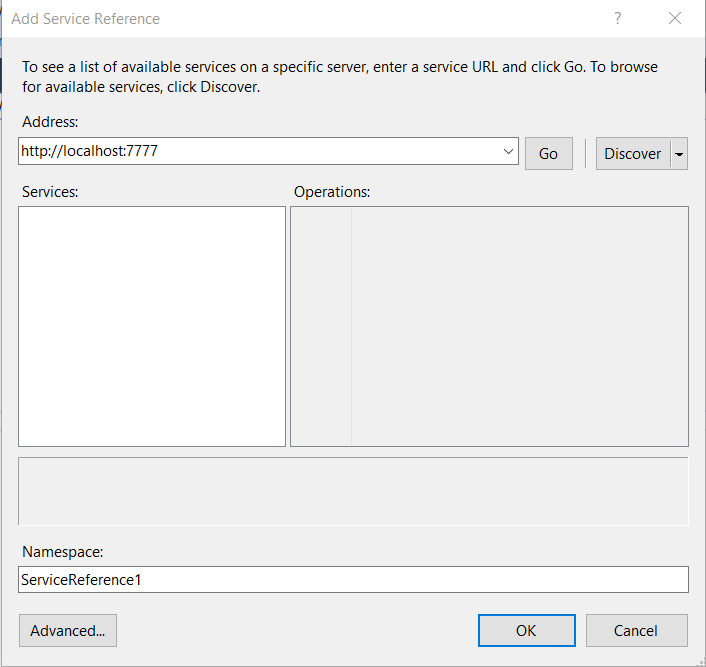
Now, let’s create a console app that calls the service. Create a console app, and add a service reference:
Add some code to call our host:
using System;
using System.Collections.Generic;
using System.Linq;
using System.Text;
using System.Threading.Tasks;
using Carl.AccessWCFConsoleHost.ServiceReference1;

namespace Carl.AccessWCFConsoleHost
{
    class Program
    {
        static void Main(string[] args)
        {
            try
            {
                Service1Client sc = new Service1Client();
                string s = sc.GetData(1);
                Console.WriteLine(s);
            }
            catch (Exception ex)
            {
                Console.WriteLine(ex.ToString());
            }
            Console.ReadLine();
        }
    }
}
You will then get a response from the service:
![]()
I AM SPENDING MORE TIME THESE DAYS CREATING YOUTUBE VIDEOS TO HELP PEOPLE LEARN THE MICROSOFT POWER PLATFORM.
IF YOU WOULD LIKE TO SEE HOW I BUILD APPS, OR FIND SOMETHING USEFUL READING MY BLOG, I WOULD REALLY APPRECIATE YOU SUBSCRIBING TO MY YOUTUBE CHANNEL.
THANK YOU, AND LET'S KEEP LEARNING TOGETHER.
CARL
