A common scenario with plugins is they will be developed in one environment, then tested in another environment and then deployed to production for use. Here we will show how to deploy the plugins across different environments.
Let’s say we have a plugin that updates the description of an opportunity when it is created that we want to deploy from a dev environment to a QA/test environment.
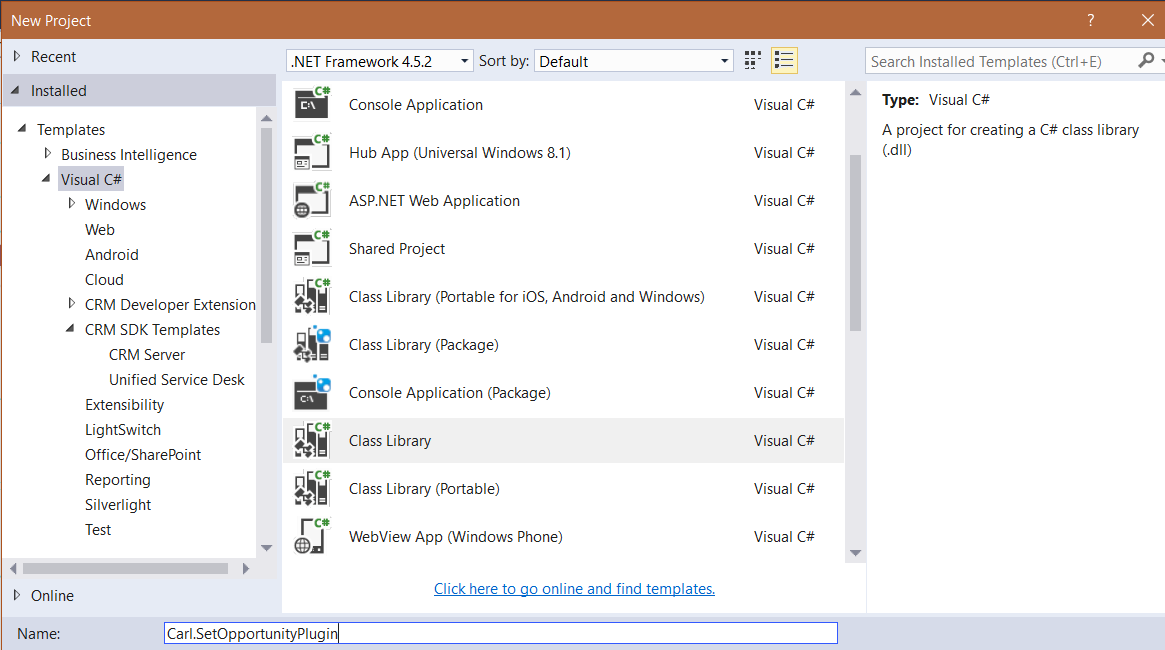
First we will create the plugin. Open Visual Studio and create a new class project:
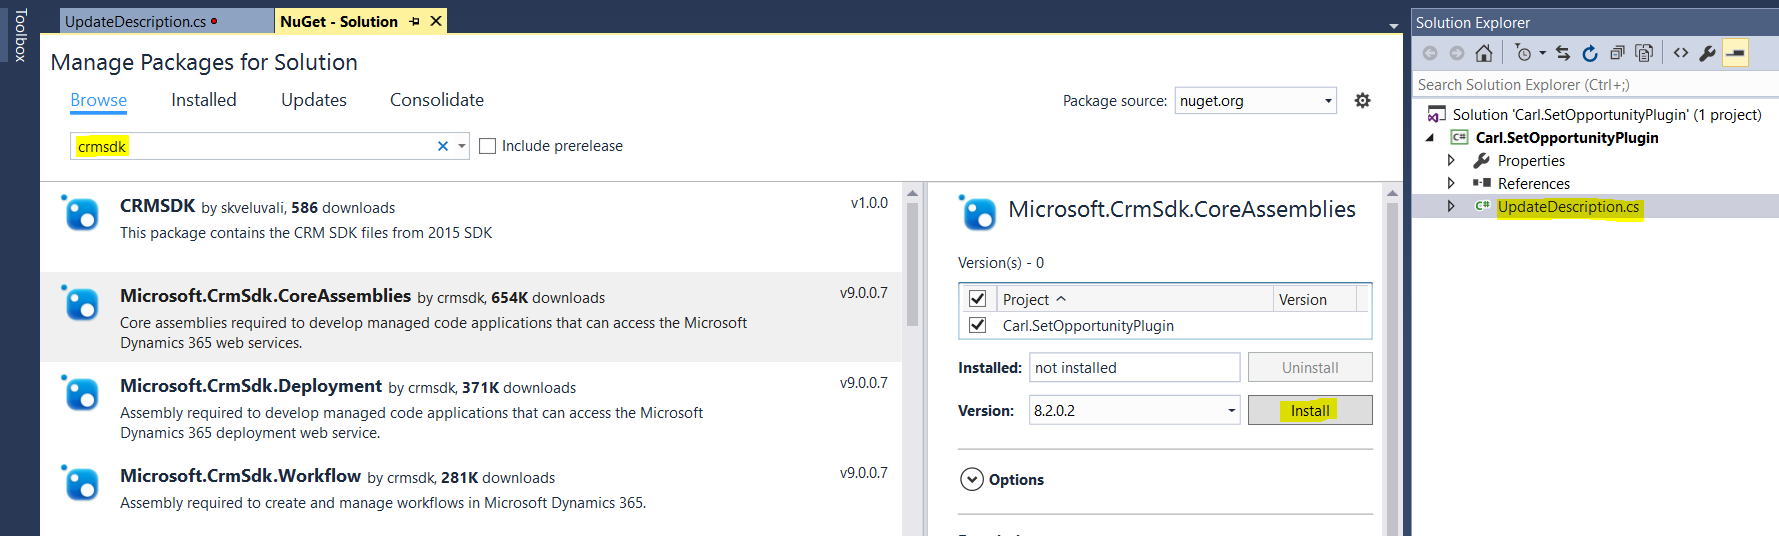
Add the CRMSDK package:
Add the code:
using System;
using System.Collections.Generic;
using System.Linq;
using System.Text;
using System.Threading.Tasks;
using Microsoft.Xrm.Sdk;
using Microsoft.Xrm.Sdk.Query;

namespace Carl.SetOpportunityPlugin
{
    public class UpdateDescription : IPlugin
    {
        public void Execute(IServiceProvider serviceProvider)
        {
            // Obtain the execution context from the service provider.
            Microsoft.Xrm.Sdk.IPluginExecutionContext context = (Microsoft.Xrm.Sdk.IPluginExecutionContext)
            serviceProvider.GetService(typeof(Microsoft.Xrm.Sdk.IPluginExecutionContext));

            // The InputParameters collection contains all the data passed in the message request.
            if (context.InputParameters.Contains("Target") &&
            context.InputParameters["Target"] is Entity)
            {
                // Obtain the target entity from the input parameters.
                Entity entity = (Entity)context.InputParameters["Target"];

                if (entity.LogicalName == "opportunity")
                {
                    if (entity.Attributes.Contains("description") == false)
                    {
                        entity.Attributes.Add("description", "Here is the new description");
                    }
                    else
                    {
                        throw new InvalidPluginExecutionException("The description can only be set by the system.");
                    }
                }
            }
        }
    }
}
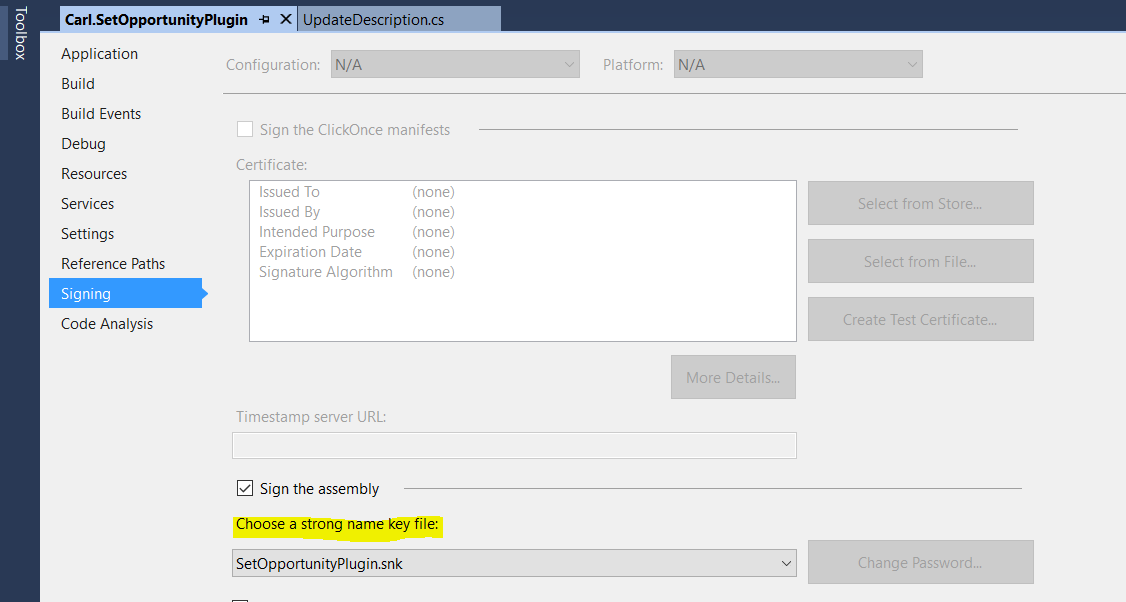
Sign and build:
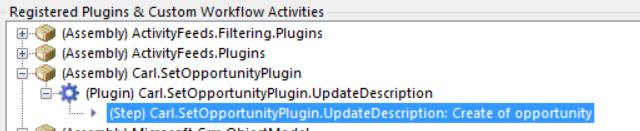
Register:
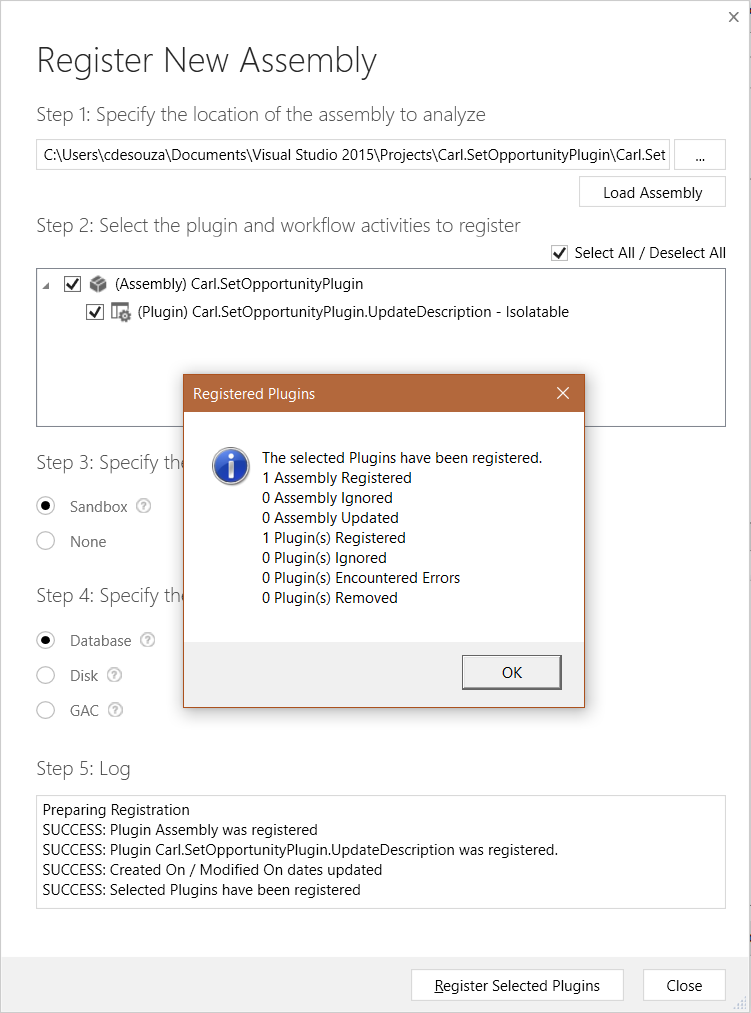
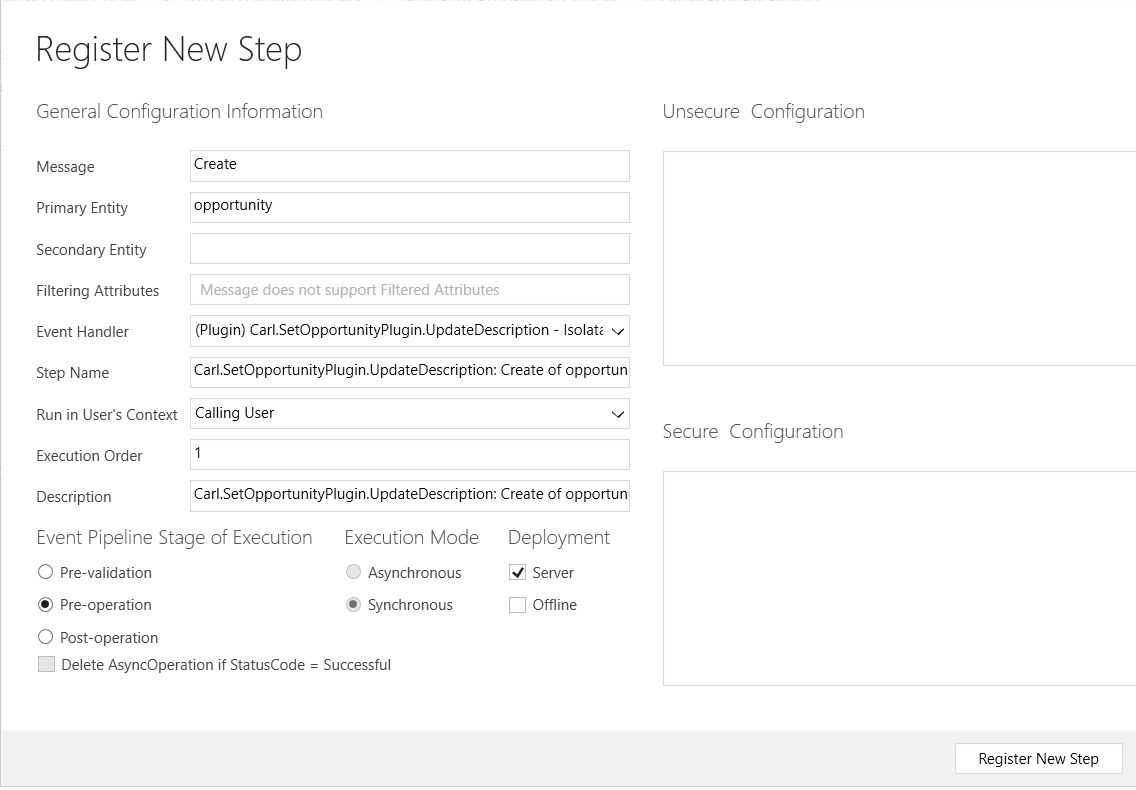
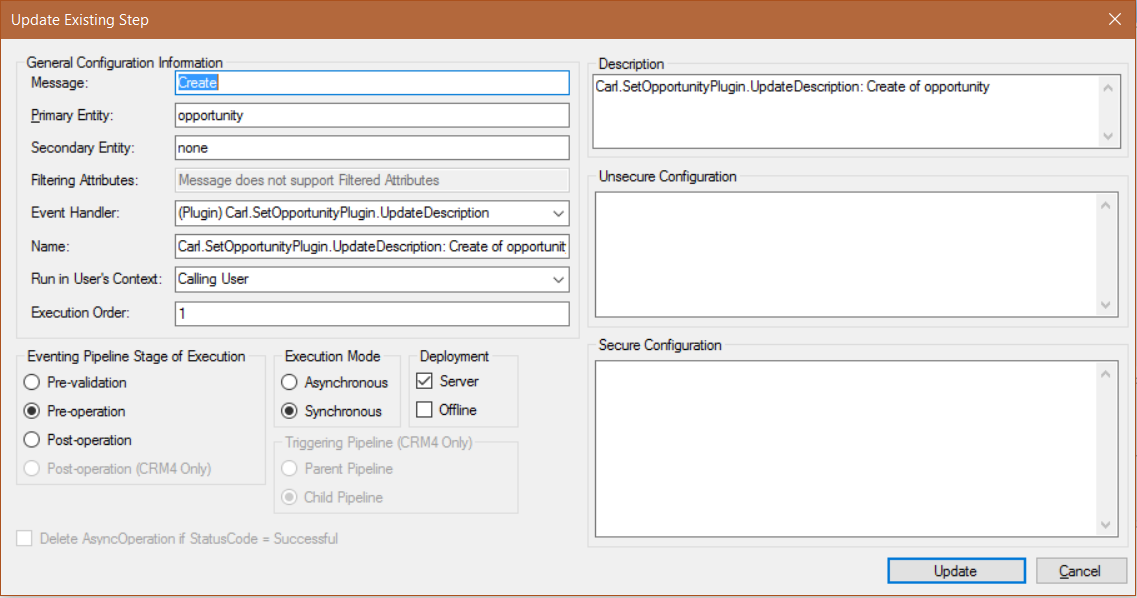
Register Step:
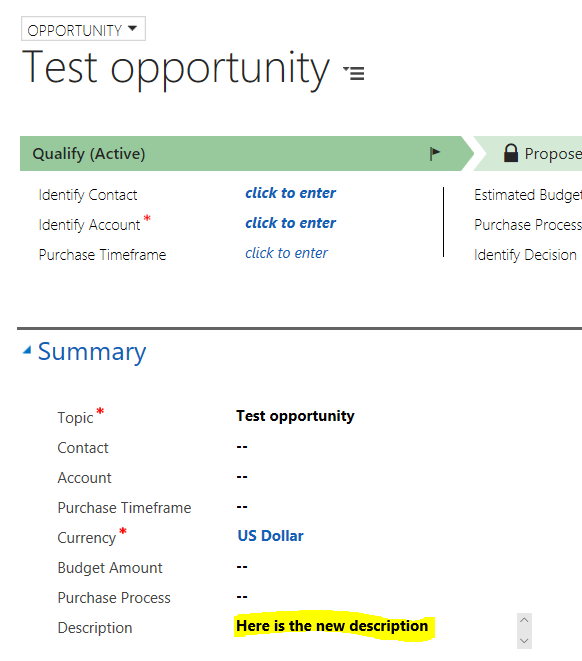
Create a new opportunity and save. You will see the description is updated and the plugin ran:
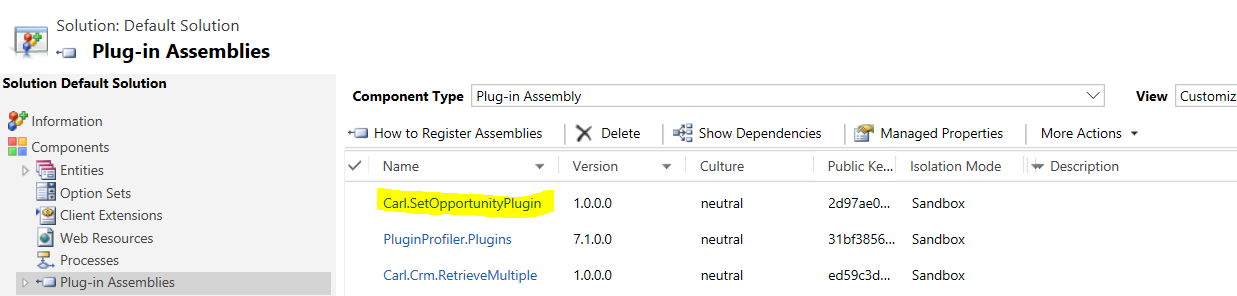
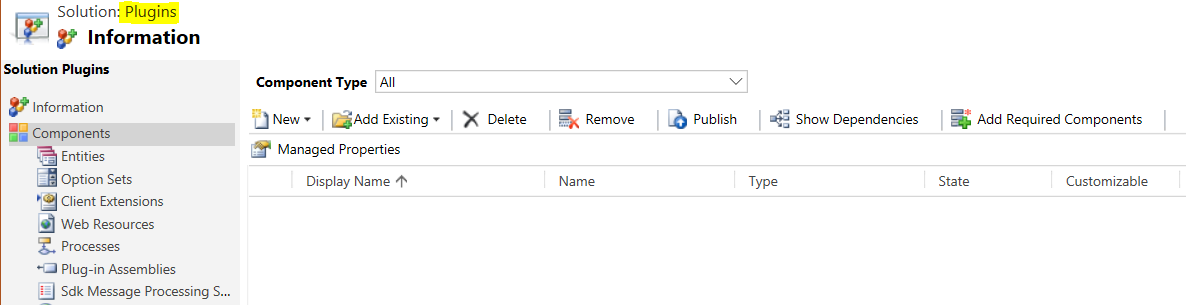
Now, let’s see what we have registered in Dynamics 365. If we browse to our default solution we can see under Plug-In Assemblies our assembly is registered:
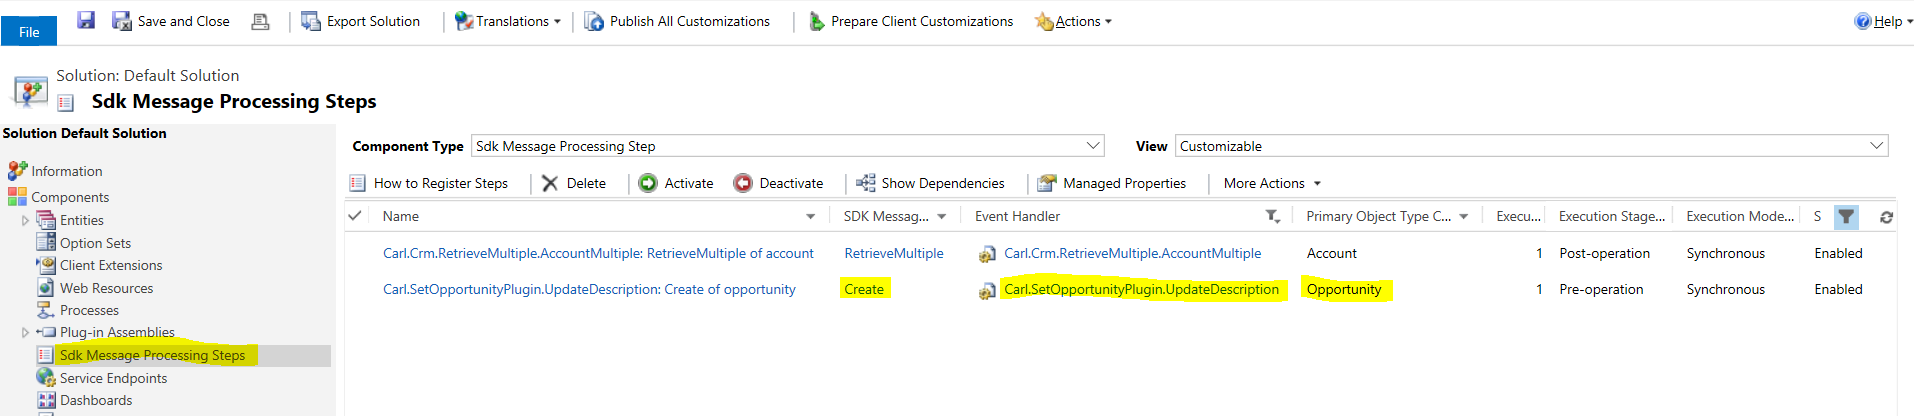
And under Sdk Message Processing Steps, our step on Create Opportunity is registered:
Now we will create a solution to export to our new test/QA environment. The process here is to export a solution containing the registered assembly and step, and to import it into the target environment.
Create a new solution:
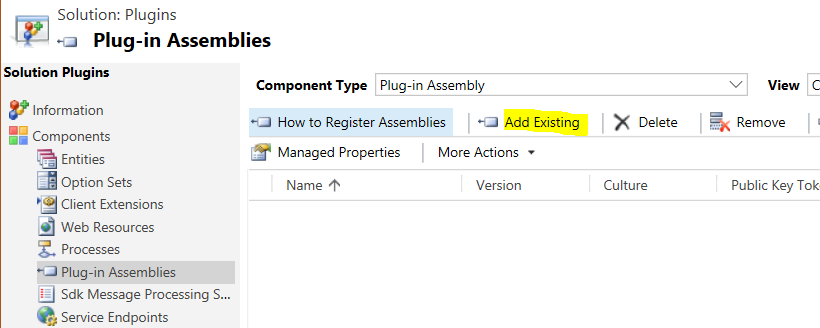
Go to Plug-In Assemblies and add existing:
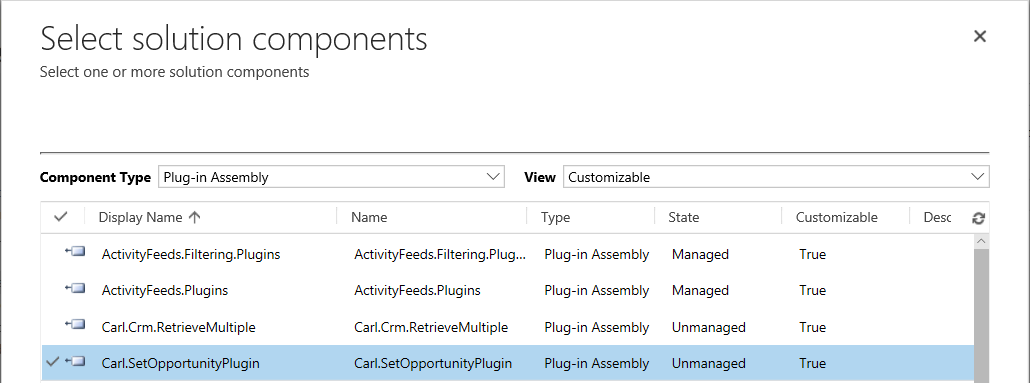
Select the assembly:
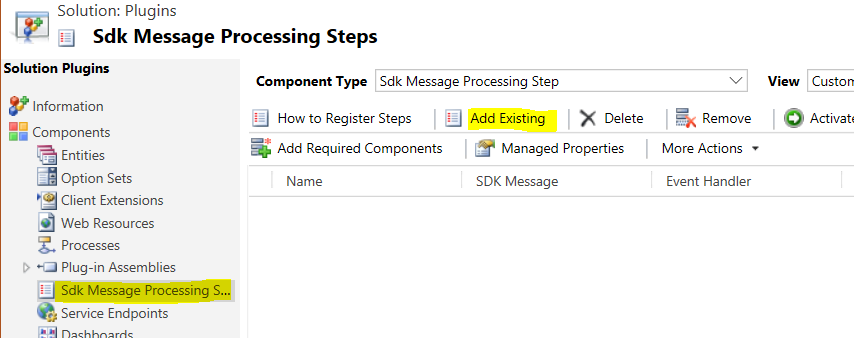
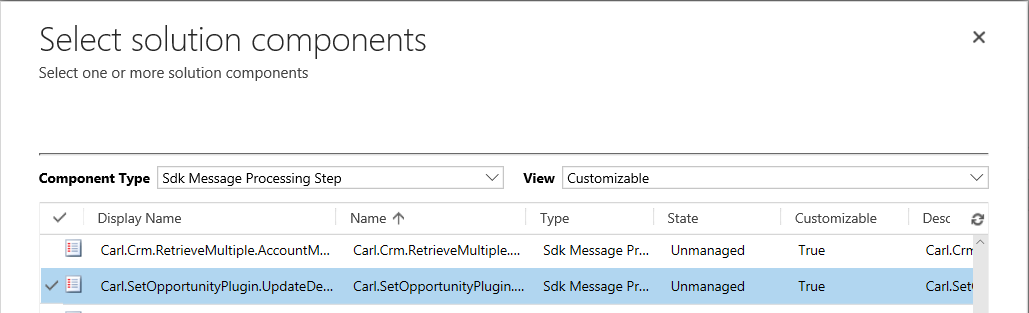
Go to Sdk Message Processing Steps and select the step:
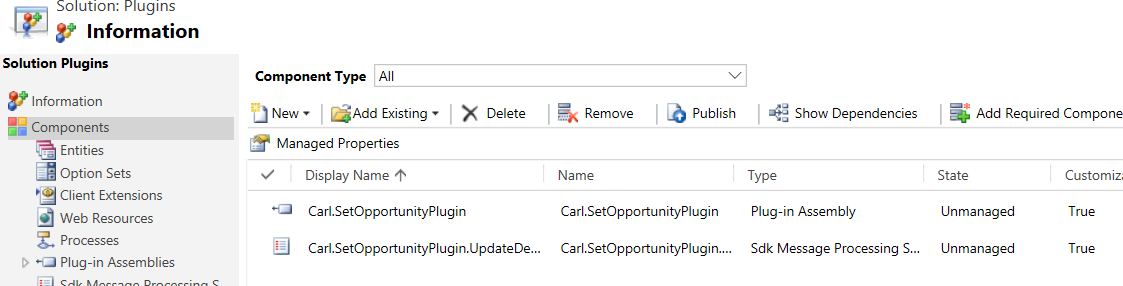
The solution should now look like below. Save and close:
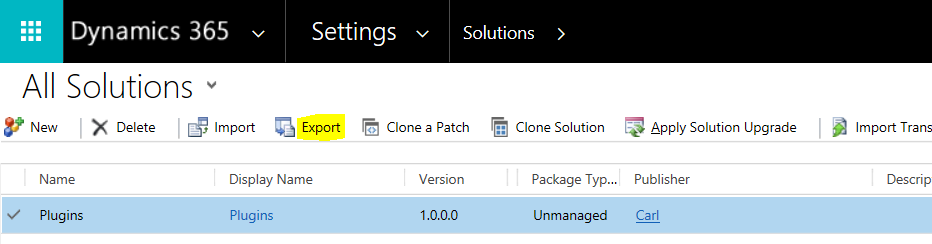
Now export the solution:
Choose managed:

The solution will be created as as ZIP file.
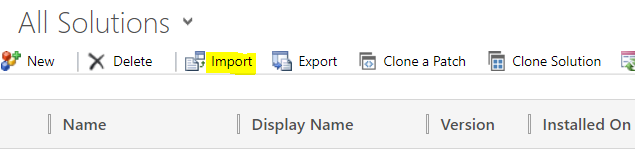
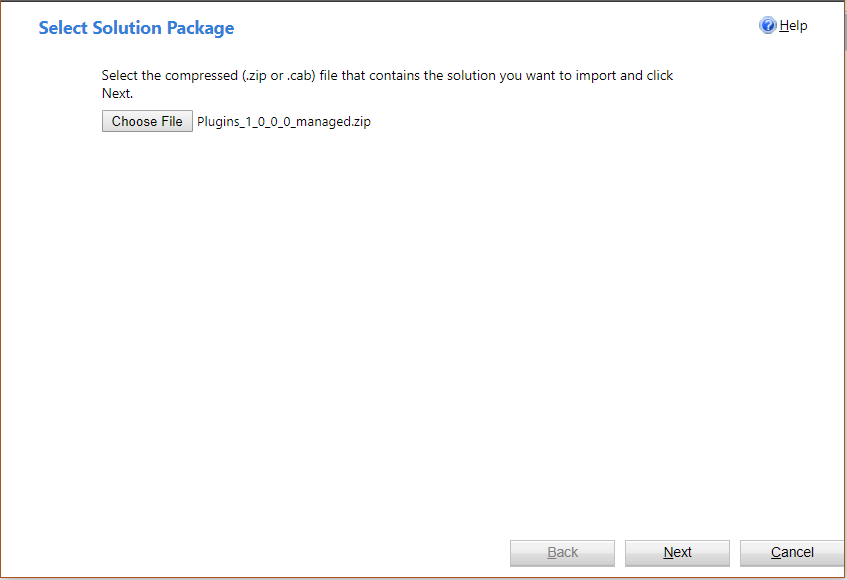
Now, go over to the environment you are migrating to, i.e. test/QA environment. Go to Solutions and click Import:
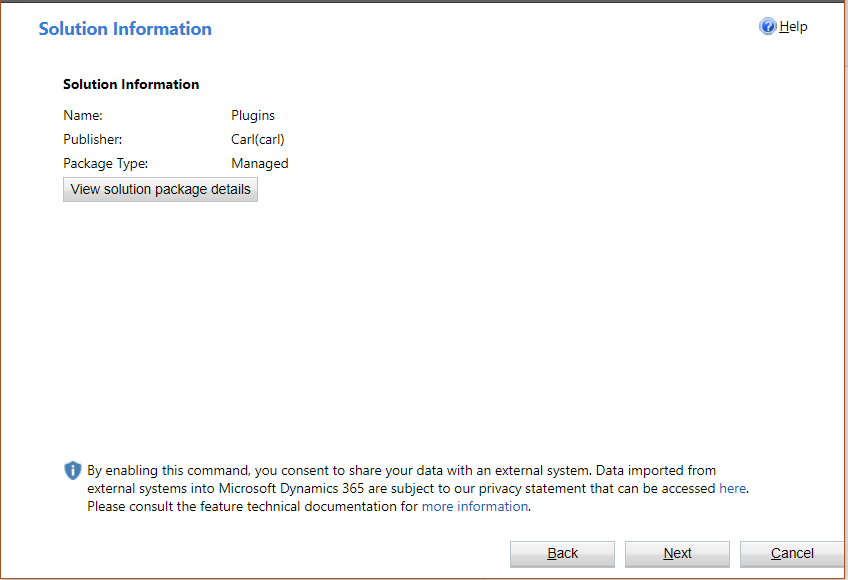
Select the package we created:
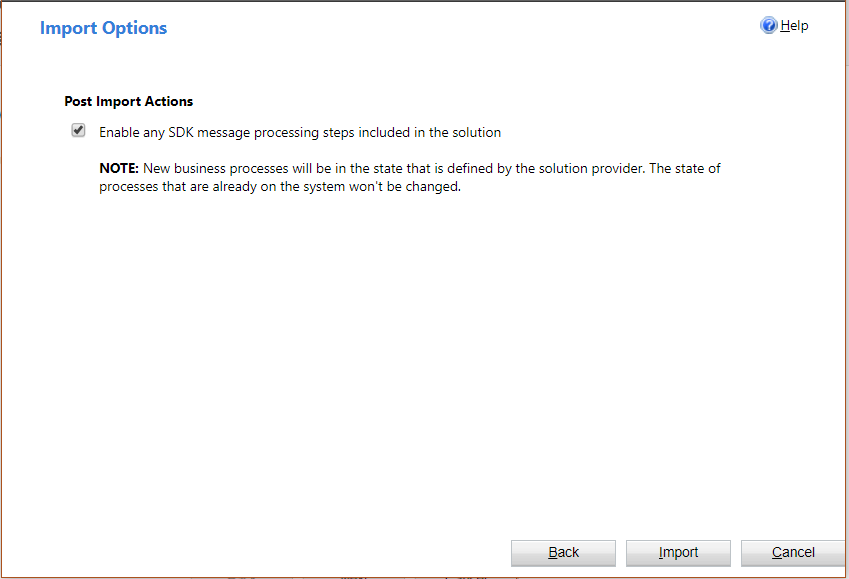
Check to Enable any SDK message processing steps included in the solution:
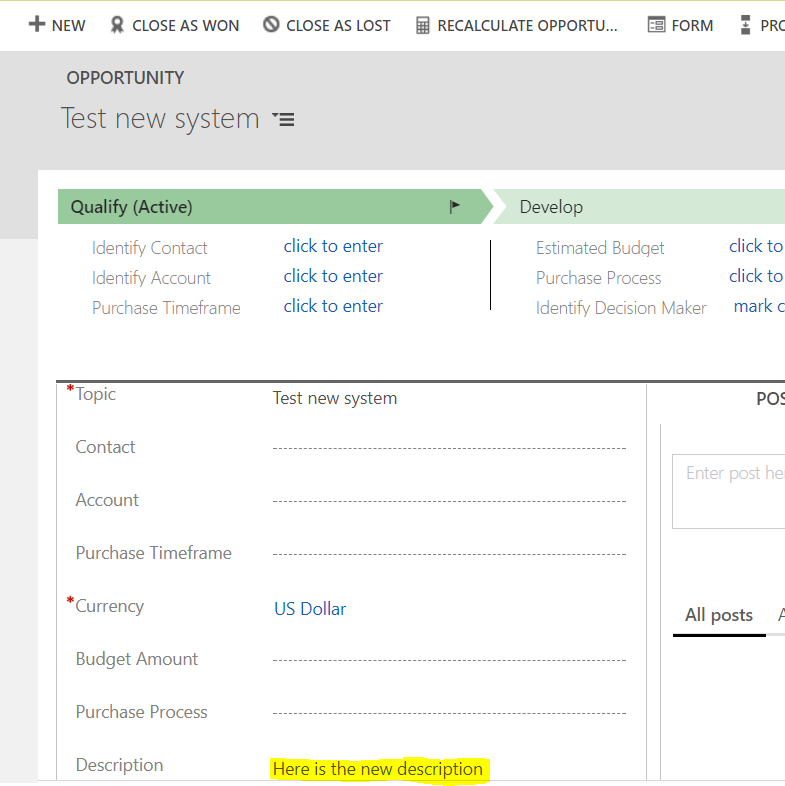
The plugin and step are now registered in the new environment. To test, create a new opportunity and save. The code will be run:
View the plugin through the plugin registration tool or XrmToolBox. You will see the steps registered:
I AM SPENDING MORE TIME THESE DAYS CREATING YOUTUBE VIDEOS TO HELP PEOPLE LEARN THE MICROSOFT POWER PLATFORM.
IF YOU WOULD LIKE TO SEE HOW I BUILD APPS, OR FIND SOMETHING USEFUL READING MY BLOG, I WOULD REALLY APPRECIATE YOU SUBSCRIBING TO MY YOUTUBE CHANNEL.
THANK YOU, AND LET'S KEEP LEARNING TOGETHER.
CARL

This was a huge help, thank you!
If I add another .cs file to the same assembly, I get the error.
DEV has 2 .cs file and QA/PROD has 1 .cs file