In this post, we will go through creating a project template in Visual Studio.
First, open Visual Studio, and create a new project. I will base my project off the Console application, so I will select Console App:
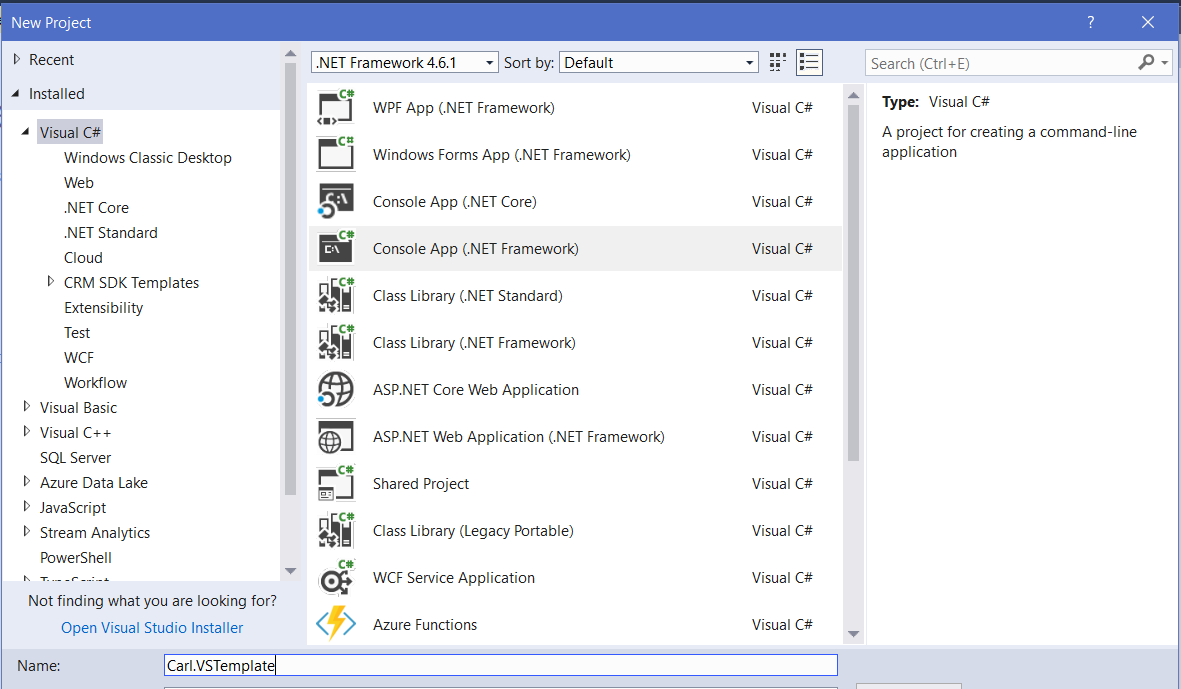
You will see:
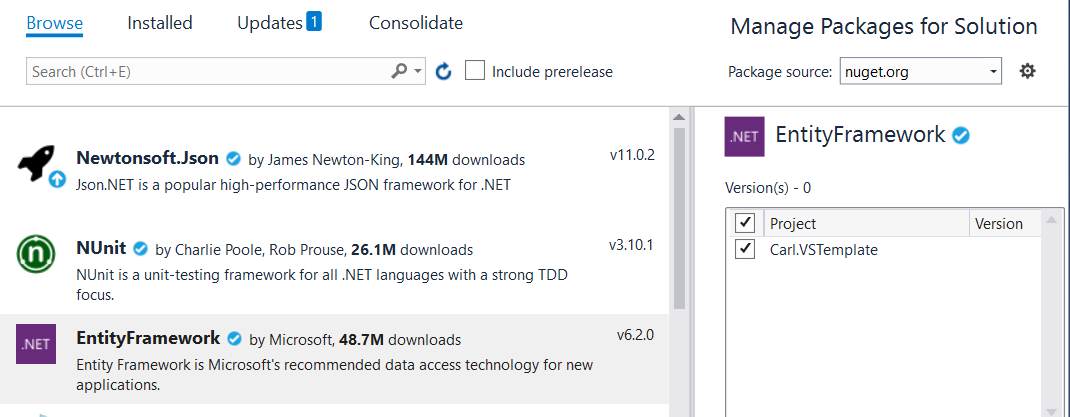
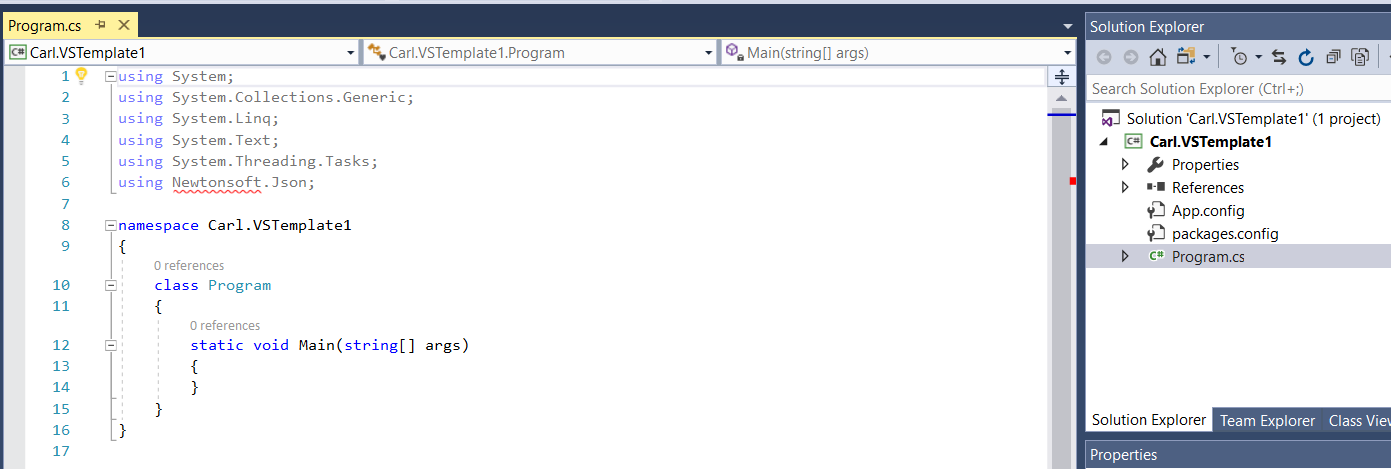
Add some packages, for example, NewtonSoft.Json and EntityFramework. Let’s add a lower version than the current version for one of the packages so we can also demonstrate what happens here:
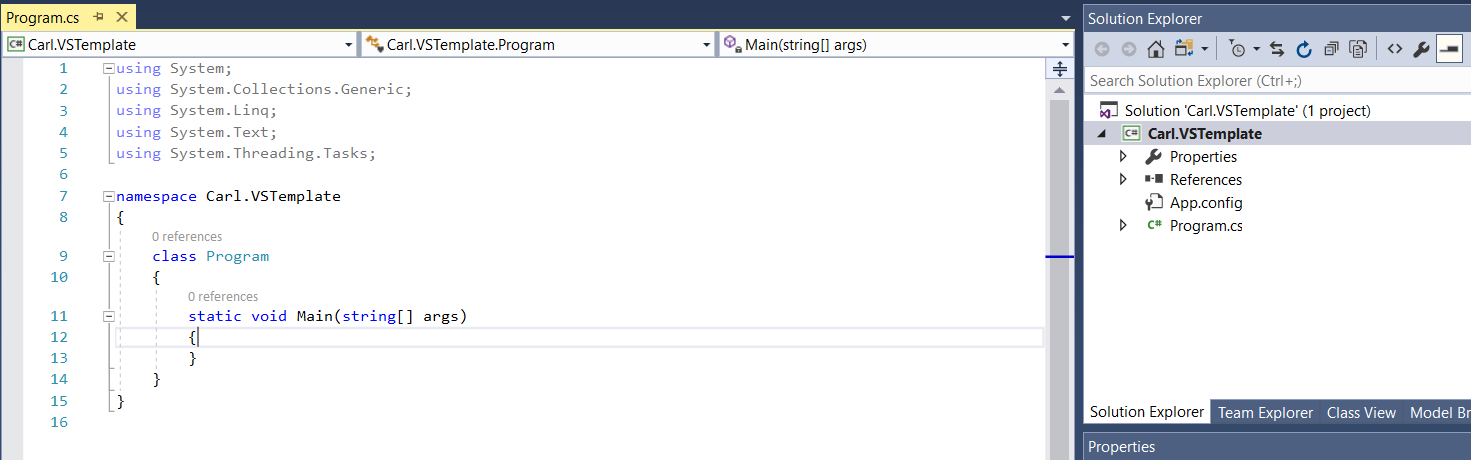
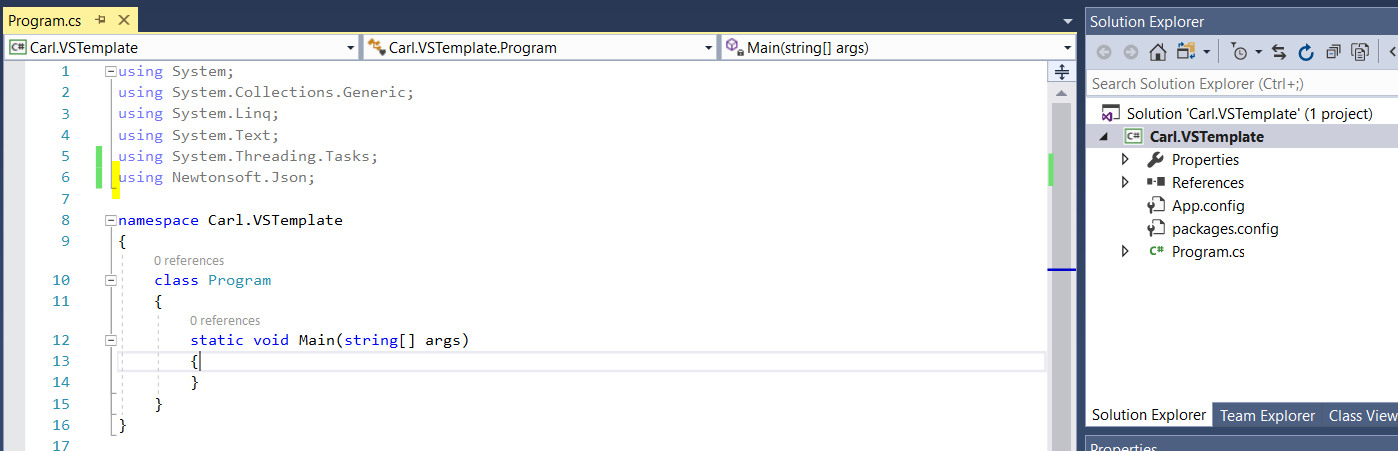
In the Program.cs file, let’s change it to add a reference to Newtownsoft.Json:
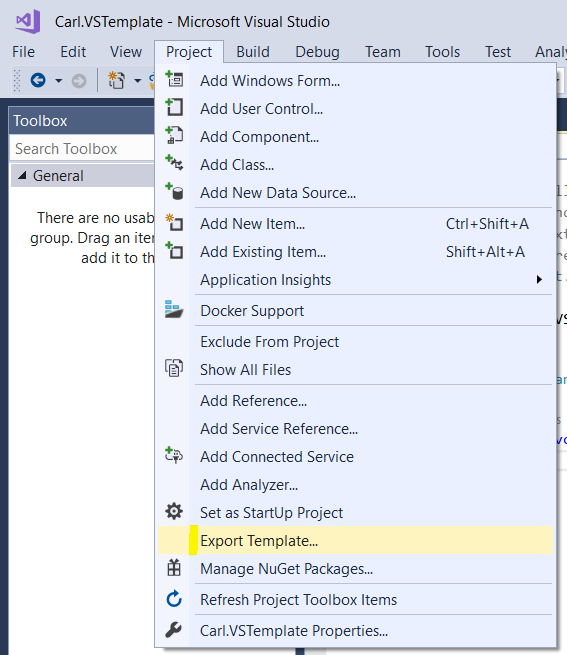
Export the template by going to Project->Export Template:
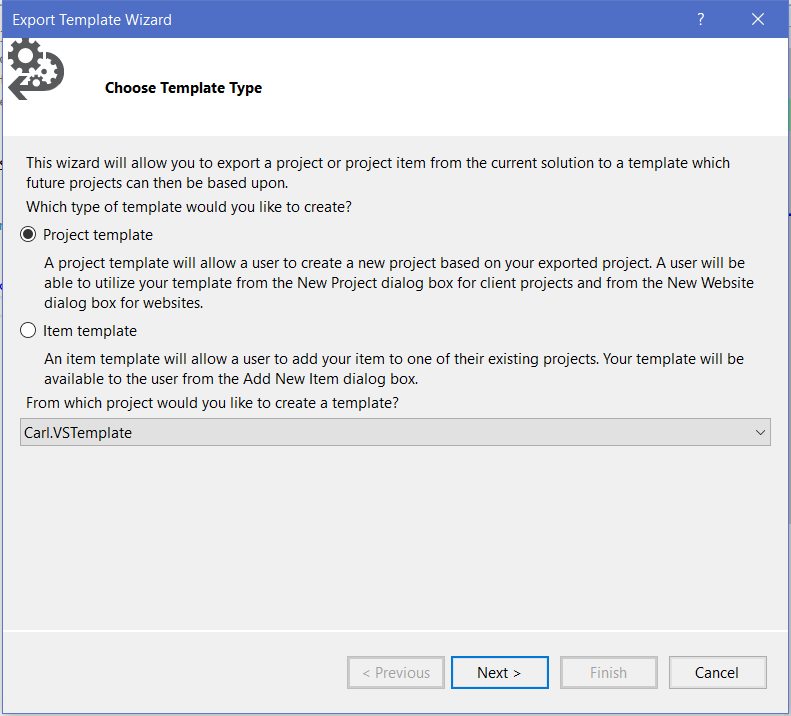
Select Project Template:
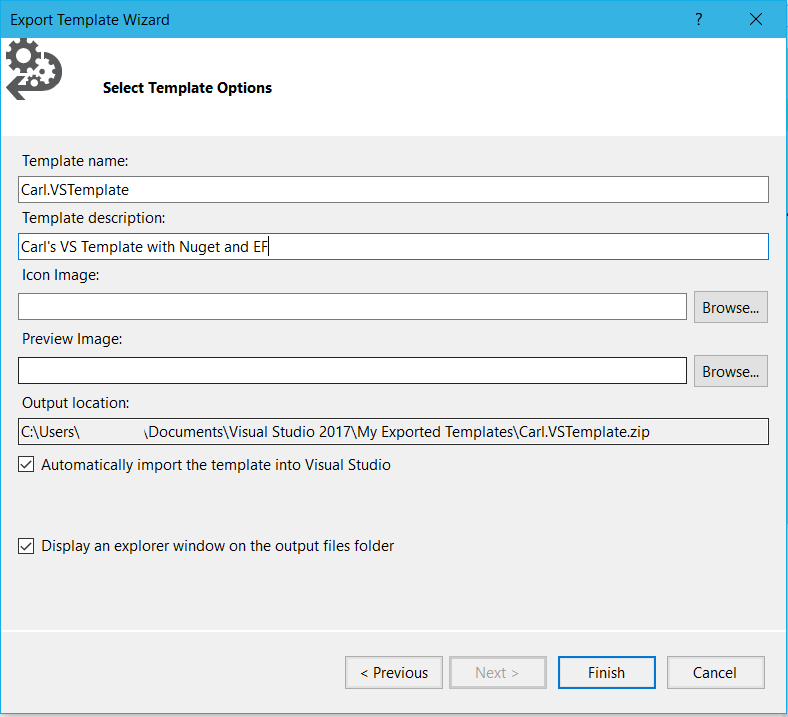
Enter information for your template and click Finish:
This will export a ZIP file:
![]()
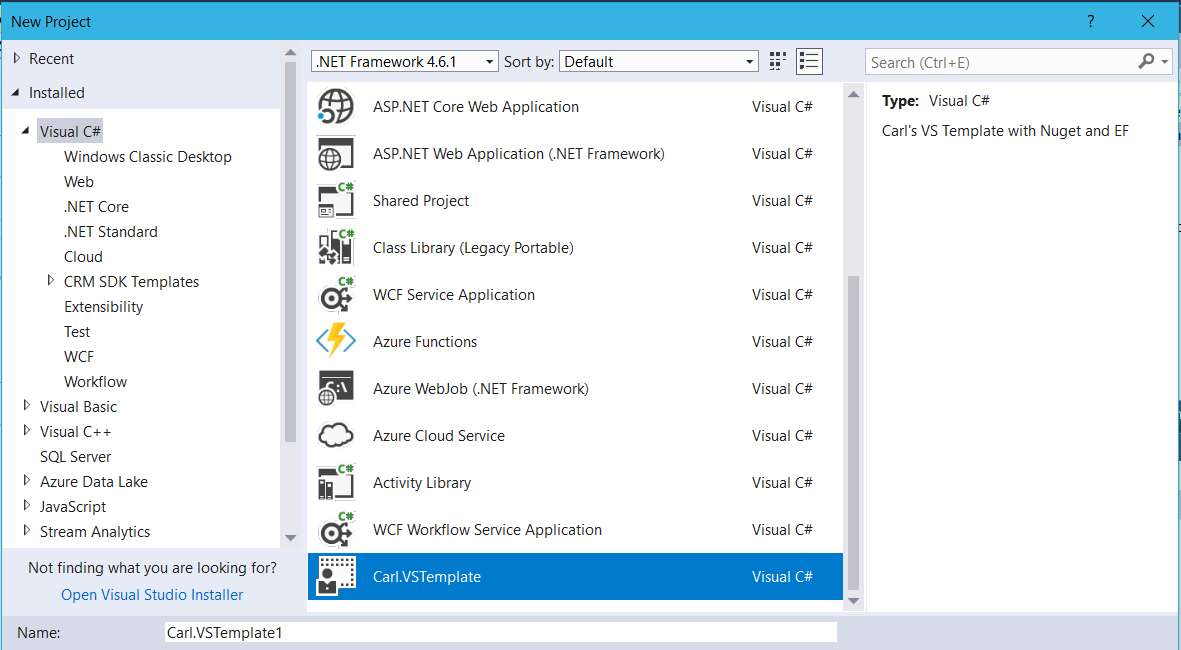
Now, in Visual Studio create a new project. You will see your new template. Click to create a new project:
It will open something like below:
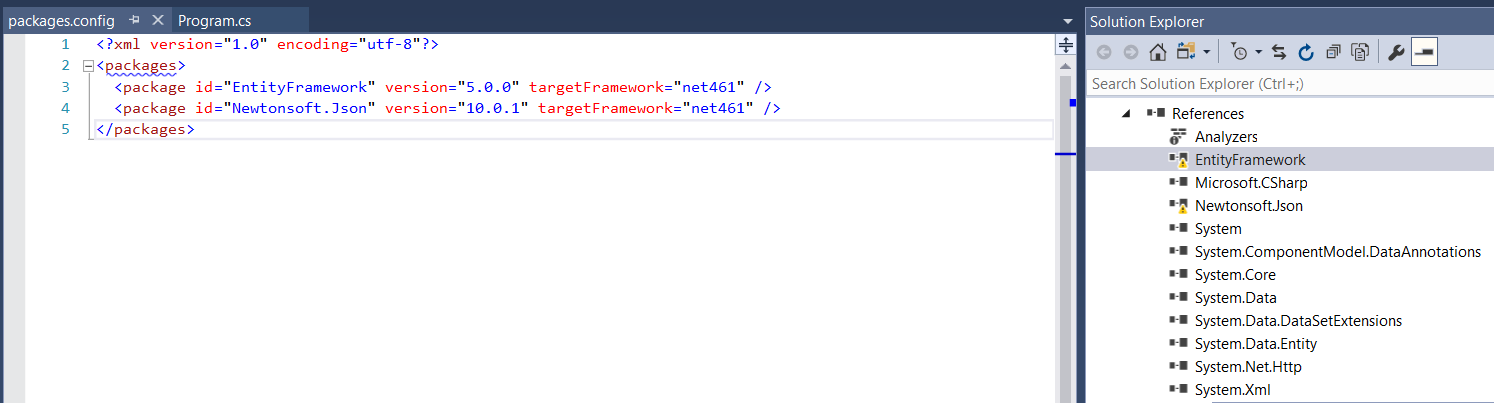
The packages will show what we selected in the template, and you may see broken assemblies for these:
Go to the NuGet Package Manager and click Restore:
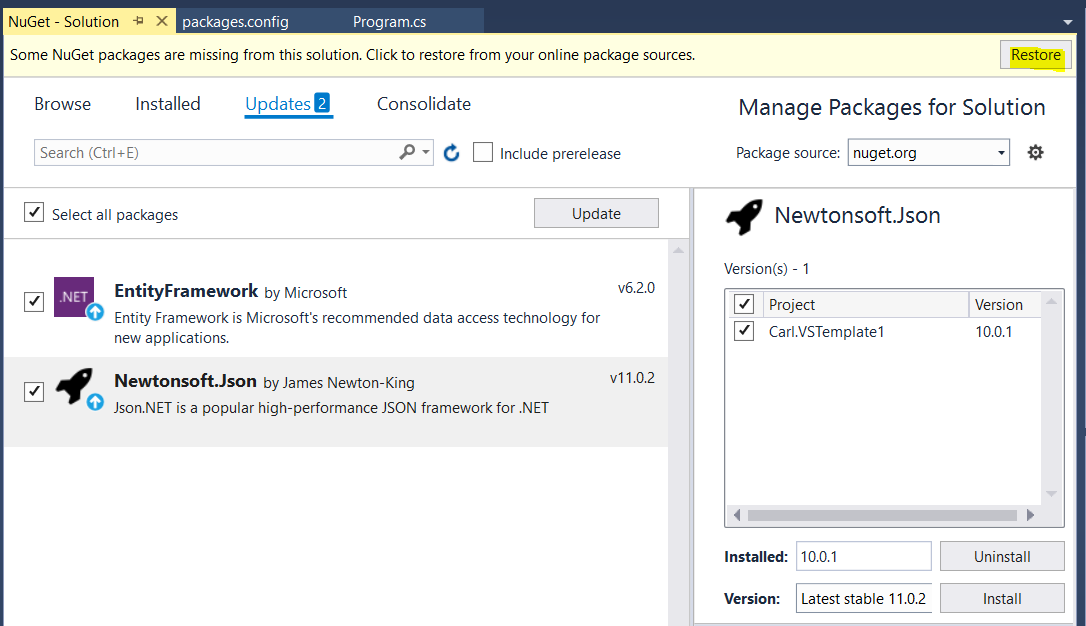
You can then update the packages as well.
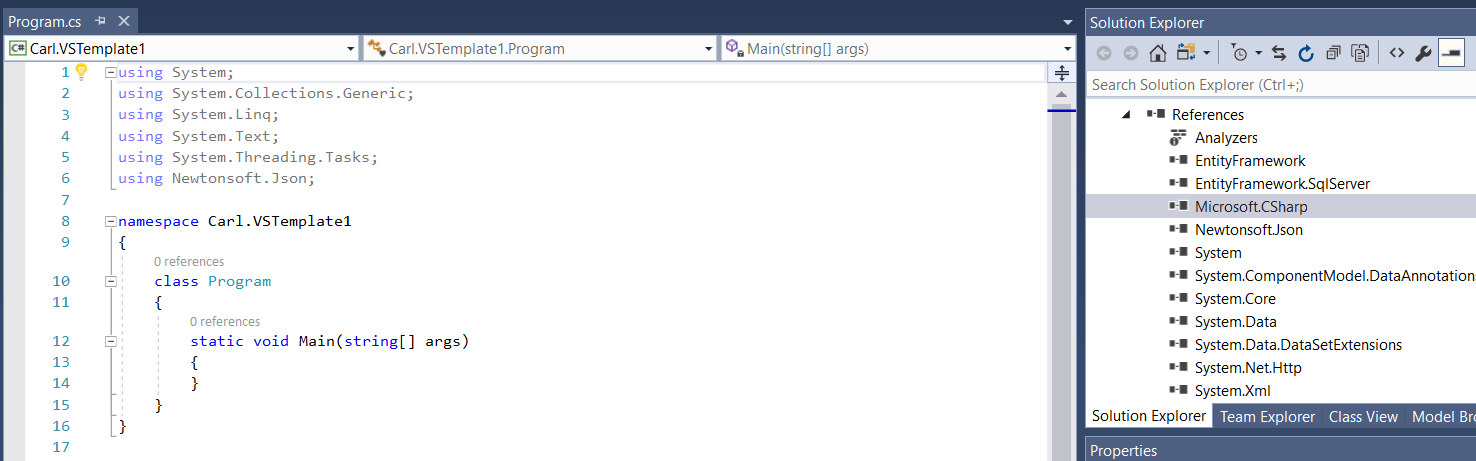
At this point you can build and use your new project:
I AM SPENDING MORE TIME THESE DAYS CREATING YOUTUBE VIDEOS TO HELP PEOPLE LEARN THE MICROSOFT POWER PLATFORM.
IF YOU WOULD LIKE TO SEE HOW I BUILD APPS, OR FIND SOMETHING USEFUL READING MY BLOG, I WOULD REALLY APPRECIATE YOU SUBSCRIBING TO MY YOUTUBE CHANNEL.
THANK YOU, AND LET'S KEEP LEARNING TOGETHER.
CARL
