In a previous post, we looked at how to create a sample PCF control. In this post, we will look at creating a React PCF control.
The current templates for PCF Controls use Fluent UI v8.
For v8 documentation, see https://developer.microsoft.com/en-us/fluentui#/controls/web .
v8 controls use @fluentui/react.
The latest version is Fluent UI v9. We can use v9 controls in our PCF controls, but it won’t use the out of the box template.
For v9 documentation, see https://react.fluentui.dev/.
v9 controls use @fluentui/react-components.
First, ensure all your software is installed as per my previous post. Let’s create a folder called SampleControlReact and run the command below with the react switch:
pac pcf init -n SampleControlReact -ns carl -t field -fw react

Then run npm install, open the folder in VS Code and navigate to the index.ts file:

We can see at the top of this file we’re automatically importing react, which is different from the non-react sample component we previously made. Along with the constructor, we have 4 main functions:
- init – used to initialize the component. You can do things here such as calling remote servers.
- updateView – called when any value in the property bag changes.
- getOutputs – called prior to a component receiving new data
- destroy – used for cleanup to release memory
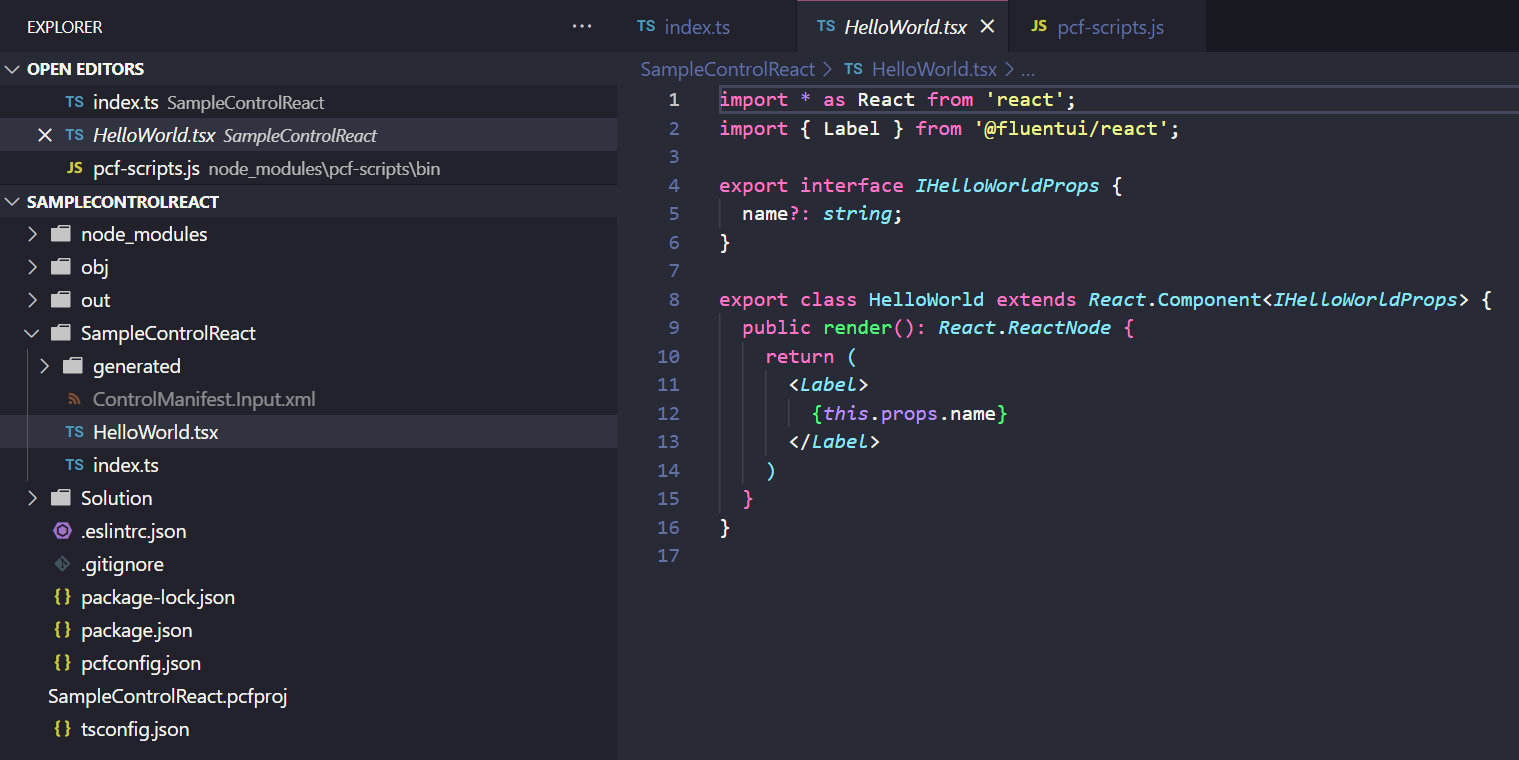
Also, we have a HelloWorld.tsx file generated. We can see that the template here returns a label field, setting the value of the label to the name that we pass in through props (which are properties in React):
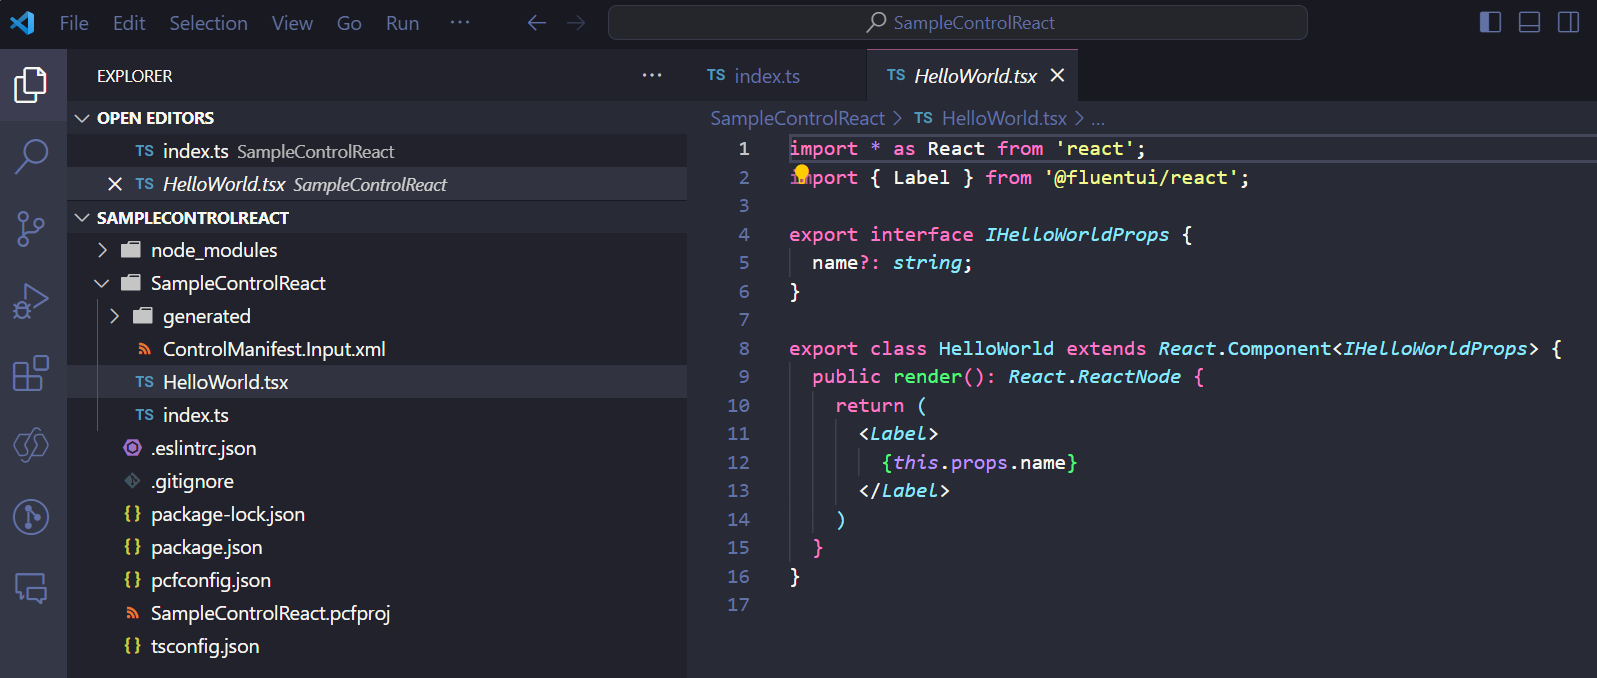
We’re passing in the actual prop name value in the updateView, here it is “Hello, World!”:

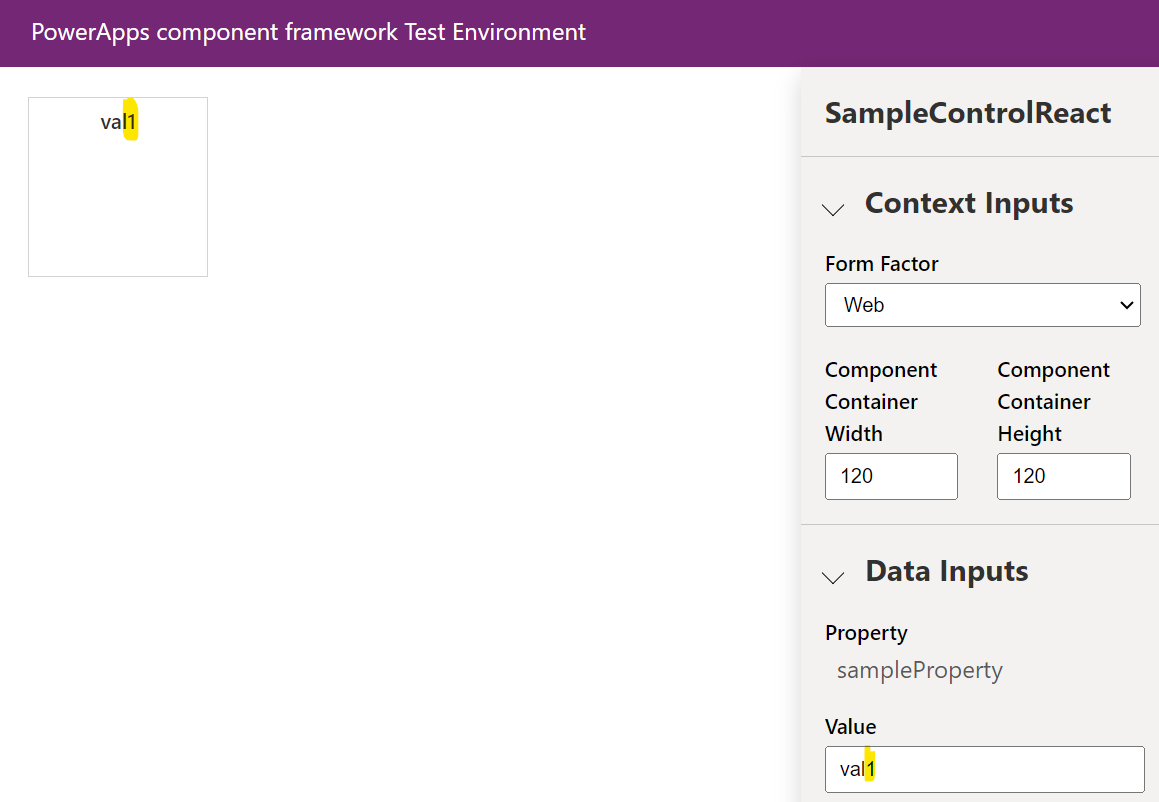
Running our test harness with npm start, we see our Hello World control:
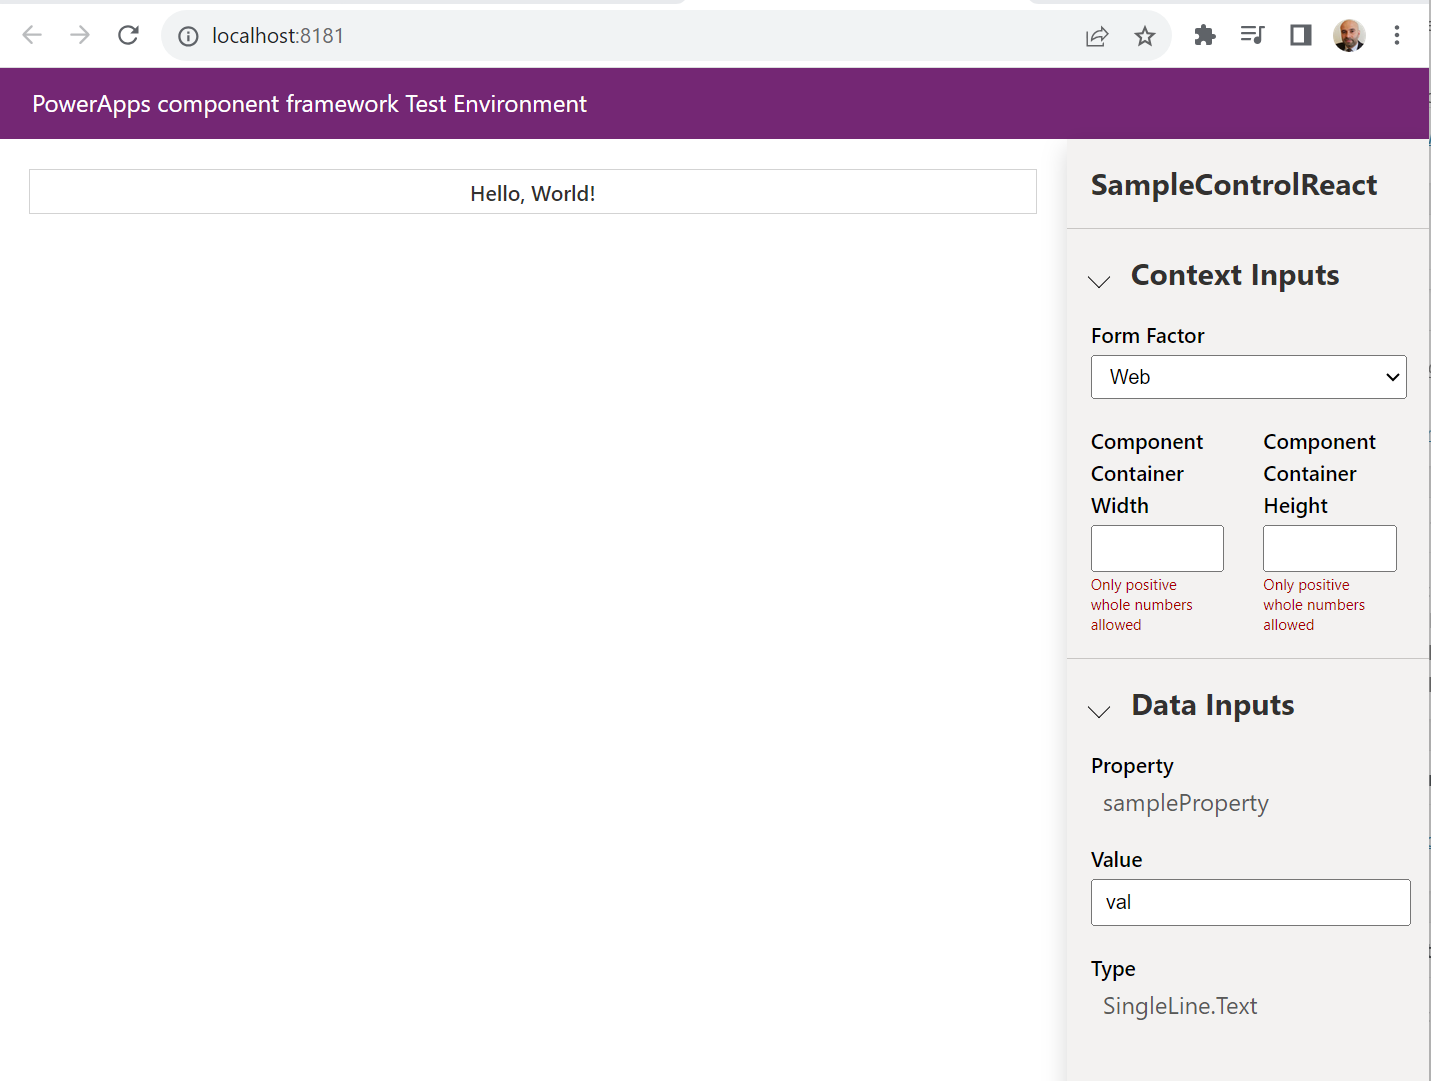
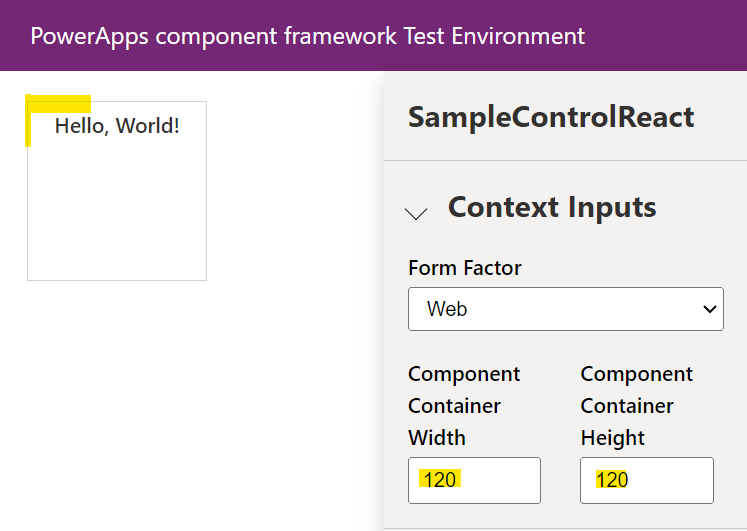
As with the non-react example, we have the ability to set the width and height:
And we have our sampleProperty which isn’t doing anything right now:
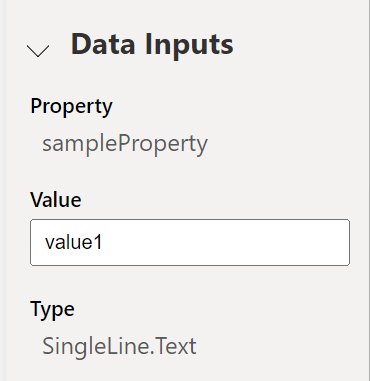
The sampleProperty again is defined in our ControlManifest.Input.xml file :

Let’s deploy this to our Dataverse org and see what it looks like. We go through the same packaging steps as we did with the non-React control.
First, create a subdirectory called Solution and in the console go into that directory, then run the solution init. In my case, the developer is Carl and the solution prefix is carl:
pac solution init --publisher-name Carl --publisher-prefix carl
Next add references to the project using the project path:
pac solution add-reference --path C:\PCF\SampleControlReact
Then run msbuild (see my blog on deploying a standard control if you run into errors):
msbuild /t:build /restore
Now connect to the Dataverse (replace the org below with yours):
pac auth create --url https://org876ac311.crm.dynamics.com/
Now go back to the component folder and do the final step to push (replace the prefix with yours):
pac pcf push --publisher-prefix carl
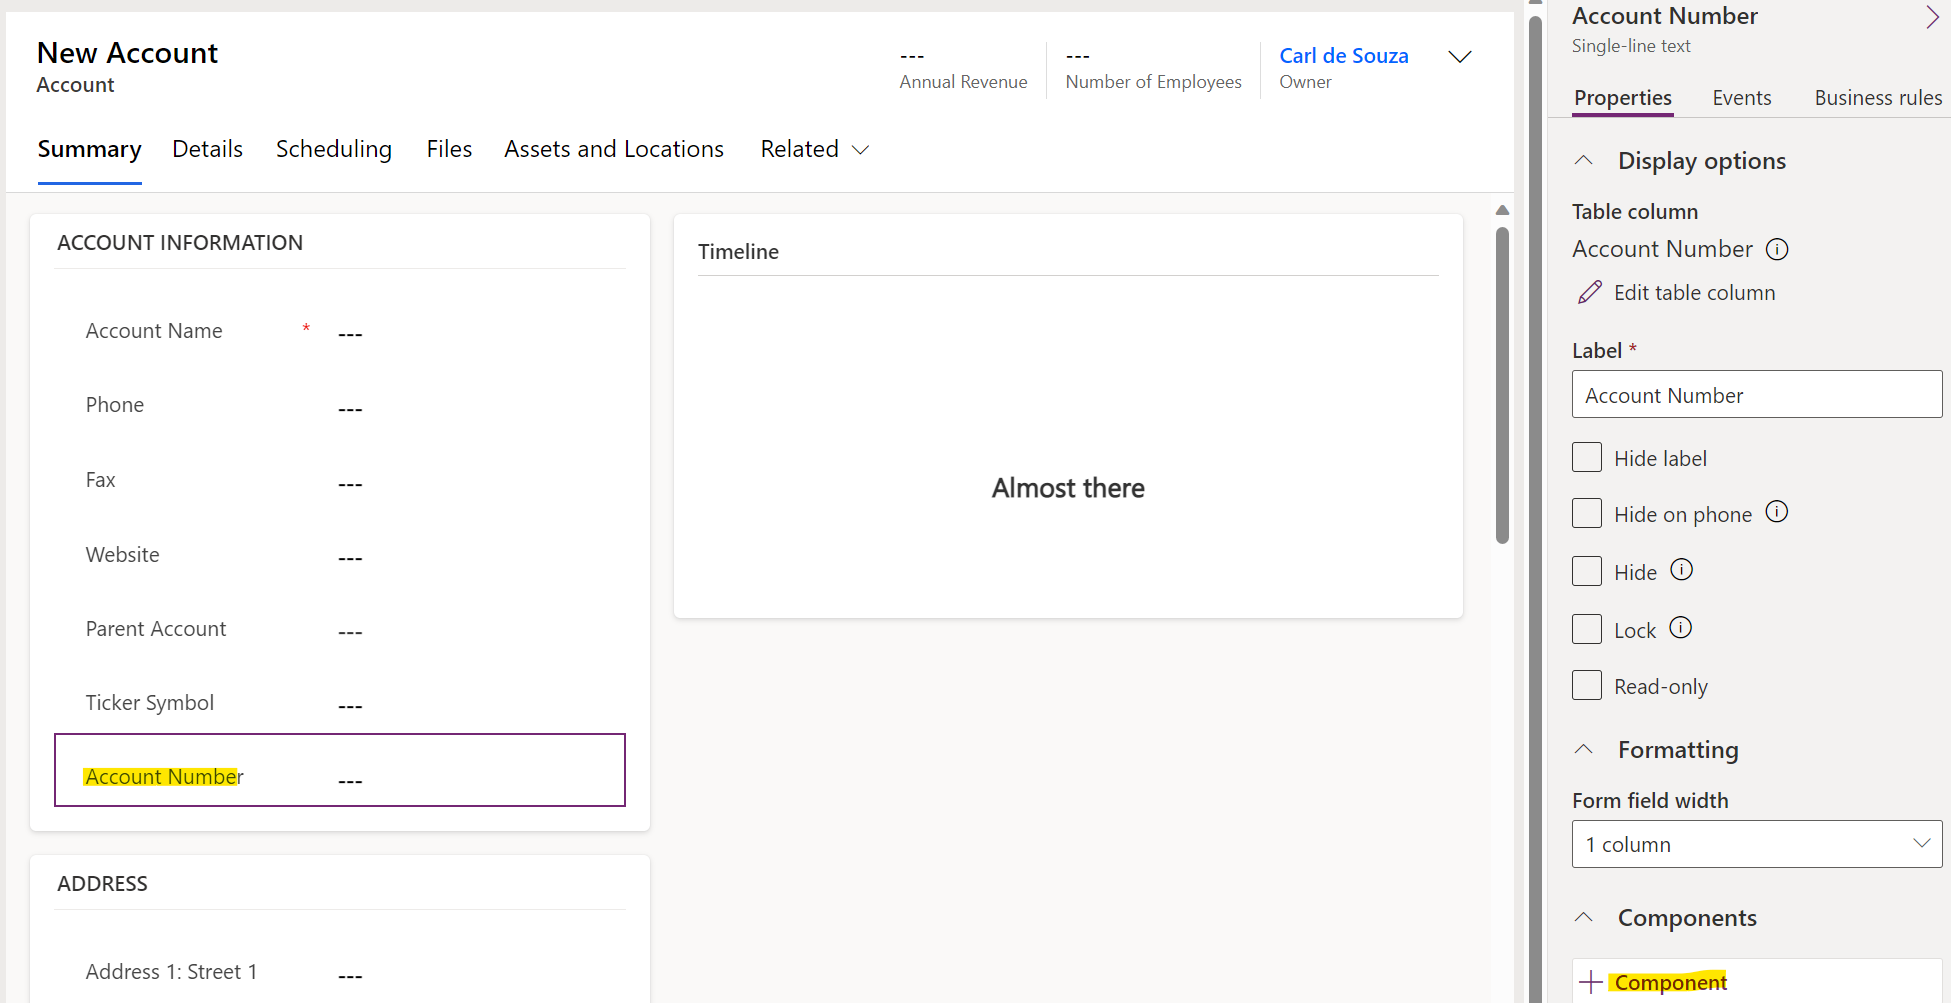
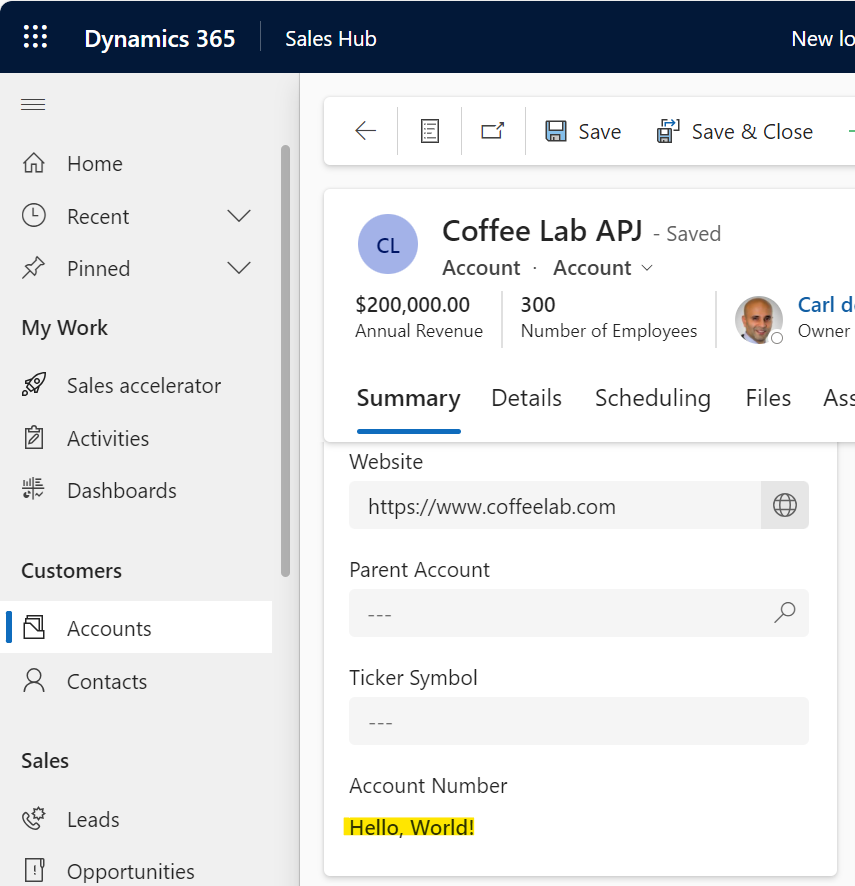
Now go to the Dataverse org and we can set our component to a field on a form. We will bind our control to the Account Number field on the Account form. Drag the field onto the form and go to + Component:
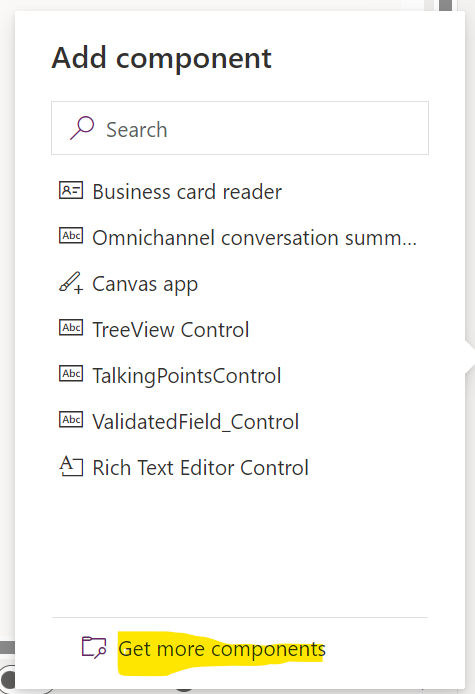
Then Get more components:
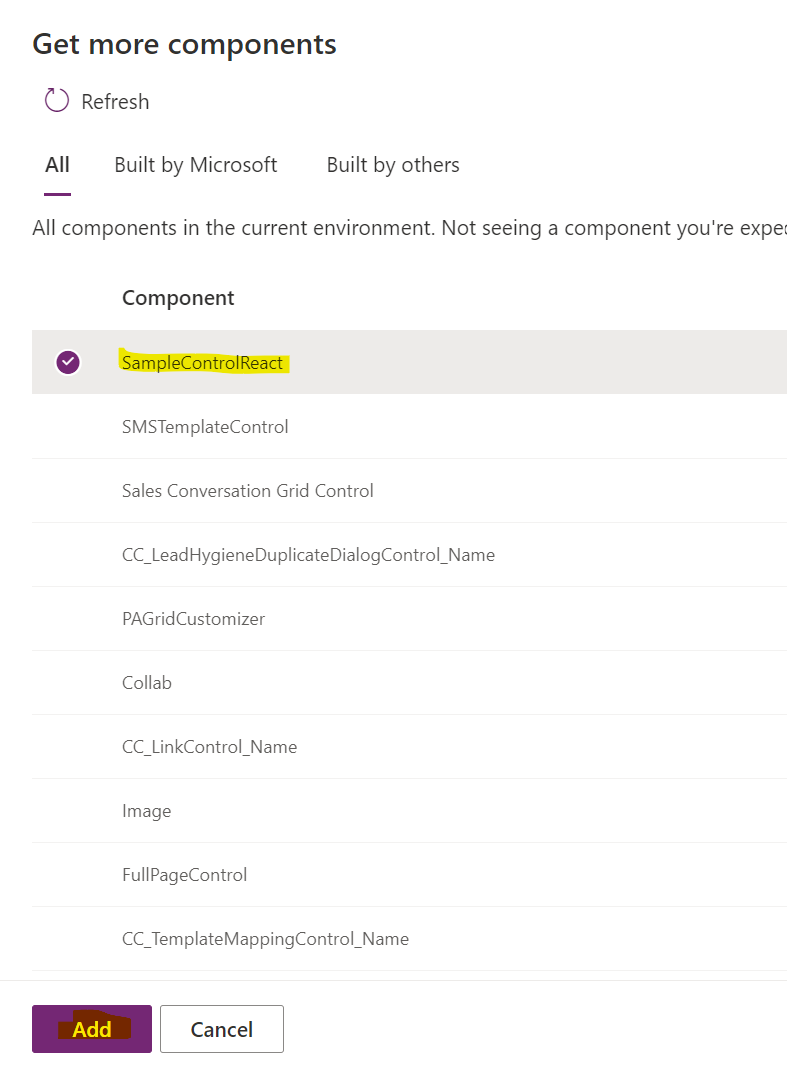
Select the control then click Add:
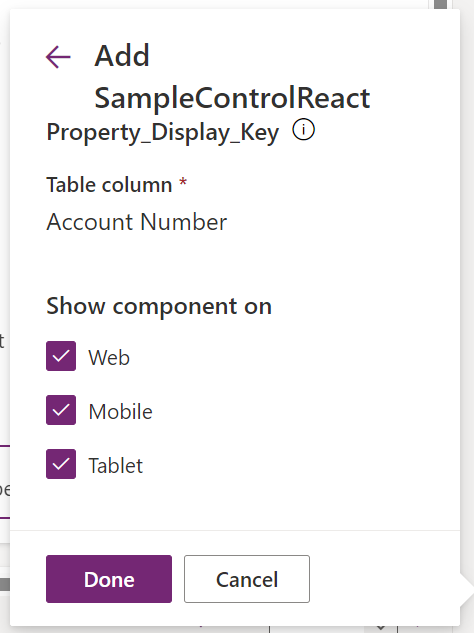
Select it again on the next screen and click Add:
We see our control rendered:

Now let’s extend the control.
Let’s change it so it uses the value of the property, not the preset Hello World. We will change the updateView to use:
context.parameters.sampleProperty.raw || ""

Now when we run in the test harness with npm start watch, any change to the value changes the label in the control immediately without tabbing off the field:
Let’s go the other way now and change the label to a textbox. We can do this by changing the HelloWorld.tsx code. Currently the code returns a react Label:
Note the label comes from the fluentui/react library imported at the top. To change this to an input textbox we will use fluentui as well by importing TextField:

Running this, we see we now have a textbox instead of a label, however the value between the control and the sampleProperty value are not synced:
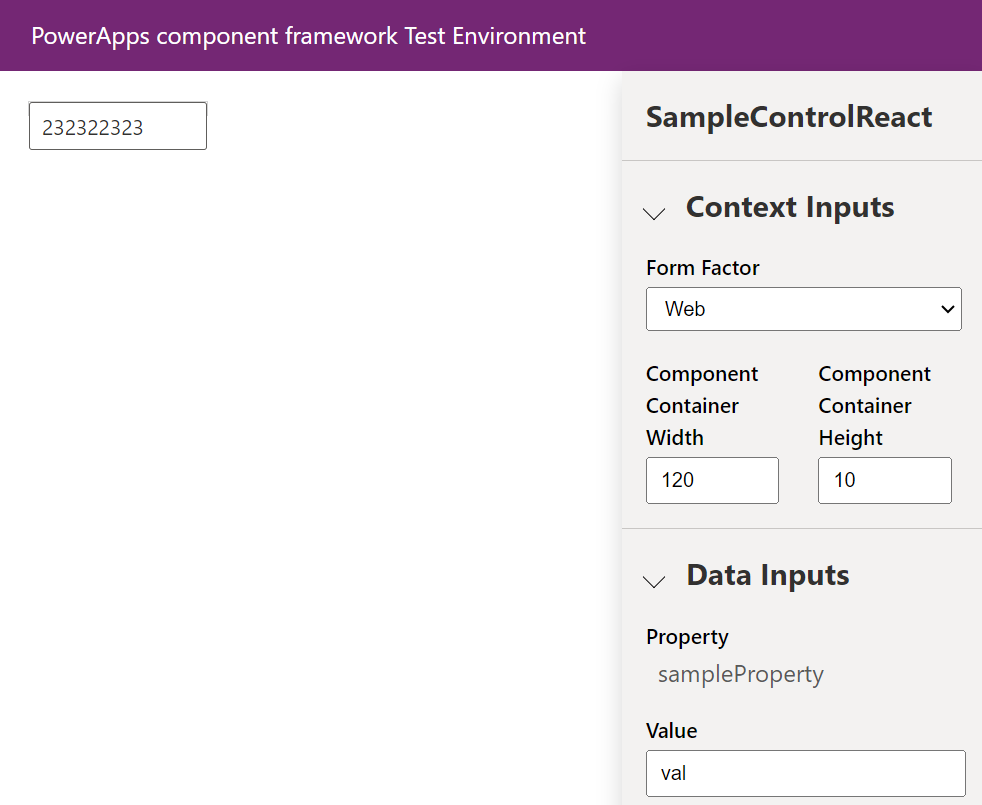
This is because we don’t have any mechanism to do an onchange on the field currently. Let’s add some code.
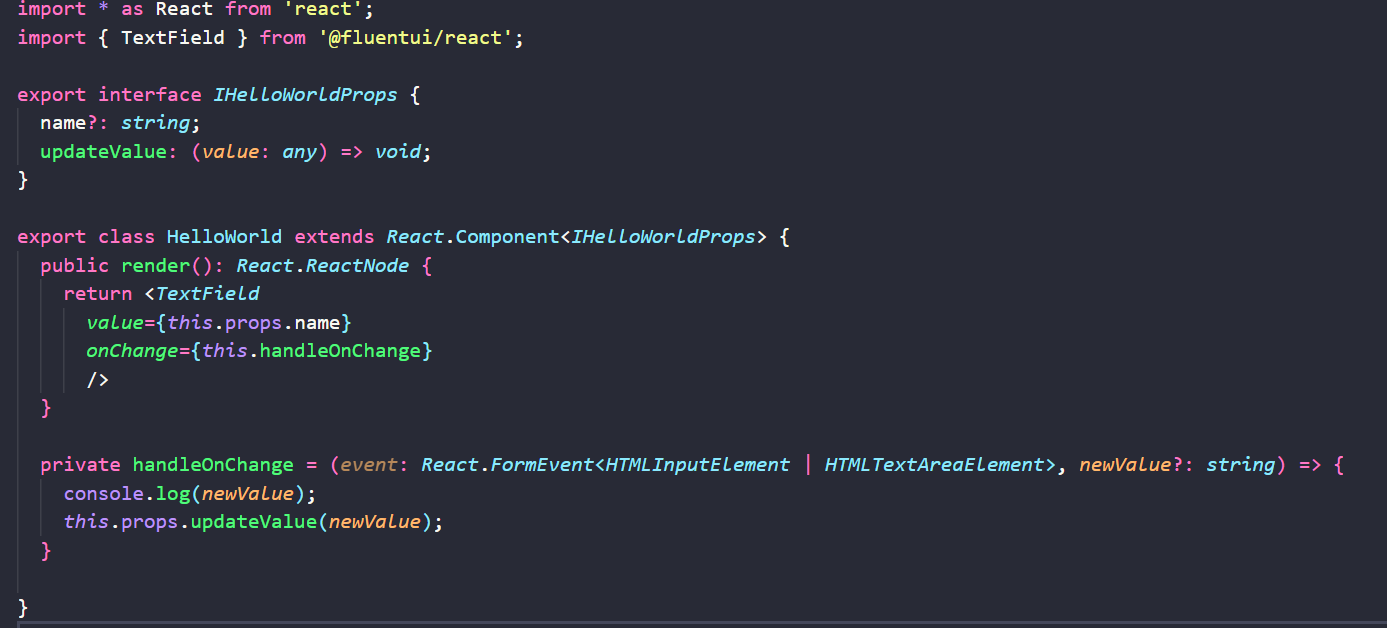
In our HelloWorld.tsx we can change our <TextField> to set the value from the props.name just like the label above, and we will add an onChange event which will call a method called handleOnChange:
In our index.tsx, we have a new property called _value which will hold our new text value:

We also have a new method called updateValue, which sets our new value and runs notifyOututChanged, which then calls our updateView:
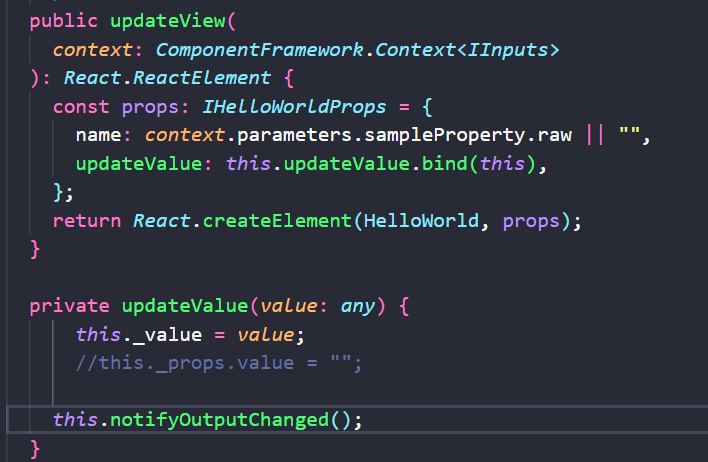
The index.tsx code:
  public init(
    context: ComponentFramework.Context,
    notifyOutputChanged: () => void,
    state: ComponentFramework.Dictionary
  ): void {
    this.notifyOutputChanged = notifyOutputChanged;
  }

  /**
   * Called when any value in the property bag has changed. This includes field values, data-sets, global values such as container height and width, offline status, control metadata values such as label, visible, etc.
   * @param context The entire property bag available to control via Context Object; It contains values as set up by the customizer mapped to names defined in the manifest, as well as utility functions
   * @returns ReactElement root react element for the control
   */
  public updateView(
    context: ComponentFramework.Context
  ): React.ReactElement {
    const props: IHelloWorldProps = {
      name: context.parameters.sampleProperty.raw || "",
      updateValue: this.updateValue.bind(this),
    };
    return React.createElement(HelloWorld, props);
  }

  private updateValue(value: any) {
      this._value = value;
      //this._props.value = "";

    this.notifyOutputChanged();
  }
And the HelloWorld.tsx code:
export interface IHelloWorldProps {
  name?: string;
  updateValue: (value: any) => void;
}

export class HelloWorld extends React.Component {
  public render(): React.ReactNode {
    return
  }

  private handleOnChange = (event: React.FormEvent, newValue?: string) => {
    console.log(newValue);
    this.props.updateValue(newValue);
  }

}
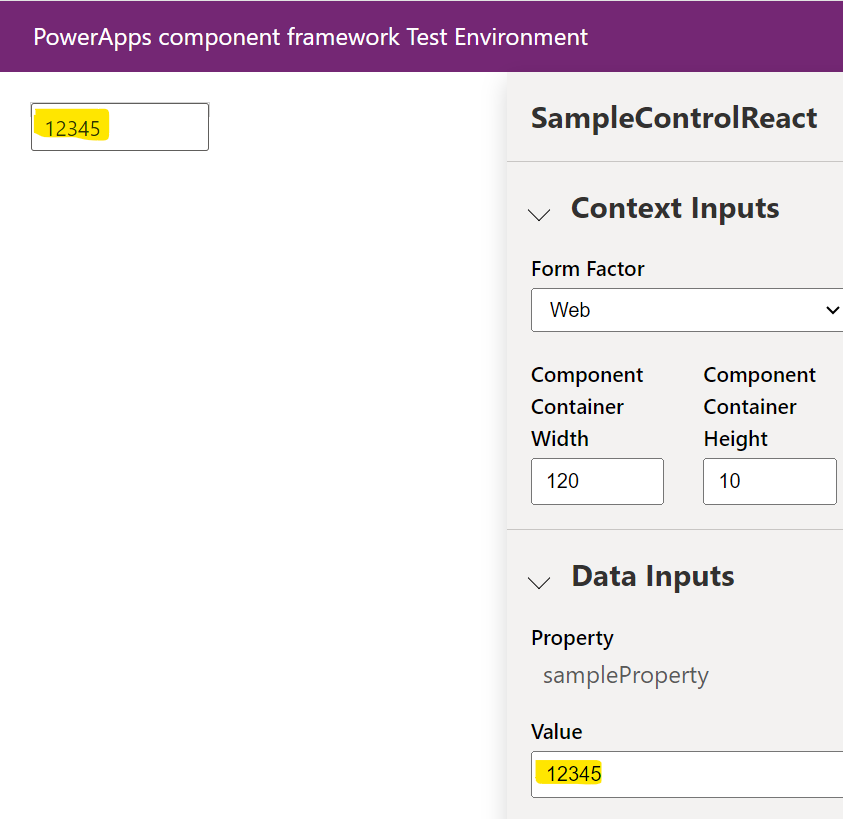
Running this in our test harness, we can type into the text field or the SampleProperty value and both will get updated without tabbing off the field:
And running this in our Dynamics 365 org, we see the text box is rendered with our text field. Entering any text makes the form dirty, and saving preserves the value on the record as expected:
![]()
That’s a simple react PCF control.
I AM SPENDING MORE TIME THESE DAYS CREATING YOUTUBE VIDEOS TO HELP PEOPLE LEARN THE MICROSOFT POWER PLATFORM.
IF YOU WOULD LIKE TO SEE HOW I BUILD APPS, OR FIND SOMETHING USEFUL READING MY BLOG, I WOULD REALLY APPRECIATE YOU SUBSCRIBING TO MY YOUTUBE CHANNEL.
THANK YOU, AND LET'S KEEP LEARNING TOGETHER.
CARL
