Model Context Protocol, or MCP, has quickly become one of the most important standards in the AI ecosystem. Introduced by Anthropic in 2024, MCP provides a common way for AI applications and agents to connect to tools, data, APIs, and enterprise systems. Instead of building a different integration for every AI platform, we can expose capabilities through an MCP server and allow MCP-compatible applications to discover and use them.
In this post, we will build an MCP server from scratch using Python and follow the full development journey. We will create tools, resources, and prompts, test them using the MCP Inspector, look at how MCP works behind the scenes, and explore the difference between local stdio servers and remote Streamable HTTP servers.
By the end, we will not only have a working MCP server, but also an understanding of how MCP fits into a real-world AI and enterprise architecture.
Let’s get started.
What is an MCP Server?
Before we start writing code, let’s quickly look at where an MCP server fits.
MCP stands for Model Context Protocol. It is an open standard that provides a common way for AI applications to connect to external systems.
An MCP architecture generally looks something like this:
User → AI Application / Host → MCP Client → MCP Server → Tools and Data
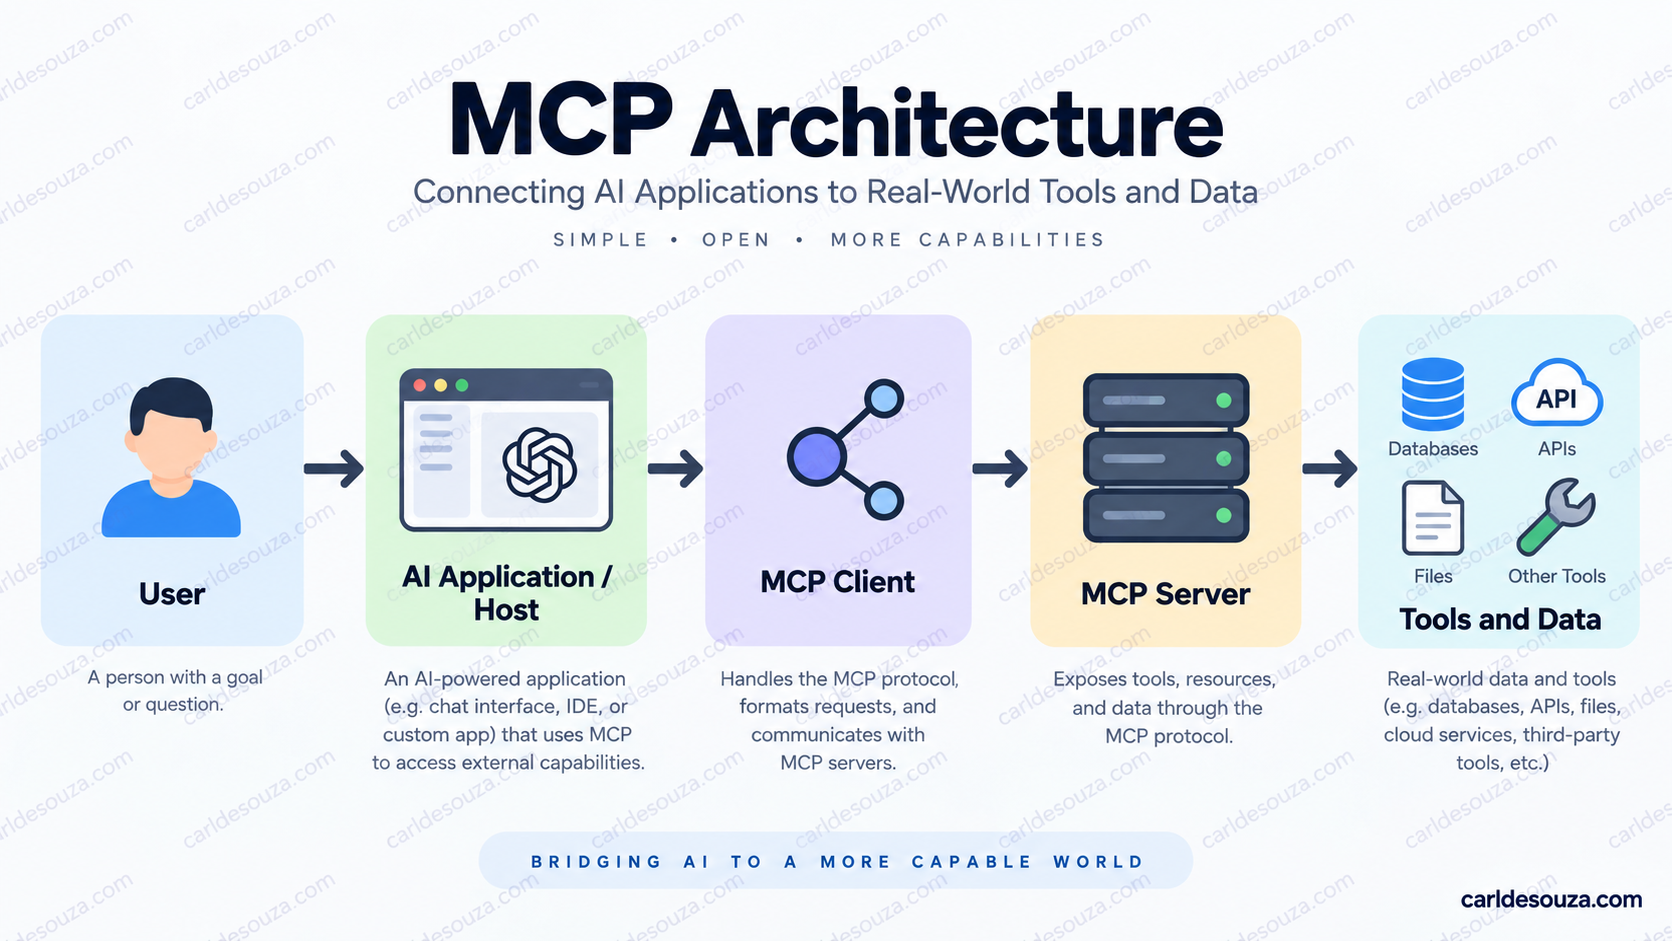
The MCP server does not contain the AI model itself. Instead, the server exposes capabilities that an AI application can discover and use.
For example, an MCP server could provide access to:
- A CRM system
- A SQL database
- A REST API
- SharePoint
- GitHub
- Microsoft Learn
- A filesystem
- Internal company applications
- Custom business logic
The AI application connects to the MCP server and discovers what capabilities are available.
MCP servers can expose three important primitives: tools, resources, and prompts. Tools are generally functions the model can call, resources provide data or context, and prompts provide reusable templates that a user can select.
Tools vs Resources vs Prompts
It is useful to understand the difference between these before we start coding.
| MCP Capability | What it does | Example |
|---|---|---|
| Tool | Allows the model to perform an action | Search customers |
| Resource | Provides data or context | Read a configuration file |
| Prompt | Provides a reusable prompt template | Review this code |
A simple way to think about this is:
Tools = do something
Resources = get something
Prompts = help ask something
There are more capabilities in MCP, but these three are a great place to start.
What We Will Build
We are going to build a simple Developer Utilities MCP Server.
Our server will expose:
- An
addtool that adds two numbers - A
word_counttool that analyzes some text - An MCP information resource
- An
explain_codeprompt
This is intentionally simple. Once we understand how these pieces work, we can replace them with calls to APIs, databases, Dynamics 365, Azure services, or anything else we want.
Our project will look like this:
mcp-developer-server
│
└── server.py
Let’s build it.
Prerequisites
For this example we will use Python.
The current MCP Python SDK requires Python 3.10 or later. The official package is called mcp, and the optional cli package gives us commands such as mcp dev and mcp run.
We will also use Visual Studio Code, though technically any editor will work.
For testing with the MCP Inspector, we will also want Node.js installed because the Inspector runs through Node and npx.
First, let’s confirm Python is installed. Open a command prompt and enter:
python --version
Or on Windows:
py --version
We should see something like:
Python 3.13.x
If Python is not installed, we can download it from the Python website and install it.
Create Our Project
Let’s create a folder for our MCP server.
From a command prompt, run:
mkdir mcp-developer-server
cd mcp-developer-server
Let’s also create a Python virtual environment. A Python virtual environment is an isolated Python workspace for a specific project. Using a virtual environment isn’t strictly required, but it is a good idea because it keeps the Python packages for our project separate from other Python projects on the machine:
py -m venv .venv
And activate it:
.venv\Scripts\activate

Install the MCP Python SDK
Now let’s install the MCP SDK.
Run:
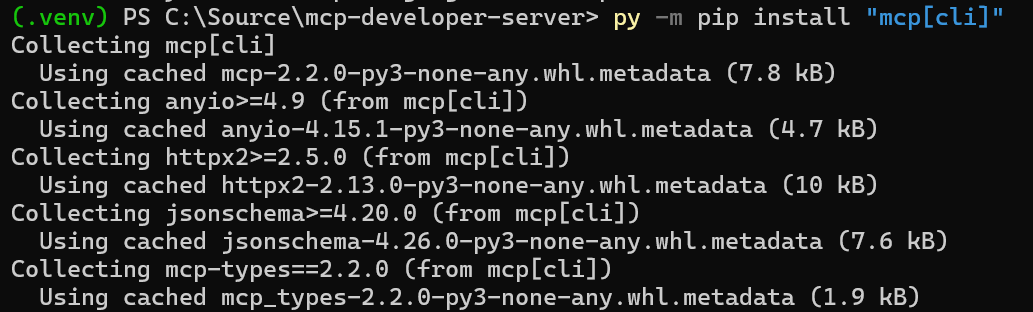
py -m pip install "mcp[cli]"
The [cli] part installs the MCP command-line tools in addition to the SDK. These give us useful commands including mcp dev, mcp run, and mcp install.
One important note here is that the MCP Python SDK changed significantly in version 2.
If we find older examples online, we may see code such as:
from mcp.server.fastmcp import FastMCP
With the current v2 SDK, the high-level class is now:
from mcp.server import MCPServer
So for this post we will use the current SDK syntax.
Create Our MCP Server
Now let’s create a file called:
server.py
Add the following:
from mcp.server import MCPServer

mcp = MCPServer("Developer Utilities")
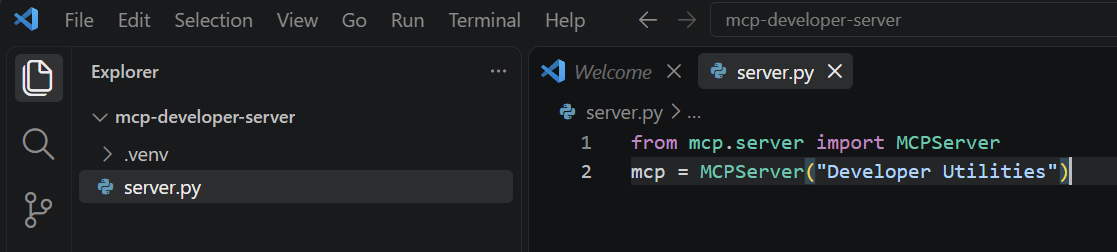
We have now created an MCP server called Developer Utilities.
That’s really all we need to create the server itself. Now let’s give it something useful to do.
Create Our First MCP Tool
Let’s add a simple tool that adds two numbers.
Add:
@mcp.tool()
def add(a: int, b: int) -> int:
    """Add two numbers together."""
    return a + b
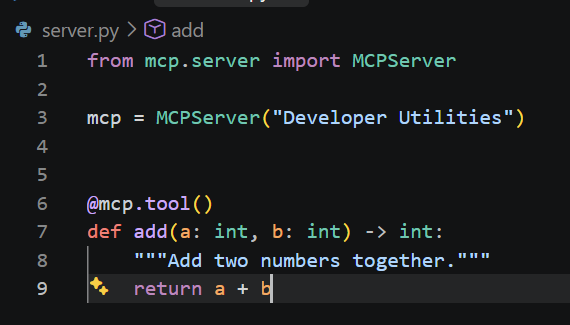
That’s our first MCP tool. Notice how simple this is.
We have created a normal Python function:
def add(a: int, b: int) -> int:
Then we added:
@mcp.tool()
This tells the MCP SDK that the function should be exposed as an MCP tool.
The SDK can use our function name, type hints, and docstring to generate the information that MCP clients need to understand and call the tool. For example, a: int tells the client that a should be an integer, and the docstring becomes the tool description.
We don’t have to manually write the JSON schema for the tool.
This is one of the nice things about the Python SDK.
Add Another Tool
Let’s create something slightly more interesting.
Add:
@mcp.tool()
def word_count(text: str) -> dict[str, int]:
    """Count the words and characters in some text."""

    words = text.split()

    return {
        "words": len(words),
        "characters": len(text)
    }
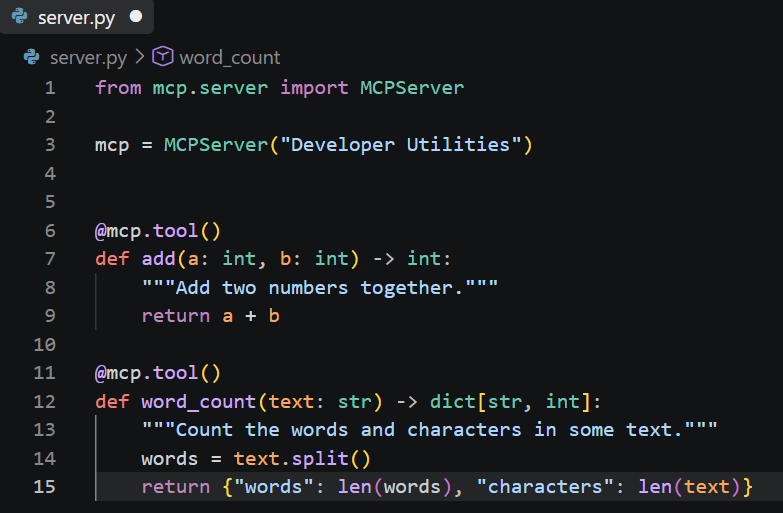
Our MCP server can now analyze text.
If the model sends:
Model Context Protocol is very cool
Our tool will return something like:
{
    "words": 6,
    "characters": 35
}
Because we are returning a typed Python dictionary, the SDK can also expose structured output to the client.
Now we have two tools.
Add an MCP Resource
Next, let’s add a resource.
Remember, tools are generally actions the model can invoke. Resources are data that an application can read and use as context.
Add:
@mcp.resource("docs://mcp-overview")
def mcp_overview() -> str:
    """Basic information about our MCP server."""

    return """
    Developer Utilities MCP Server

    This server provides developer utilities through
    the Model Context Protocol.

    Available capabilities include:
    - Adding numbers
    - Counting words and characters
    - Developer prompts
    """
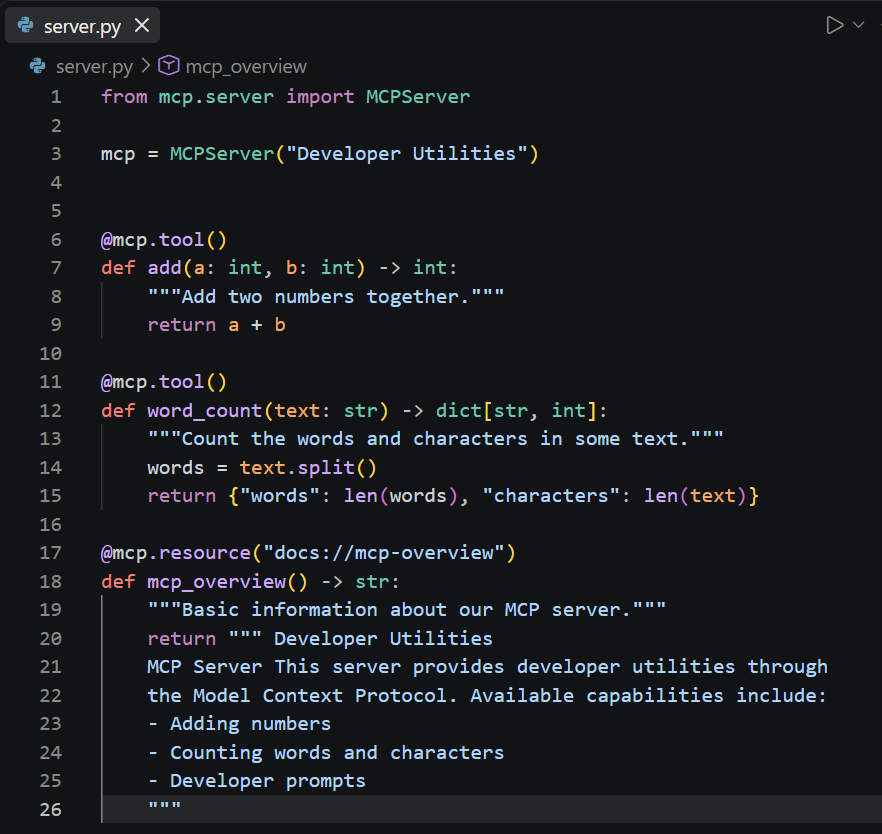
Notice something different here:
@mcp.resource("docs://mcp-overview")
Resources have a URI. In our case, the resource can be addressed as:
docs://mcp-overview
An MCP client can read this resource and use the returned information as context. In a real application, a resource could represent something much more useful.
For example:
customer://12345
could return information about a customer.
Or:
product://surface-laptop
could return product information.
Or:
schema://dataverse/account
could return the schema of a Dataverse table.
This is where MCP starts becoming very interesting.
Add an MCP Prompt
Next, let’s add a prompt.
Prompts provide reusable message templates that users can select from their MCP client.
Add:
@mcp.prompt()
def explain_code(code: str) -> str:
    """Explain a piece of code."""

    return f"""
    Explain the following code in simple terms.

    Describe:
    1. What the code does
    2. The important parts of the code
    3. Any potential improvements

    Code:

    {code}
    """
Our MCP server now exposes an explain_code prompt.
The important distinction here is that the prompt does not call an AI model itself.
It simply returns a prompt.
The MCP host can then place that prompt into the conversation with the model. Prompts are intended to be user-controlled, whereas tools are typically available for the model to invoke.
Our Complete MCP Server
Our complete server.py should now look like this:
from mcp.server import MCPServer

mcp = MCPServer("Developer Utilities")


@mcp.tool()
def add(a: int, b: int) -> int:
    """Add two numbers together."""
    return a + b


@mcp.tool()
def word_count(text: str) -> dict[str, int]:
    """Count the words and characters in some text."""

    words = text.split()

    return {
        "words": len(words),
        "characters": len(text)
    }


@mcp.resource("docs://mcp-overview")
def mcp_overview() -> str:
    """Basic information about our MCP server."""

    return """
    Developer Utilities MCP Server

    This server provides developer utilities through
    the Model Context Protocol.

    Available capabilities include:
    - Adding numbers
    - Counting words and characters
    - Developer prompts
    """


@mcp.prompt()
def explain_code(code: str) -> str:
    """Explain a piece of code."""

    return f"""
    Explain the following code in simple terms.

    Describe:
    1. What the code does
    2. The important parts of the code
    3. Any potential improvements

    Code:

    {code}
    """


if __name__ == "__main__":
    mcp.run()
And that’s a working MCP server.
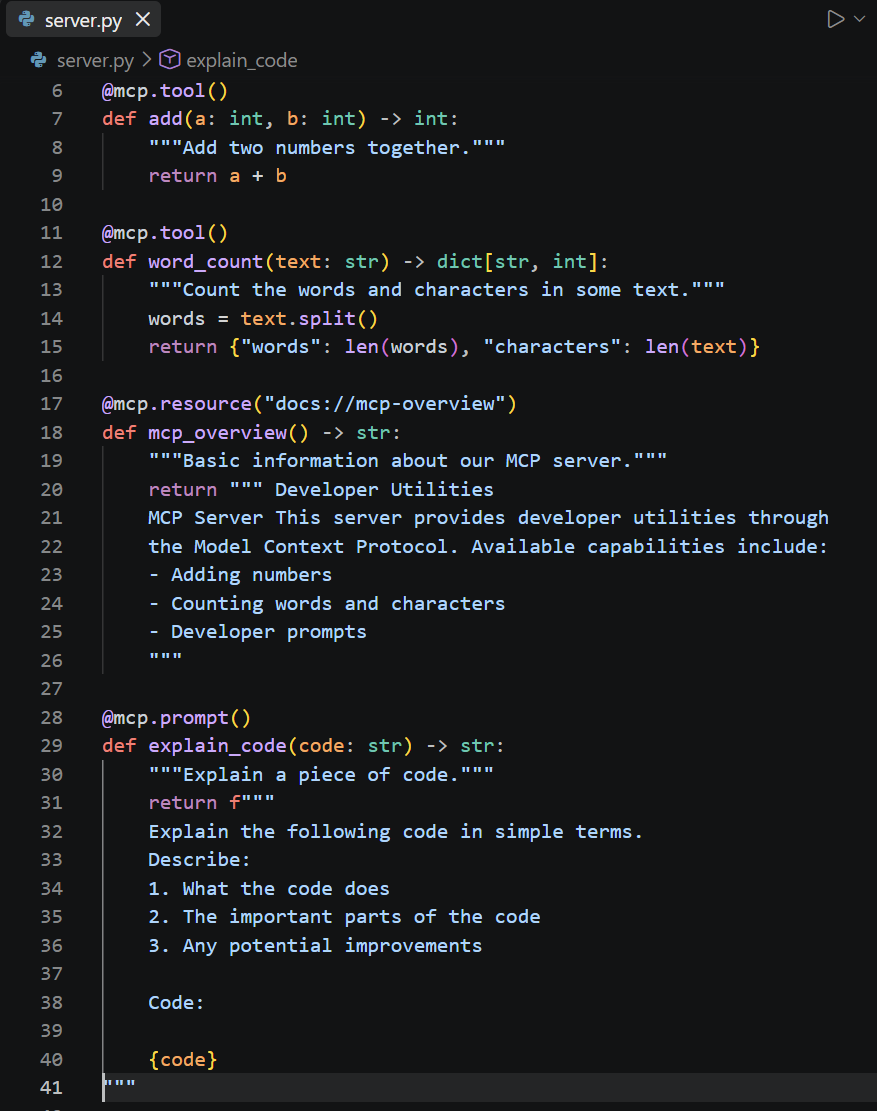
There is no REST controller, routing code, JSON parsing, or manually created schema. The MCP SDK takes care of the protocol layer for us. Finally, install uv if you don’t have it:
pip install uv
Run the MCP Server
Now let’s test it. The easiest way during development is to use the MCP development command.
Run:
mcp dev server.py
If we are using uv, the equivalent command is:
uv run mcp dev server.py

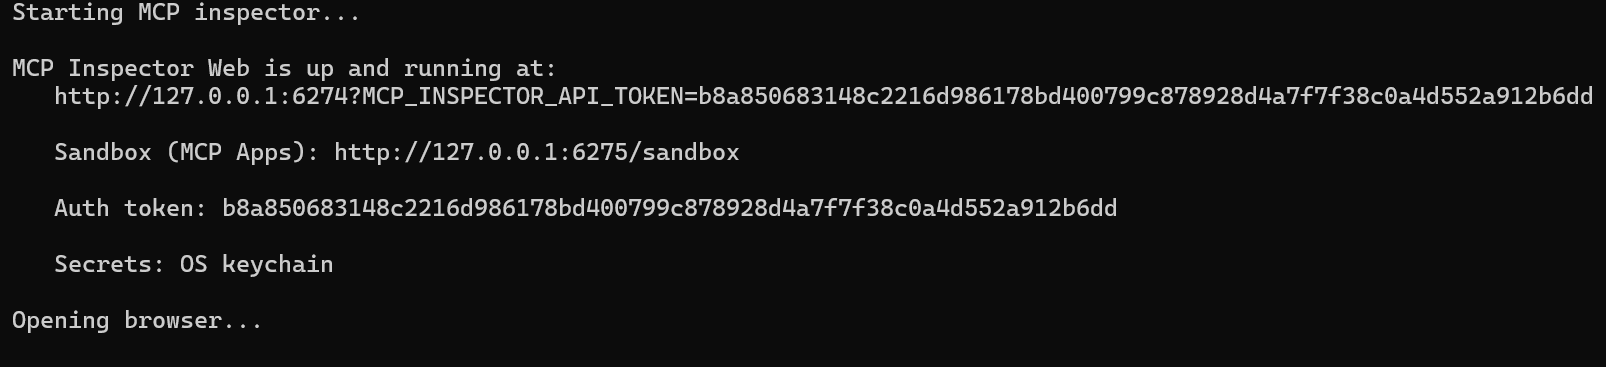
The MCP development command starts our server and launches the MCP Inspector, which is an interactive tool for testing MCP servers. The Inspector was originally created by Anthropic and is now maintained as part of the open-source Model Context Protocol project. It provides a visual way to test and debug MCP servers, including tools, resources, and prompts.
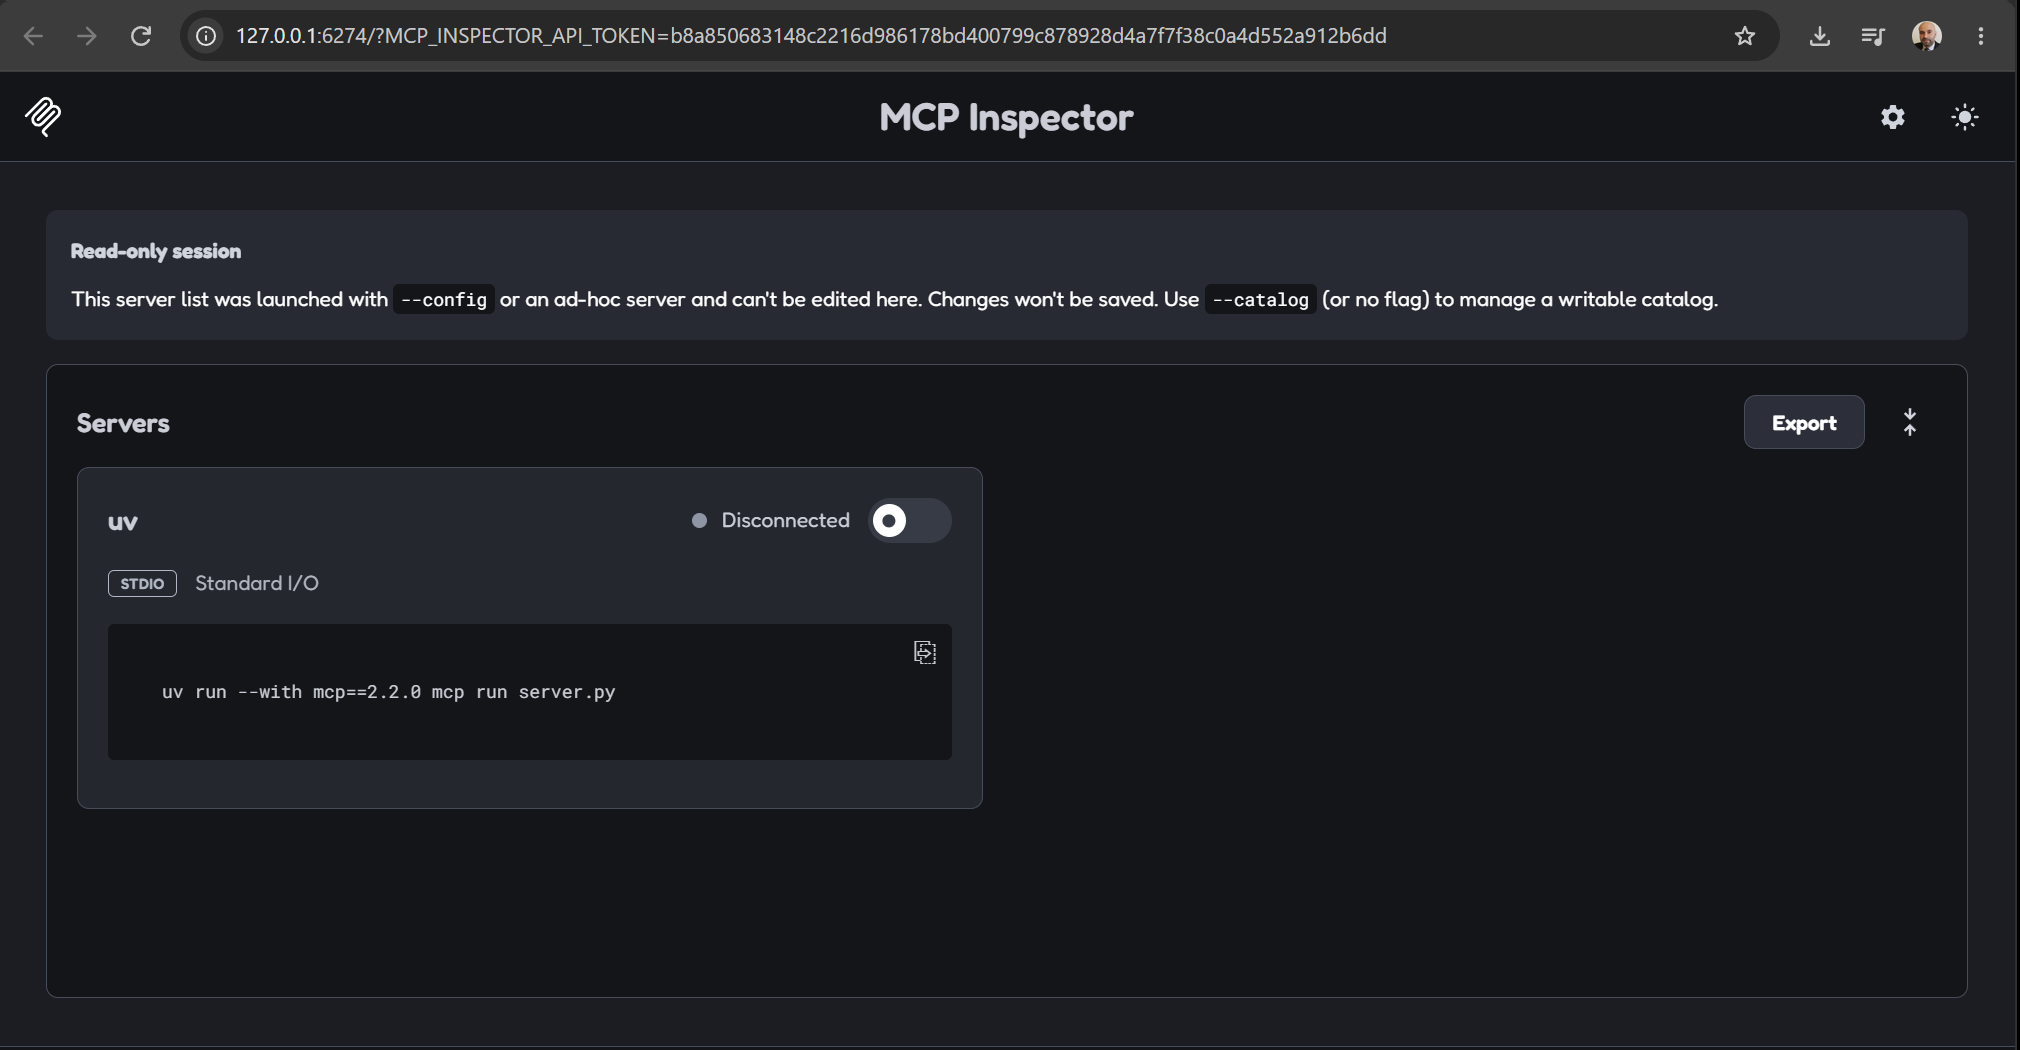
The command will display a URL, open it in the browser. It may open automatically.
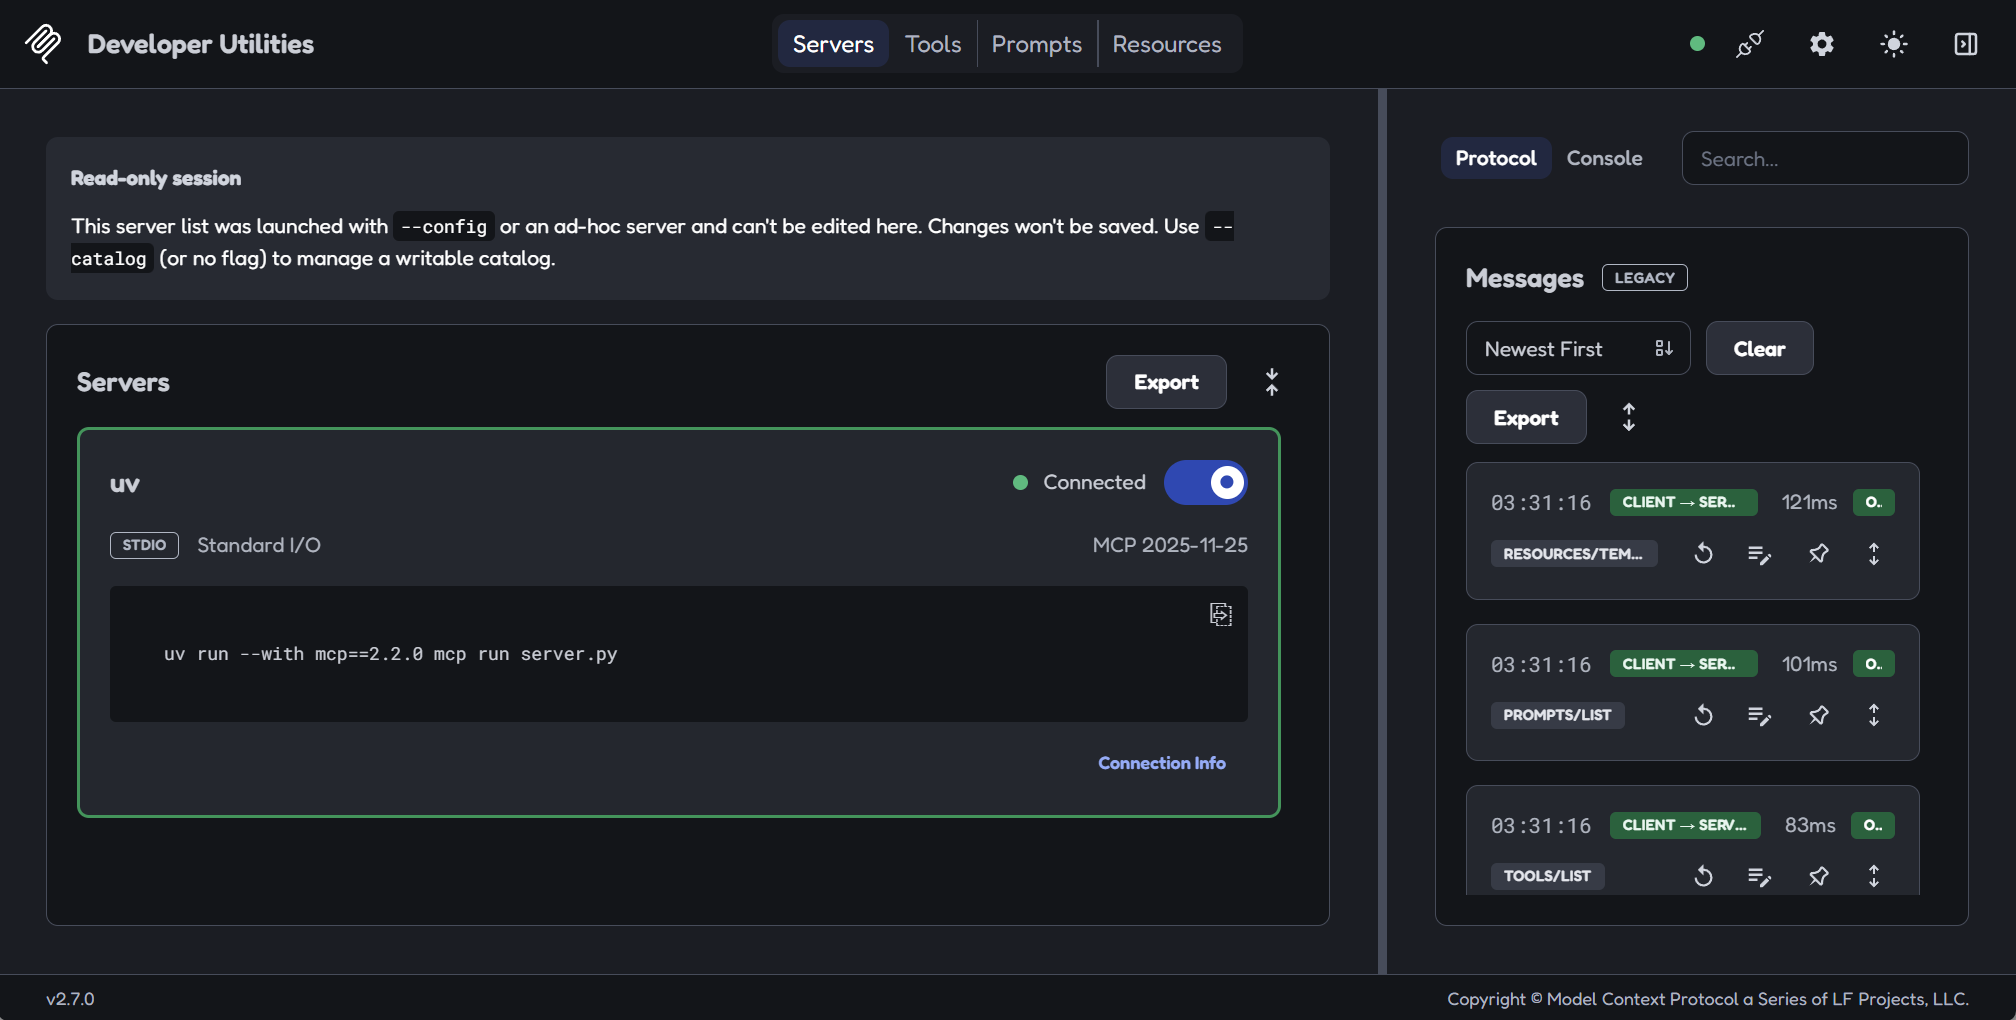
We should then see the MCP Inspector.
Click Connect:
Test Our MCP Tools
In the Inspector, open the Tools section.
We should see:
add
word_count
Let’s select add.
The Inspector should automatically provide fields for:
a
b
This UI was generated from the Python type hints we created in our function.
Enter:
a = 10
b = 25
Run the tool.
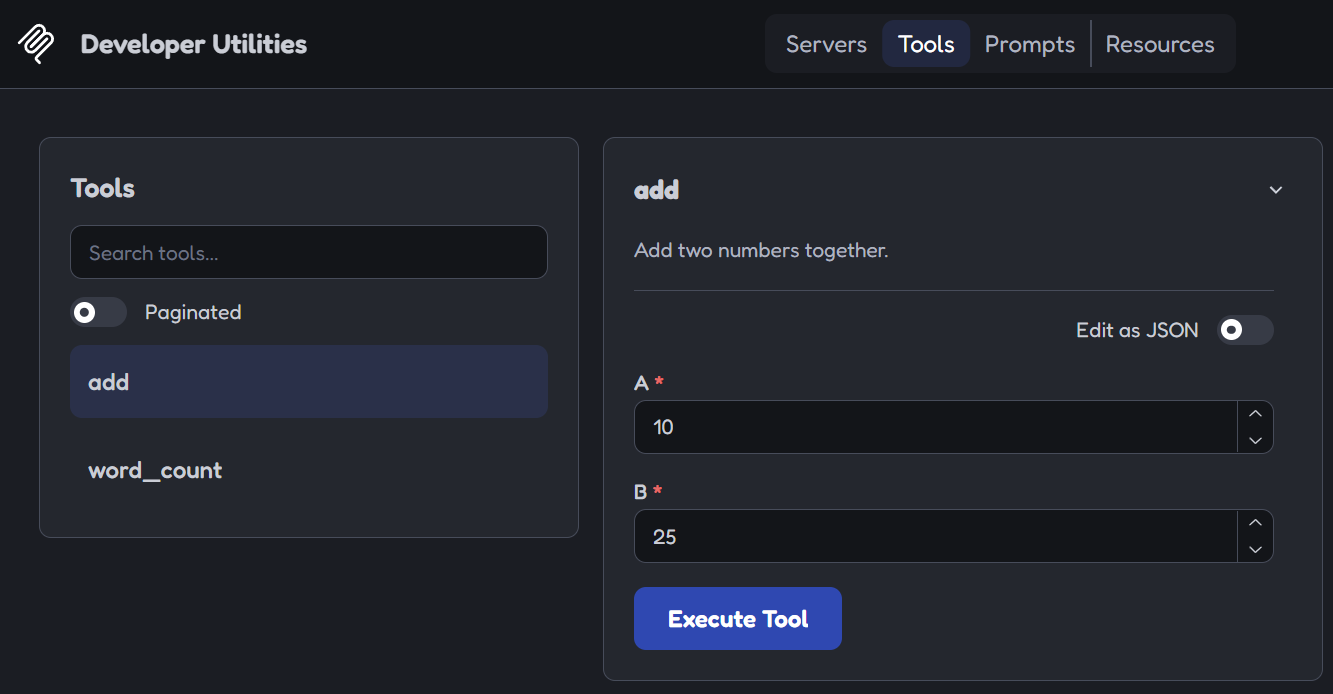
We should get:
35
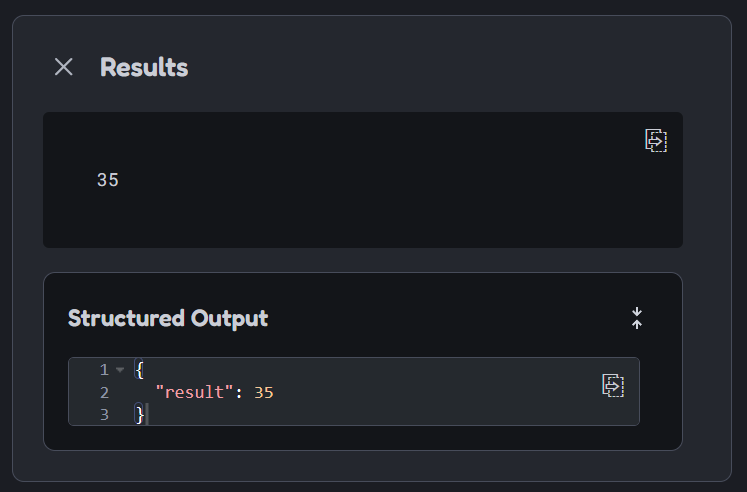
Now let’s test word_count.
Enter:
Model Context Protocol makes connecting AI systems easier.
Run the tool.
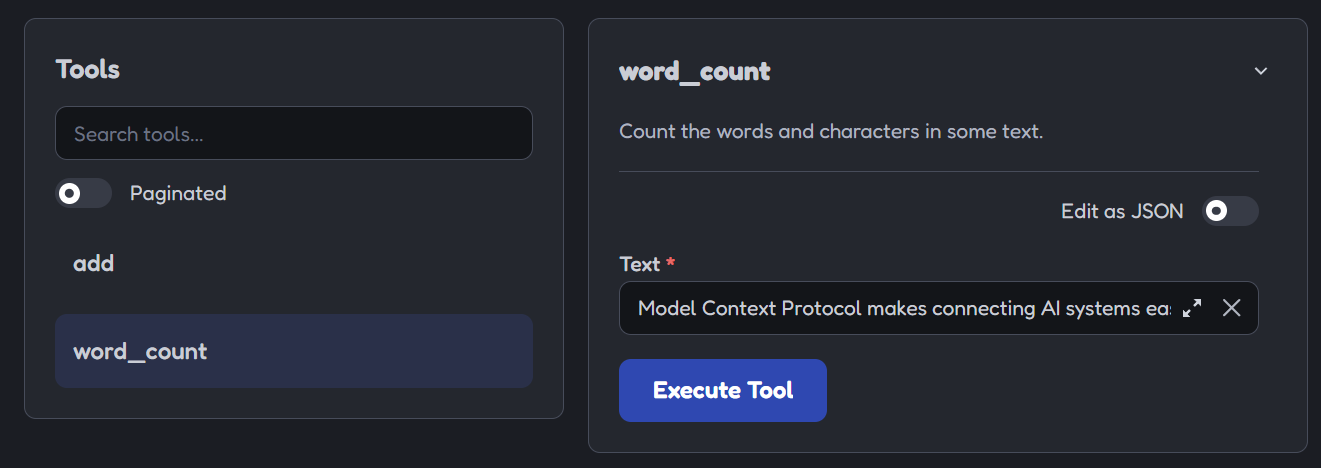
We should receive the word and character counts.
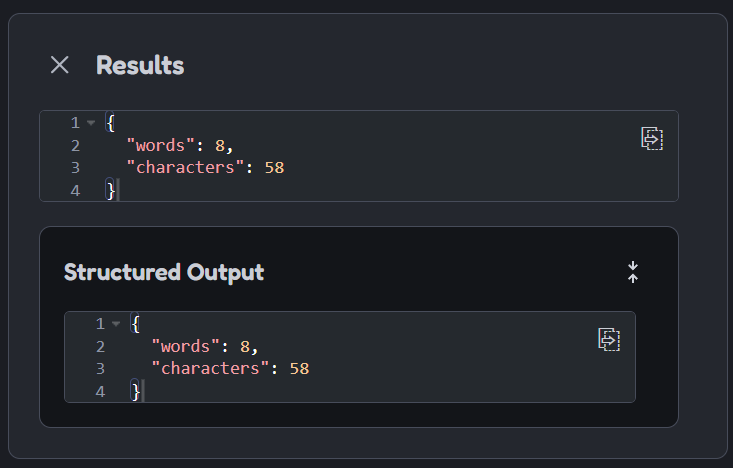
Our tools are working.
Test Our Resource
Next, open the Resources section of the Inspector.
We should see our resource:
docs://mcp-overview
Select it and read the resource. We should see the text returned by our Python function.
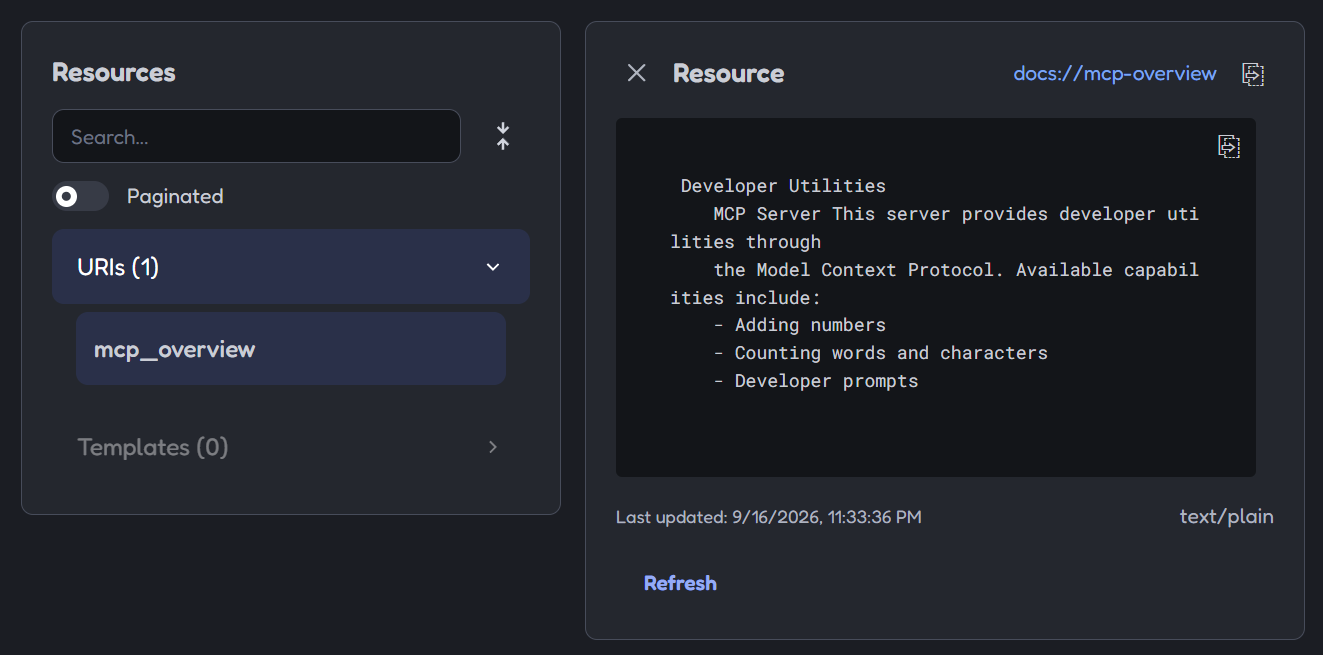
Again, imagine that instead of hard-coded text this function queried:
- Dataverse
- SQL Server
- Azure
- SharePoint
- A REST API
- An internal knowledge base
Now our AI applications would have a standardized way of accessing that data.
Test Our Prompt
Next, open the Prompts section.
We should see:
explain_code
Select the prompt. The Inspector should ask us for the code argument.
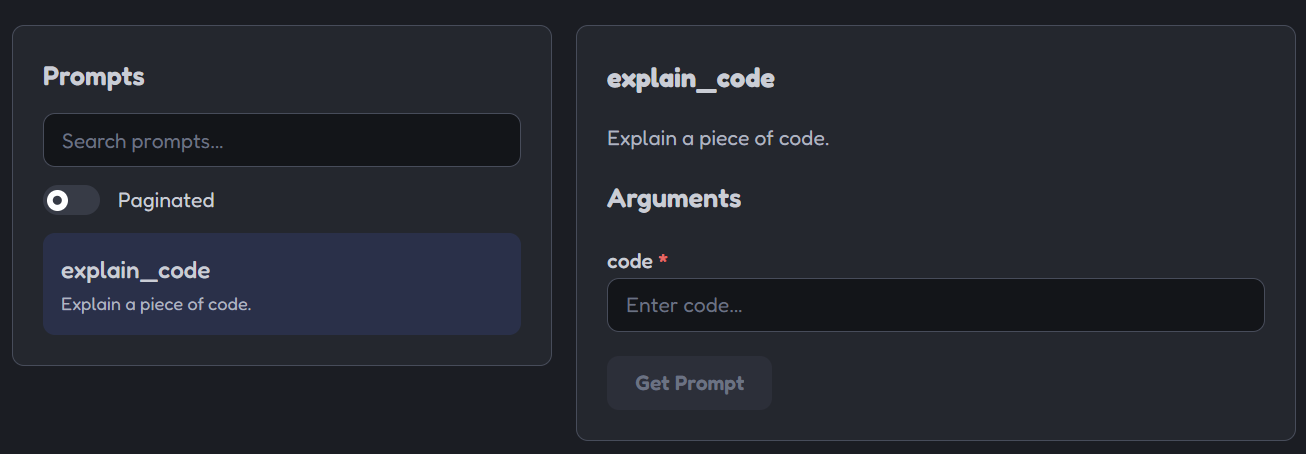
Enter something like:
def add(a, b):
    return a + b
The server will return our completed prompt template containing the supplied code.
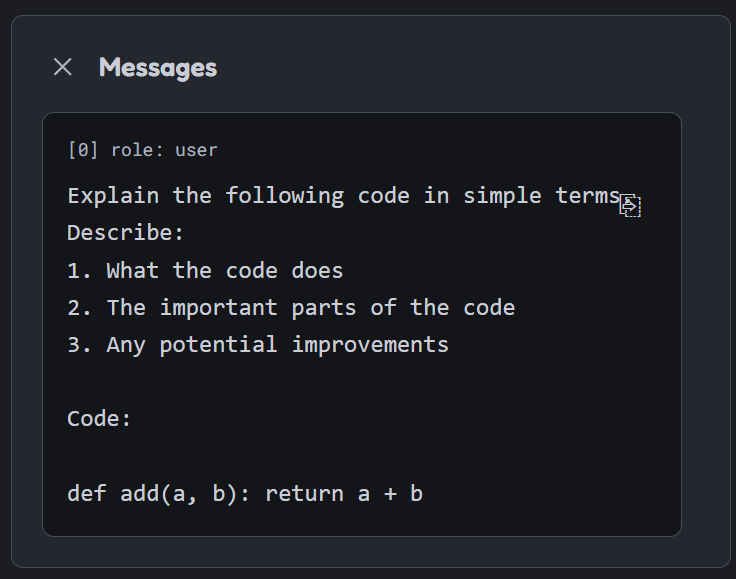
The explain_code function does not explain the code itself. It simply builds a reusable prompt containing the code we provide, and the MCP host can then send that prompt to the AI model for the actual explanation.
We have now implemented and tested all three major MCP server primitives:
- Tools
- Resources
- Prompts
What Is Happening Behind the Scenes?
At this point, it is worth looking at what MCP is doing for us. When an MCP client connects to our server, it can discover the capabilities our server exposes. For example, the client can discover:
add
word_count
as available tools.
It can learn the parameters those tools accept.
For add, it knows that:
a = integer
b = integer
It can also discover our resources and prompts. The SDK handles the MCP protocol messages required to expose all this information. Our job as developers is mainly to write the actual business logic. This separation is one of the most powerful parts of MCP.
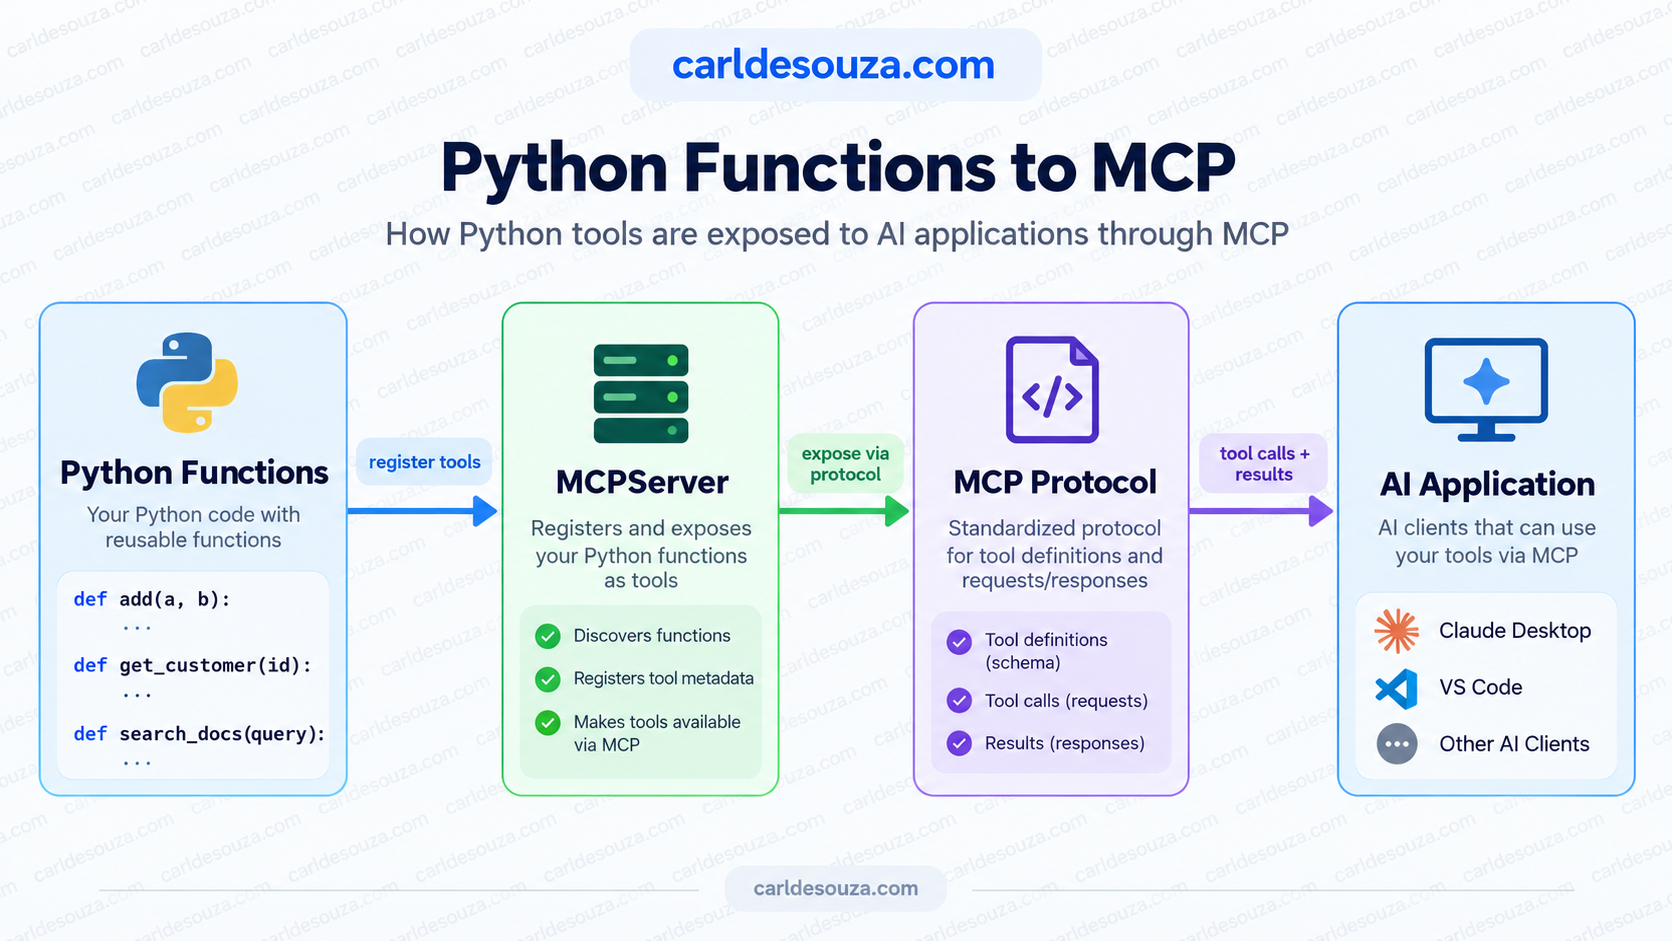
Understanding MCP Transports
So far, we have focused on what our server exposes. But there is another important concept, transports. The transport determines how the MCP client communicates with the MCP server. Two transports we will commonly work with are:
stdio
stdio means standard input and standard output. This is commonly used for local MCP servers. The host application launches our MCP server as a child process and communicates with it through stdin and stdout. This is a common pattern for connecting a local MCP server to an AI application or IDE.
Our code:
mcp.run()
uses stdio by default.
Streamable HTTP
Streamable HTTP is the MCP transport commonly used for remote servers. Instead of launching an MCP server locally and communicating through standard input/output, an AI application connects to the server over HTTP, allowing the MCP server to run in the cloud or on another machine and be shared by multiple applications.
For remote servers, we can expose our MCP server over HTTP.
For example:
mcp run server.py --transport streamable-http
Or with uv:
uv run mcp run server.py --transport streamable-http

The server can then be reached at an MCP endpoint such as:
http://localhost:8000/mcp
The current MCP SDK supports both local stdio connections and Streamable HTTP connections.
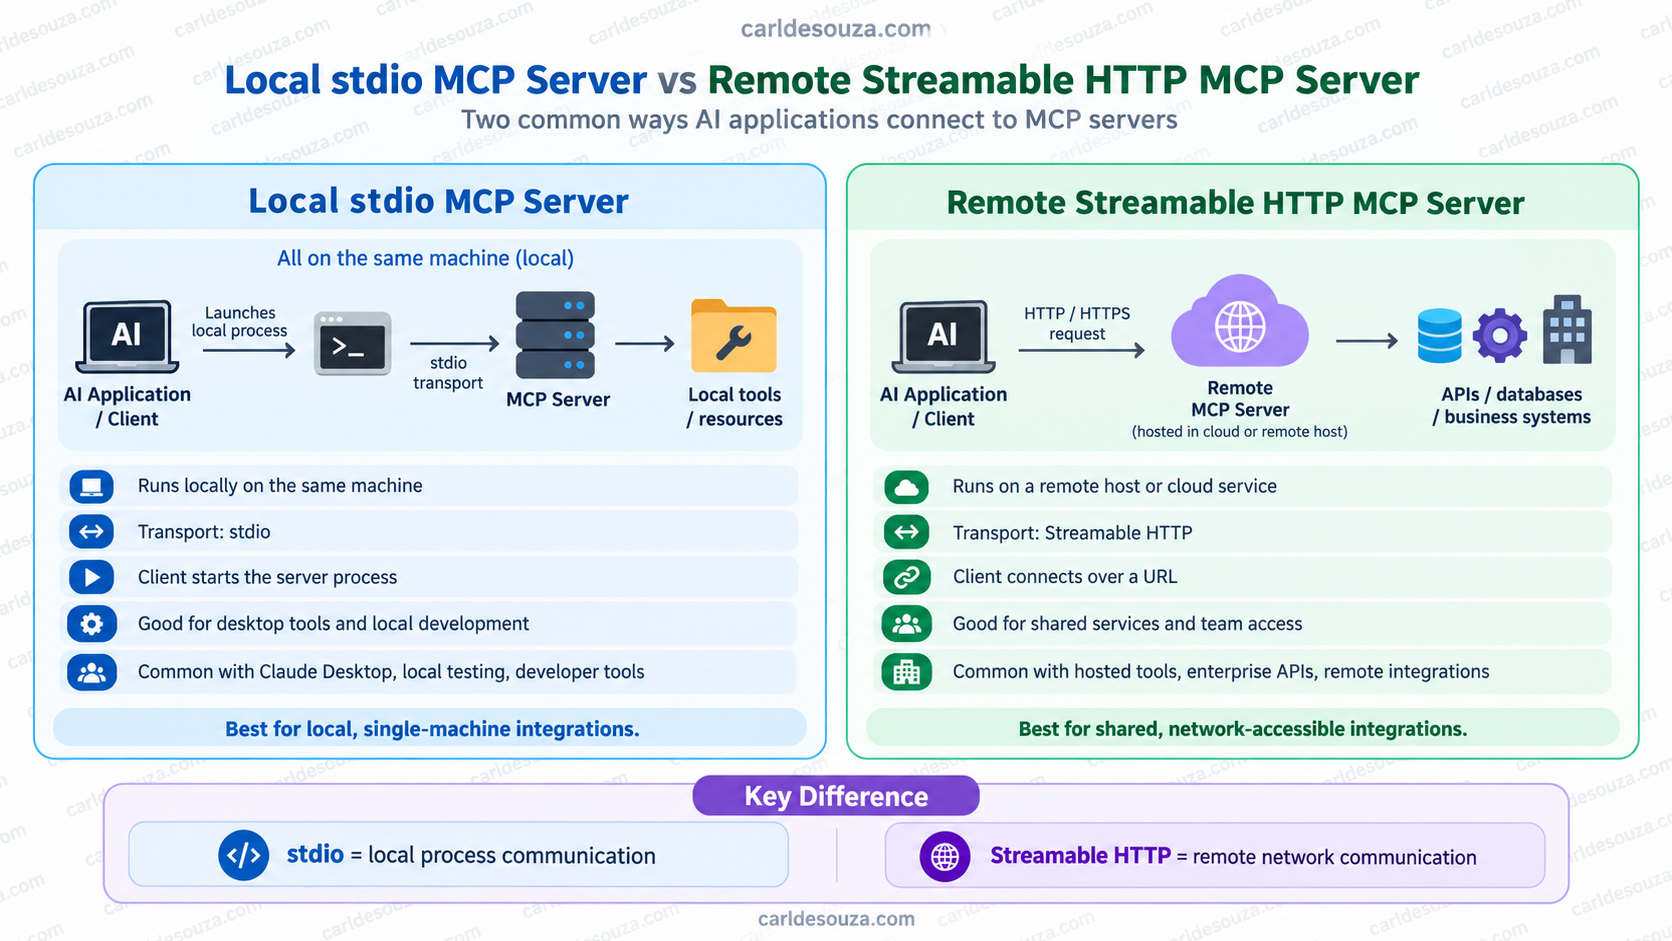
This means we can start by developing locally and later deploy the same MCP server as a remote service.
Calling Our MCP Server from Python
We can even create our own MCP client. First, start the server using Streamable HTTP:
mcp run server.py --transport streamable-http
Let’s create a client.py that performs an add:
import asyncio
from mcp import Client


async def main():
    async with Client("http://localhost:8000/mcp") as client:
        result = await client.call_tool(
            "add",
            {
                "a": 10,
                "b": 25
            }
        )

        print(result.structured_content)


asyncio.run(main())
And in a new PowerShell window, run it:
cd <yourdevserverfolder>
.\.venv\Scripts\Activate.ps1
python client.py
We get our result back:

The same MCP SDK can therefore be used to build both MCP servers and MCP clients.
This is useful when building our own agent applications rather than relying entirely on an existing MCP host.
Turning This Into a Real MCP Server
Our example is deliberately simple, but we now have the foundation required to build much more useful integrations.
For example, we could replace:
def add(a: int, b: int):
with:
def get_customer(customer_id: str):
and query Dynamics 365. Or:
def search_orders(customer_name: str):
and query a database. Or:
def create_support_ticket(
    title: str,
    description: str
):
and call a customer service API.
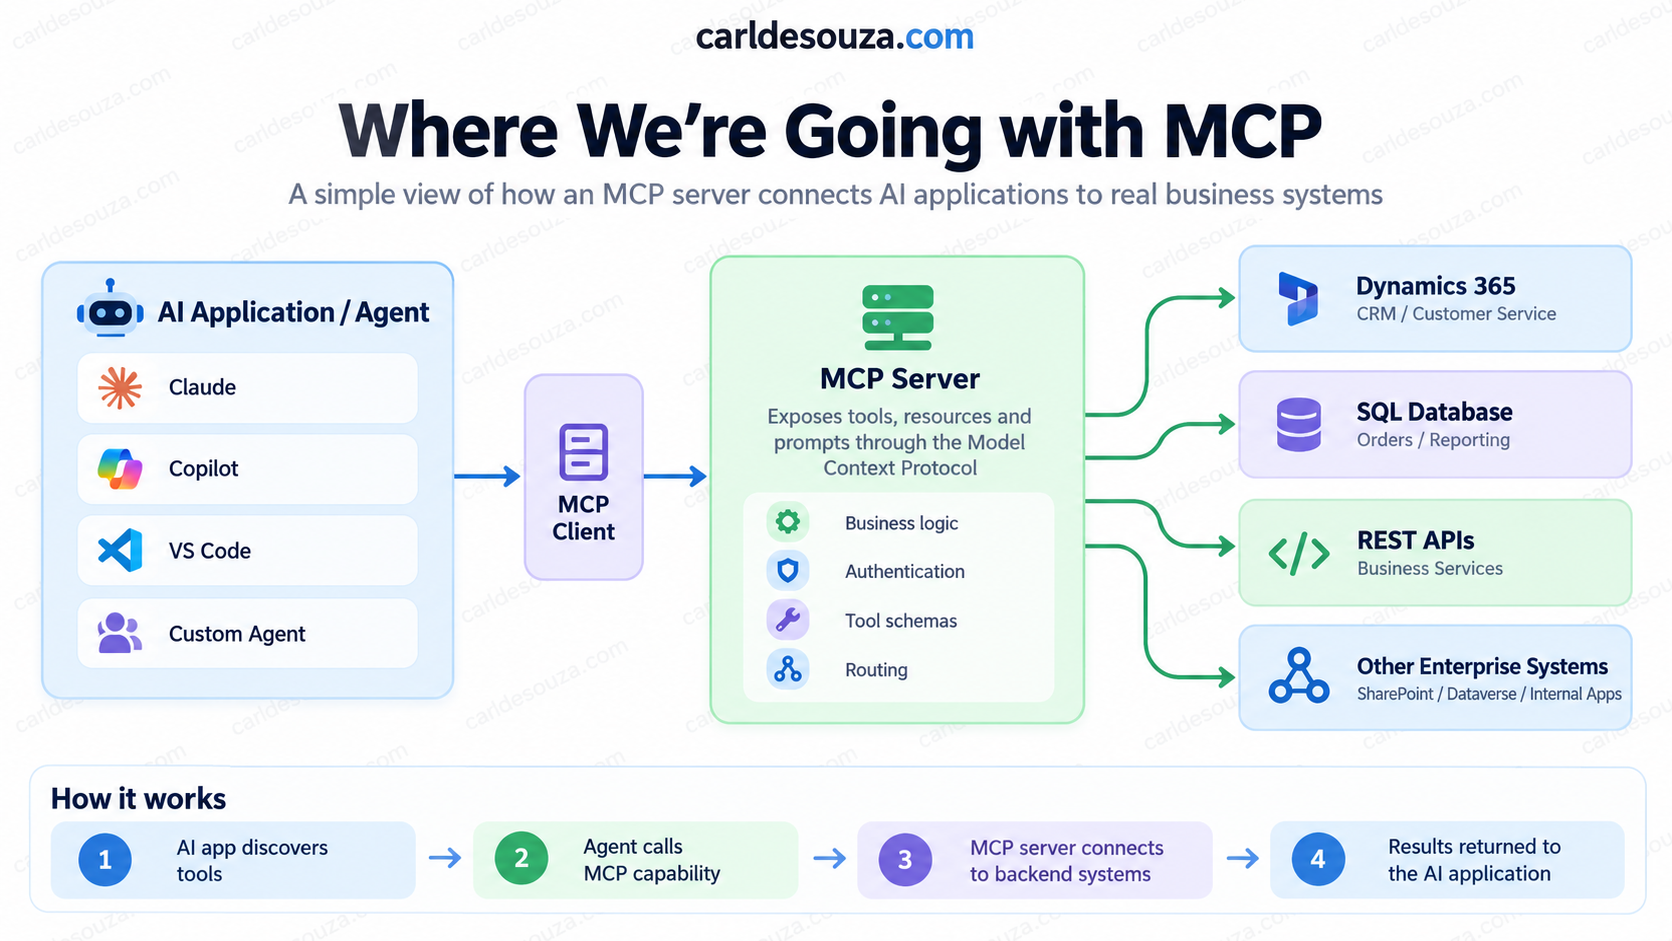
Our architecture could then look something like: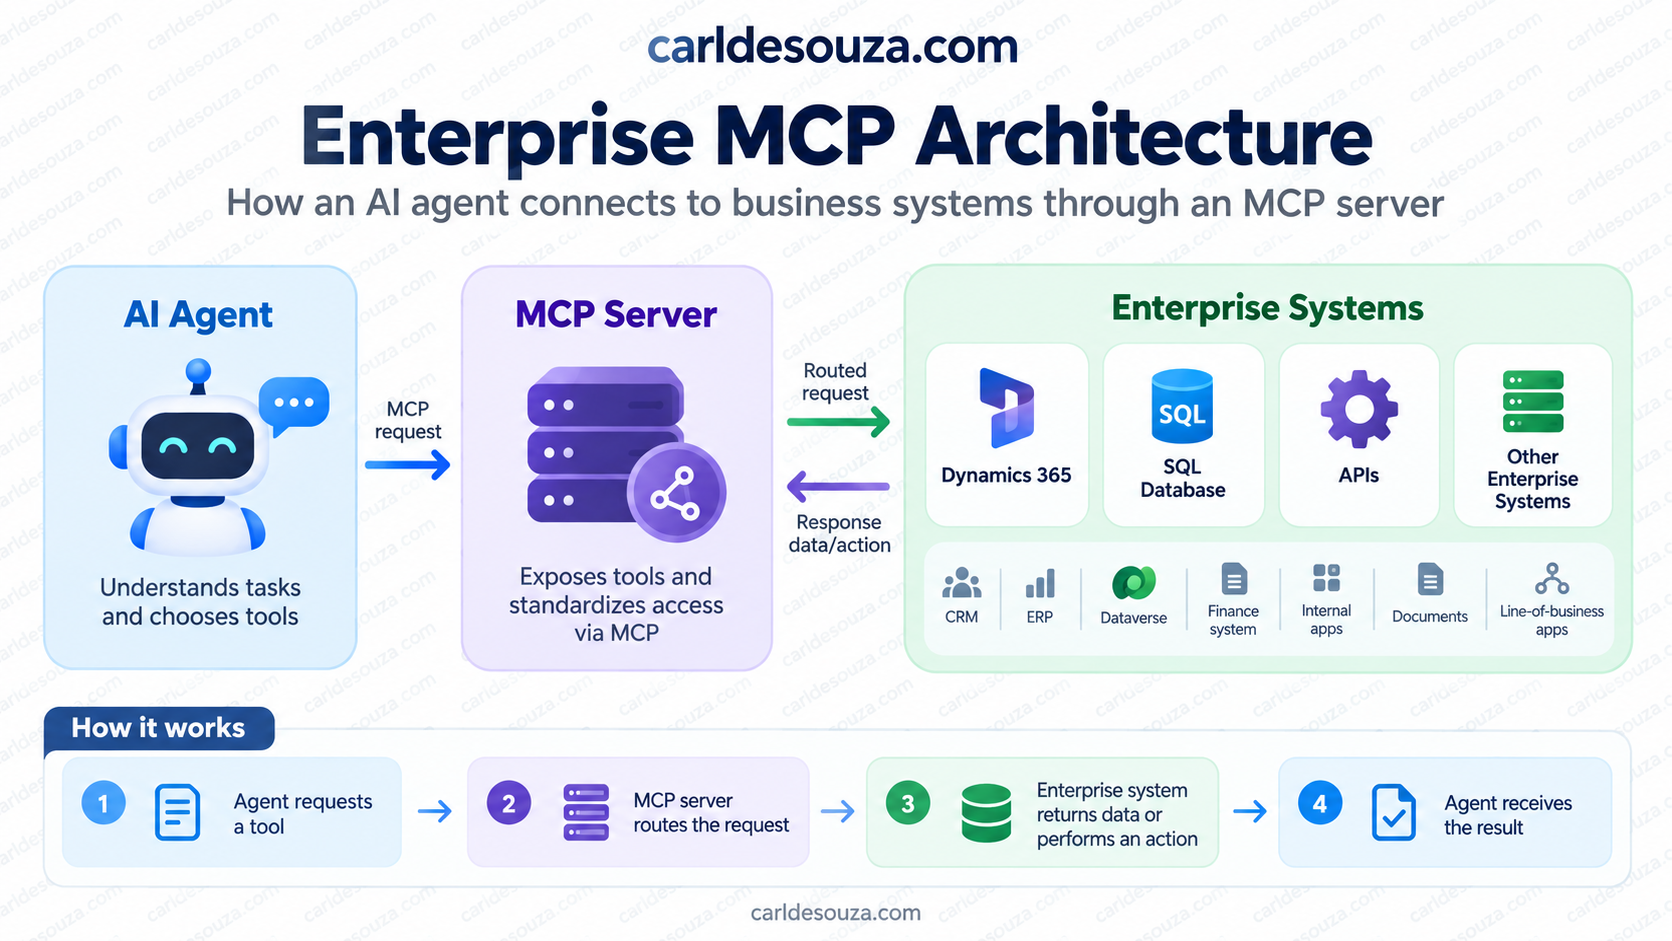
This is where MCP becomes especially useful for agent development.
Instead of teaching every agent how to integrate directly with every backend system, we can expose well-defined capabilities through MCP servers. You could also chain MCP servers in a pattern such as MCP Server->MCP Client->MCP Server, but keep in mind possible tradeoffs such as network hop, more authentication to manage, additional failure points, and more latency.
Vendor MCP Servers vs Custom MCP Servers
So far, we have been building our own MCP server. But we do not always need to build one ourselves. Software vendors can publish their own MCP servers that expose the capabilities of their products through a standard MCP interface.
For example, Microsoft provides a Dataverse MCP server that allows MCP-compatible AI applications to work with Dataverse data and capabilities. Instead of us building our own API layer over Dataverse, we can connect an MCP client directly to the Microsoft-hosted MCP endpoint.
Conceptually, this looks like:
AI Application
      ↓
MCP Client
      ↓
Microsoft Dataverse MCP Server
      ↓
Dataverse / Dynamics 365
A Few MCP Development Best Practices
As we move from demos to real MCP servers, there are a few things we should keep in mind.
Give Tools Clear Names
Instead of:
get_data
use something like:
get_customer_orders
This makes it easier for the model to understand when the tool should be used.
Write Good Tool Descriptions
Our docstrings matter. For example:
"""Return all open orders for a customer."""
is much more useful than:
"""Gets data."""
The description helps the model understand the purpose of the tool.
Use Strong Types
Instead of:
def get_order(id):
use:
def get_order(order_id: str) -> dict:
The SDK uses these types when generating schemas for clients.
Validate Inputs
If a tool expects an ID, date, email address, or limited set of values, we should validate them.
MCP tools may eventually perform real actions against production systems, so we should treat inputs just as carefully as we would in a normal API.
Keep Tools Focused
A tool should ideally perform one clear task.
For example:
get_customer
get_customer_orders
create_case
update_case
is generally easier for a model to understand than one giant one:
customer_operations
Think About Security
An MCP tool can potentially call APIs, modify records, access files, or execute other powerful actions.
The MCP specification specifically calls out user consent, access control, data privacy, and human oversight around tool execution as important security considerations.
We should apply the same security principles we would to any other application integration:
- Use least-privilege permissions
- Authenticate remote servers
- Validate tool inputs
- Protect credentials
- Avoid logging secrets
- Restrict access to sensitive resources
- Be especially careful with destructive operations
We should never assume that because something is being called by an AI model it can bypass our normal application security.
MCP and Enterprise AI
Our example only has a few lines of actual MCP code, which is really the point. The MCP server is simply the standardized interface. Behind our tools we can have almost anything.
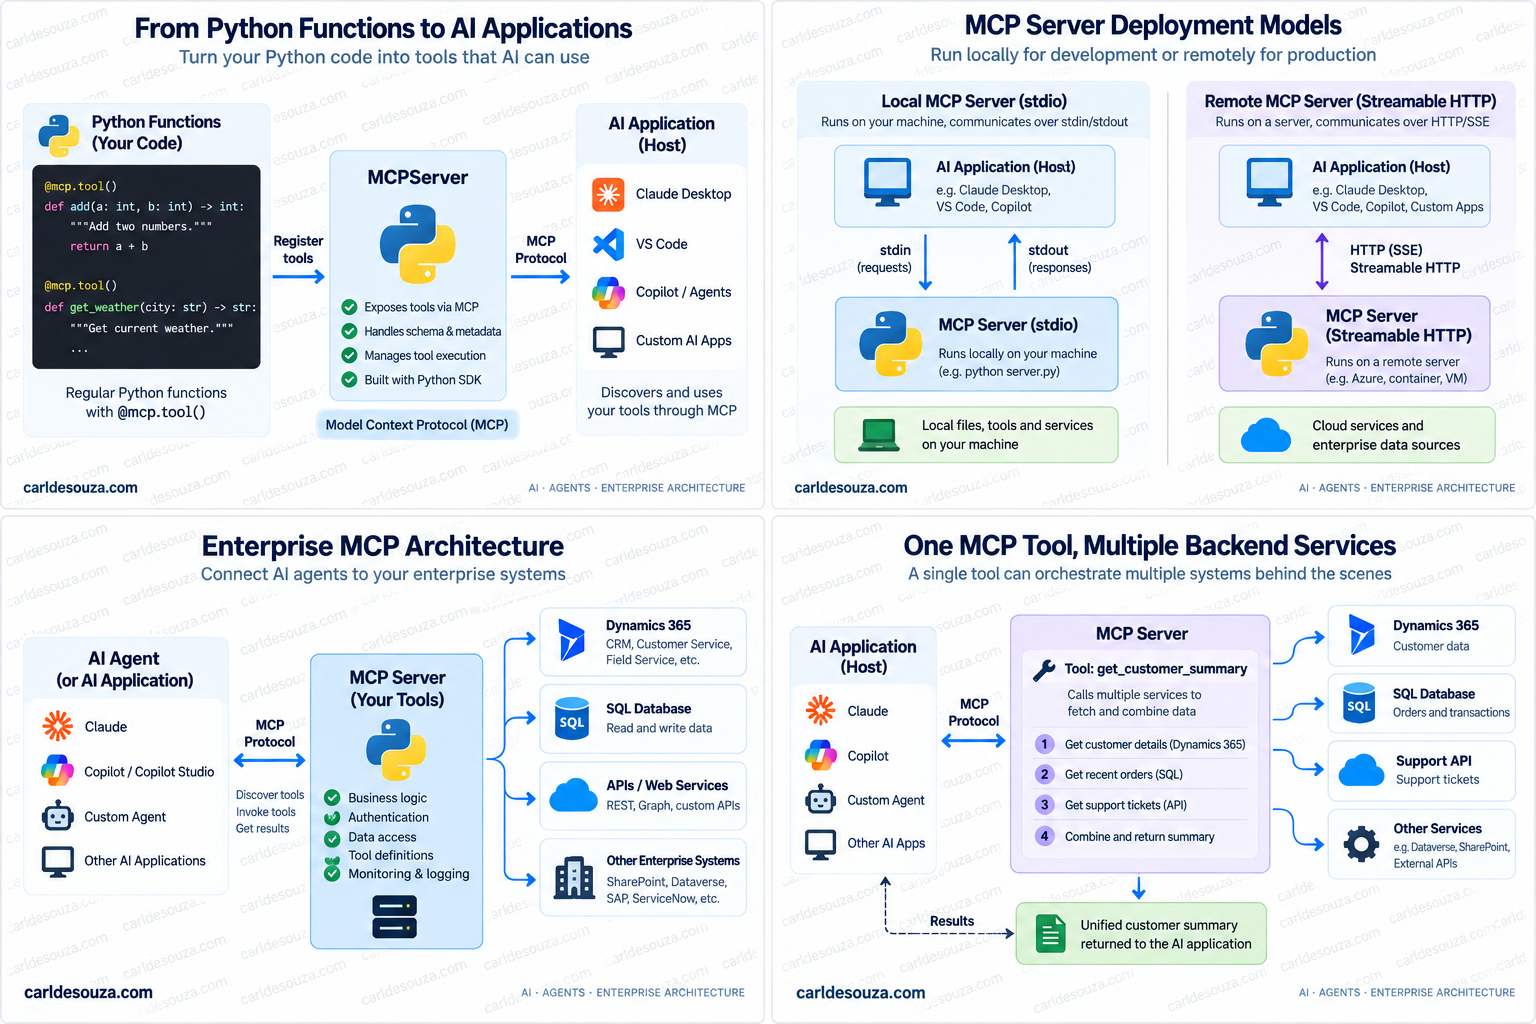
This makes MCP very interesting for enterprise AI. We can build agents that connect to standardized MCP servers rather than creating completely different integrations for every AI platform. And because MCP is a protocol rather than a specific AI model, the same server can potentially be used by multiple MCP-compatible hosts.
Final Thoughts
In this post, we built an MCP server completely from scratch using Python. We created a new project, installed the MCP SDK, created an MCPServer, and exposed tools, resources, and prompts. We then tested everything using the MCP Inspector and looked at how our server can run locally using stdio or remotely using Streamable HTTP.
Our final server was surprisingly small:
from mcp.server import MCPServer

mcp = MCPServer("Developer Utilities")


@mcp.tool()
def add(a: int, b: int) -> int:
    """Add two numbers together."""
    return a + b


if __name__ == "__main__":
    mcp.run()
But behind that small amount of code is a standardized interface that AI applications can discover and interact with.
From here, we can start replacing our simple tools with real-world integrations into APIs, databases, Dynamics 365, Azure, Microsoft services, and our own applications.
And that’s where MCP starts to become really powerful.
In future posts, we can take this further by connecting our MCP server to an AI agent, adding authentication, deploying it remotely, and building more advanced tools.
© 2026 carldesouza.com. This article, examples, and original diagrams were created for educational use. Please do not republish substantial portions of this article or its graphics without permission. If you reference or quote this content, please link back to the original article on carldesouza.com.

Explore AI, agents & Microsoft technology.
I share practical ideas, tutorials, and videos about AI, AI agents, Microsoft technologies, and the Power Platform.
Subscribe on YouTube →