In this post, we will look at how to use custom status reasons and status reason transitions in Dynamics 365. Status Reason Transitions are a way to configure how Status Reasons work in the system. Let’s take a look.
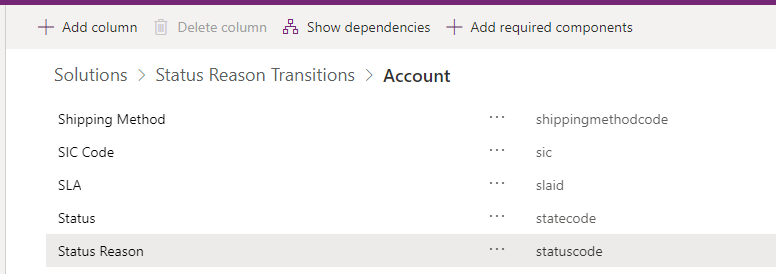
First, we should understand that not all entities in the system have custom status reason transitions, but they do have status reasons. For example, the account entity has a field called Status Reason:
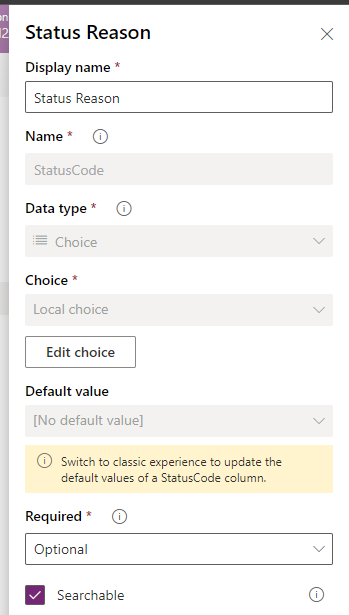
If we take a look at the field, we see it’s a Local choice field:
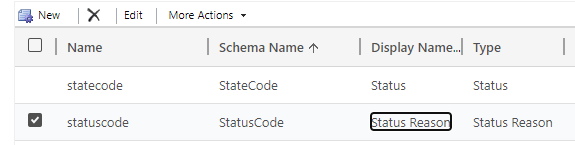
Let’s switch to the classic view to see what it looks like:
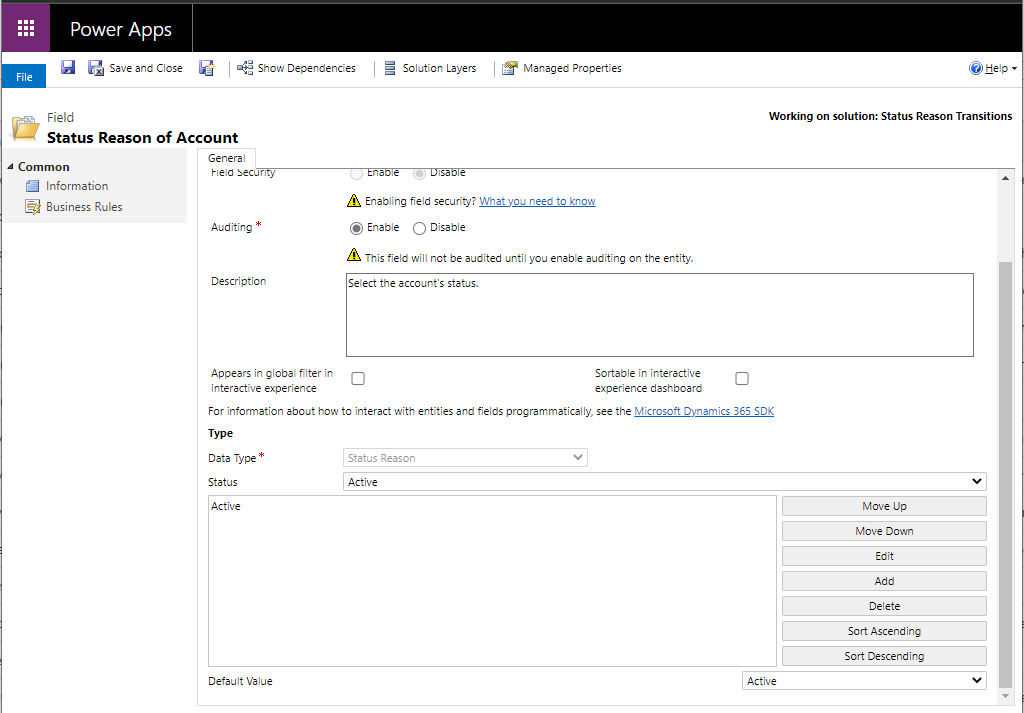
We can see the field looks like below. Notice that we can add and remove statuses but there is no Status Reason Transitions button that we will see later:
Cases and custom entities do allow status reason transitions. Let’s look at the case entity’s status reason field and how status reason transitions work. The status reason field looks like below:
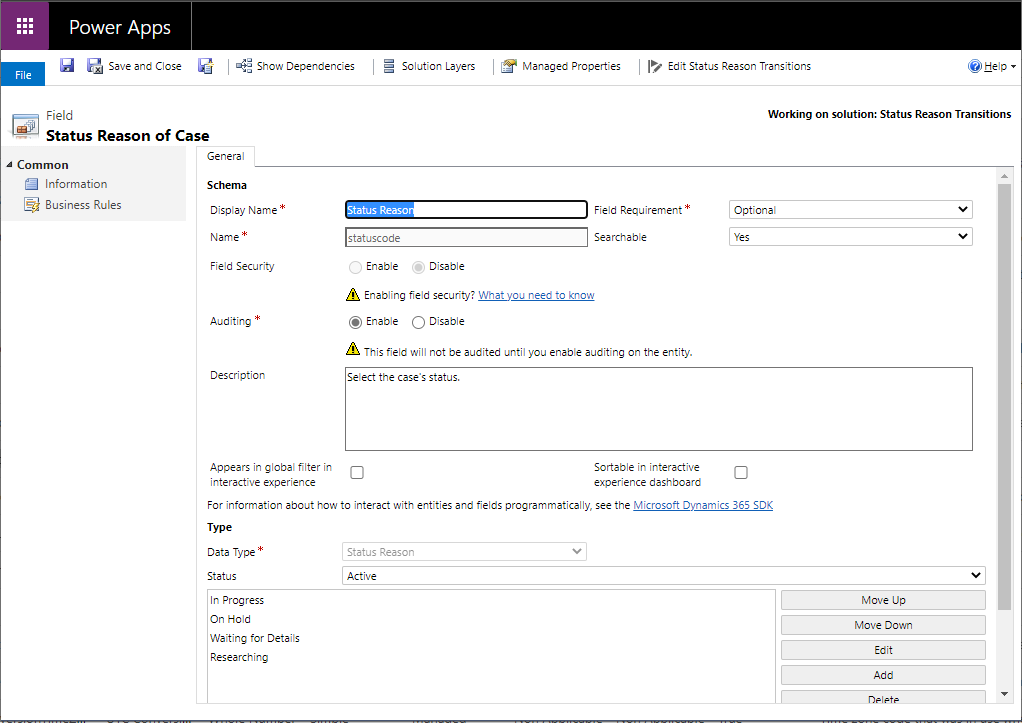
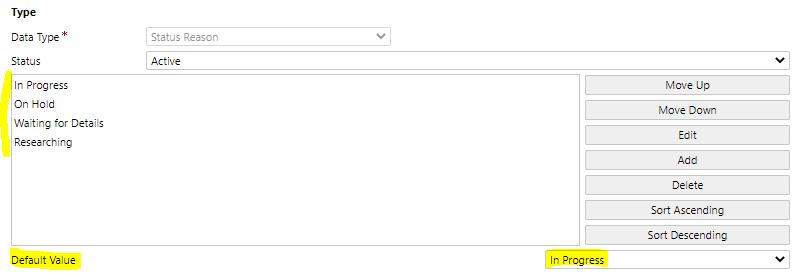
We see the available status reasons at the bottom, we see the Status=Active options with the default value as In Progress:
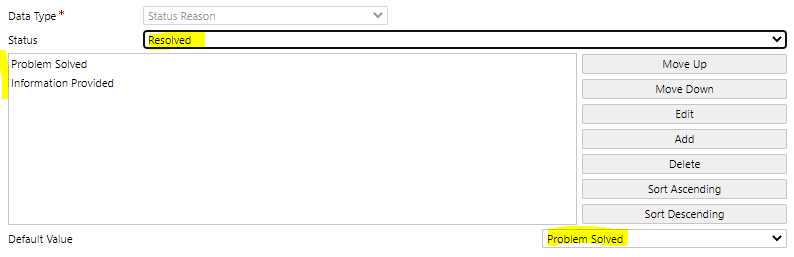
If we change the status to Resolved, we get 2 more options with the Status=Resolved and the default value = Problem Solved:
And with Status=Canceled, Default Value = Canceled:

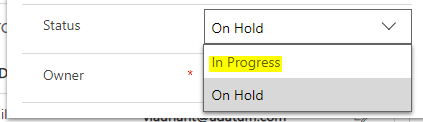
If we create a new case, we see the status is In Progress:

Let’s change the status. In the top right, after pressing the drop-down arrow, we see the Status field, currently set to In Progress:
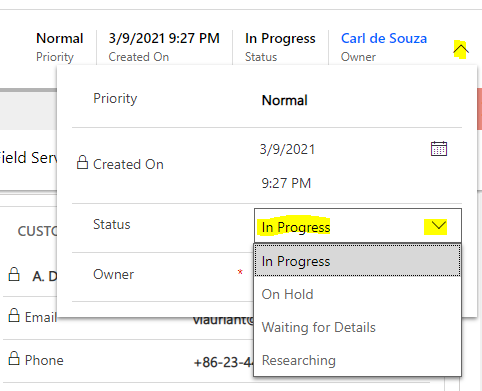
As the status of the case is Active, we see the 4 options for the active status above – In Progress, On Hold, Waiting for Details, Researching. We can change it to any of these statuses at this point if we want to.
Now let’s set the status to Resolved by clicking on the Resolve button:
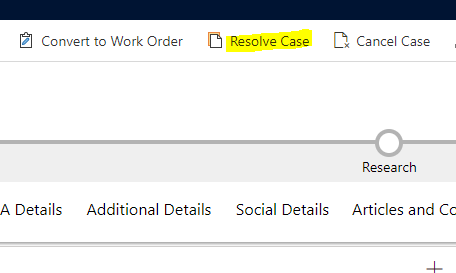
We get 2 options for the Resolution Type, as above for the Resolved status – Problem Solved, and Information Provided:
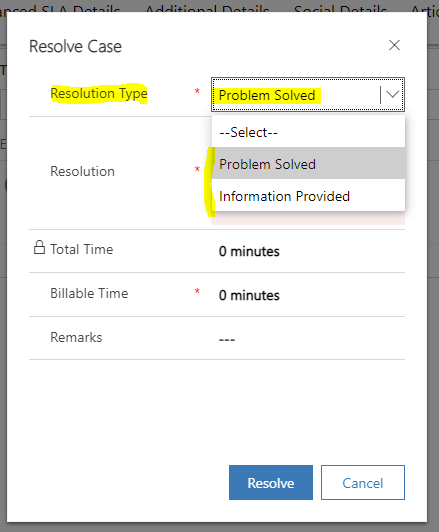
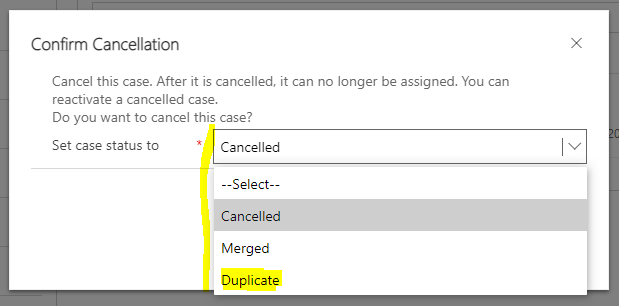
And same when we Cancel the case:
We see 2 status for cancelled – Cancelled and Merged:
If we wanted to add a new status in any of the above, we can do that. For example, let’s add a new status to Cancelled, such as Duplicate, we can add it like below:
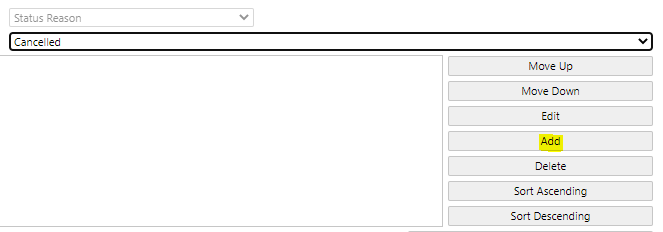

On saving the field, we get the new option displayed to the user:
Now let’s look at Status Transitions. Click on Edit Status Reason Transitions in the field properties:
![]()
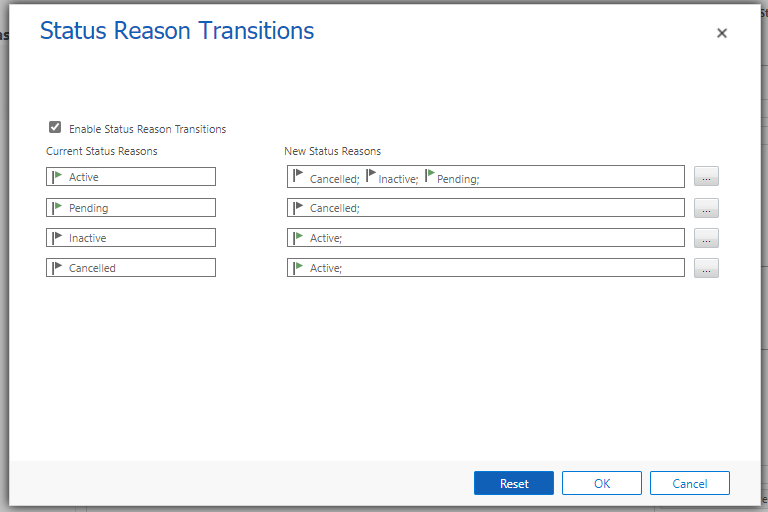
We see below:
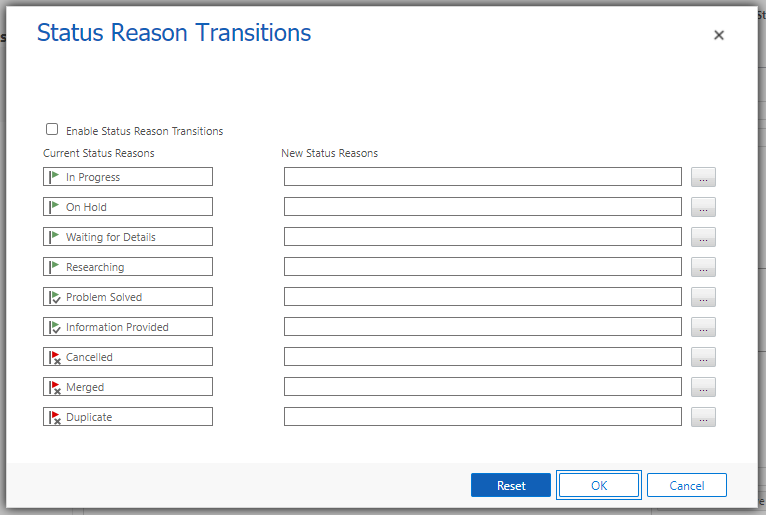
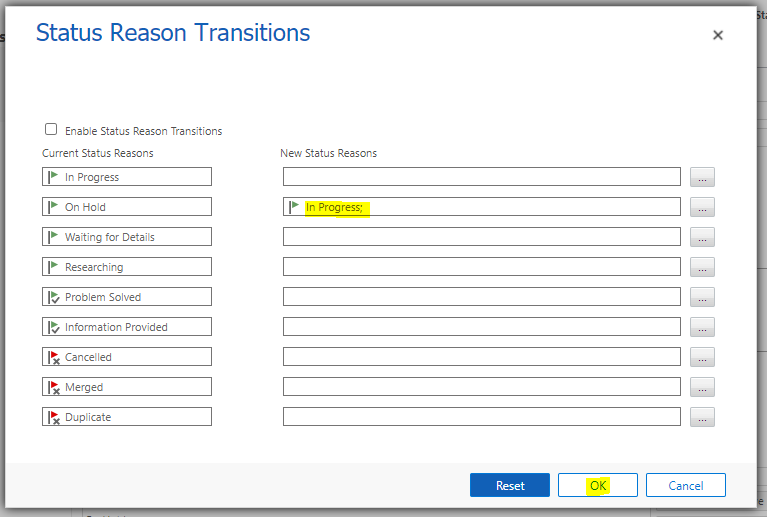
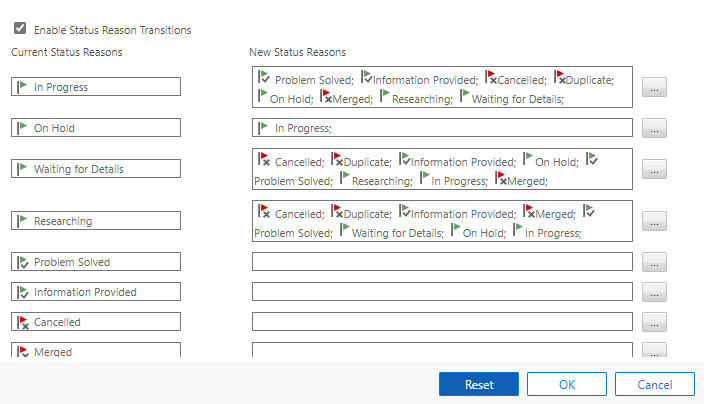
This is where we define how the status of a record can move from one status to another. For example, let’s say a case is put On Hold. We can set up a status reason transition so that the On Hold status needs to go back to In Progress before any other status, including any of the resolved or cancelled statuses. To do this, select the 3 dots next to the On Hold stauts:

And we will select in Progress:

And then OK:
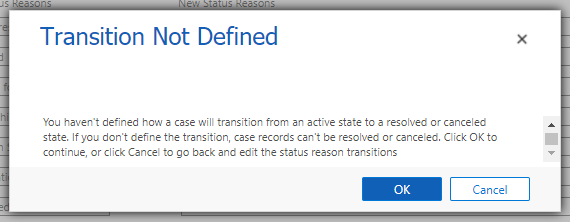
We see the message “You haven’t defined how a case will transition from an active state to a resolved or canceled state. If you don’t define the transition, case records can’t be resolved or canceled. Click OK to continue, or click Cancel to go back and edit the status reason transitions”:
Let’s add rules for going from the active statuses to the other statuses and also select Enable Status Reason Transitions:
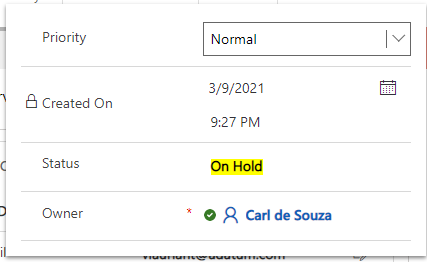
Now we can set our case status to On Hold and save:
Now if we try to resolve the case by clicking the Resolve button, we get the message “Because of the status transition rules, you cannot resolve a case in the current status. Change the case status, and then try resolving it, or contact your system administrator”:

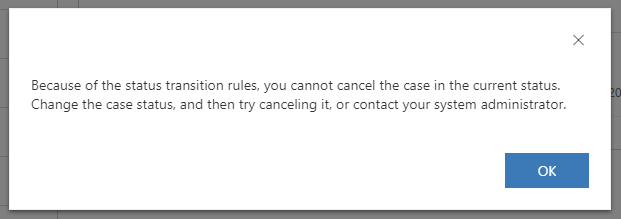
And same with Cancelling – “Because of the status transition rules, you cannot cancel the case in the current status. Change the case status, and then try canceling it, or contact your system administrator“:
And the only other available status is In Progress:
Once we go back to In Progress, we see the other statuses.
You can see this is very useful in building a flow to determine how records should be handled.
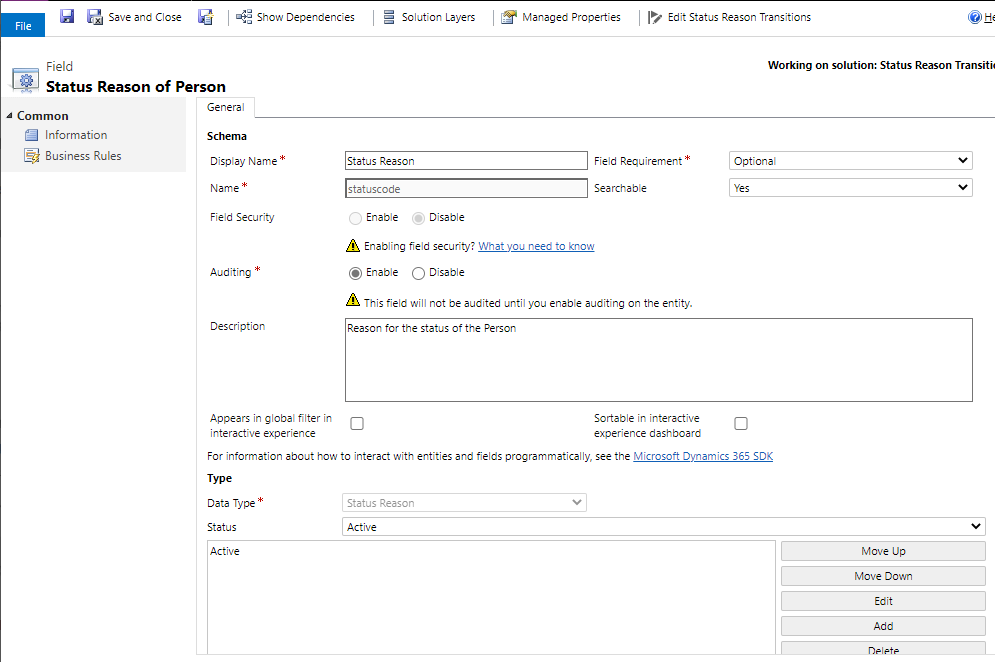
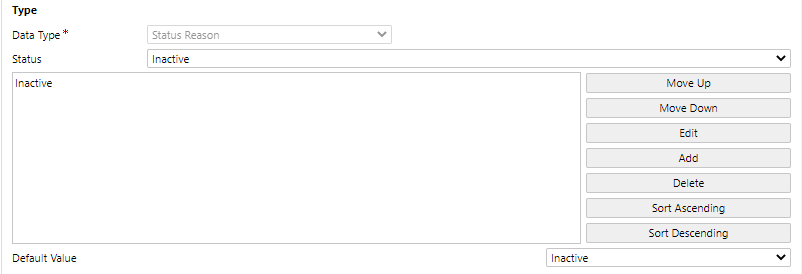
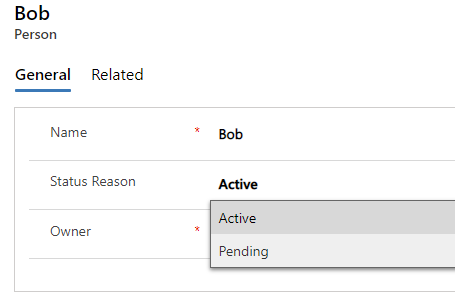
Let’s now look at a custom entity. Let’s create a new entity called Person. On saving the new entity, we see the field created called Status Reason. The Active status has one option, Active, and there is an Inactive status with just Inactive. We have the Edit Status Reason Transition button as well:
Now let’s create a new Person record:
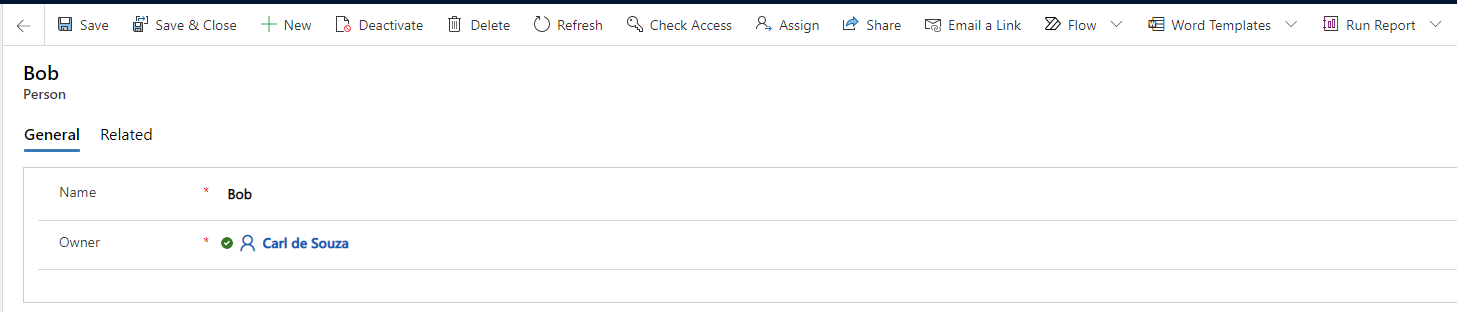
We see options to Deactivate and Assign:
![]()
Let’s add 2 new status – Active-Pending and Inactive-Cancelled:
And let’s define some status reasons. Active can go to any status, but the other statuses are more restrictive:
Publish all.
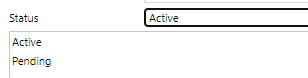
Let’s add the Status Reason to the form. Let’s change the status reason to Pending:
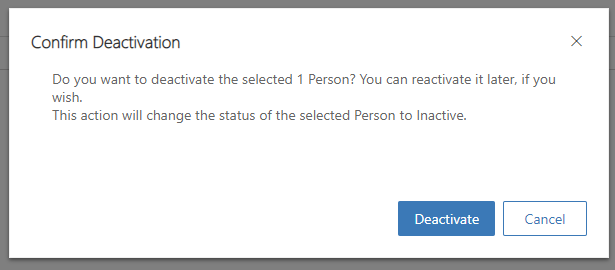
Now if we click the Deactivate button, we get the prompt to cancel but no option to select a status. This is because the only option available in the transition is to go to Cancelled:
We now see the status is cancelled:

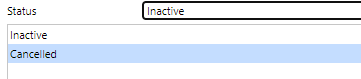
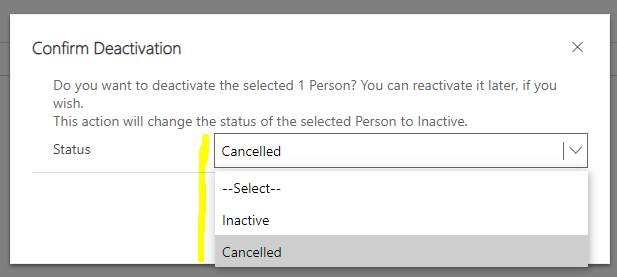
Back on Active status, if we click Deactivate, we get the options appearing in the Confirm Deactivation window – Inactive and Cancelled:
That’s it. You can now build out your status workflow for your organization.
I AM SPENDING MORE TIME THESE DAYS CREATING YOUTUBE VIDEOS TO HELP PEOPLE LEARN THE MICROSOFT POWER PLATFORM.
IF YOU WOULD LIKE TO SEE HOW I BUILD APPS, OR FIND SOMETHING USEFUL READING MY BLOG, I WOULD REALLY APPRECIATE YOU SUBSCRIBING TO MY YOUTUBE CHANNEL.
THANK YOU, AND LET'S KEEP LEARNING TOGETHER.
CARL

Hi Carl,
Do you know what table these transitions are stored in?