In this post, we will look at how to set up custom branding for your organization in Power BI.
First, let’s log into the Power BI service at https://app.powerbi.com/ and select Settings->Admin Portal:
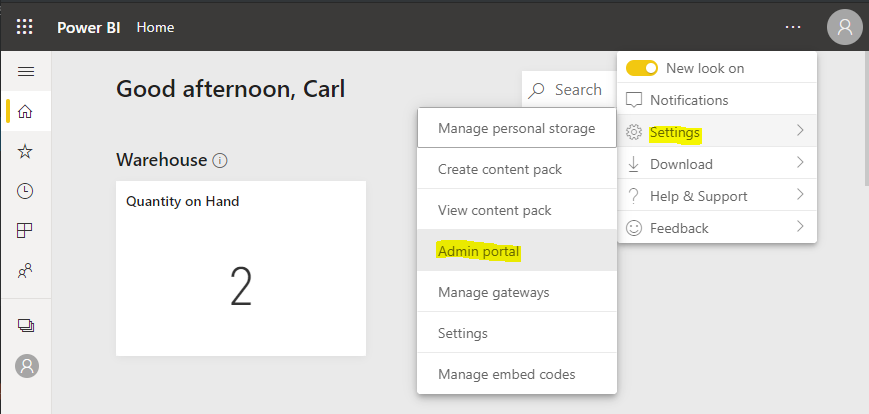
Select Custom Branding in the menu:
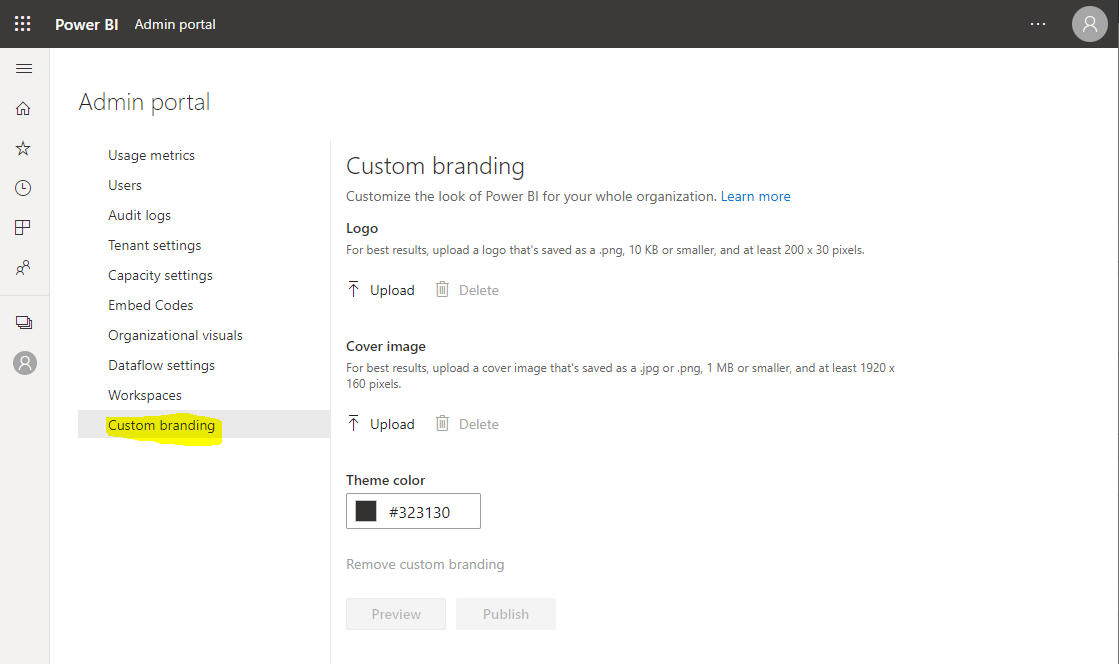
We can see there are 3 ways we can brand Power BI:
- Logo
- Cover image
- Theme color
Let’s look at each one of these.
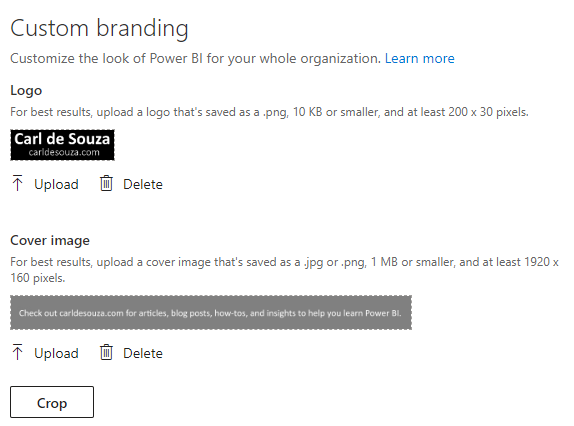
For the logo, the size should be at least 200×30 pixels. Let’s create a simple logo like below, of size 285×83 pixels. We will save this as a png file:

The Cover Image is recommended to be at least 1920×160 pixels. Let’s use the image below, which are those exact dimensions. It is recommended to save this as a png or jpg. We will use png:

Upload both using the Upload buttons:
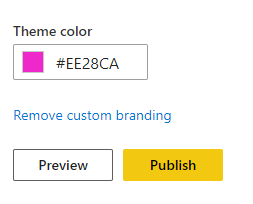
The theme color defaults to #323130. Let’s make it a bright pink color so we can see it clearly in Power BI:
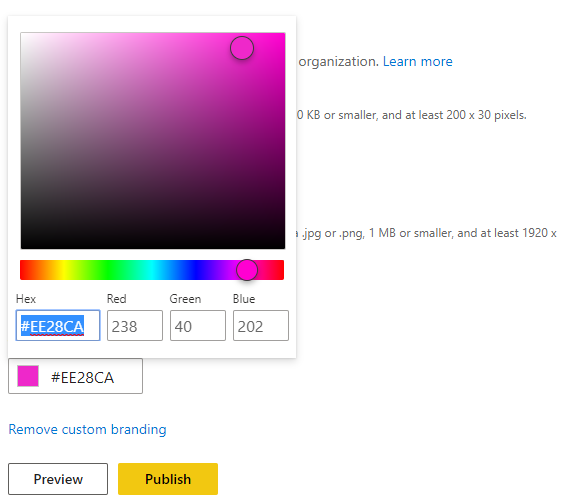
We can now Preview or Publish the theme. Let’s preview it:
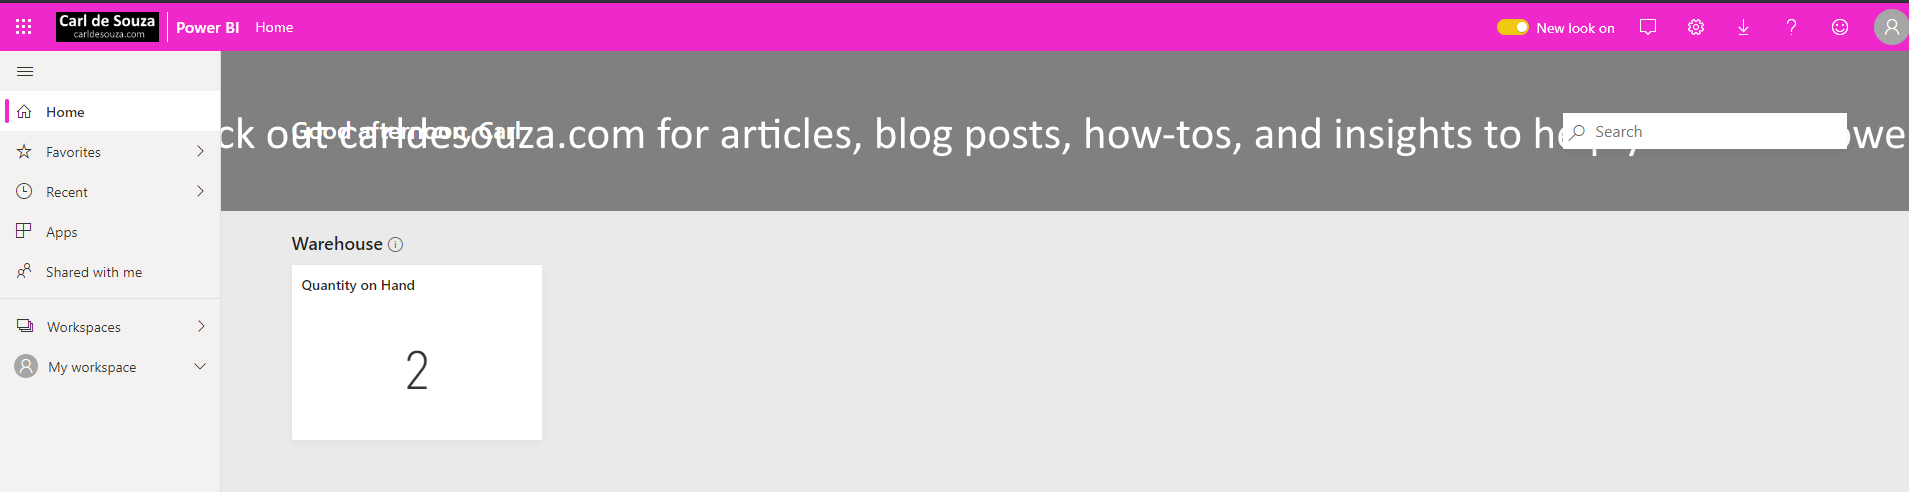
We can see the custom image text is cut off, so you will want to take this into account :
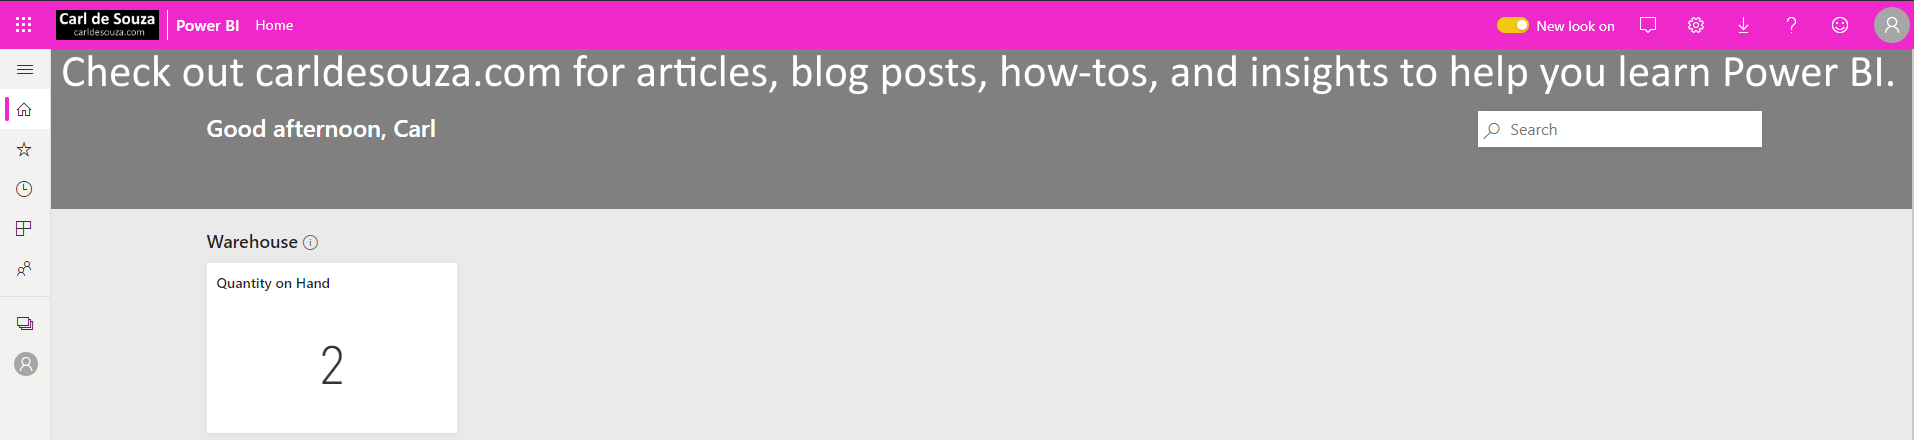
Let’s adjust the text so it is higher and try again. Uploading the new image:

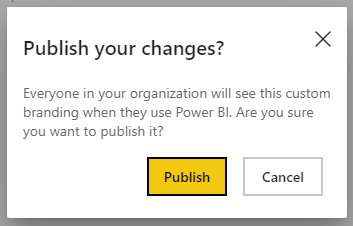
Click Publish and Publish again:
Click OK and Refresh your browser:

The new branding has been applied:
I AM SPENDING MORE TIME THESE DAYS CREATING YOUTUBE VIDEOS TO HELP PEOPLE LEARN THE MICROSOFT POWER PLATFORM.
IF YOU WOULD LIKE TO SEE HOW I BUILD APPS, OR FIND SOMETHING USEFUL READING MY BLOG, I WOULD REALLY APPRECIATE YOU SUBSCRIBING TO MY YOUTUBE CHANNEL.
THANK YOU, AND LET'S KEEP LEARNING TOGETHER.
CARL

Hi,
I have a question about the cover image. We can see automatically appearing “Good afternoon, Carl”. Is there the possibility to change the colour of the this phrase? Unfortunately my colour doesn´t match with the picture in the background.
Thanks!
[…] 5. How to Set Up Custom Branding in the Power BI Service – Carl … […]