In PowerApps, there are 2 types of apps, Canvas Apps and Model Driven Apps. If you are new to PowerApps, you can learn more about the differences here. In short, Canvas Apps are designed to build a flexible user interface that connects to various data sources easily, whereas model driven apps are designed with an out of the box business model that you can easily extend and integrate.
In this post, we will go through how to create a canvas app and then embed that within a model driven app. Let’s talk about a scenario of why you might do this. Let’s say you build a model driven app, because your business needed an enterprise foundation to store entities such as customers, vendors, orders etc. This app came included with security, ways to design business process flows, and can be accessed through the web, mobile etc. You take the built in forms, add new fields specific to your business, and change the layout.
Now, as you use this new business application, you would like to extend some forms even further to integrate to other systems and/or display the data in more creative ways. You could do this by writing custom code, or you can utilize the power of canvas apps to provide the infrastructure and do the heavy lifting.
Let’s go through creating this scenario.
First, go to https://admin.powerapps.com/ and select Environments:
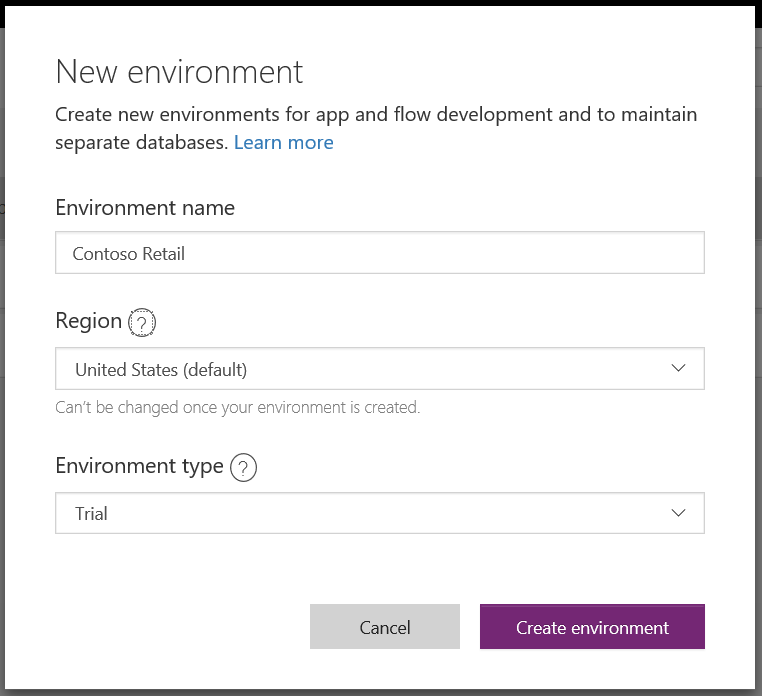
We will create a new environment called Contoso Retail. Click Create environment:
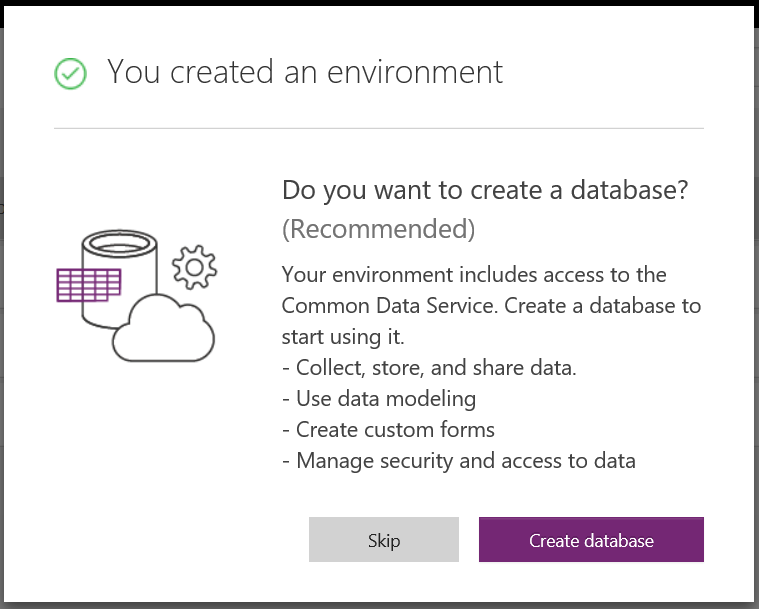
Next, we will create a new database:
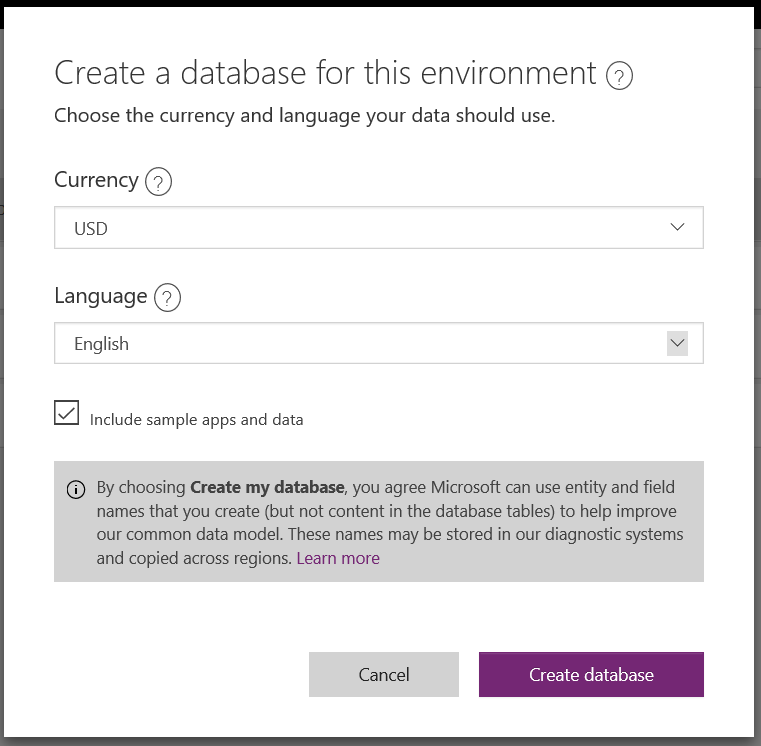
Click Create database:
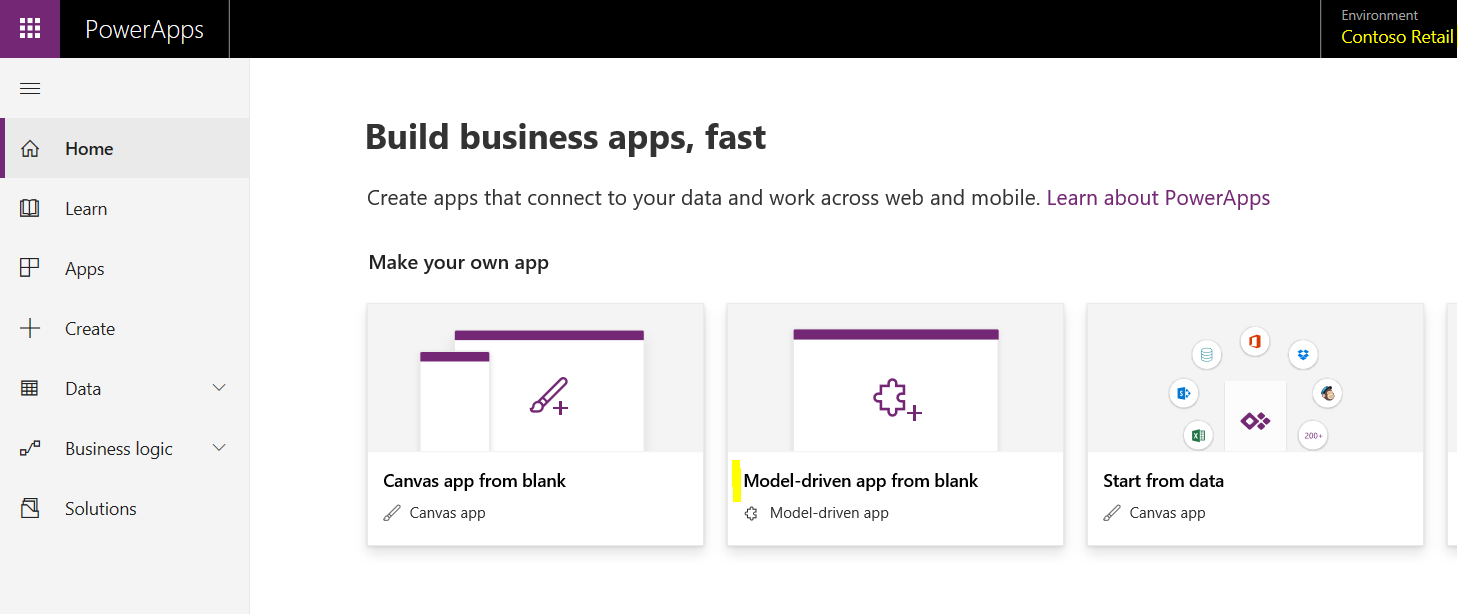
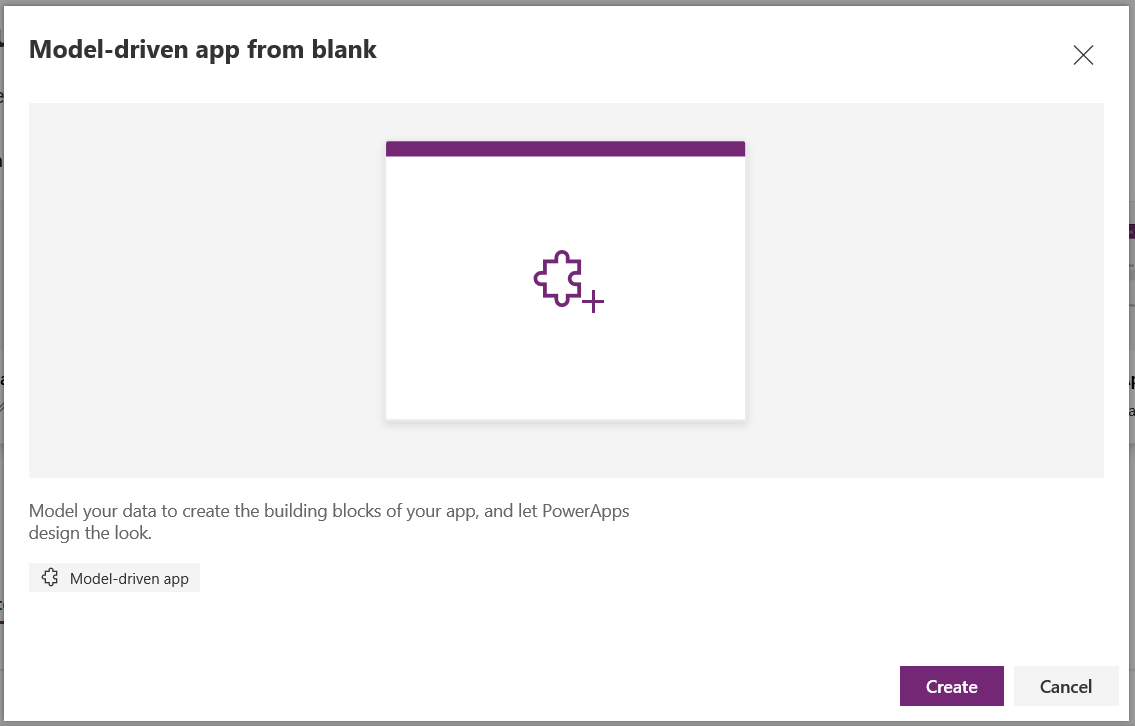
Now, we will create the model-driven app. Go to https://web.powerapps.com/ and select the new Contoso Retail environment. Select Model-driven app from blank:
Click Create:
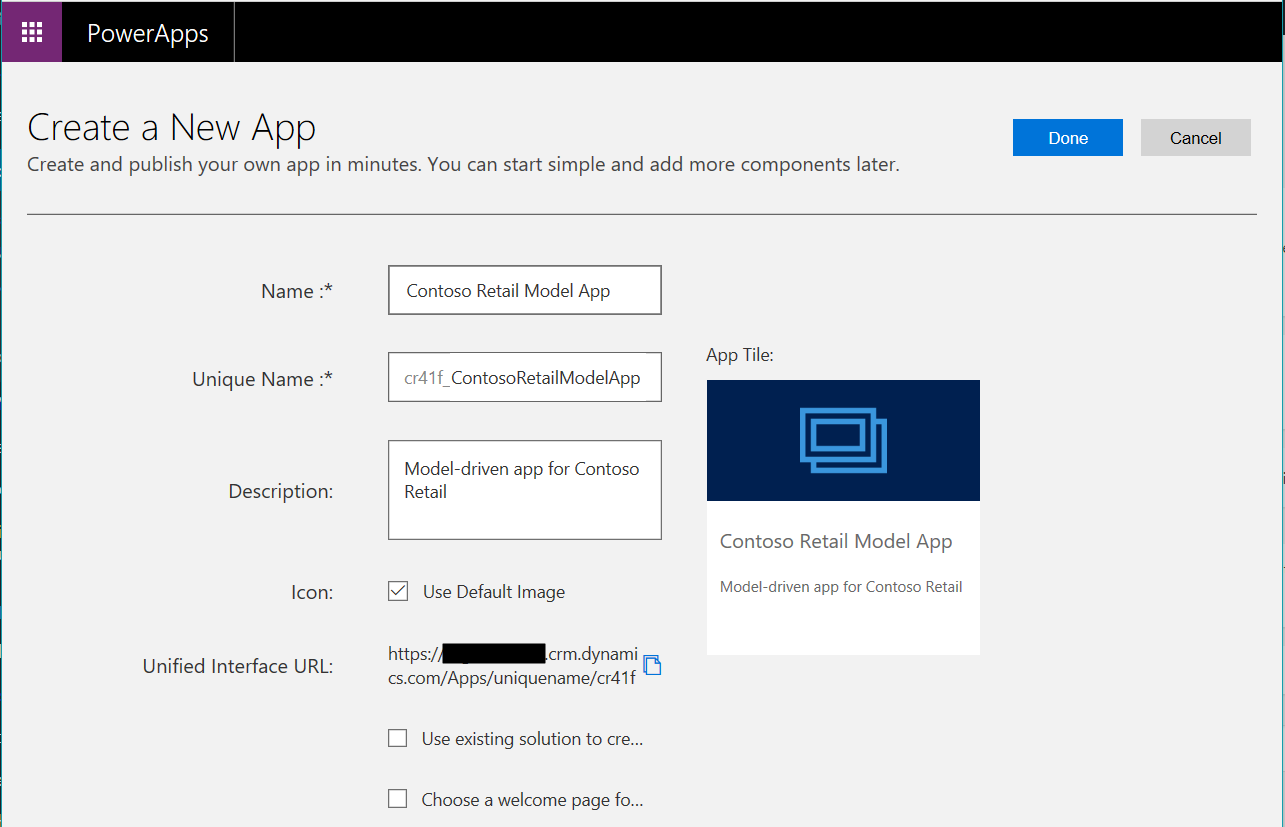
Enter the name and click Done:
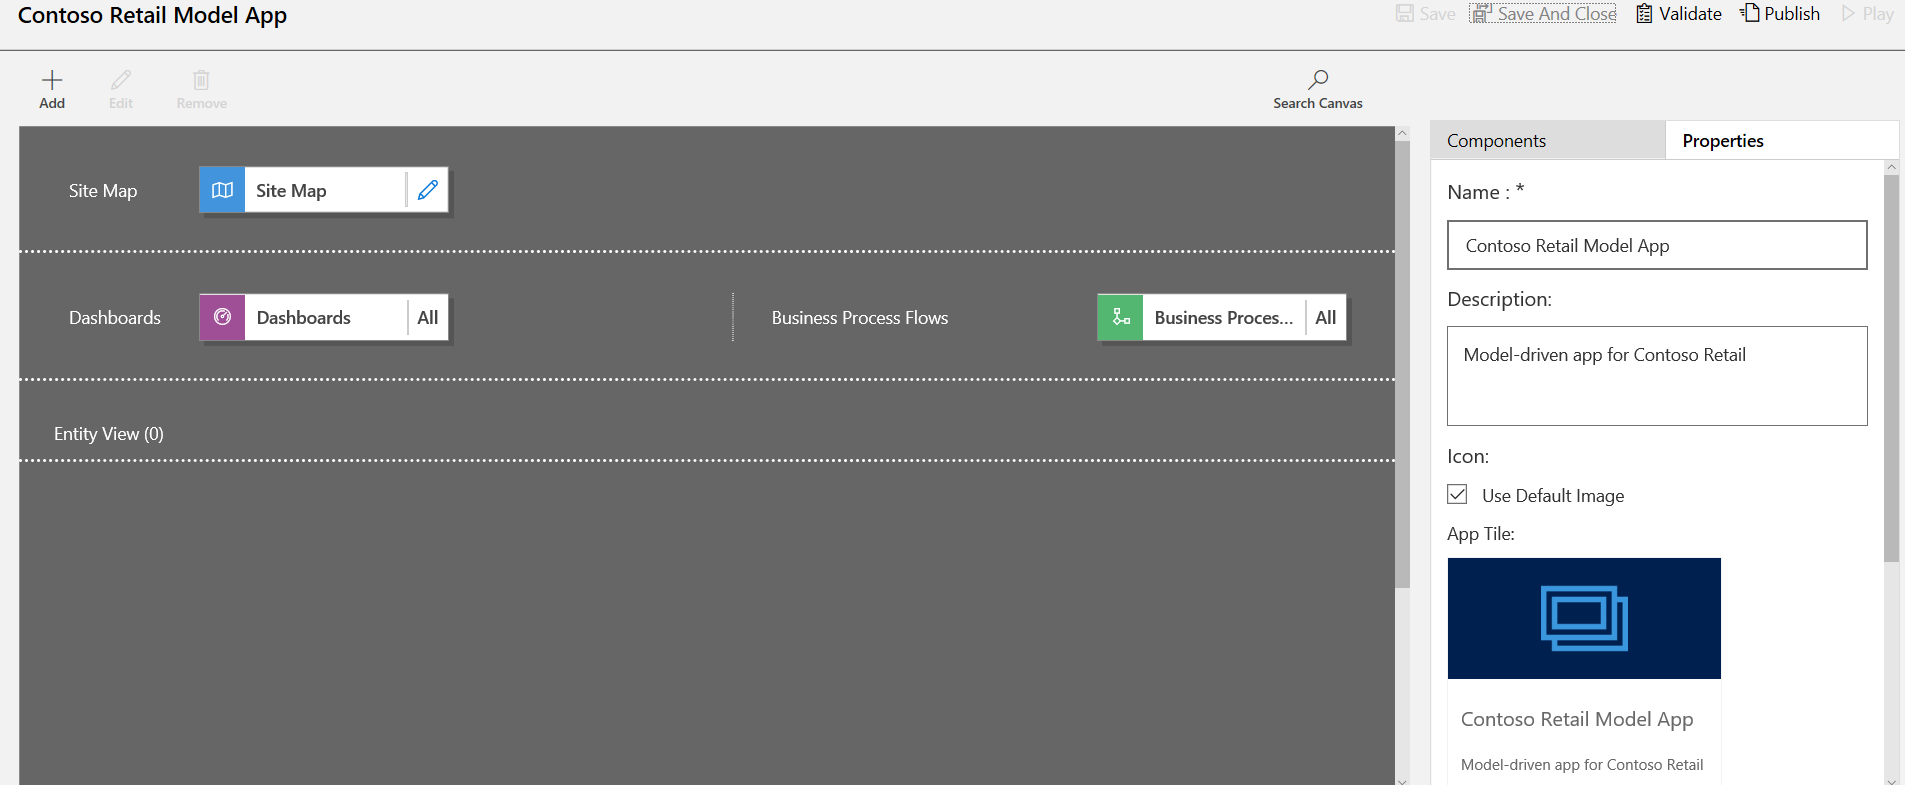
Edit the Site Map:
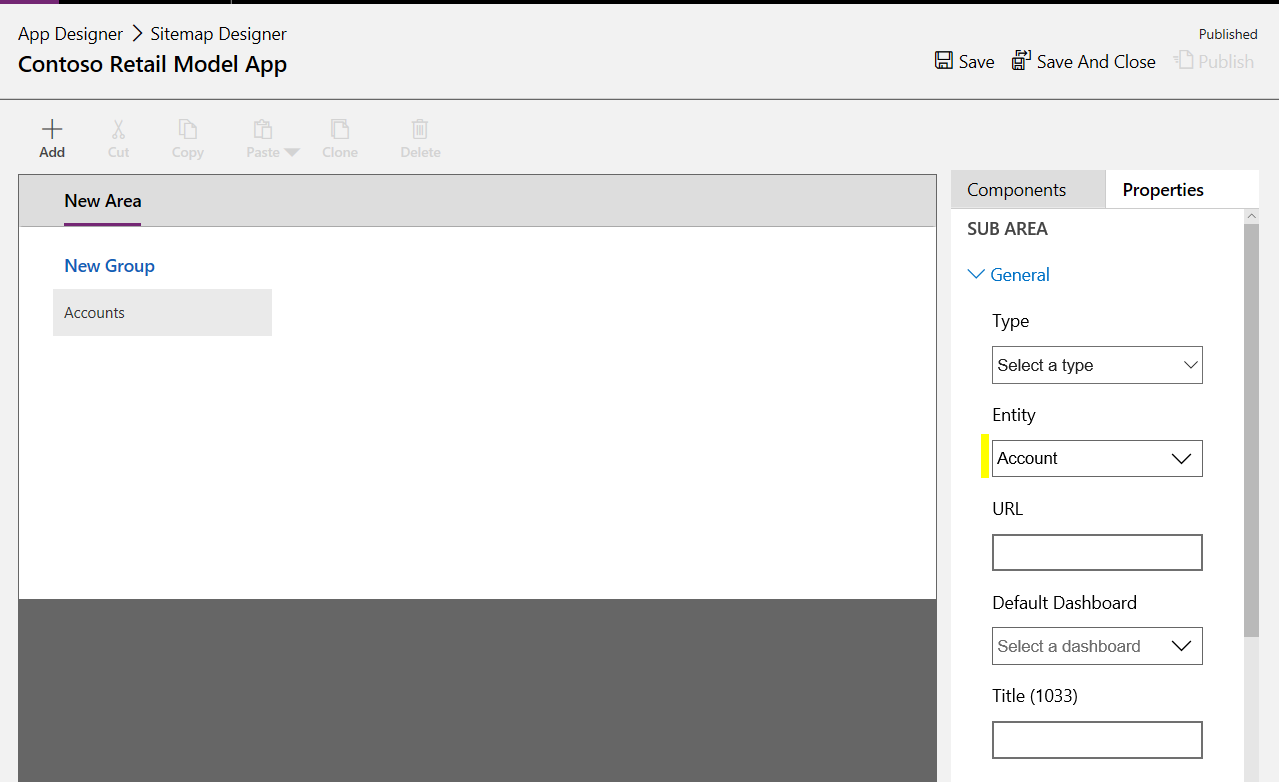
We will set the subarea to show Accounts:
Save and Publish, then press Play to view the app:
![]()
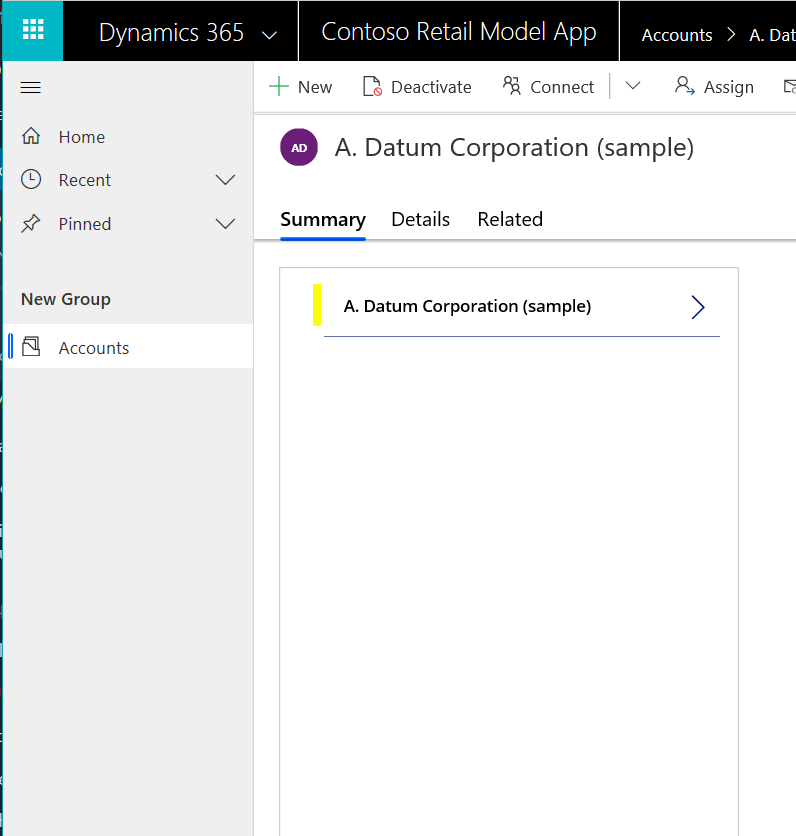
We can see Accounts:
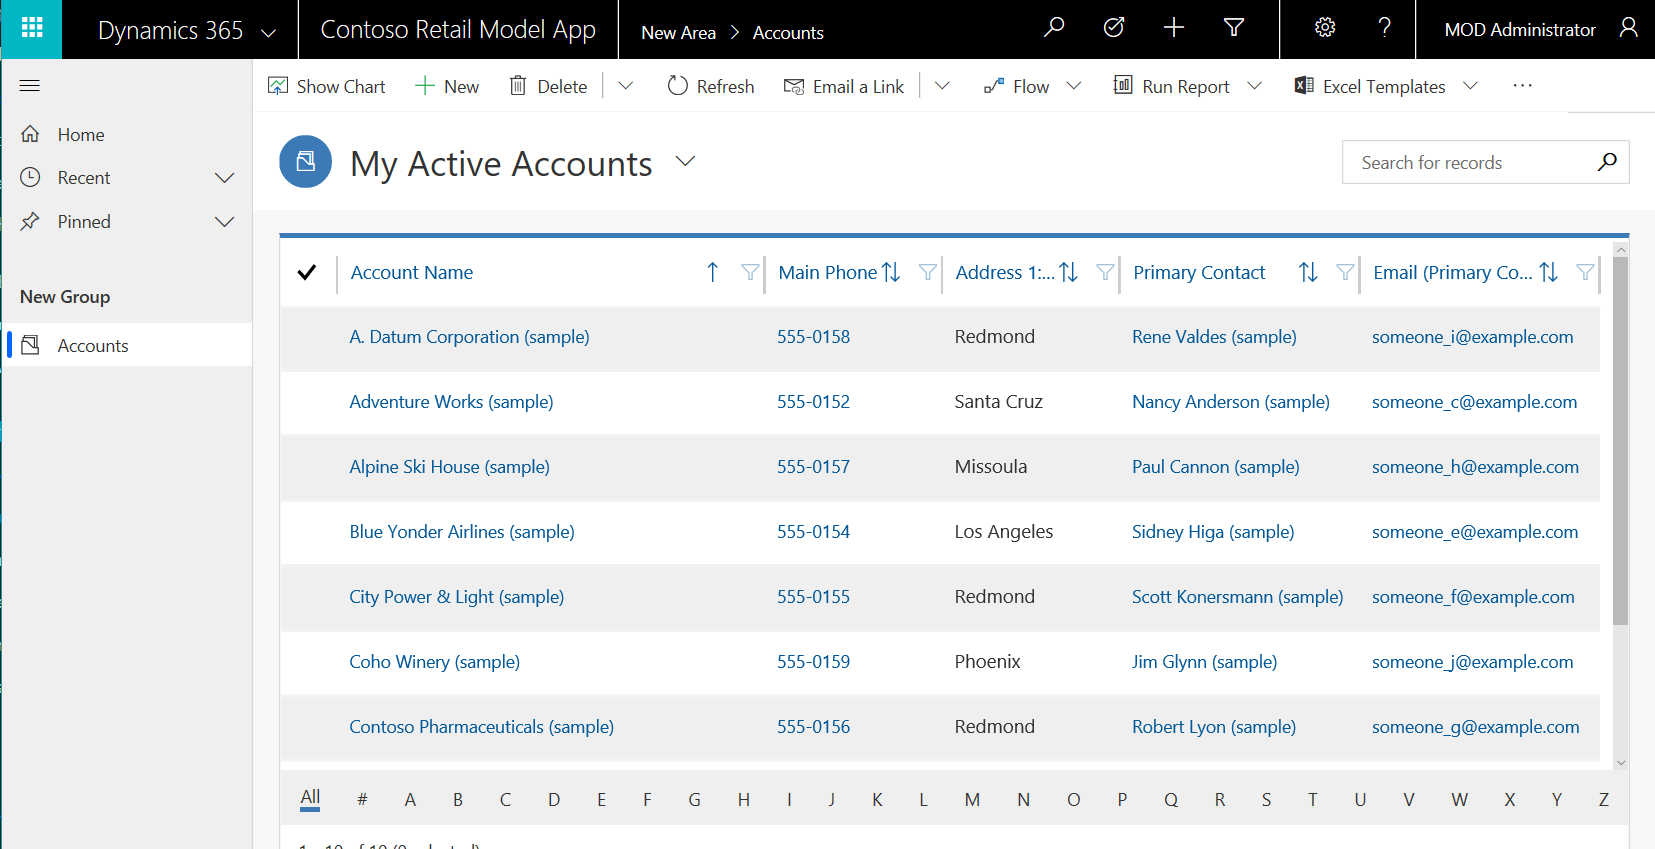
Click to select an Account:
Next, let’s create a new canvas app. Open the App Designer again and select Forms, then edit the default form:
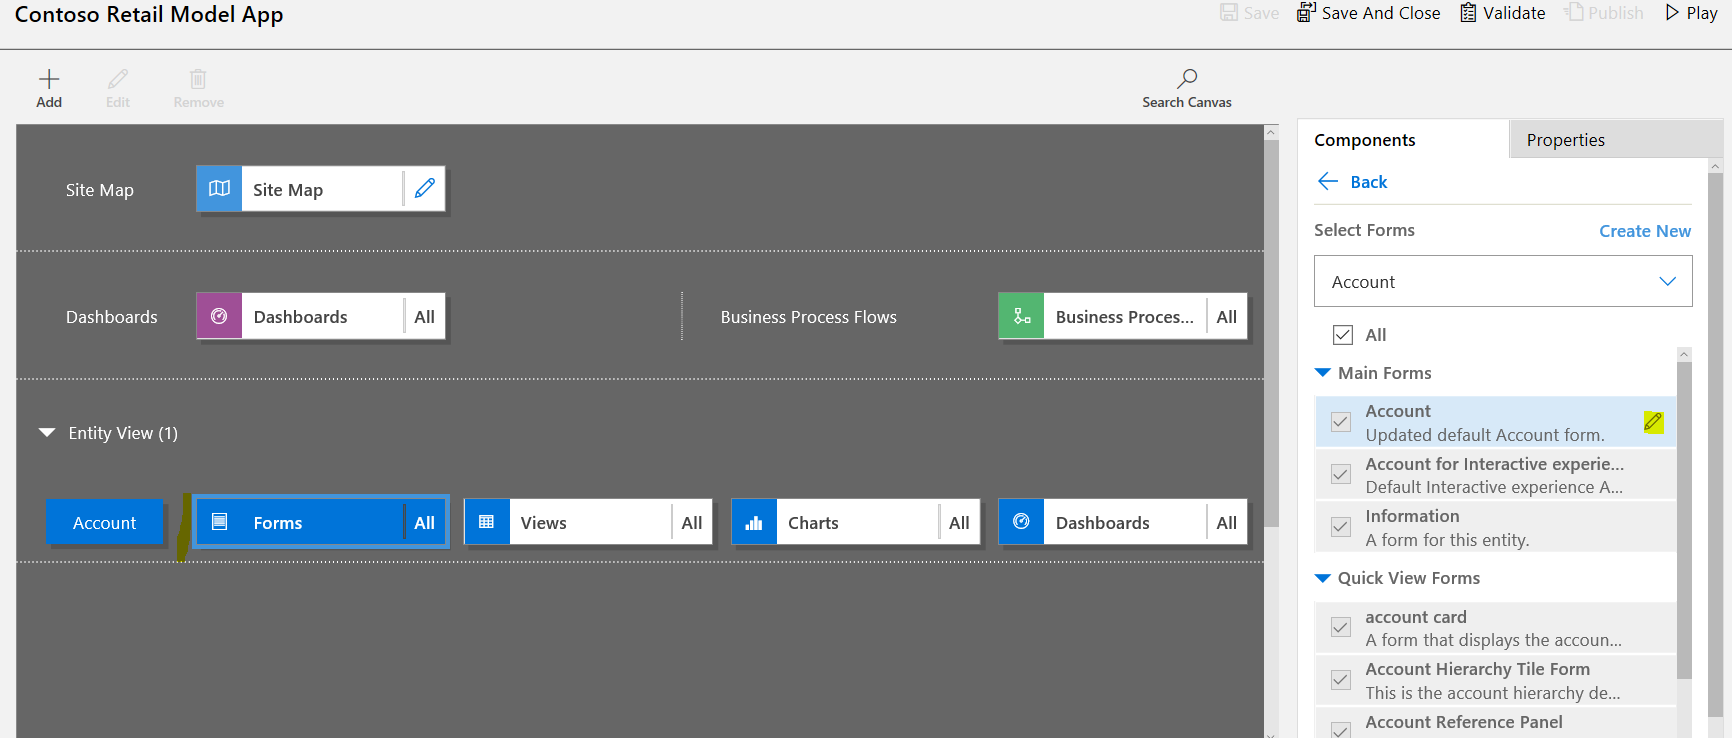
This opens the form editor:
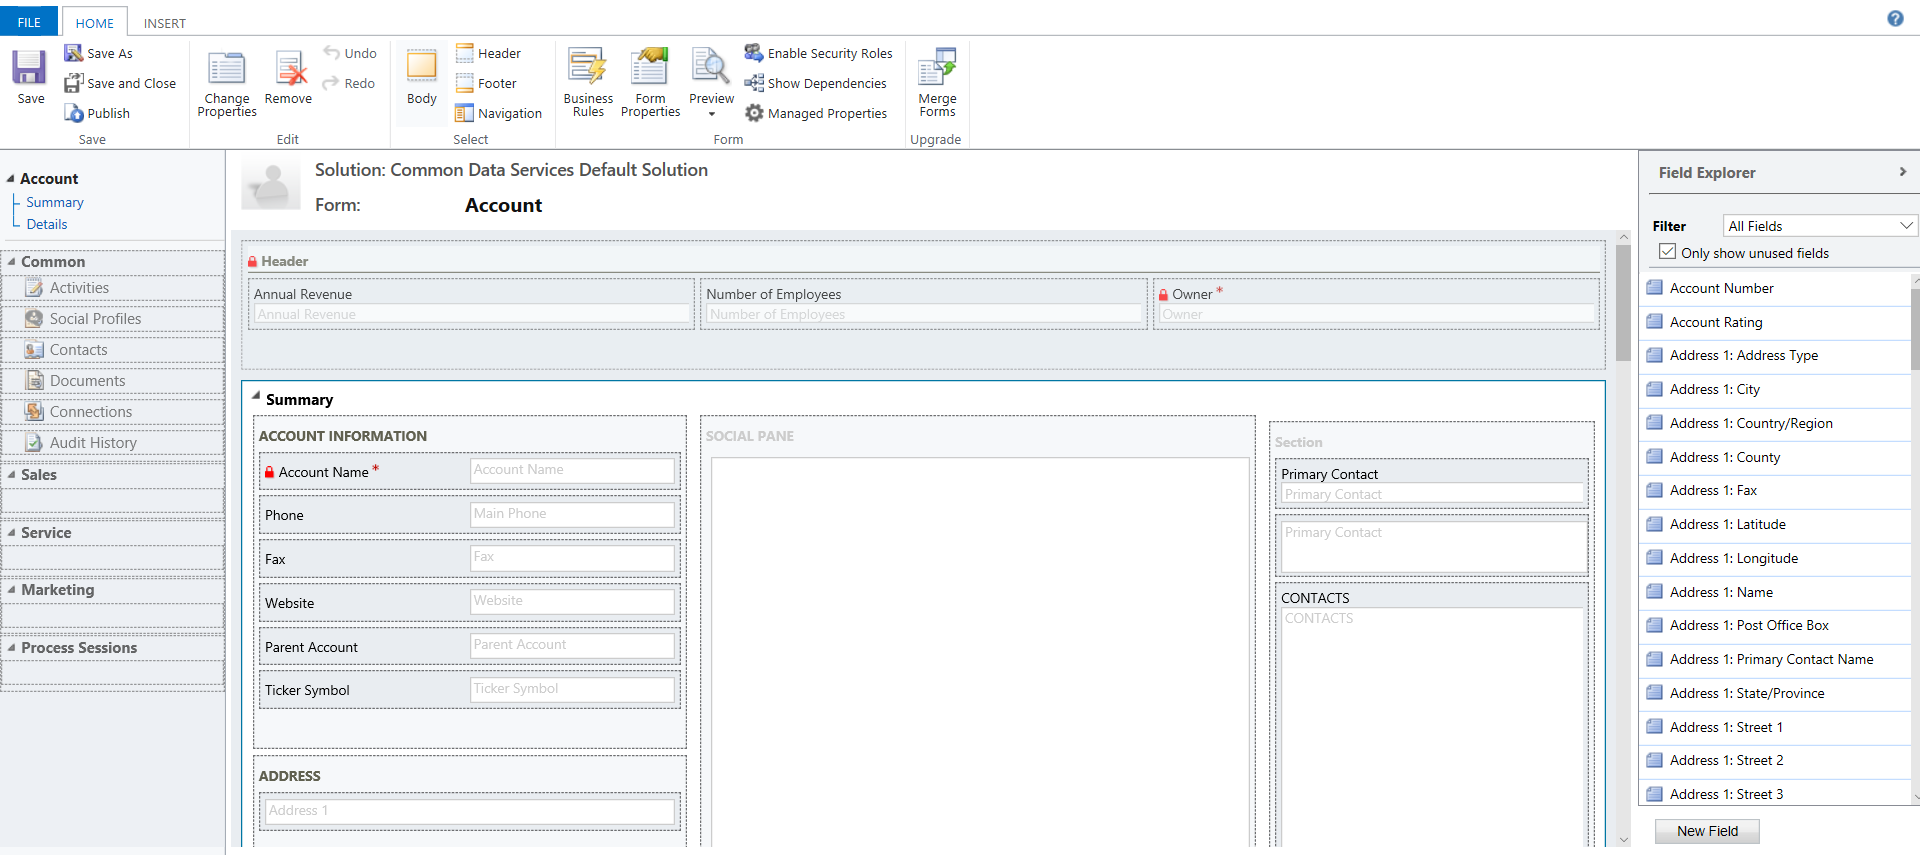
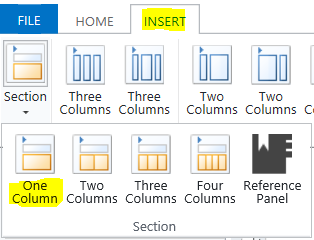
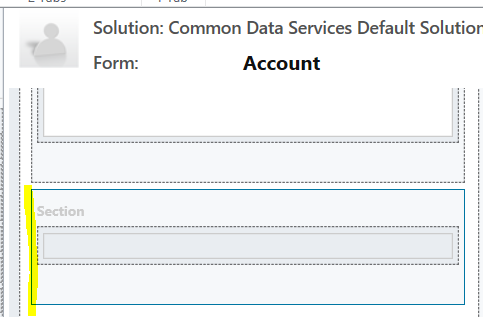
Select to insert a One Column section:
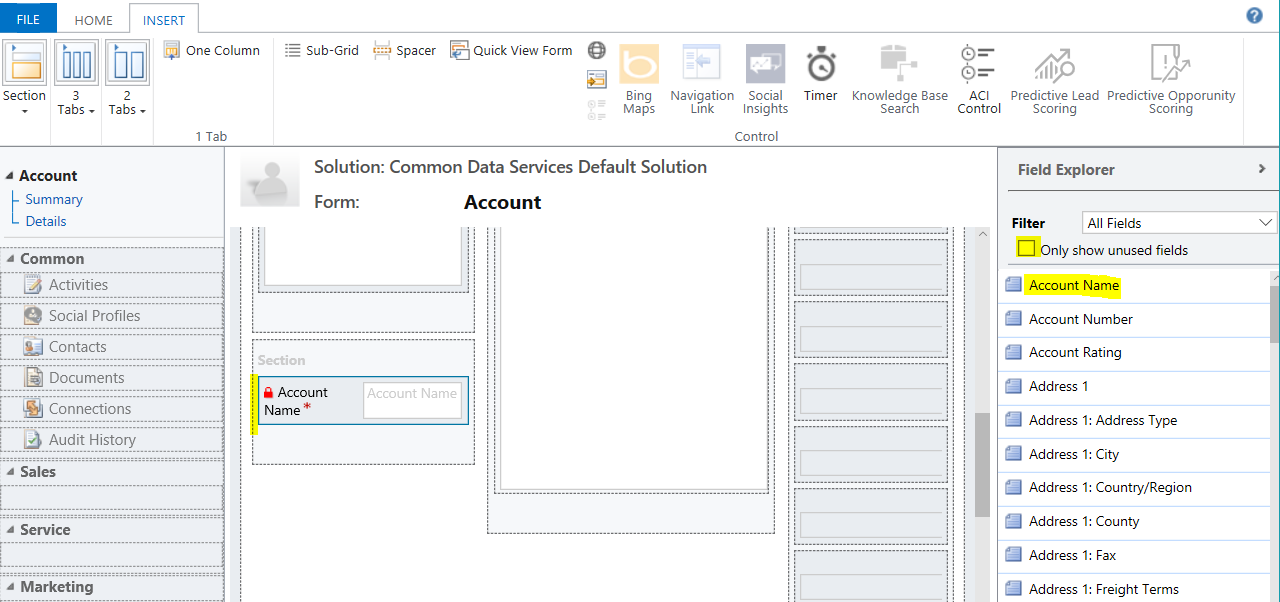
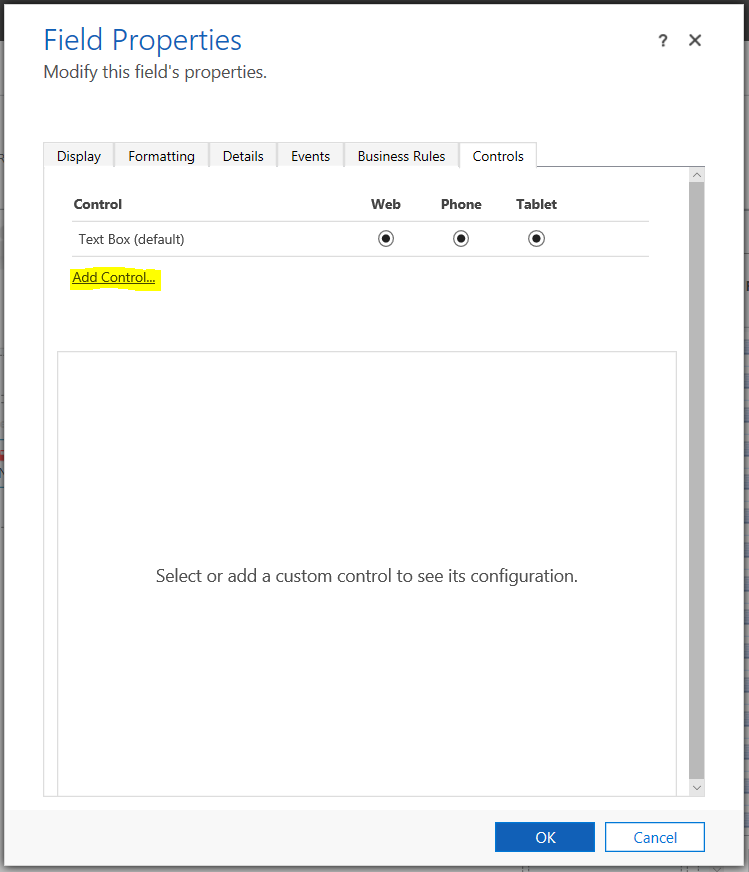
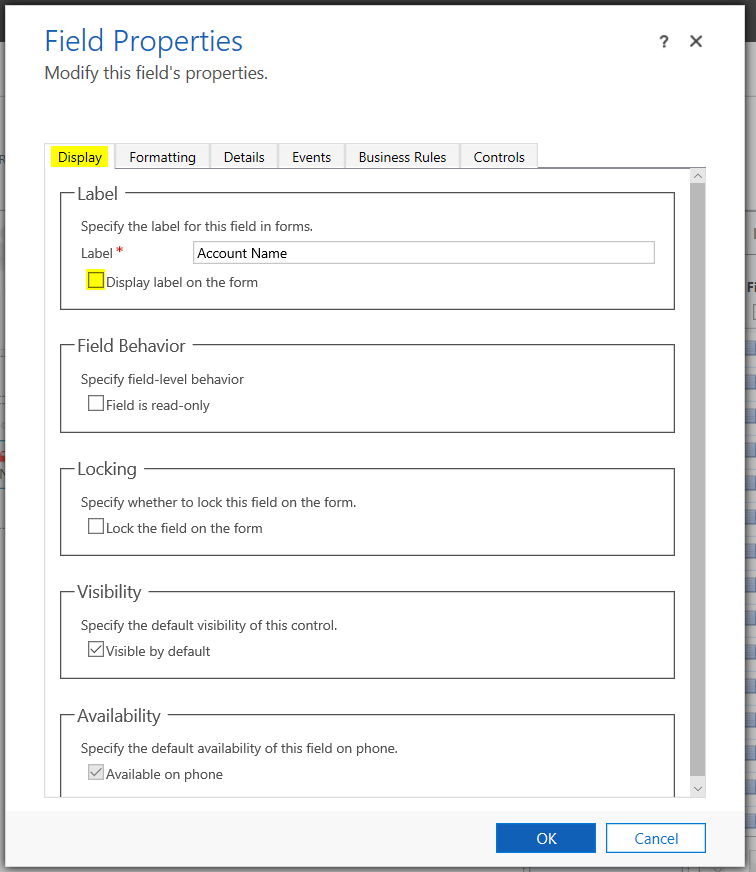
Next, add a field to the section. We will use the Account Name. Note you can use the same field multiple times on a form by unchecking the Only show unused fields:
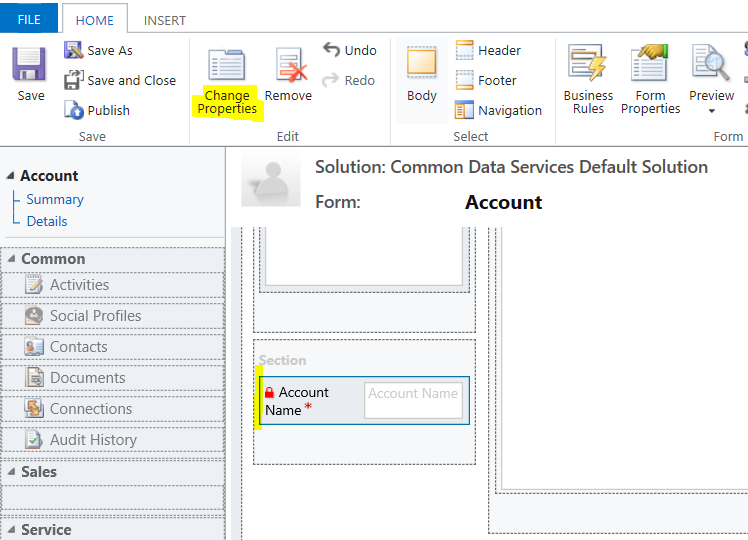
Select the field and click Change Properties:
Select Controls tab and then Add Control:
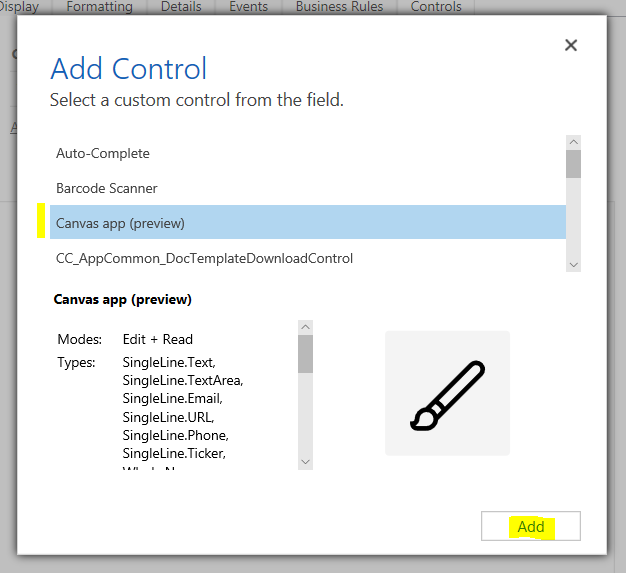
Select Canvas App and then Add:
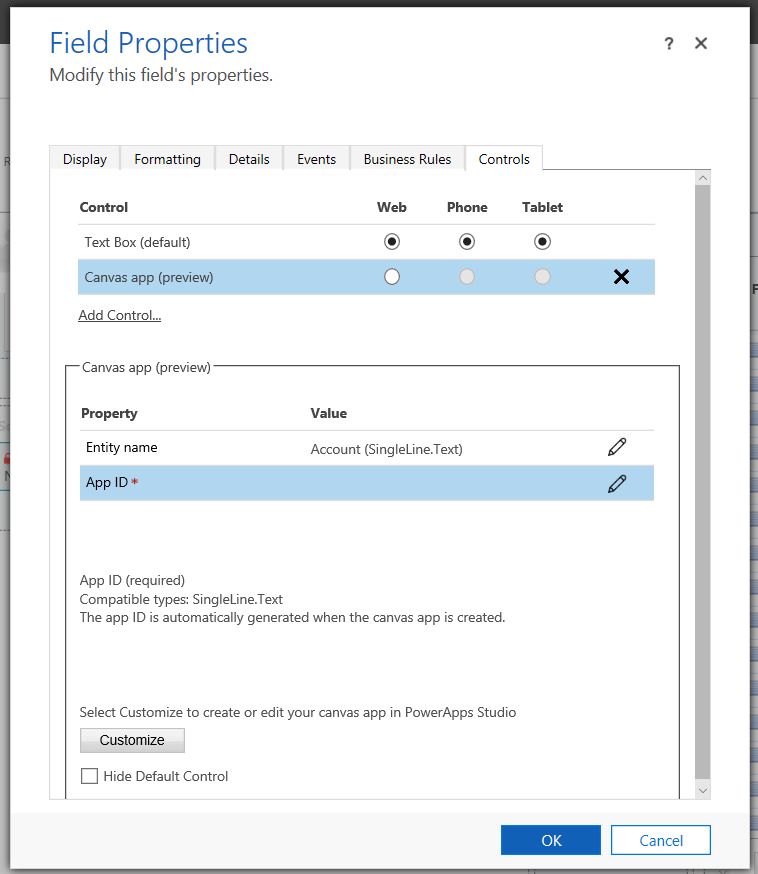
Click Customize:
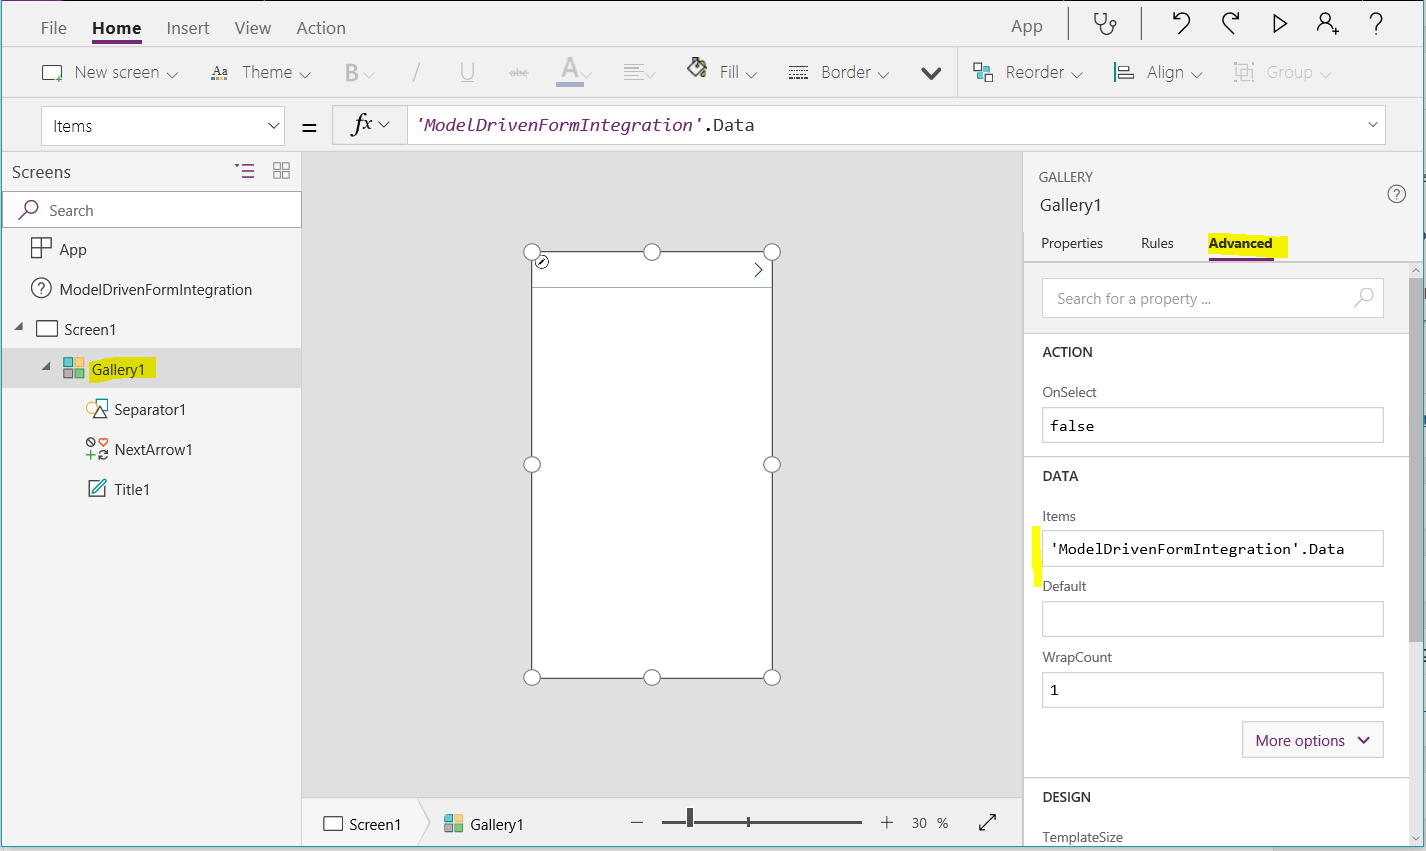
This will open. Note the ModelDrivenFormIntegration. This provides contextual information to the app:
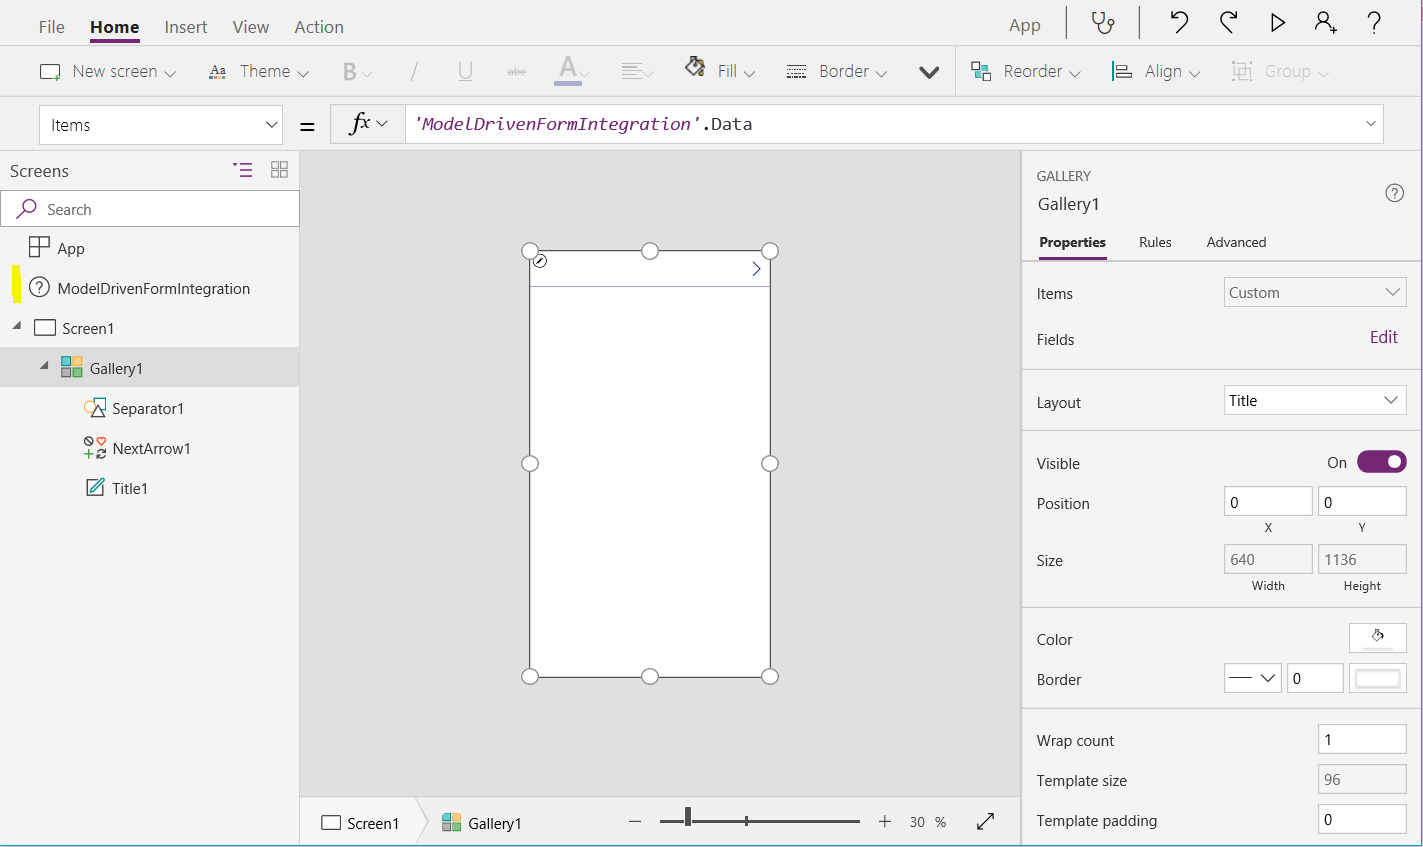
Click on Gallery and select the Advanced tab. You will see the items is set to the ModelDrivenFormIntegration.Data:
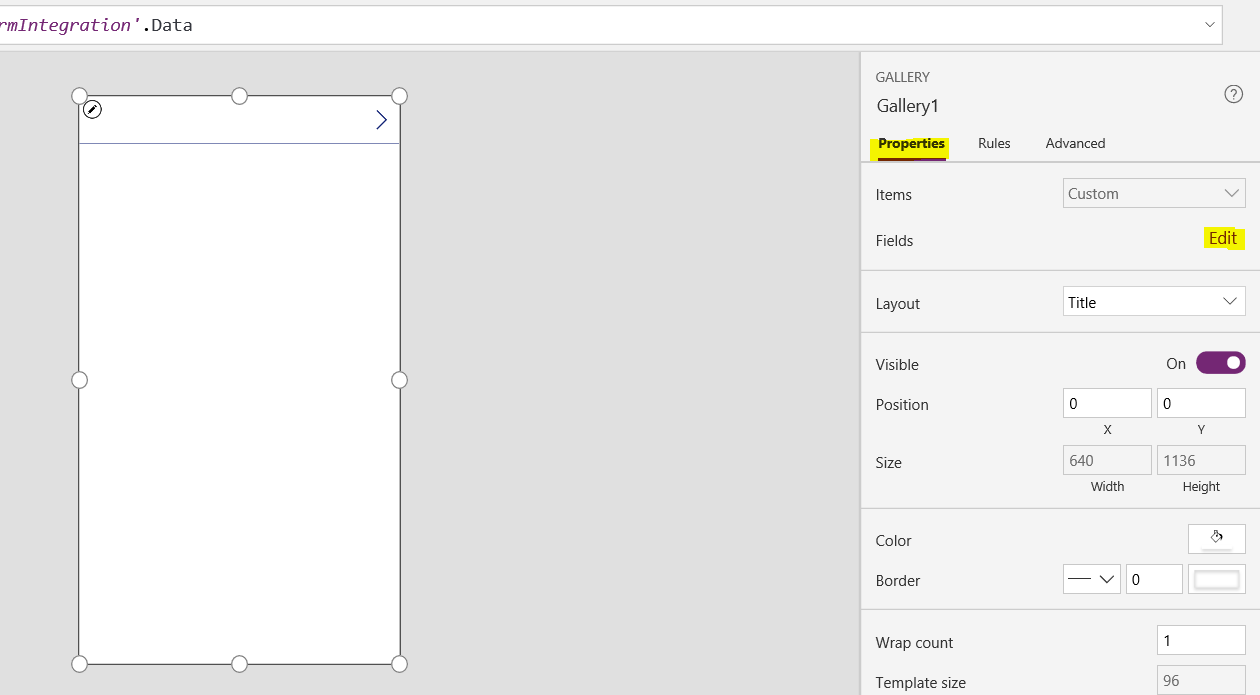
Select Properties, and next to Fields select Edit:
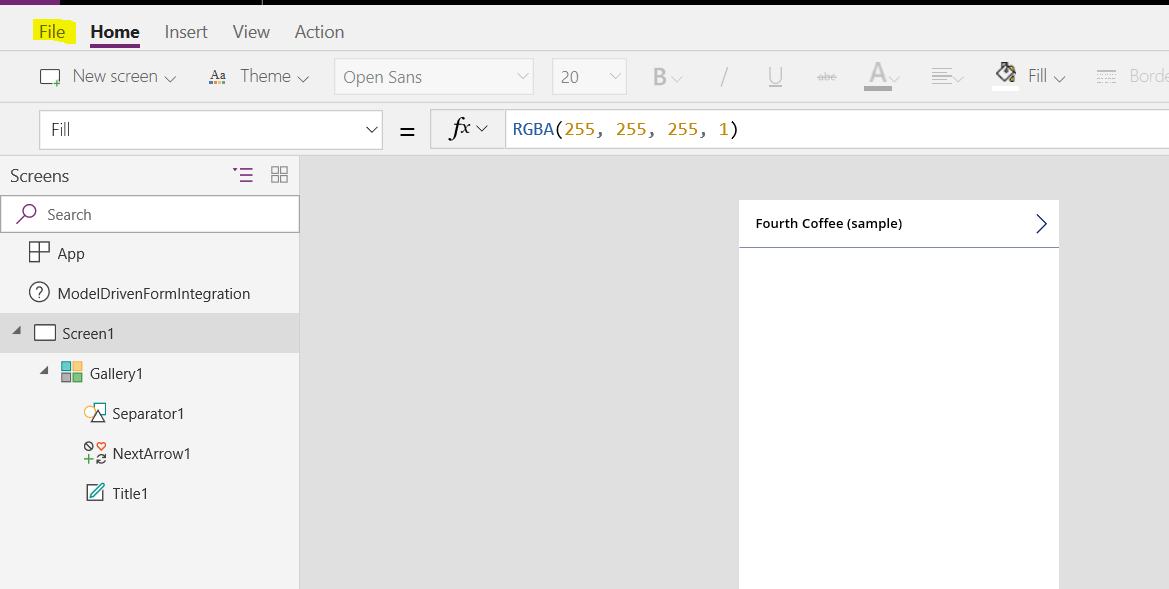
If we change the title to the Name data element, we can see it is reflected in the design pane as Fourth Coffee (sample), the first account in our data:
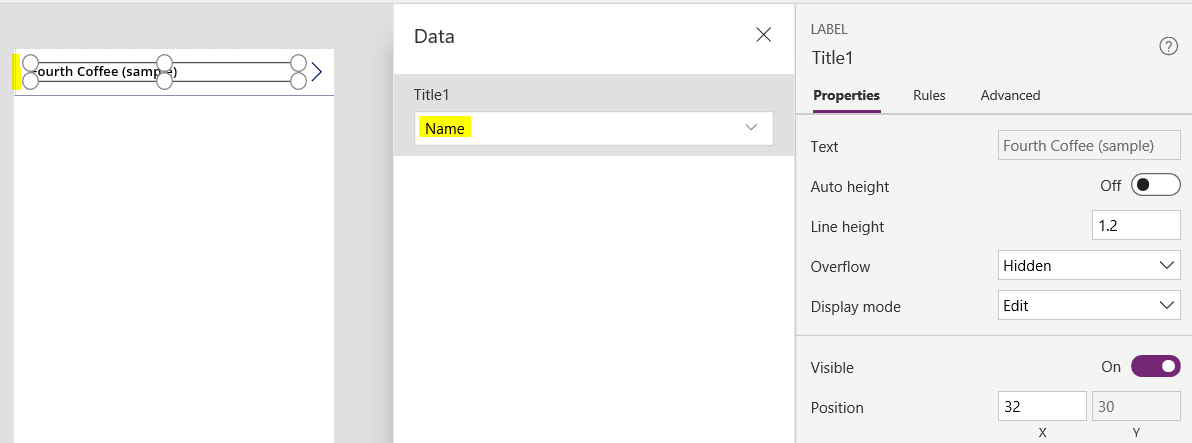
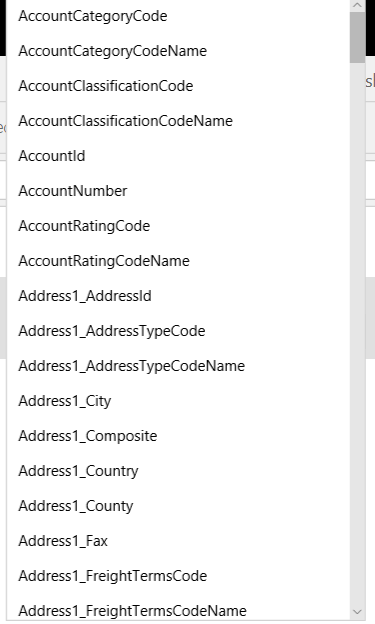
Note the other fields available, including the AccountId, which you may use to pull data from other systems, for example.
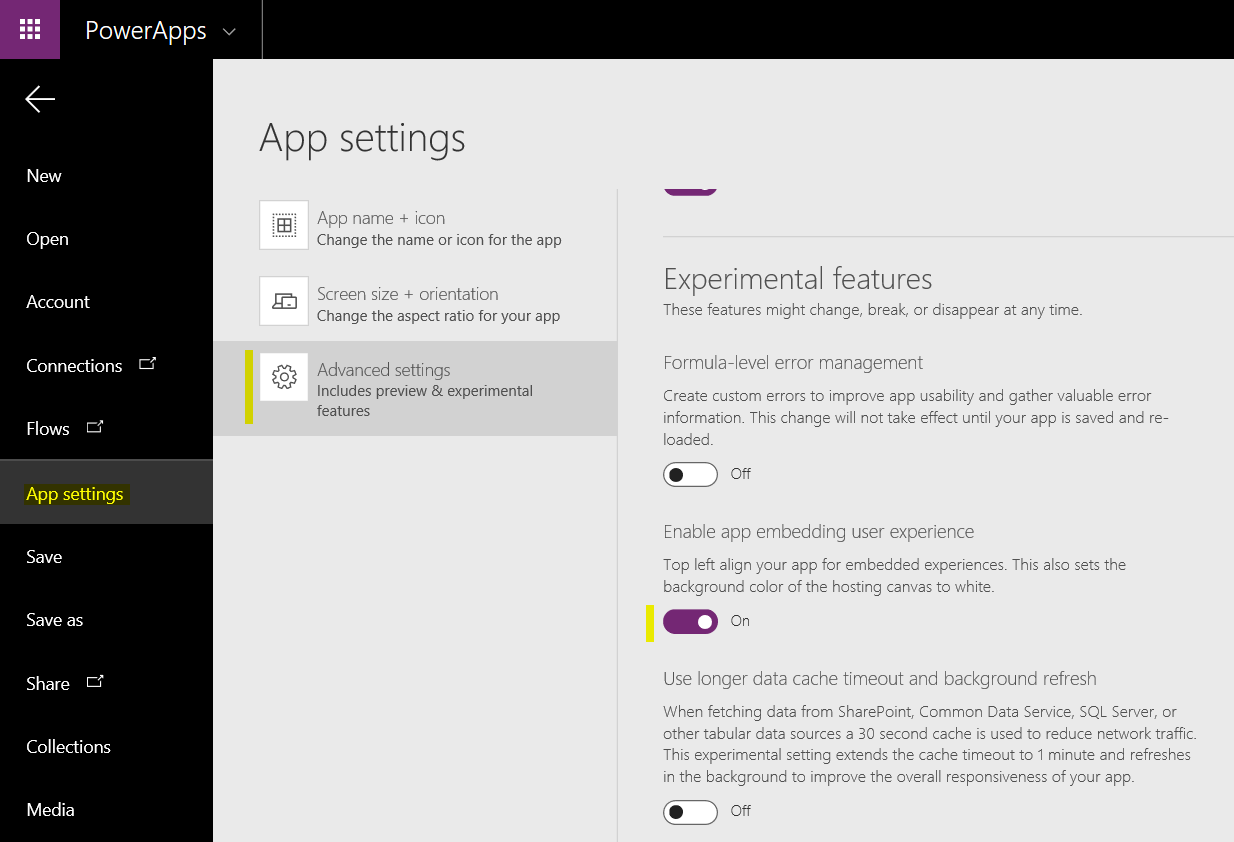
Now, select File->App Settings:
Select Advanced Settings and scroll down to Enable app embedding user experience. Set this to On:
Save the app:
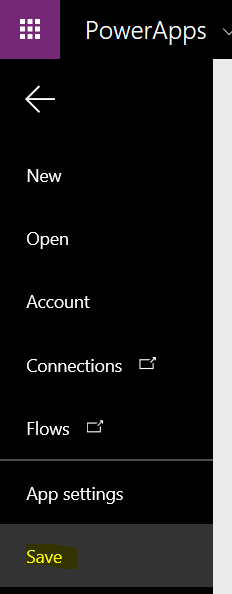
This will also publish the app.
Now back on the field properties window, you will see the App ID has been filled in. Under Control, set the Canvas app to be displayed in the web:
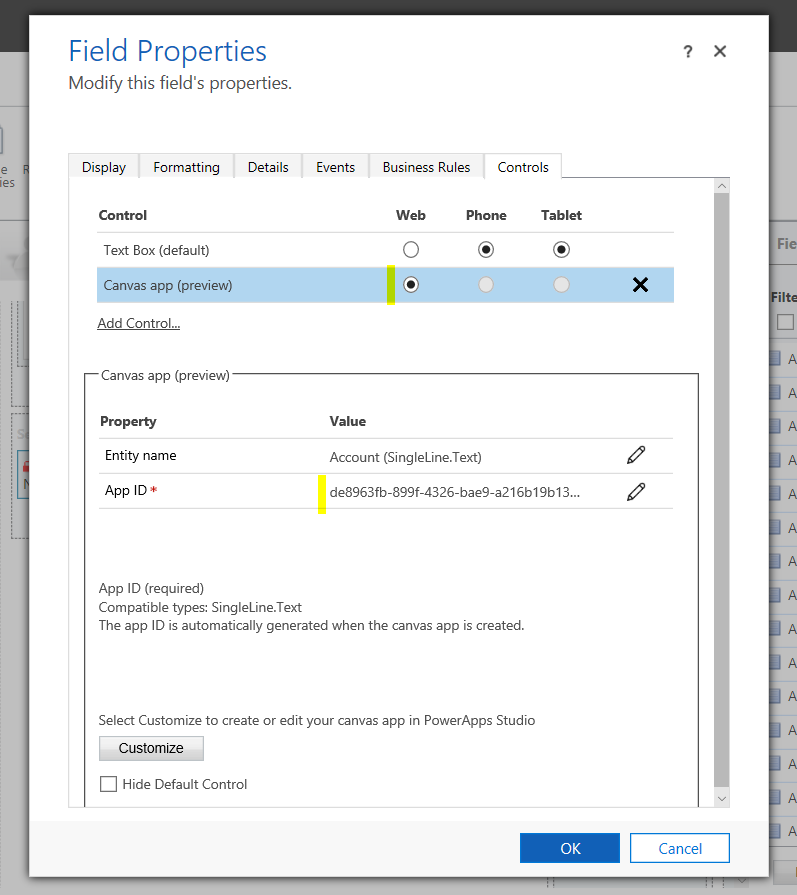
Go back to the Display tab and uncheck to Display label on the form. Click OK:
Select Save and Publish:
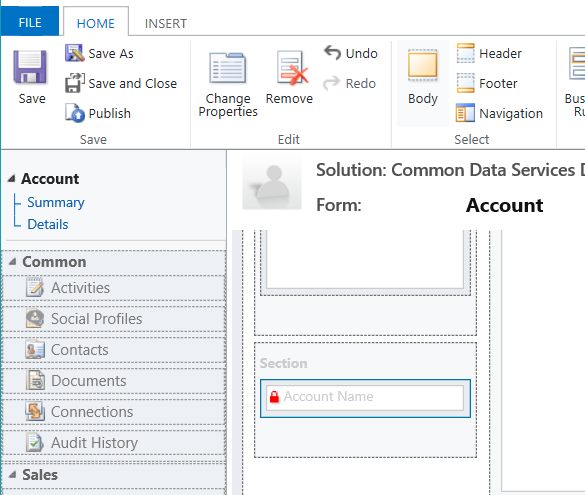
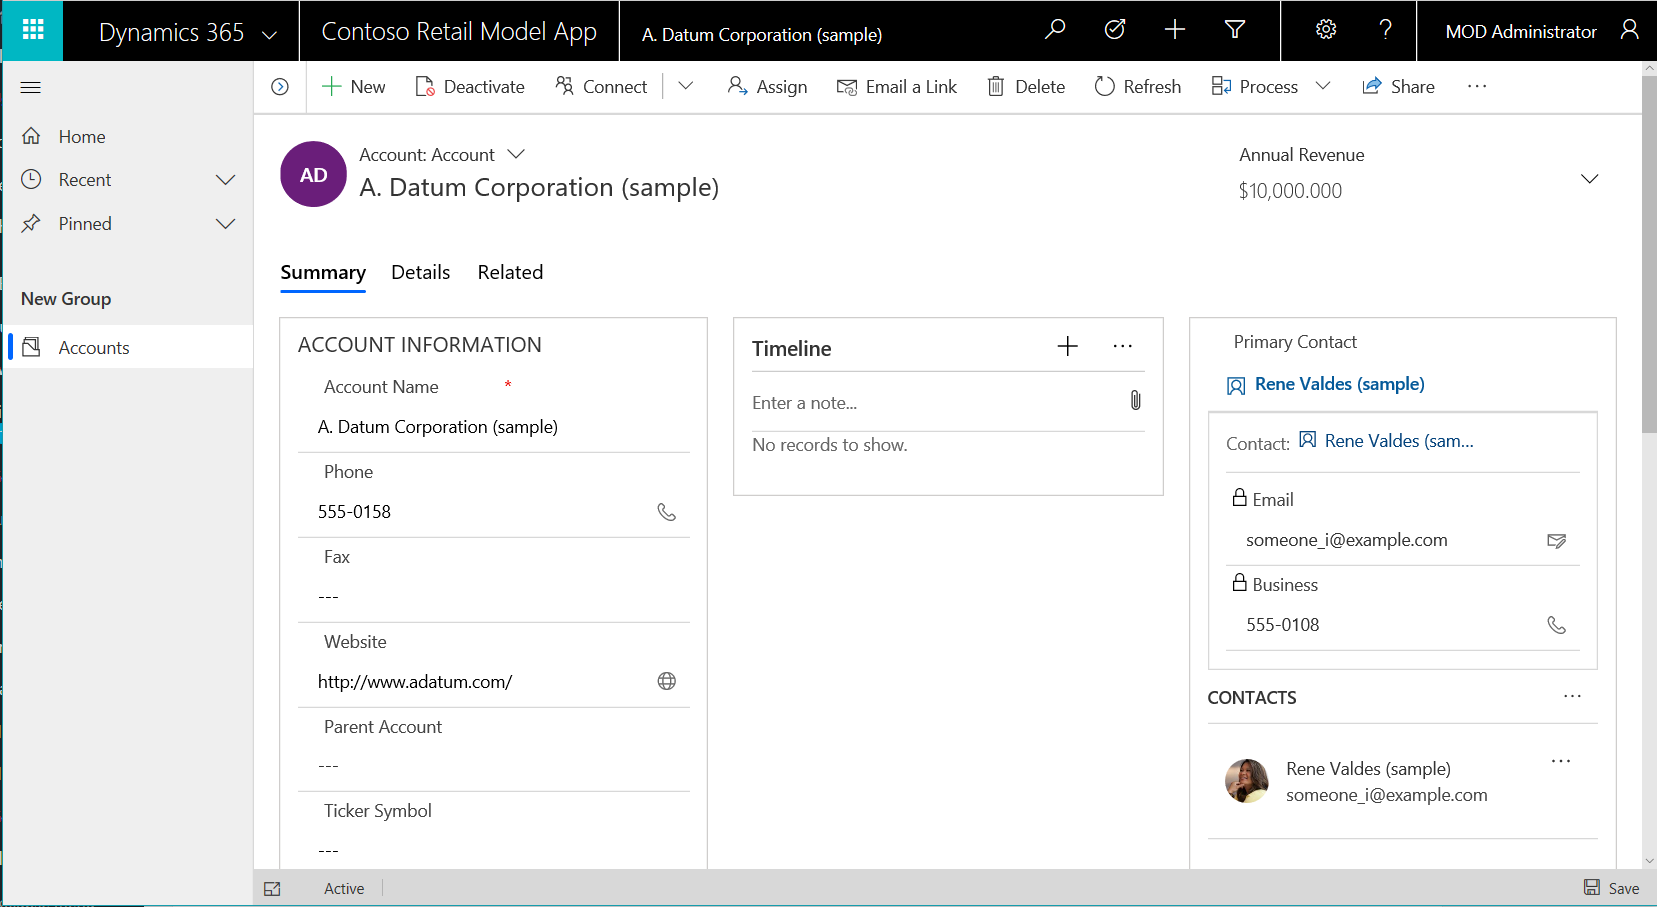
Now, refresh the form that has the Account record open, and scroll down to the new section with the embedded canvas app:
This simple example shows us how we can create a canvas app and embed it on a model driven app’s form, with the contextual form information being passed to the canvas app. This opens a large number of possibilities around customizing model driven app forms and integrating them with other systems.
Note this feature is currently in preview.
I AM SPENDING MORE TIME THESE DAYS CREATING YOUTUBE VIDEOS TO HELP PEOPLE LEARN THE MICROSOFT POWER PLATFORM.
IF YOU WOULD LIKE TO SEE HOW I BUILD APPS, OR FIND SOMETHING USEFUL READING MY BLOG, I WOULD REALLY APPRECIATE YOU SUBSCRIBING TO MY YOUTUBE CHANNEL.
THANK YOU, AND LET'S KEEP LEARNING TOGETHER.
CARL

How can we make list view of records with filters?
hi thanks for the post, followed each step -by-step, but when refresh the form, still seeing the old form view only. please advise
Hello, i really need to use a canvas app to substite a old html web resource, but i found this sentence in docs:
“The canvas app custom control is only supported for use with the Web client type. Currently, the Phone and Tablet client types aren’t supported.”
https://docs.microsoft.com/en-us/powerapps/maker/model-driven-apps/embedded-canvas-app-guidelines
That sentence make everything i’ve done useless, because the most of the users view Dynamics trough the android or ios app (obviously no one use the microsoft store app), and only who stay at office use a pc with a browser and the web client.
But i tested on android device and all works fine, can’t test on apple device casue quarantine..
Do thing that i can distribute the embedded canvas app for every clients?
Hi,
thanks for step by step information its very very helpful.
but in my business case scenario i want canvas app to open when i click on “new” button or while creating new record.