In Dynamics 365, there are several ways to use Excel to analyze data. In this post, we will look at the various different options.
Let’s start with a view of All Accounts. Note we’re displaying this in the Sales Hub app. The logic applied to the web client as well.
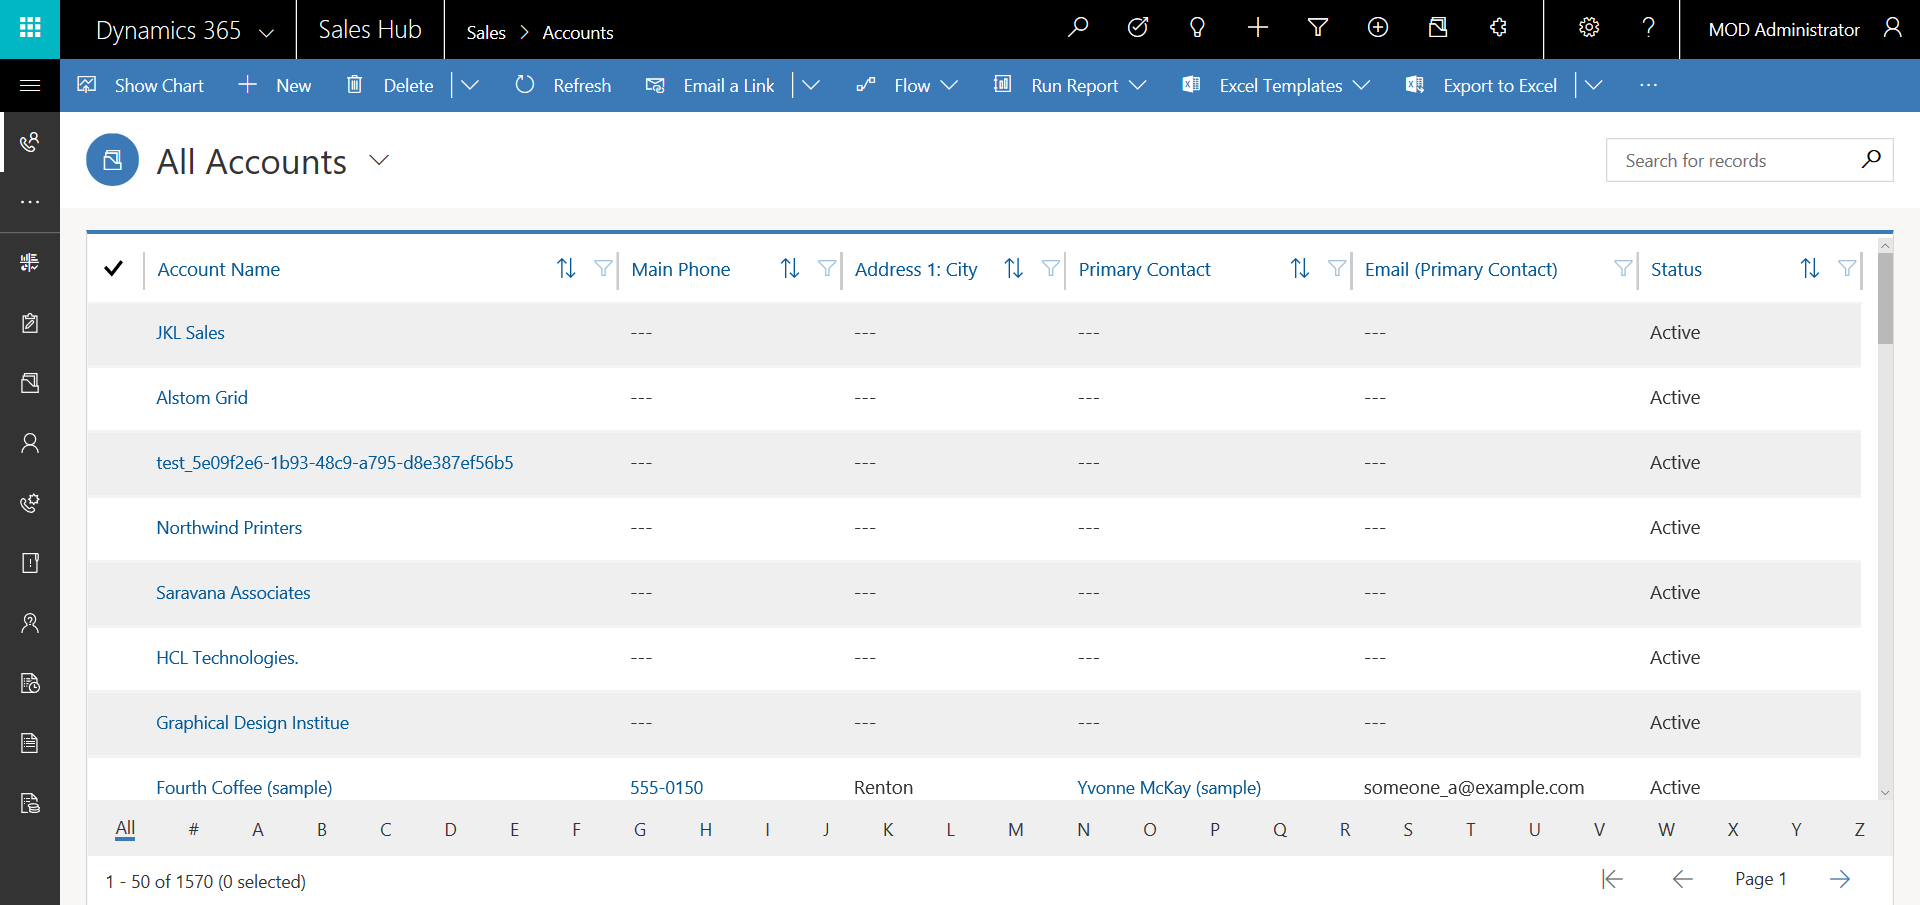
In the toolbar, we have several Excel options, including:
- Excel Templates
- Export to Excel
- Open in Excel Online
- Static Worksheet
- Static Worksheet (Page only)
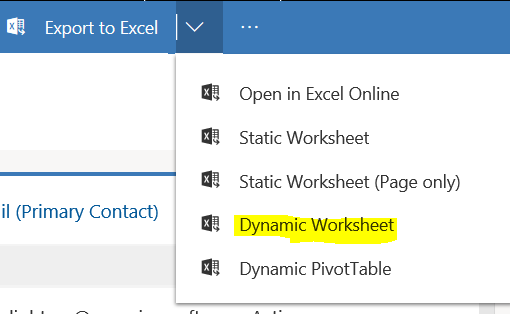
- Dynamic Worksheet
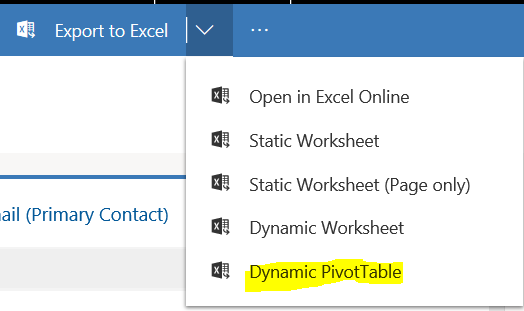
- Dynamic PivotTable
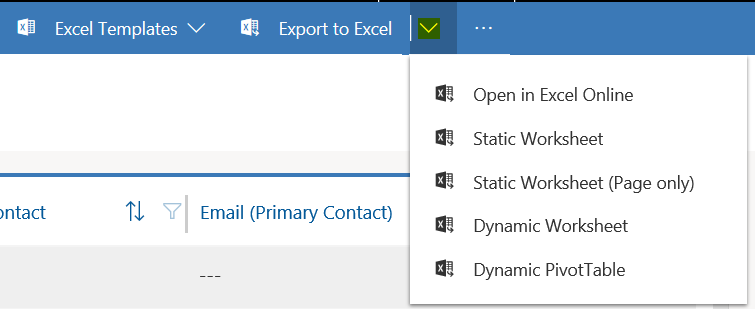
Let’s look at each of these.
Excel Templates
Excel Templates are used to export data to Excel in a particular pre-defined template. You build your own templates and upload them to Dynamics 365 so you can access the data in your desired format at any given time. Clicking on the down arrow shows the options to Upload Template, i.e. a template you have created and would like to use in Dynamics 365, and Download Template, which will download a blank template for you to use.
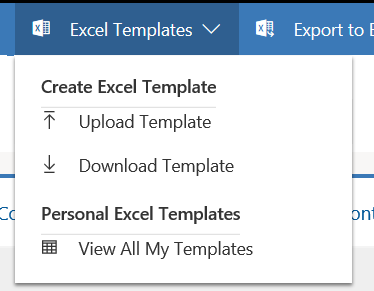
To make a basic template, select Download template and select the entity and view for your template:

Open the downloaded xlsx file. The file is basically what you see in your view, with the columns and data:
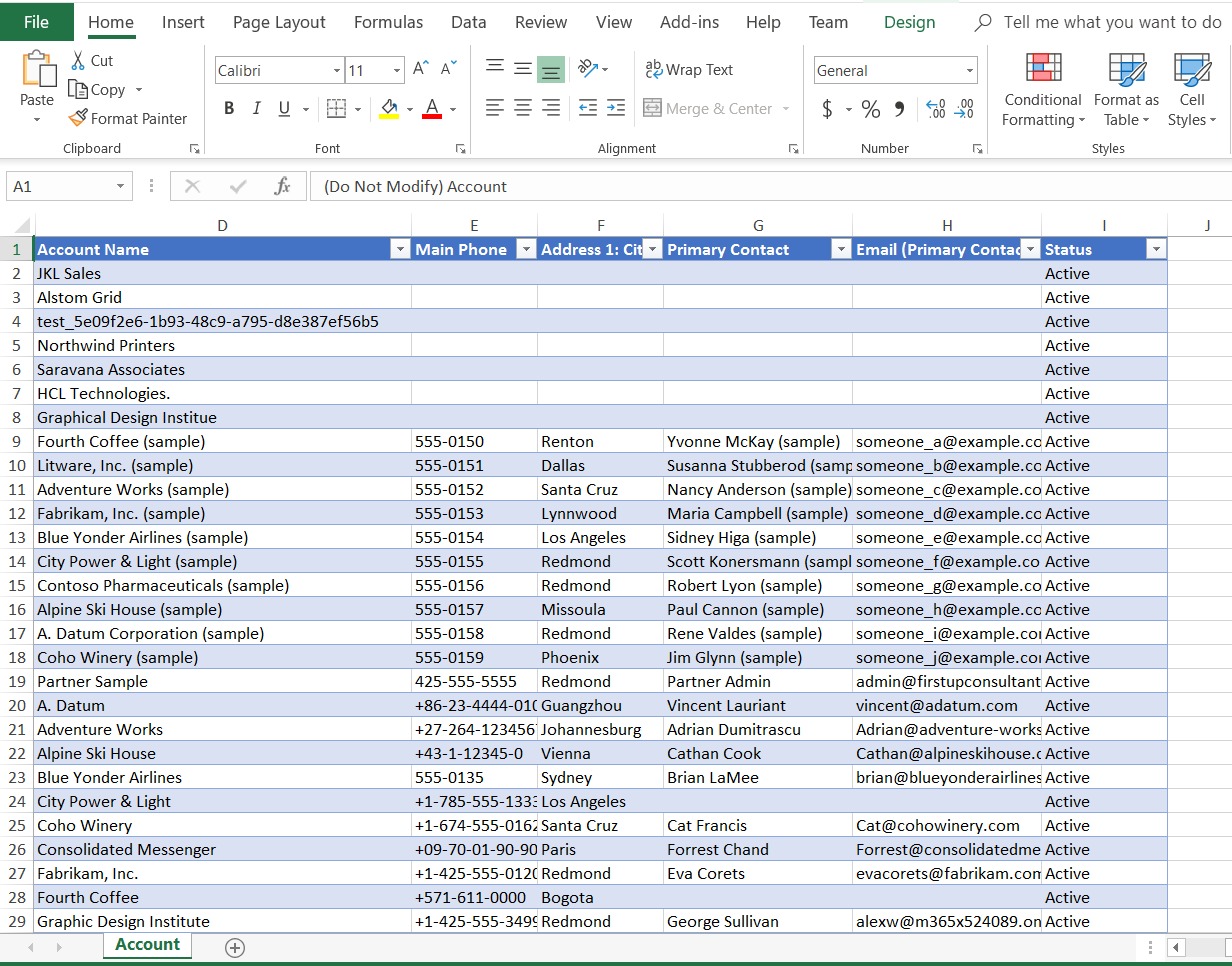
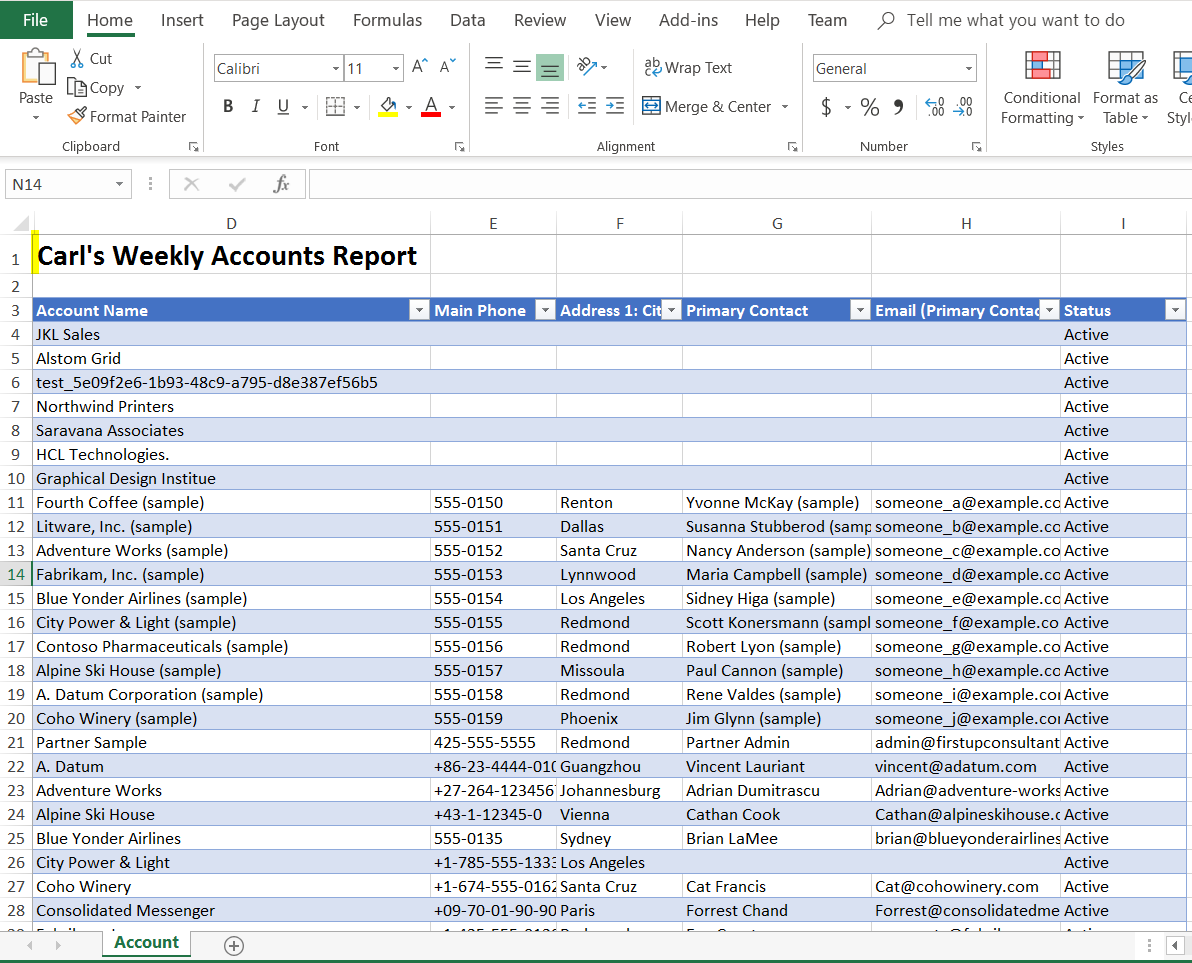
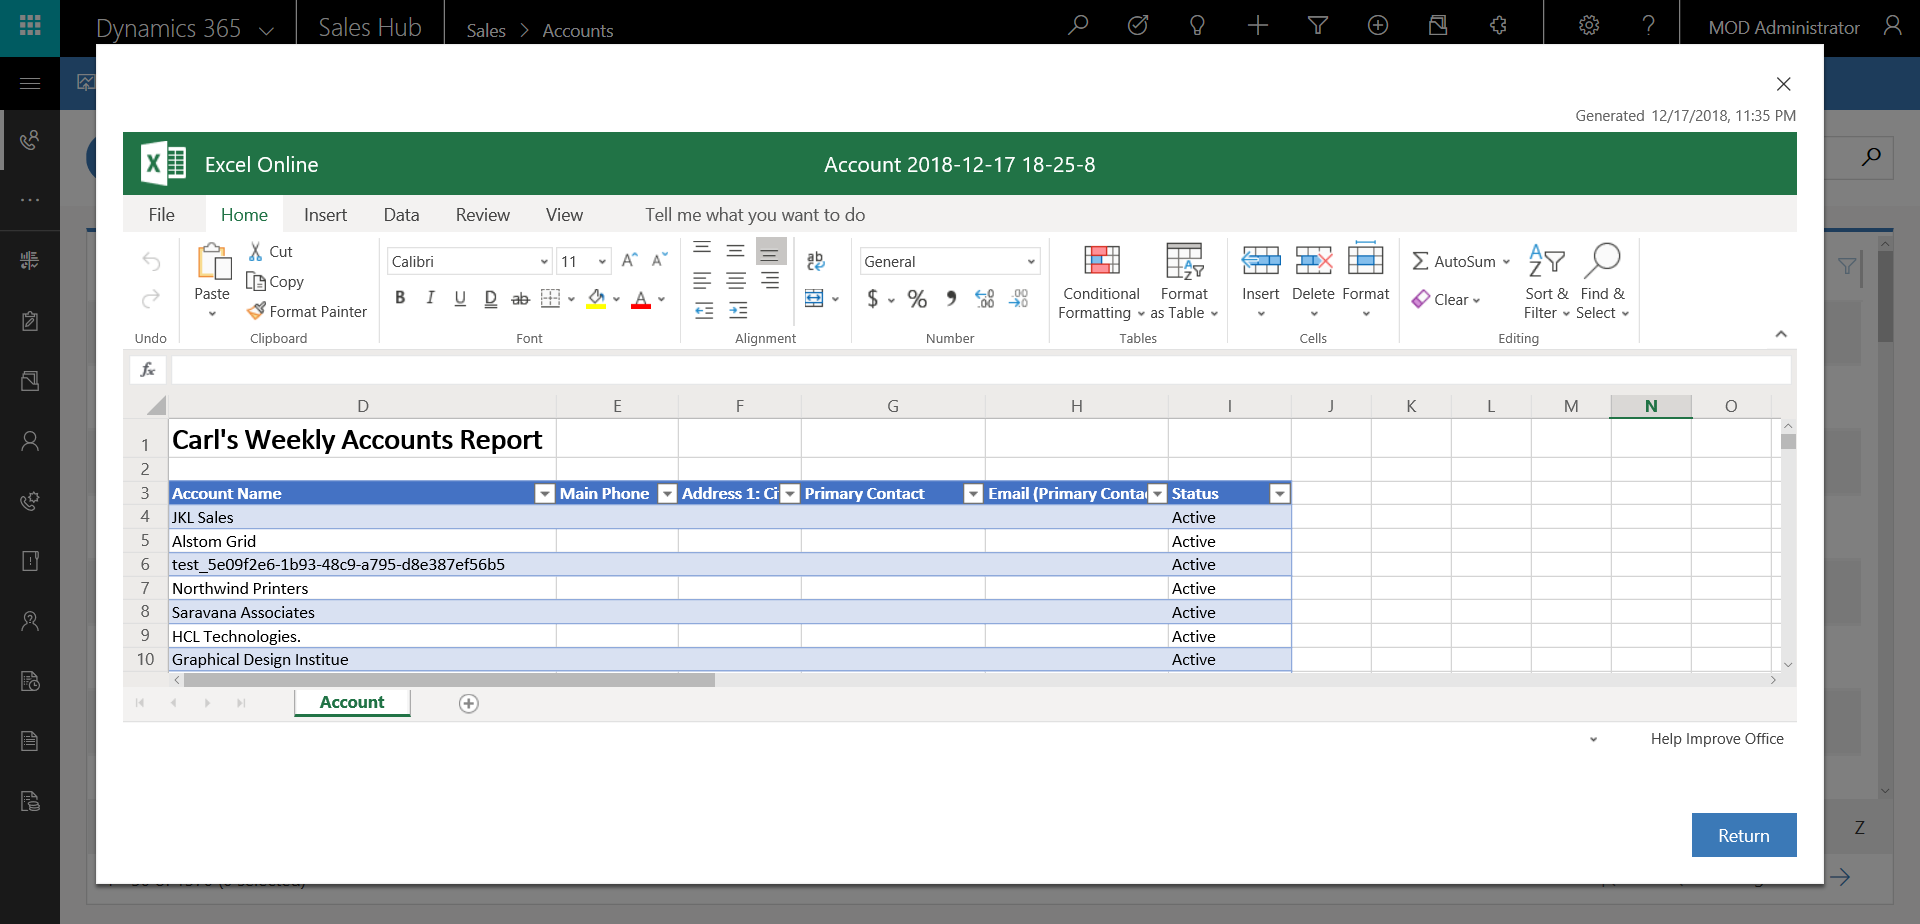
Now let’s say each week I create and send an Excel report to my boss that lists all accounts. But, I need a header in the report that shows it is “Carl’s Weekly Accounts Report”. I can add that title to my template. We will then upload this to Dynamics 365:
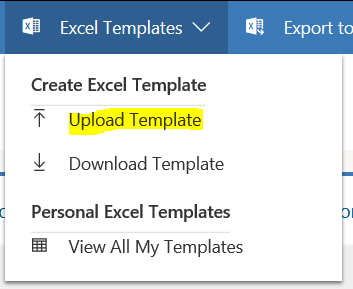
Once saved, close the file and then click Upload Template:
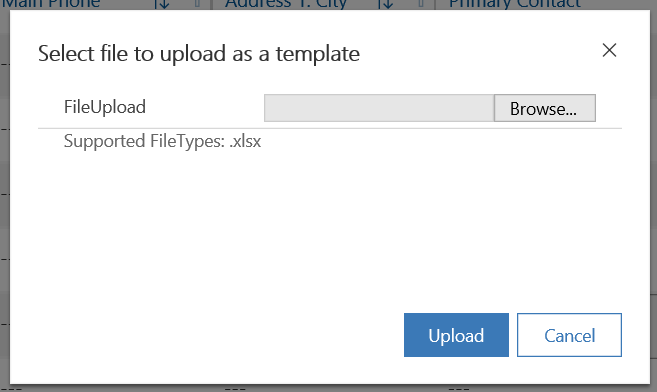
Select the file (if you still have it open it will show as blank, so be sure to close it before trying to upload) and press Upload:
You will then see the template under Personal Template Options:
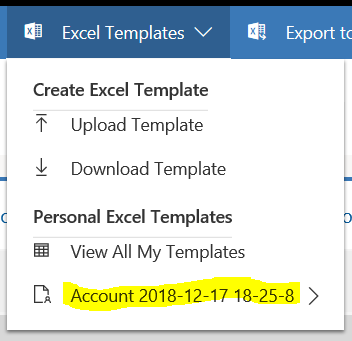
Selecting it allows you to choose to Open in Excel Online or Download It:
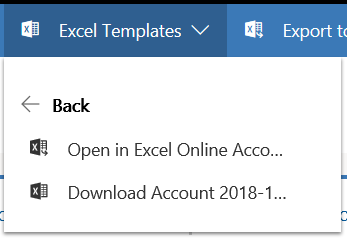
Let’s first open in Excel Online:
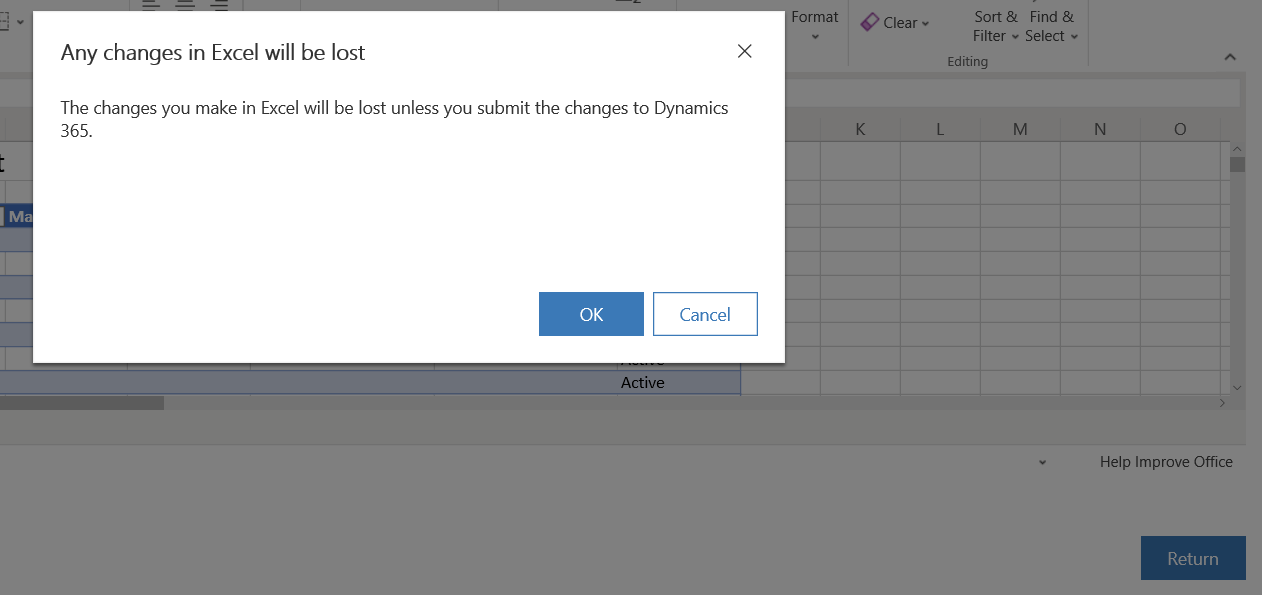
If we make a change to the worksheet, we may get the prompt “Any changes in Excel will be lost. The changes you make in Excel will be lost unless you submit the changes to Dynamics 365”:
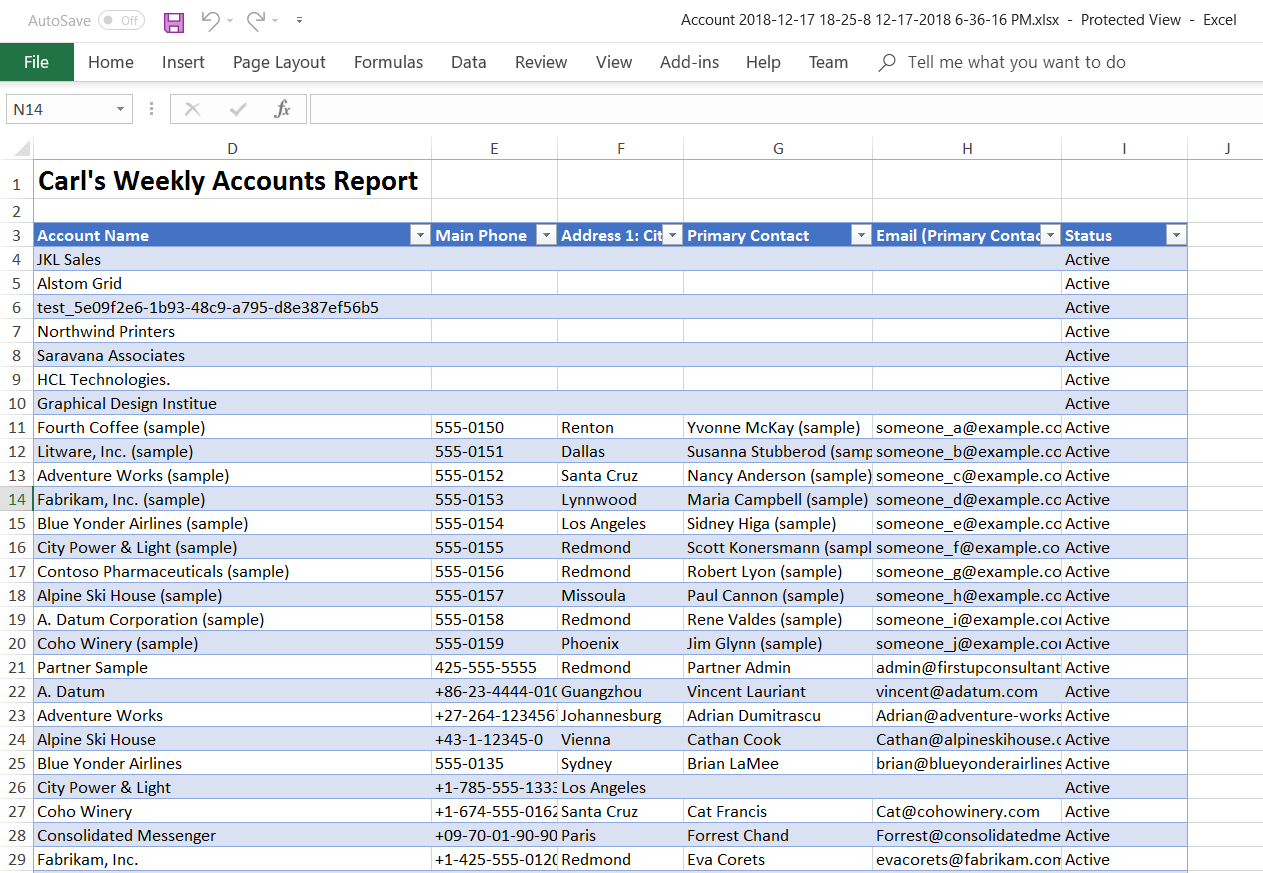
Selecting to Download It will download the file in the template format with the latest data:
You can read more about creating templates here.
Export to Excel
This is a fast, one-click way to export data to Excel on your desktop.
![]()
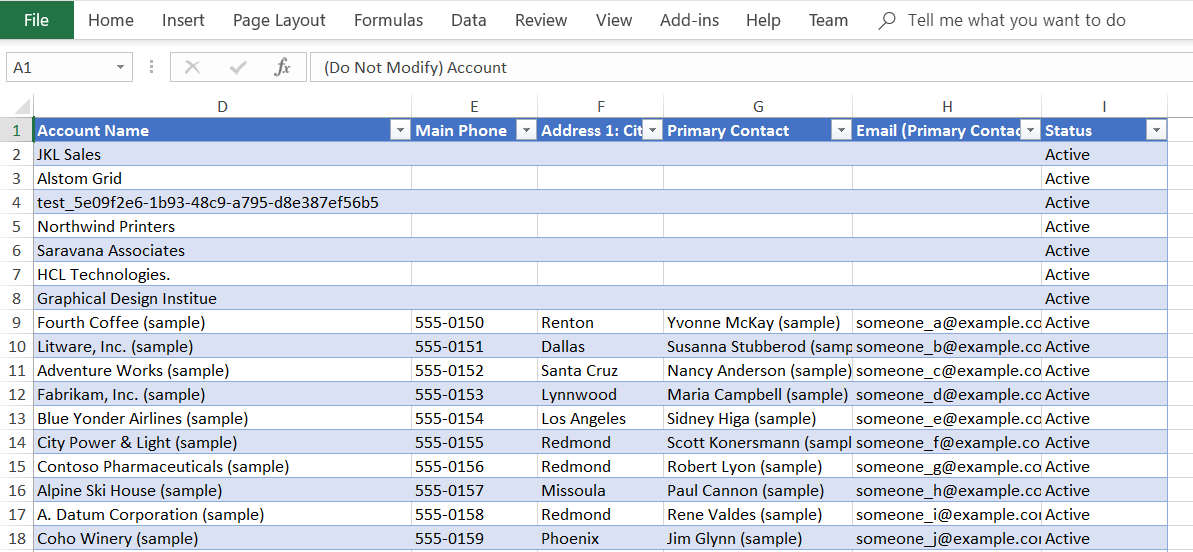
As there is no template involved, it will be simply a dump of what is in the view:
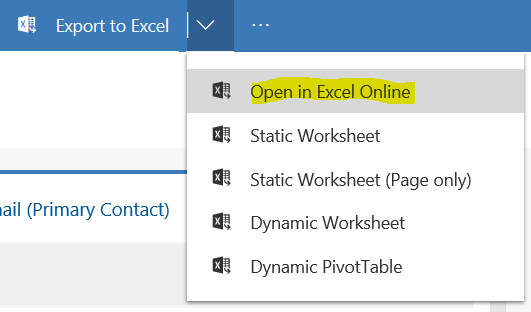
Open in Excel Online
As with the option above, Open in Excel Online will open the data in your browser in Excel Online:
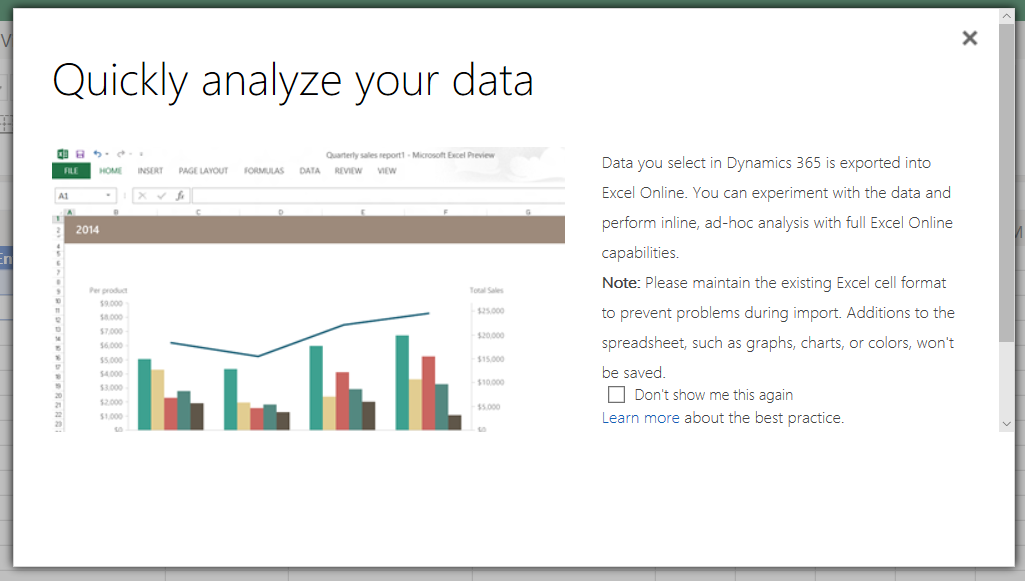
You may see the following:
This is probably the fastest way to view data in an Excel format if you wanted to write some quick formulas such as adding fields together, getting counts etc:
Note we can save changes back to Dynamics 365 by clicking on the Save Changes to Dynamics 365 button.
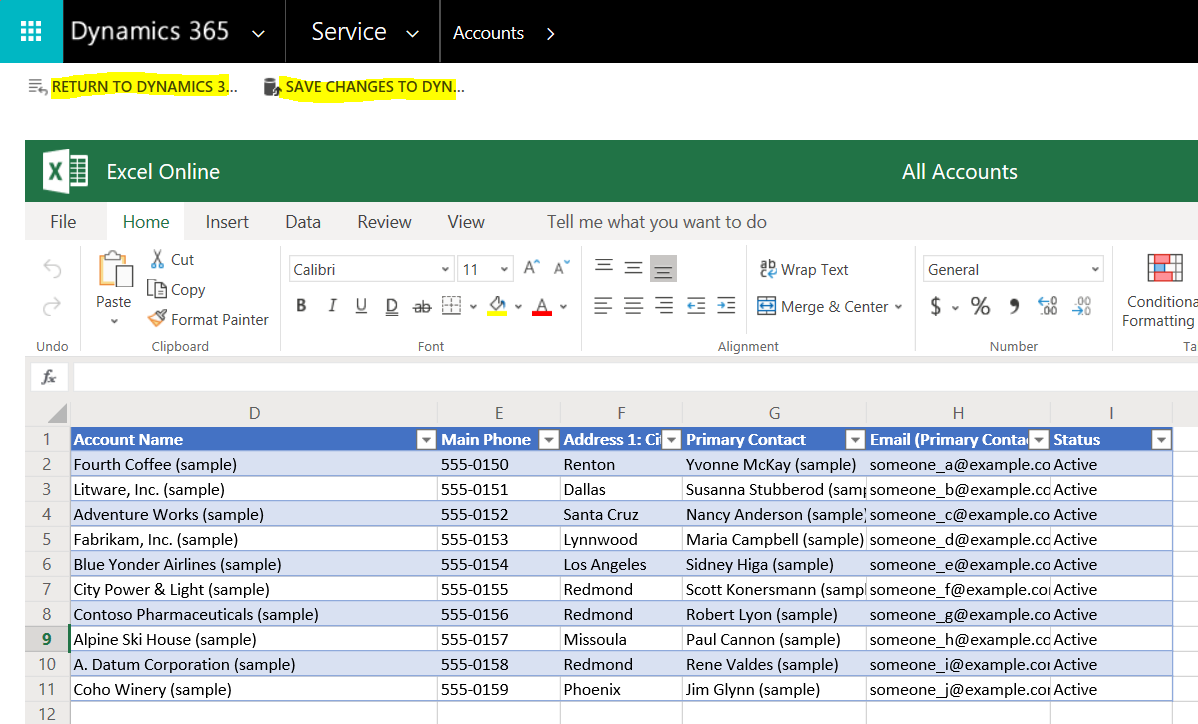
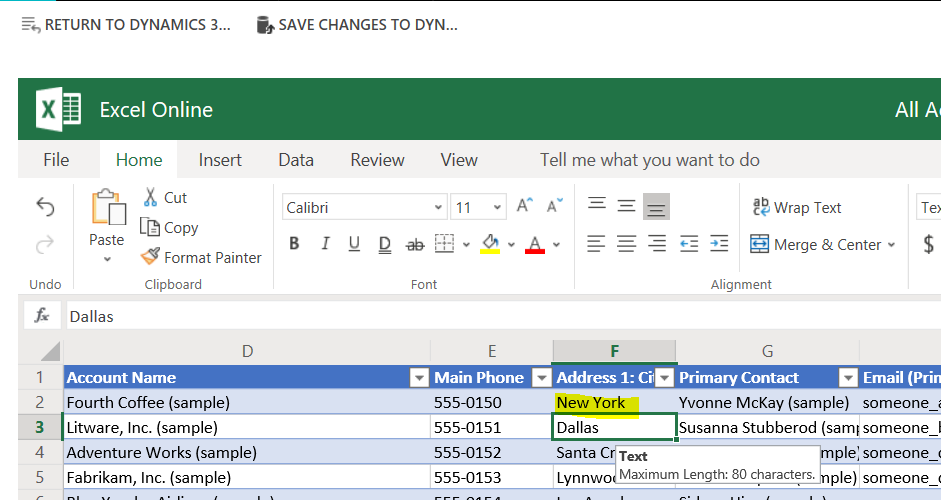
Let’s try this. Update an address and click Save changes to Dynamics 365:
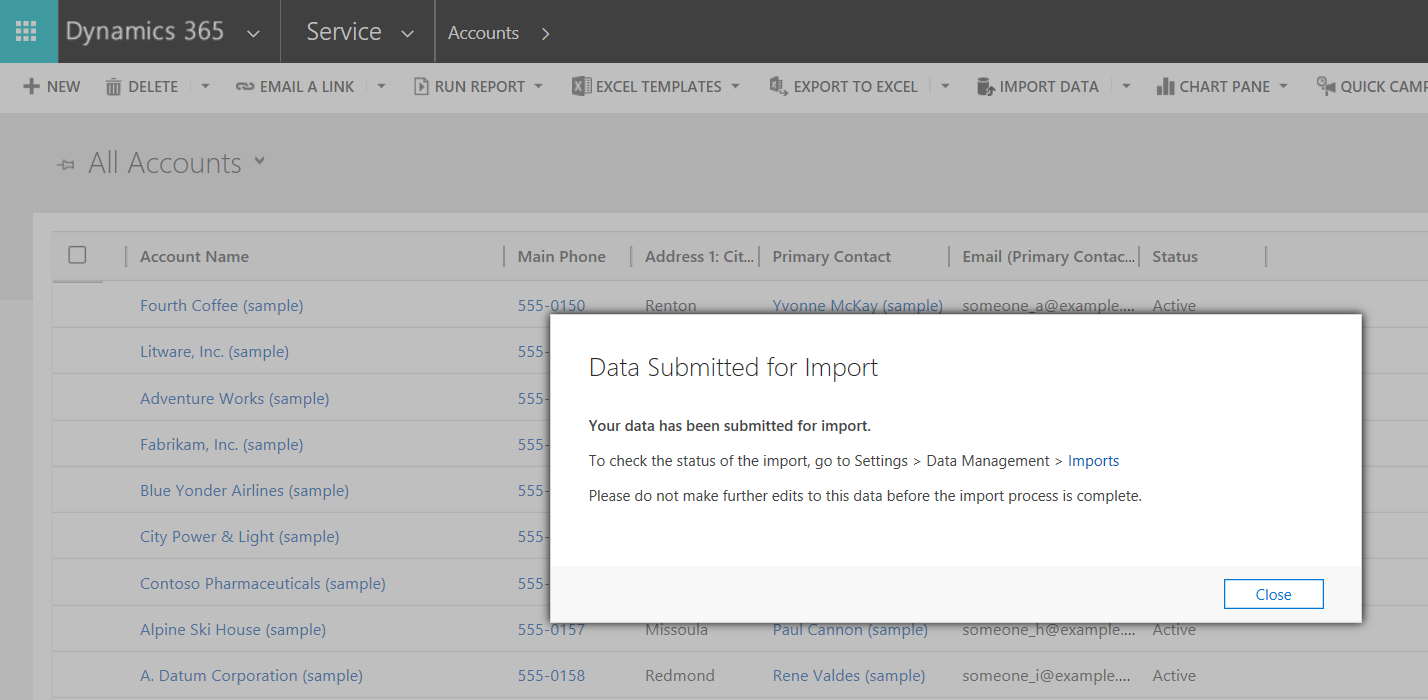
You will be taken to the window:
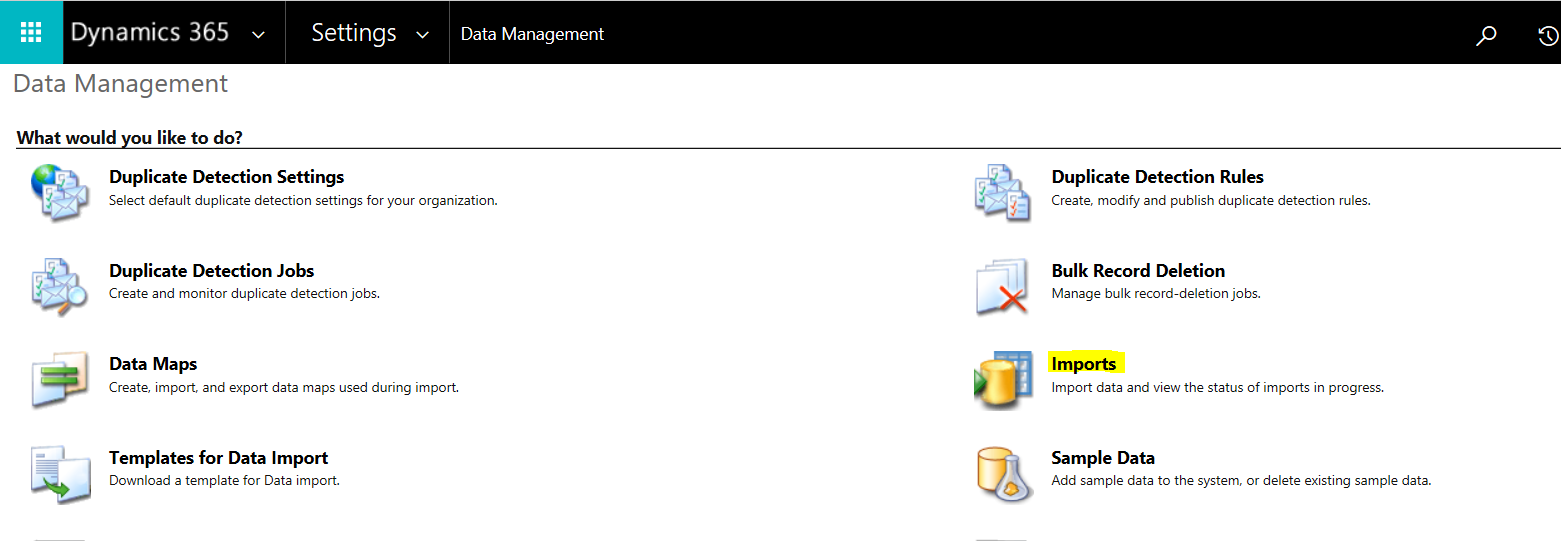
To track progress, go to Settings->Data Management->Imports:
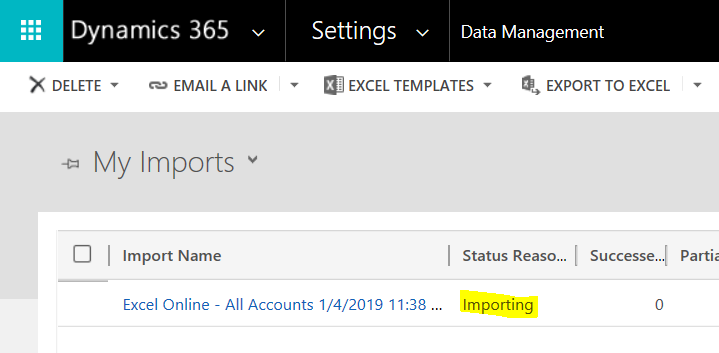
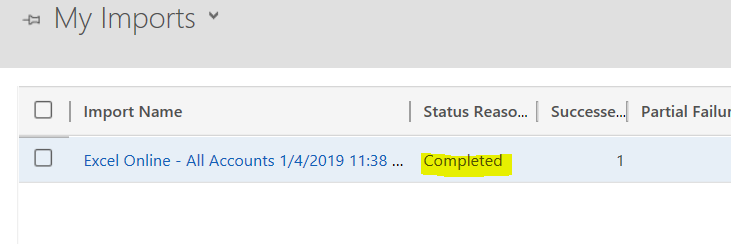
You will see the status change from Importing to Completed:
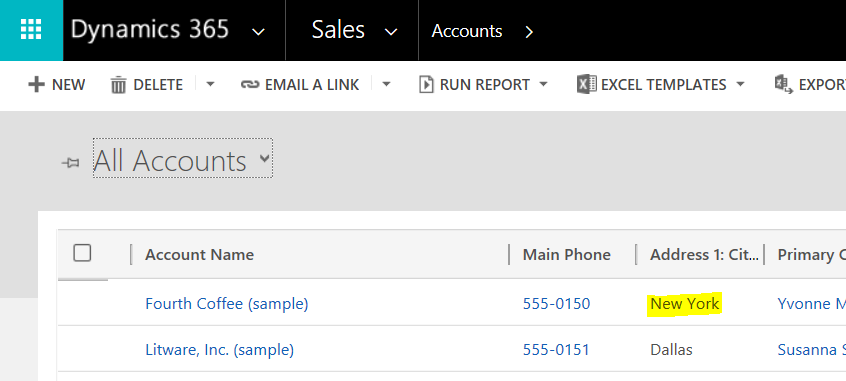
And finally, the data updated:
Static Worksheet
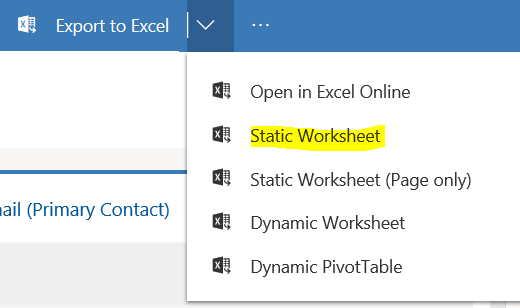
Selecting Static Worksheet will download a worksheet to your computer:
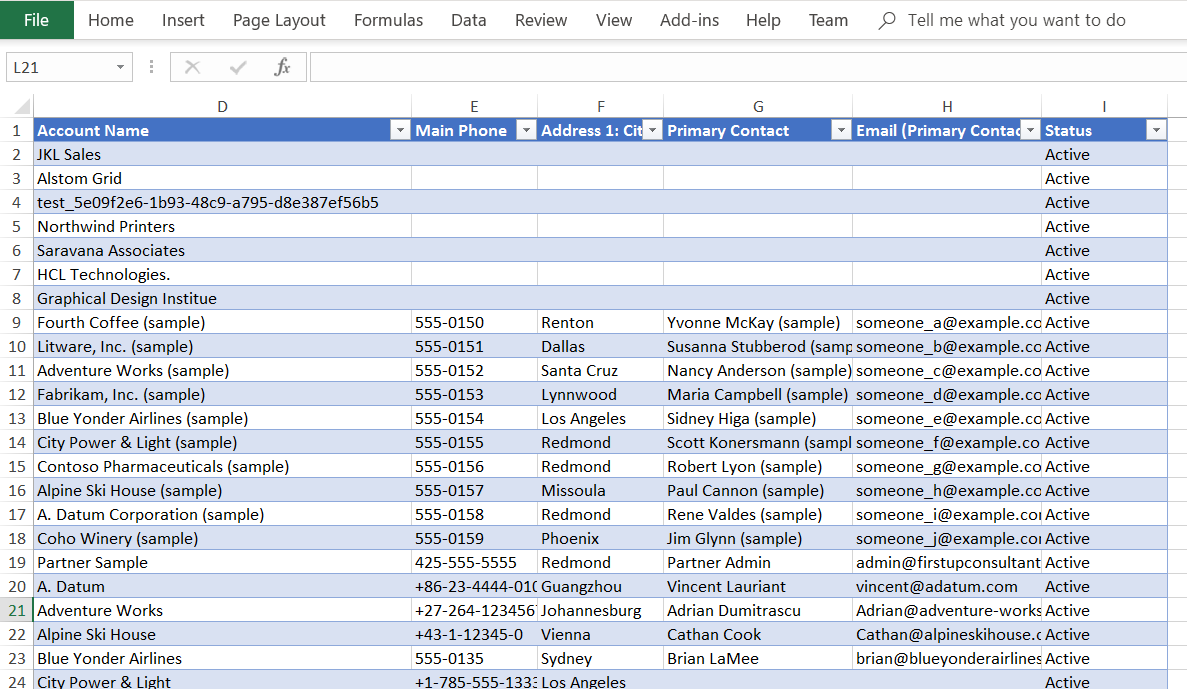
This worksheet will be “static”, meaning the data is not updated:
Static Worksheet (Page Only)
As above,
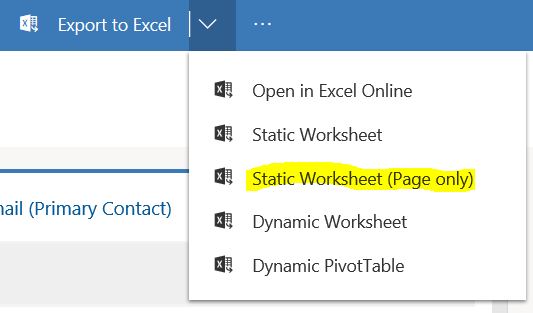
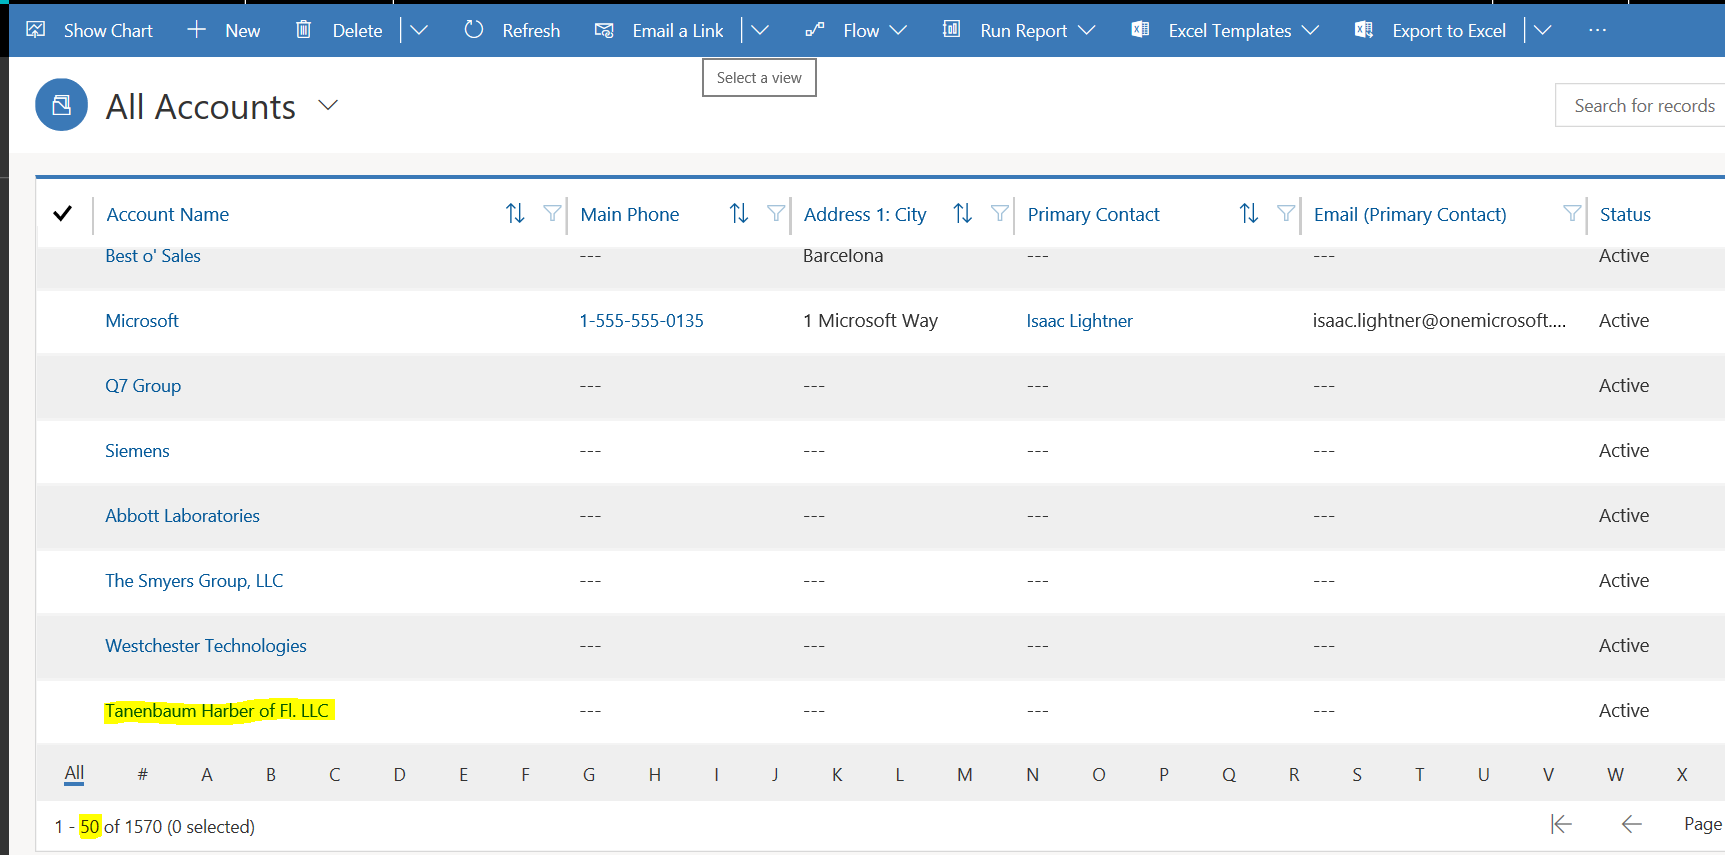
The difference here is the static worksheet (page only) will only display what is currently selected in the view. Below we have 50 records displayed:
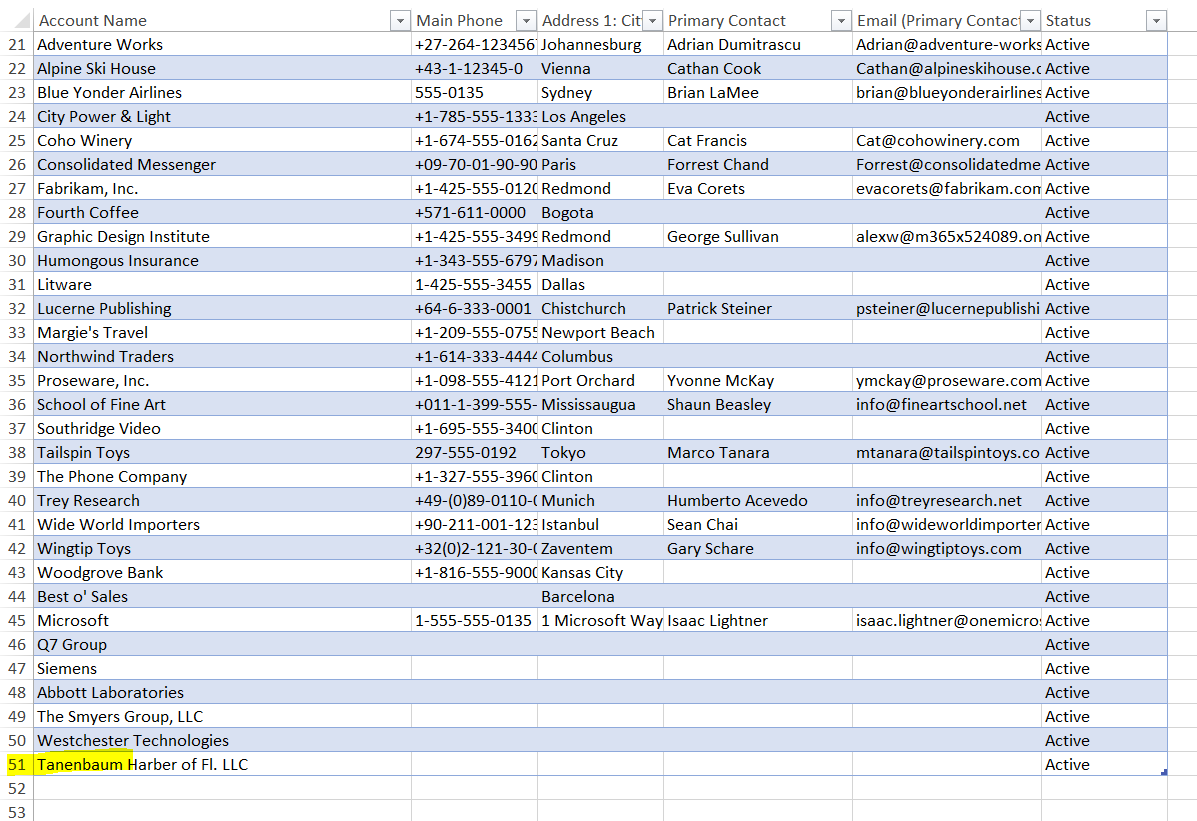
These are downloaded in the Excel file:
Export to Excel Dynamic Worksheet
Let’s select Dynamic Worksheet:
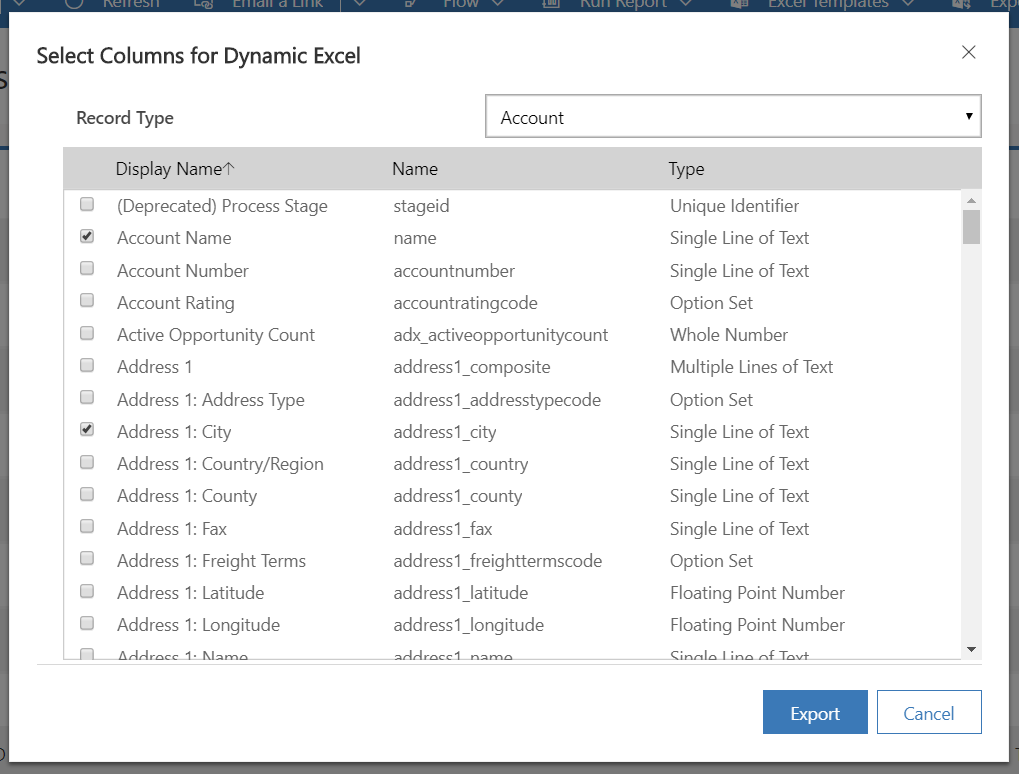
Select the columns to export:
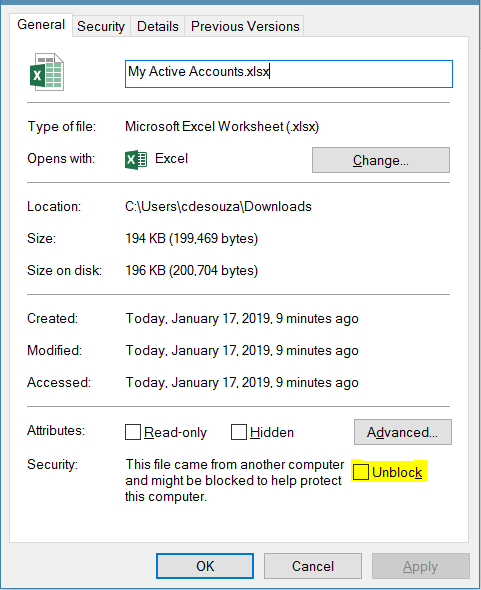
The file will download. The first thing you will need to do is
And in IE:
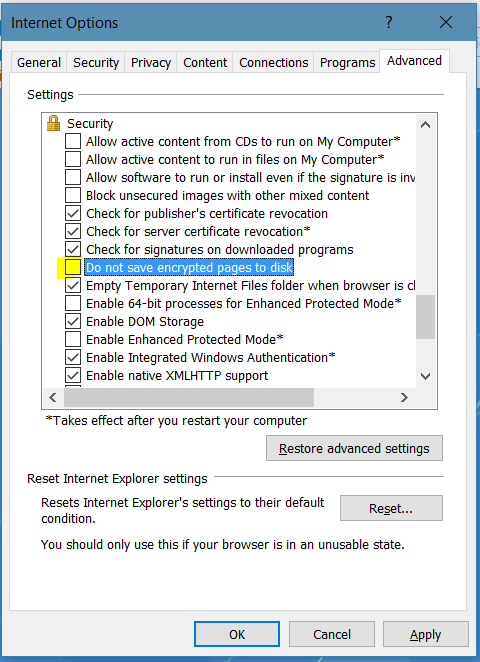
If you continue to have issues, see here.
Open the downloaded file.
Excel will open. You may see the security warning. Click to Enable Content:

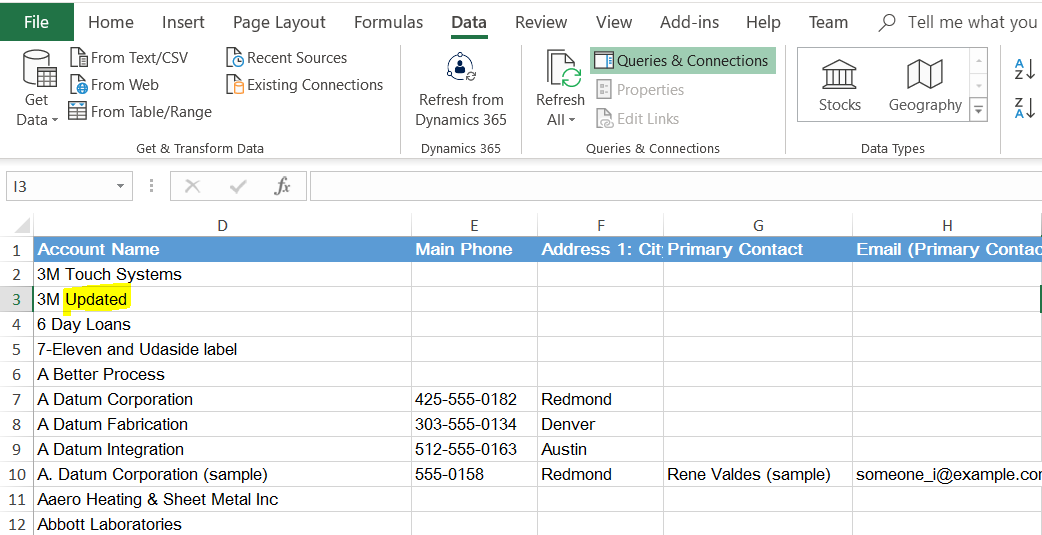
You will see in the Data tab, Refresh from Dynamics 365:
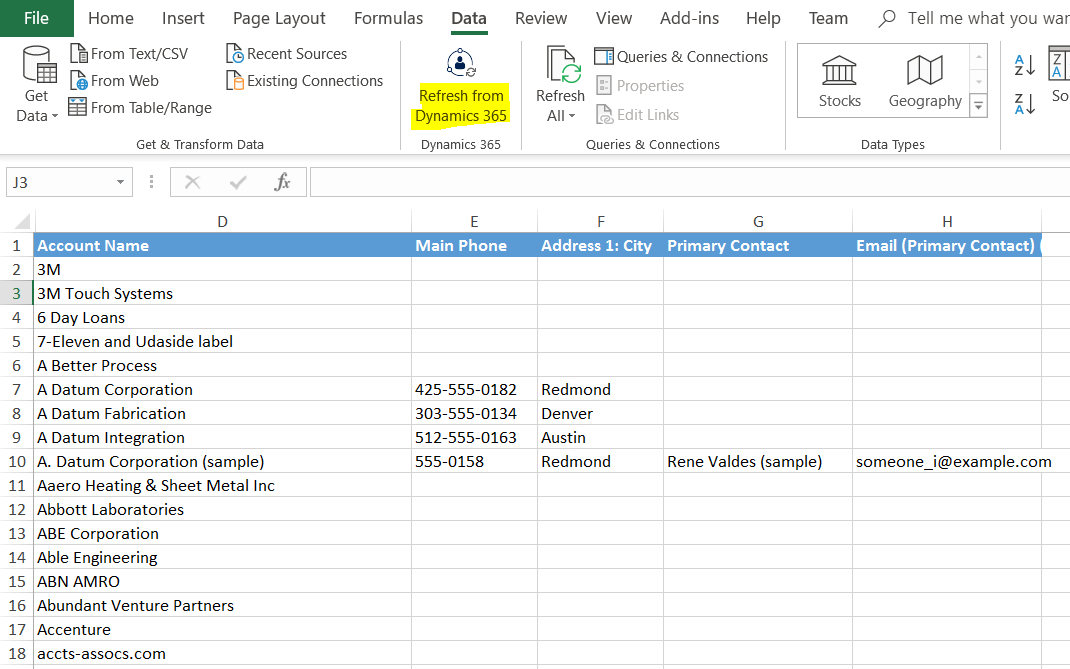
Let’s make an update to a Dynamics 365 record, e.g. by updating the name of an account:
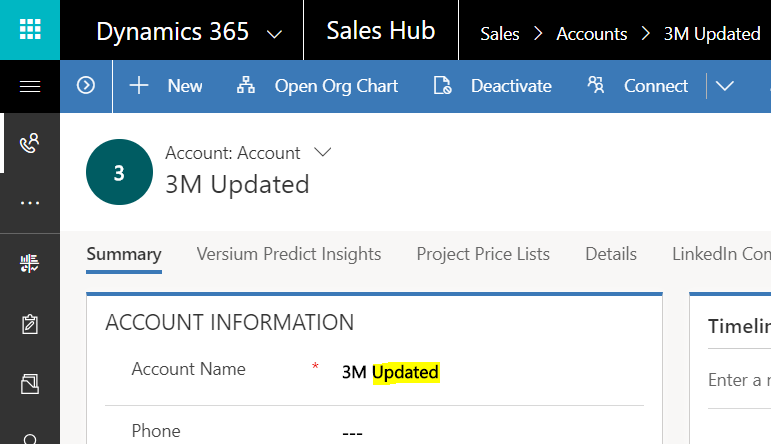
Now, click to refresh in Excel. You will see the data in the spreadsheet has been updated:
If you continue to have issues, see here.
Export to Excel Dynamic PivotTable
Select Dynamic PivotTable:
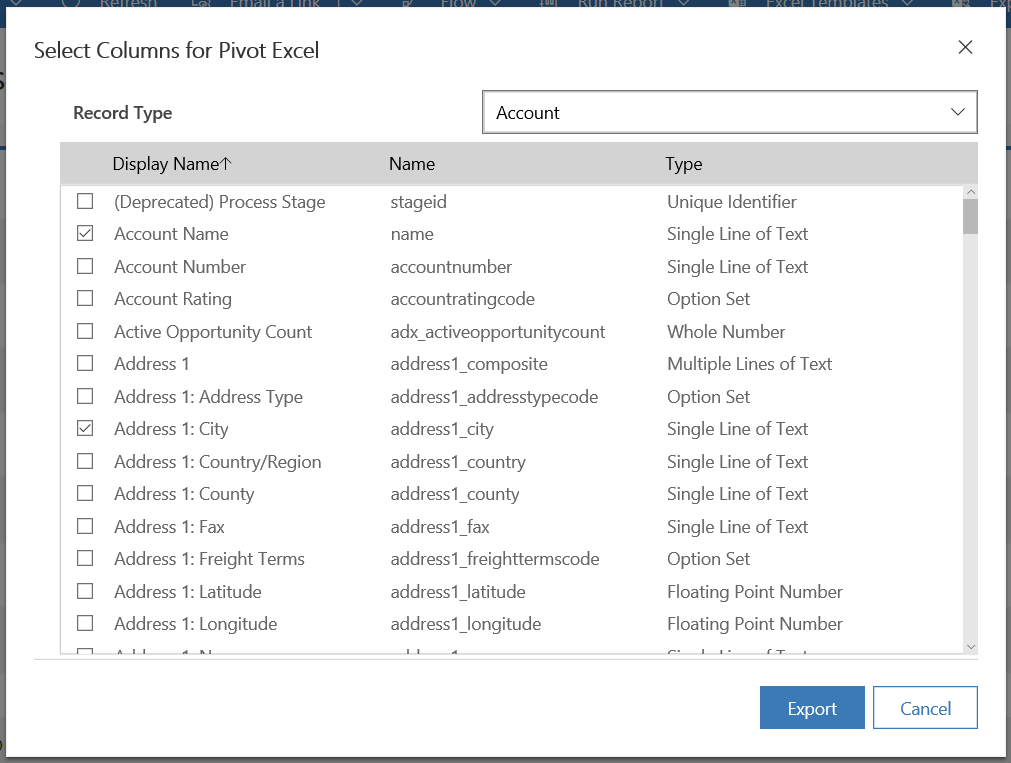
Select the columns:
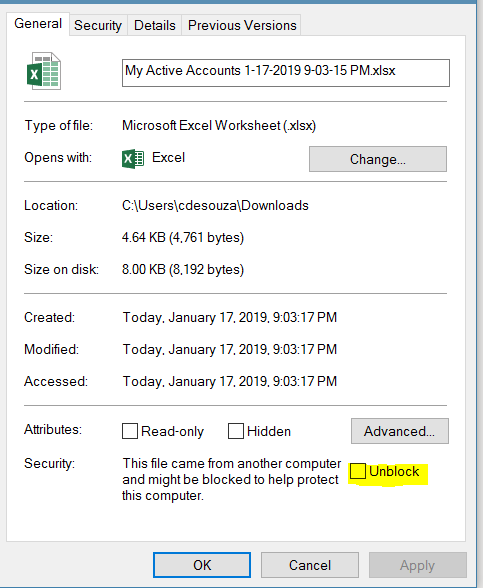
Unblock the file:
Click Enable Editing:

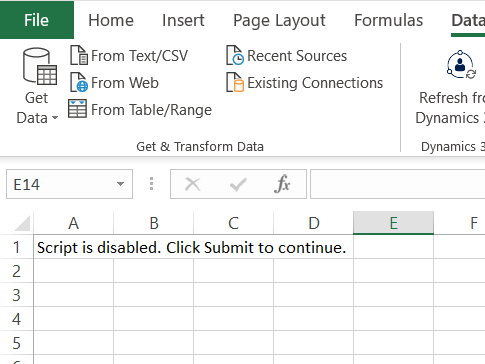
You may see: “Script is disabled. Click Submit to continue”:
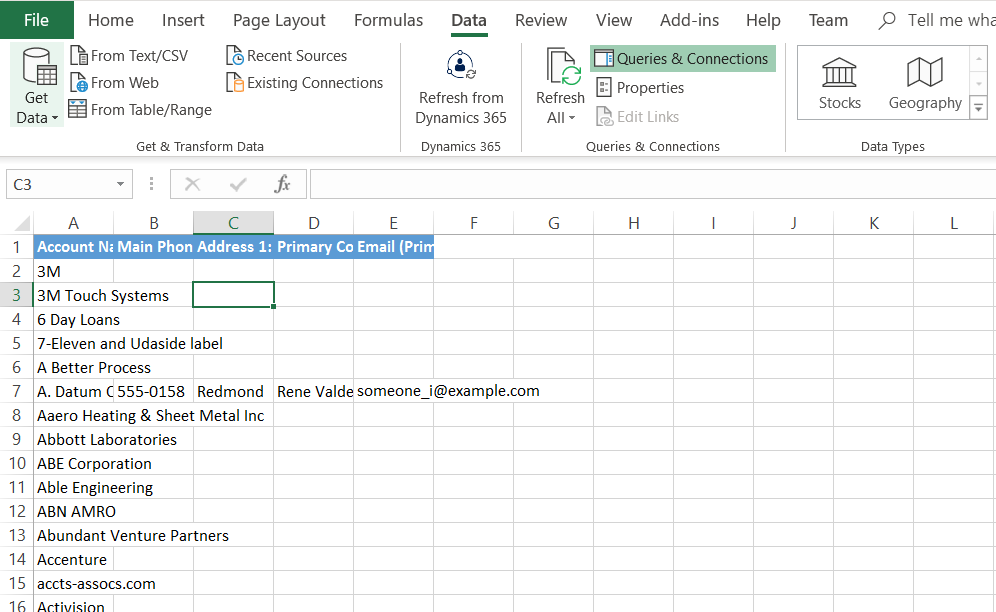
Click Refresh All in the Data tab. The data will be displayed:
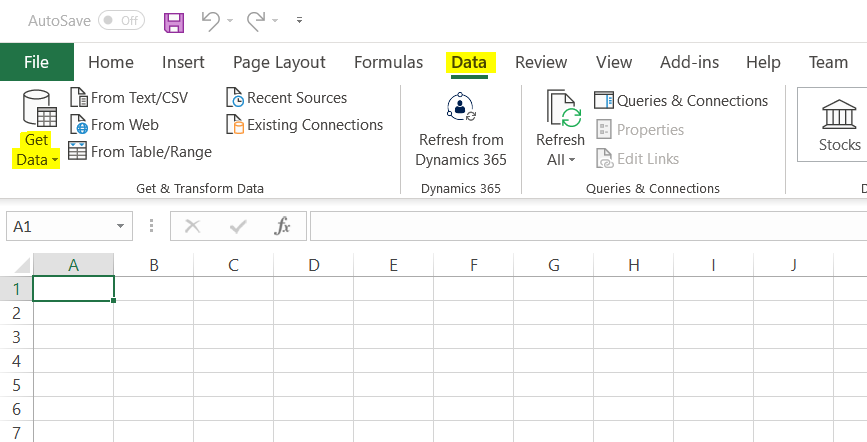
| Script is disabled. Click Submit to continue. Connecting from Excel to Dynamics 365Power QueryUsing Excel as a starting point, to connect from Excel to Dynamics 365 we can use Power Query. Open Excel and go to the Data tab:
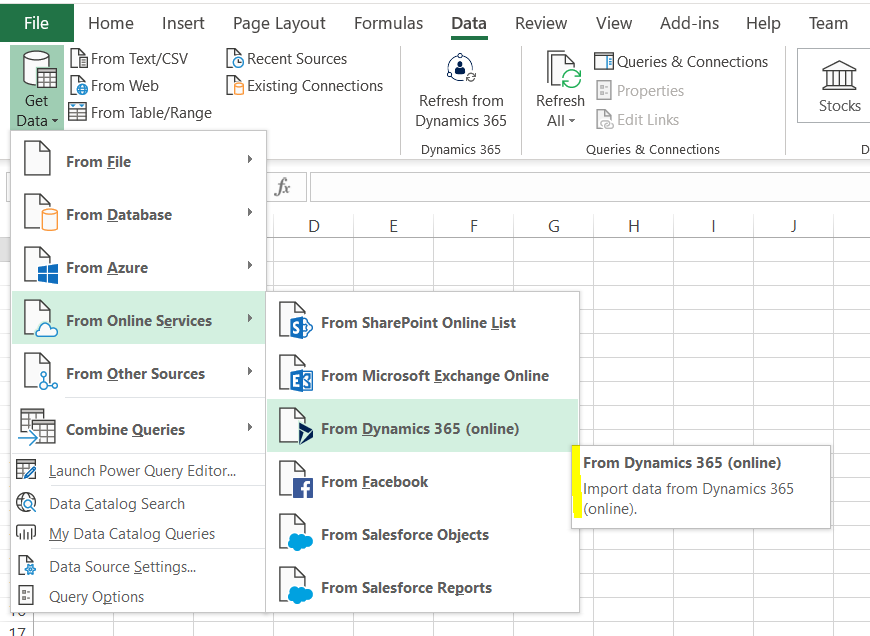
Select Get Data->From Online Services->From Dynamics 365 (online):
Enter your Web Api URL:
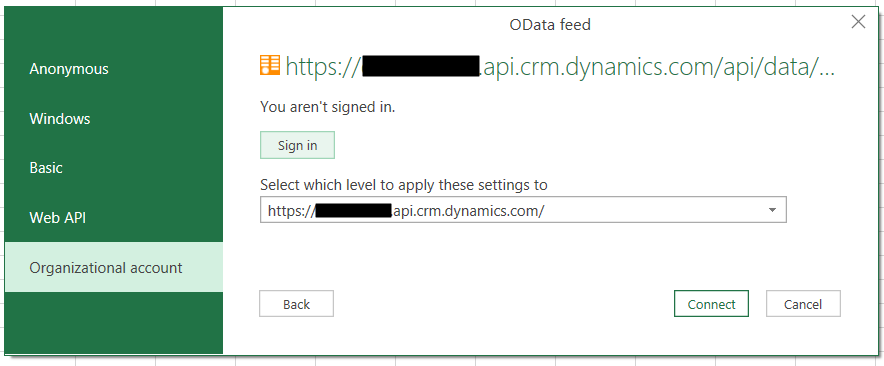
Select Organizational account, click Sign In, then Connect:
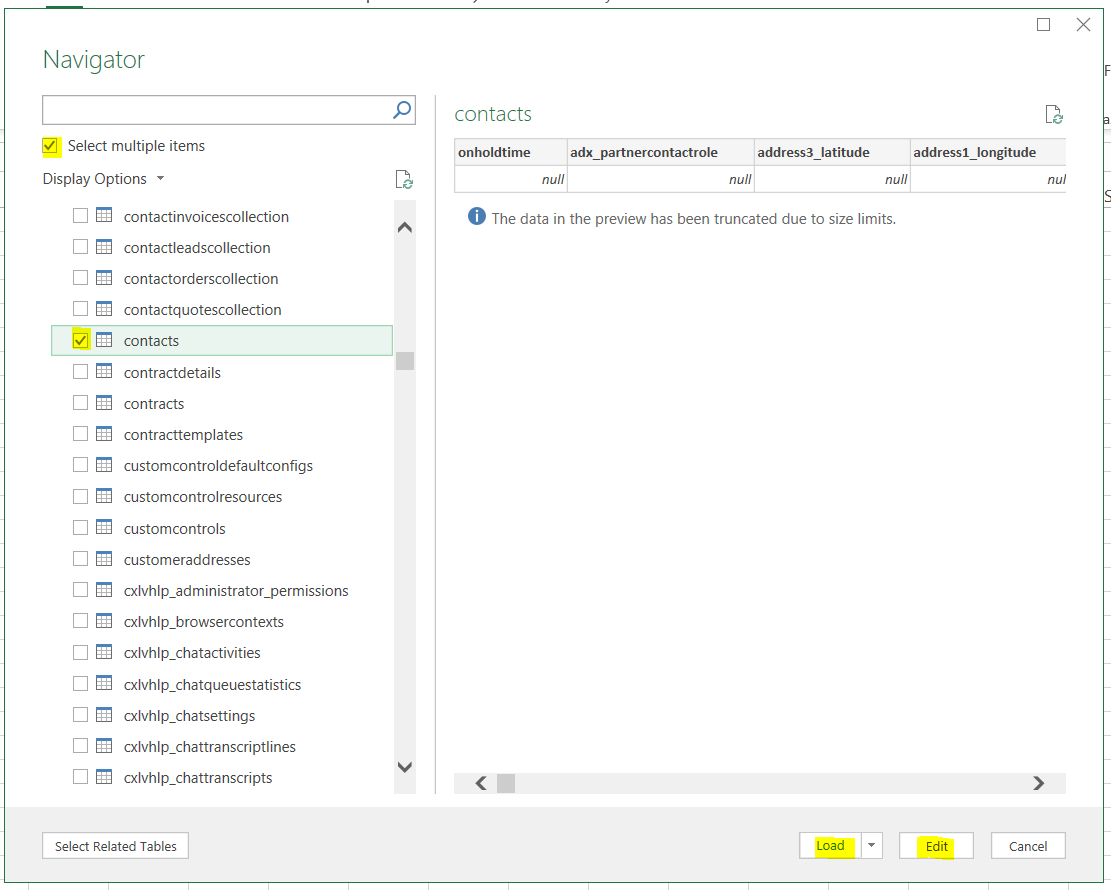
Select any entities you would like to include in your spreadsheet, and click either Load or Edit. Load will load the data into the spreadsheet, Edit will allow you to first edit the query before loading into the spreadsheet:
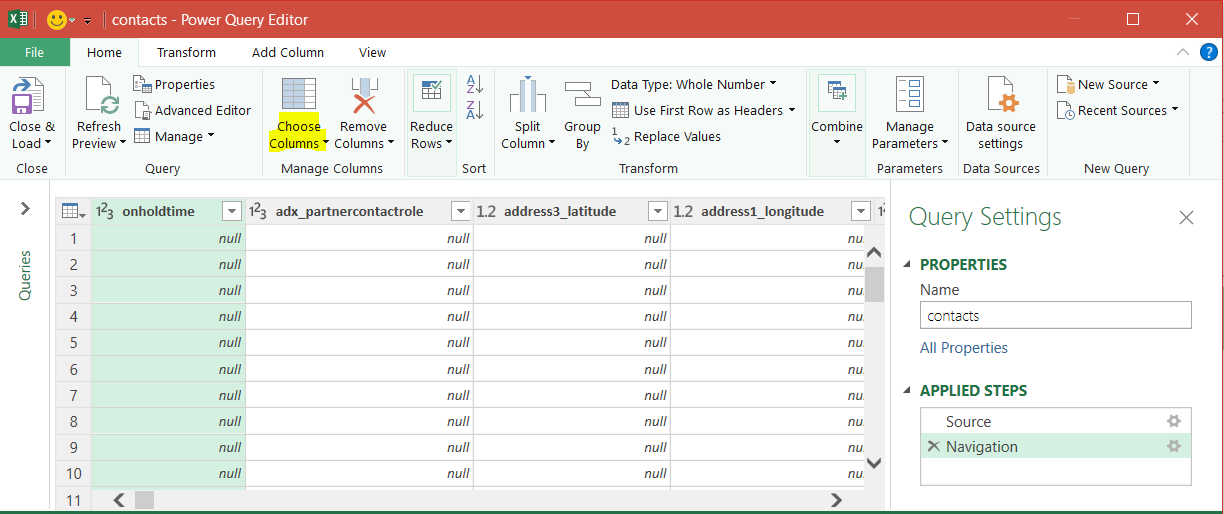
The PowerQuery Editor will give you options to limit the number of columns and rows returned, as well as other features:
You will see something like this on your spreadsheet before you load the data onto it:
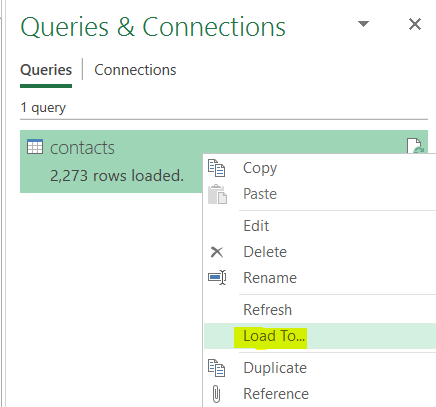
Right click the contacts query:
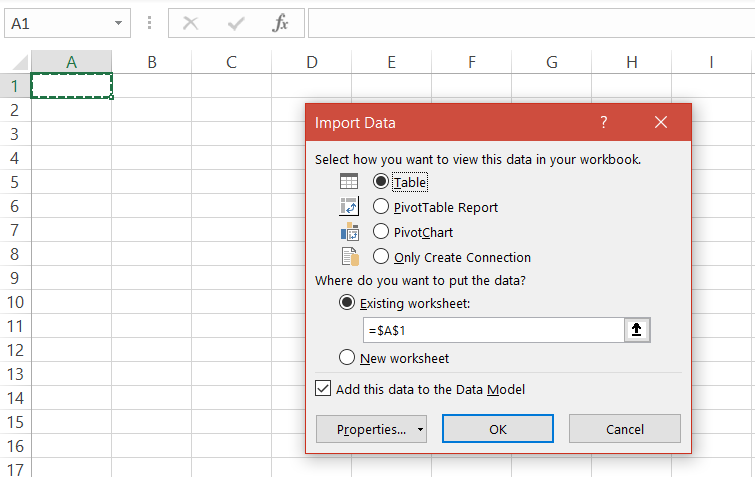
Choose the way you would like to bring the data into the spreadsheet, i.e. Table, PivotTable Report, PivotChart:
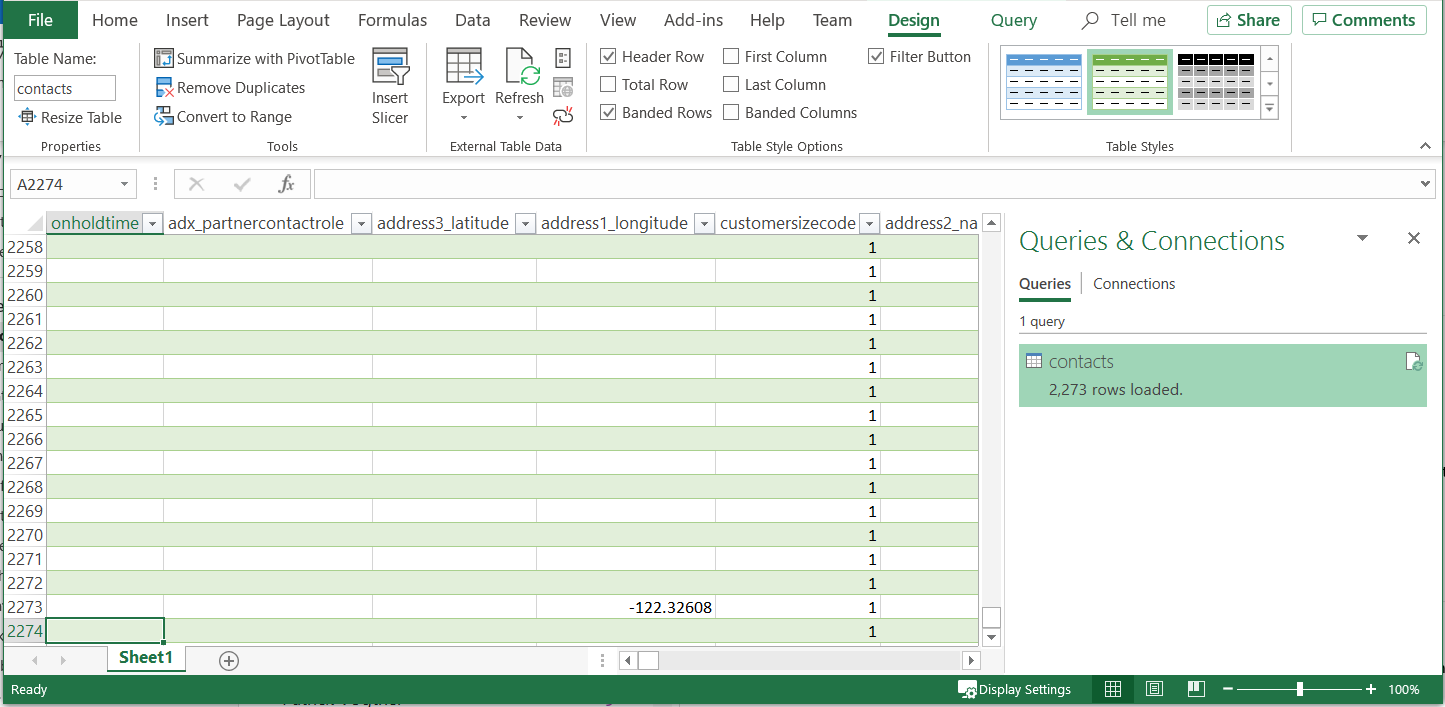
Selecting Table, we see the data is loaded onto the spreadsheet:
Depending on your Excel version you may need to download and install Power Query.
THANKS FOR READING. BEFORE YOU LEAVE, I NEED YOUR HELP.
I AM SPENDING MORE TIME THESE DAYS CREATING YOUTUBE VIDEOS TO HELP PEOPLE LEARN THE MICROSOFT POWER PLATFORM. IF YOU WOULD LIKE TO SEE HOW I BUILD APPS, OR FIND SOMETHING USEFUL READING MY BLOG, I WOULD REALLY APPRECIATE YOU SUBSCRIBING TO MY YOUTUBE CHANNEL. THANK YOU, AND LET'S KEEP LEARNING TOGETHER. CARL
4 Responses to Everything You Need to Know About Using Microsoft Excel with Dynamics 365Leave a Reply |




Hi
I have problem in here. (Enter your Web Api URL:)
After I enter the link, i have the following error message. (unable to connect)
Hi,
I am not getting the “Refresh from Dynamics 365” button under Data tab in excel once I download using “Dynamic Excel sheet”
… [Trackback]
[…] Find More on to that Topic: carldesouza.com/everything-you-need-to-know-about-using-microsoft-excel-with-dynamics-365/ […]
… [Trackback]
[…] Find More Info here on that Topic: carldesouza.com/everything-you-need-to-know-about-using-microsoft-excel-with-dynamics-365/ […]