In this post, we will look at how to switch between GitHub branches in Visual Studio.
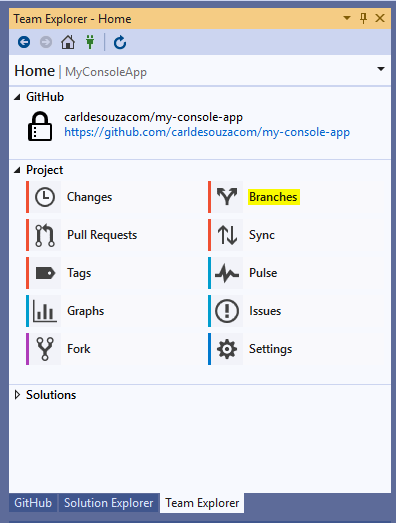
First, open a solution that is connected to a GitHub repository and go to Branches:
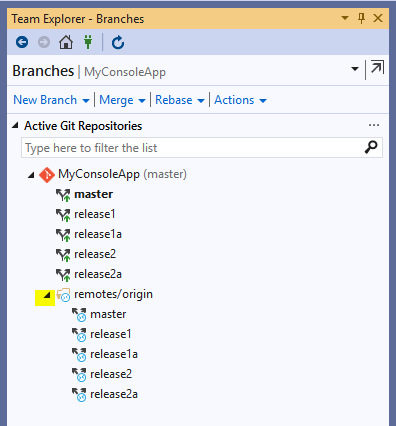
In this case, we have several branches – Master, release1, release1a, etc. We also have remote GitHub branches. We see the active branch in brackets, in this case master:
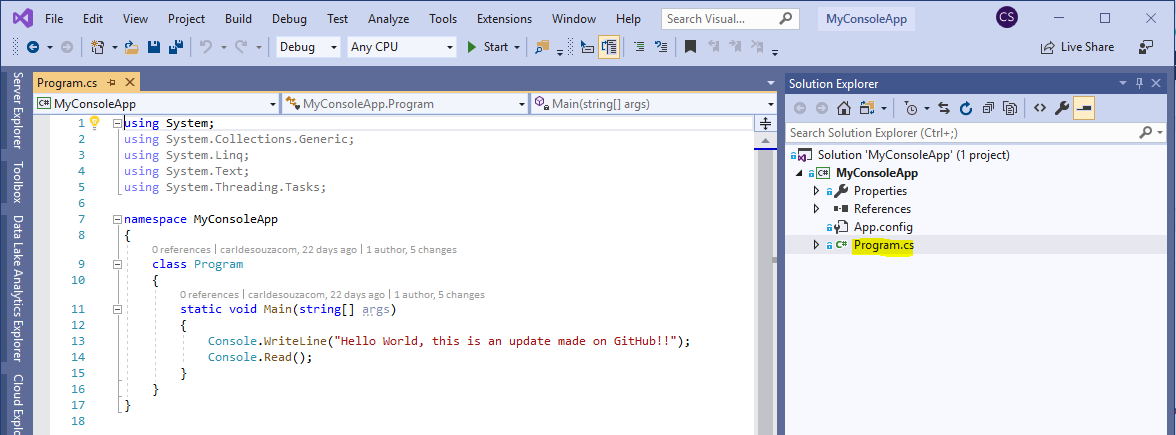
Let’s open the Program.cs file in the solution:
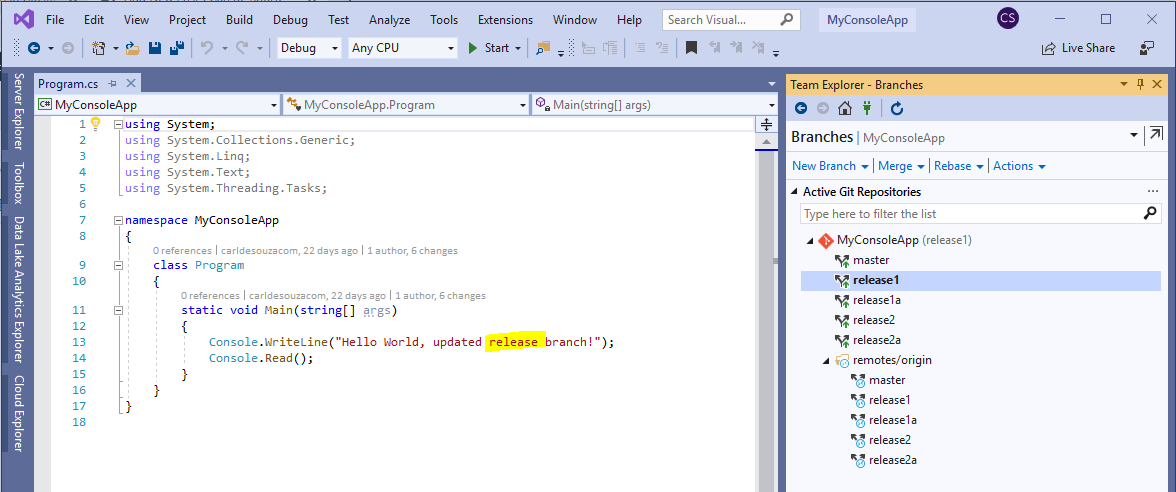
Now, if we select Release1 on the right, we see the file updated to that release version:
Now, if we select Release2 on the right, we see the file updated to that release version:
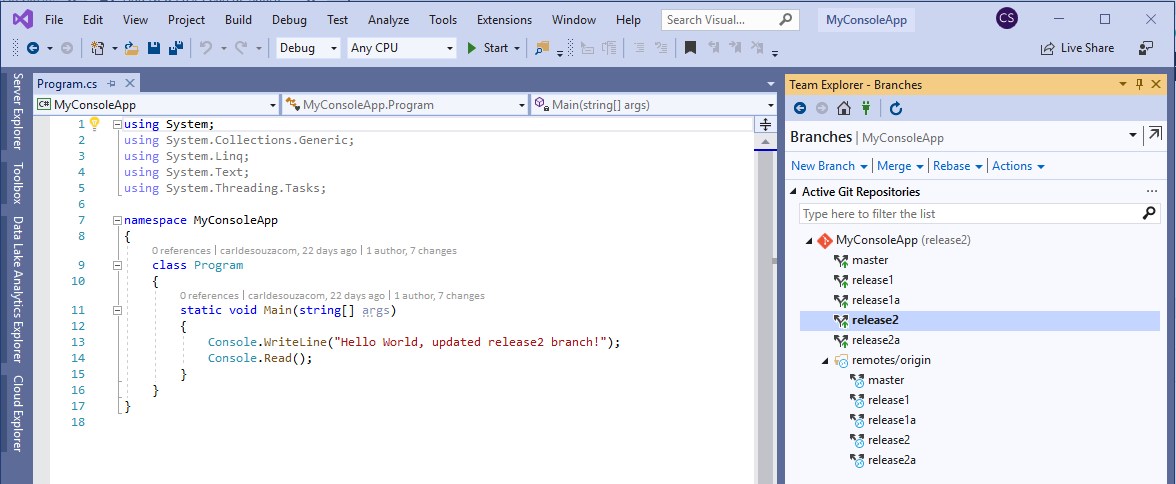
That’s it, you can move between branches this way.
I AM SPENDING MORE TIME THESE DAYS CREATING YOUTUBE VIDEOS TO HELP PEOPLE LEARN THE MICROSOFT POWER PLATFORM.
IF YOU WOULD LIKE TO SEE HOW I BUILD APPS, OR FIND SOMETHING USEFUL READING MY BLOG, I WOULD REALLY APPRECIATE YOU SUBSCRIBING TO MY YOUTUBE CHANNEL.
THANK YOU, AND LET'S KEEP LEARNING TOGETHER.
CARL


