Power Apps has traditionally been associated with low-code development. Code Apps introduce a different approach: building Power Apps as React-based single-page applications using pro-code, while still taking advantage of the Power Platform.
What are Code Apps?
A little background, one of the strengths of Power Apps has been it’s low code tools, with the ability to create applications quickly through it’s Maker UI. These apps could be extended through pro-code at various entry points. With Code Apps, we now have the ability to create stand-alone Power Apps, which take advantage of the Power Platform, through pro-code. These code apps are React-Based SPAs (Single Page Applications).
There’s 3 ways to build a code app:
| Approach | Starting Point | Best For |
| From a template | Empty React app | Developers learning Code Apps |
| AI-generated | Prompt + Code Apps skill | Rapid application development |
| Existing Dataverse data | OOTB/custom tables | Business applications |
We will take a look at each approach.
Let’s go through an example of how to build a Code App.
The high level steps:
- Enable Code Apps in PPAC
- Install the prerequisites
- Create the app template in a project folder
- Install Power Apps CLI
- Install Power Apps package
- npm i and install/approve any missing packages
- pa app init, provide Environment Id and App Name
- npm i and install/approve any missing packages
- pa app run
- Open your CLI, E.g. Copilot or Claude
- /code-apps-preview:create-code-app
- Describe the app (paste or enter prompt)
- Approve the design
- Let the code run
- View the app
- Reiterate
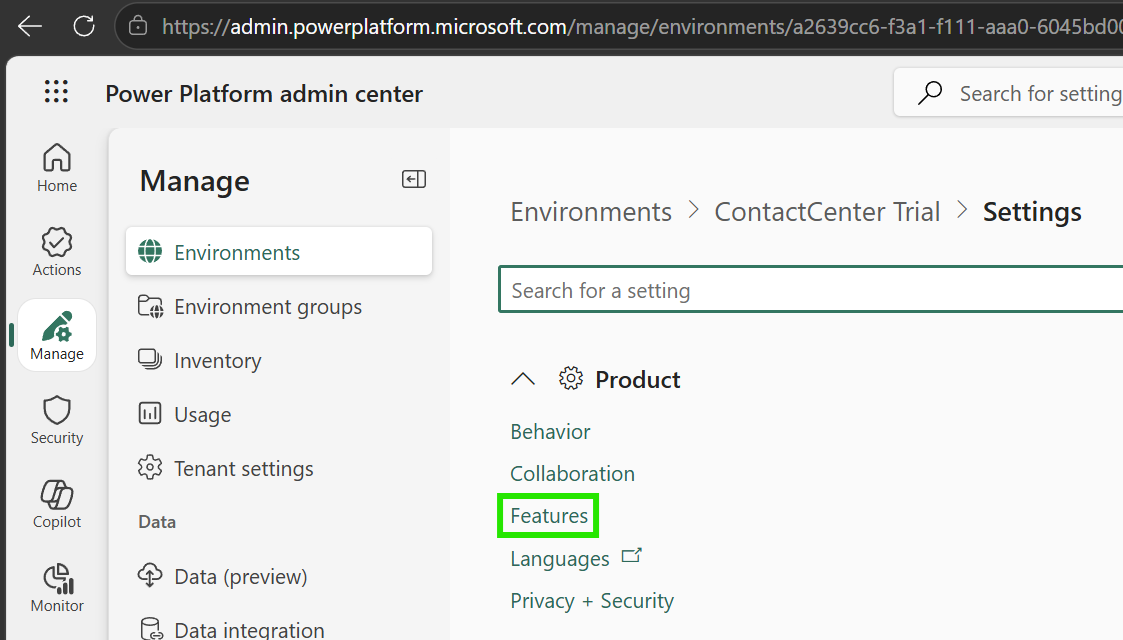
First, you will need to go to the Power Platform Admin Center at https://admin.powerplatform.microsoft.com, select your org, then go to Settings->Product->Features:
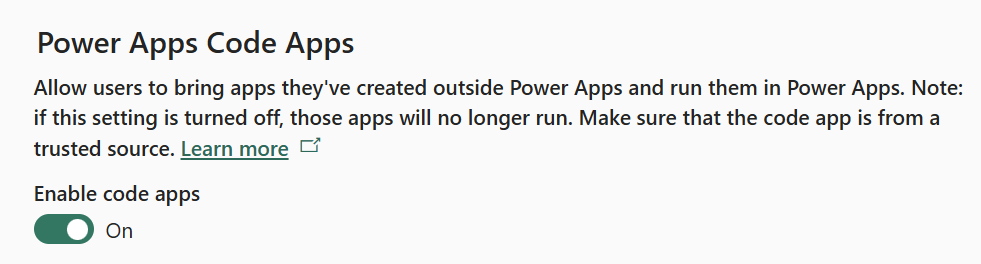
Find Power Apps Code Apps and turn this on:
Next, you will need the following installed locally:
- Node.js LTS
- Git
- VS Code (or another editor. We will use VS Code)
Next, create a solution in the Maker portal at https://make.powerapps.com. I will call mine CodeAppsHelloWorld.
Microsoft has a Quick Start app that is in their documentation here that I will go through, but I will also extend that app. Their instructions may change, but I’ll follow the current ones at time of writing here.
Open a terminal and type the following. Note I am naming my app helloworld. The command will create a new folder and install the code there:
npx degit github:microsoft/PowerAppsCodeApps/templates/vite helloworld
cd helloworld

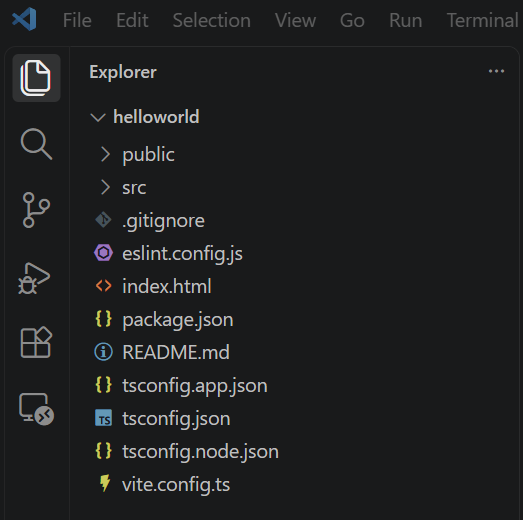
We can now go into the directory and open it in VS Code. We can see the following files have been created:
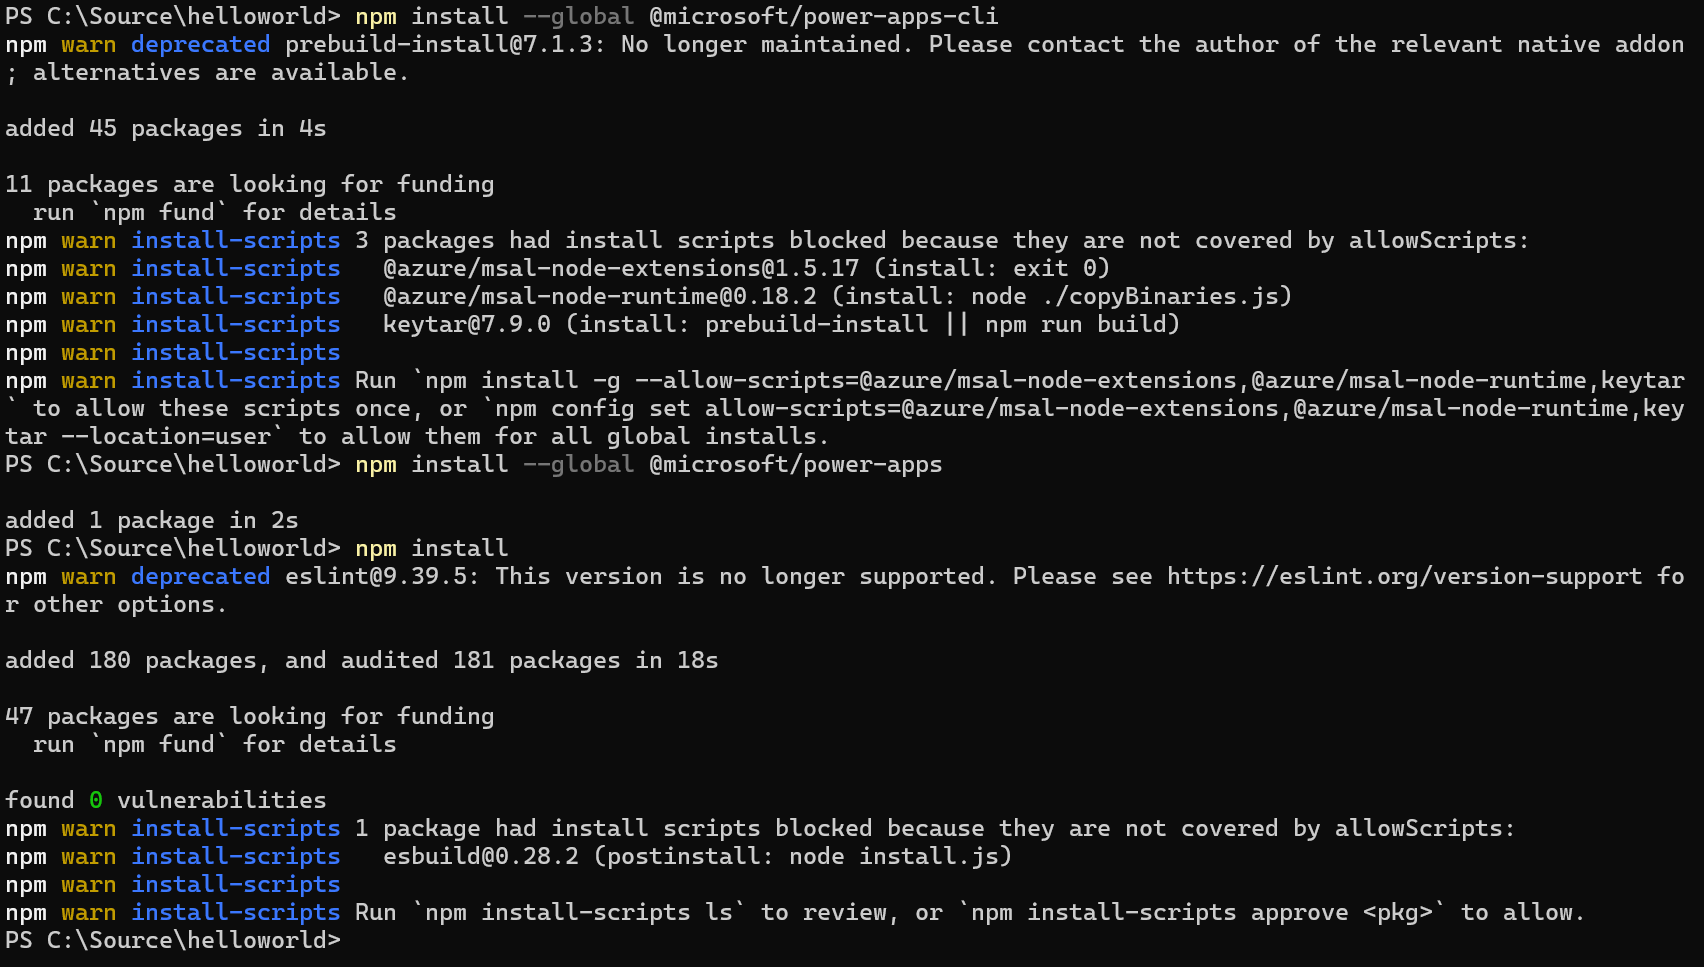
Next, let’s install the dependencies.
npm install --global @microsoft/power-apps-cli
npm install --global @microsoft/power-apps
npm install
And run below:
pa app init
You will need to provide your Environment Id, which you can get from the Power Platform Admin Center (Manage->Environments->Your Environment->Under Details), then provide a name for the app (Hello World) and sign in when prompted:
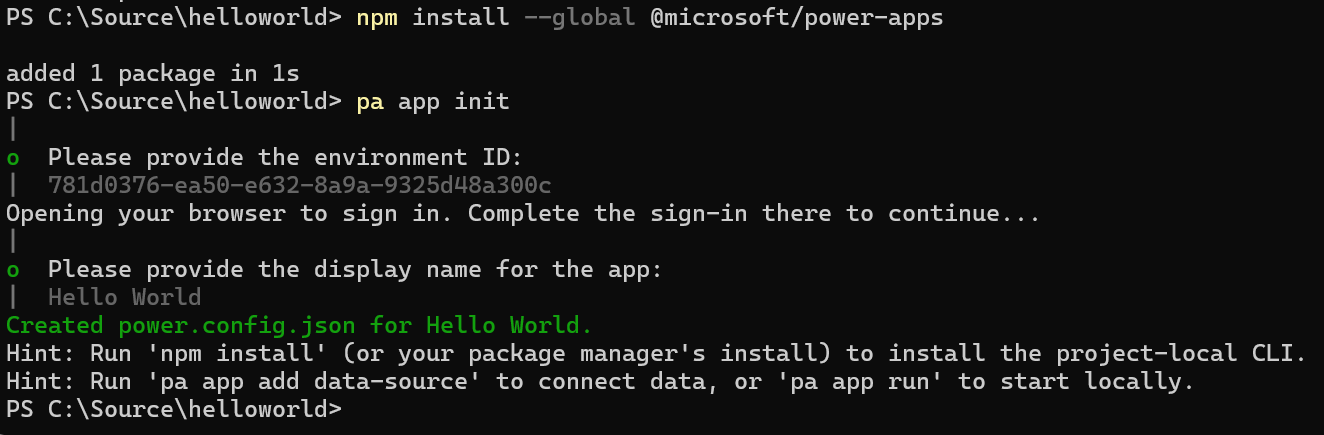
Run npm install. You may need to approve blocked scripts through npm install-scripts approve <pkg>, but of course review anything you approve.
We can now run the app:
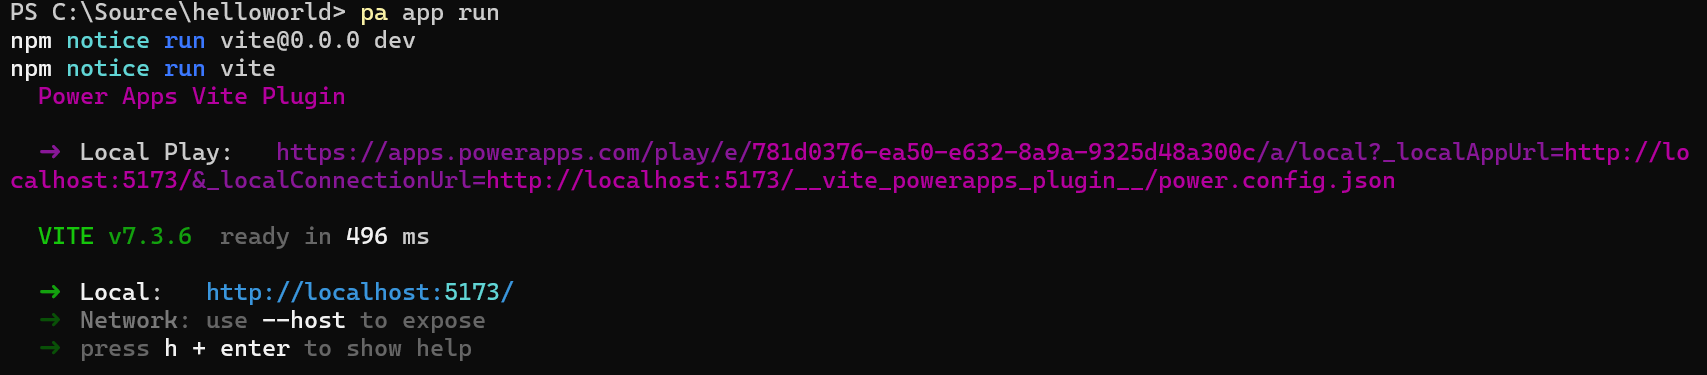
pa app run
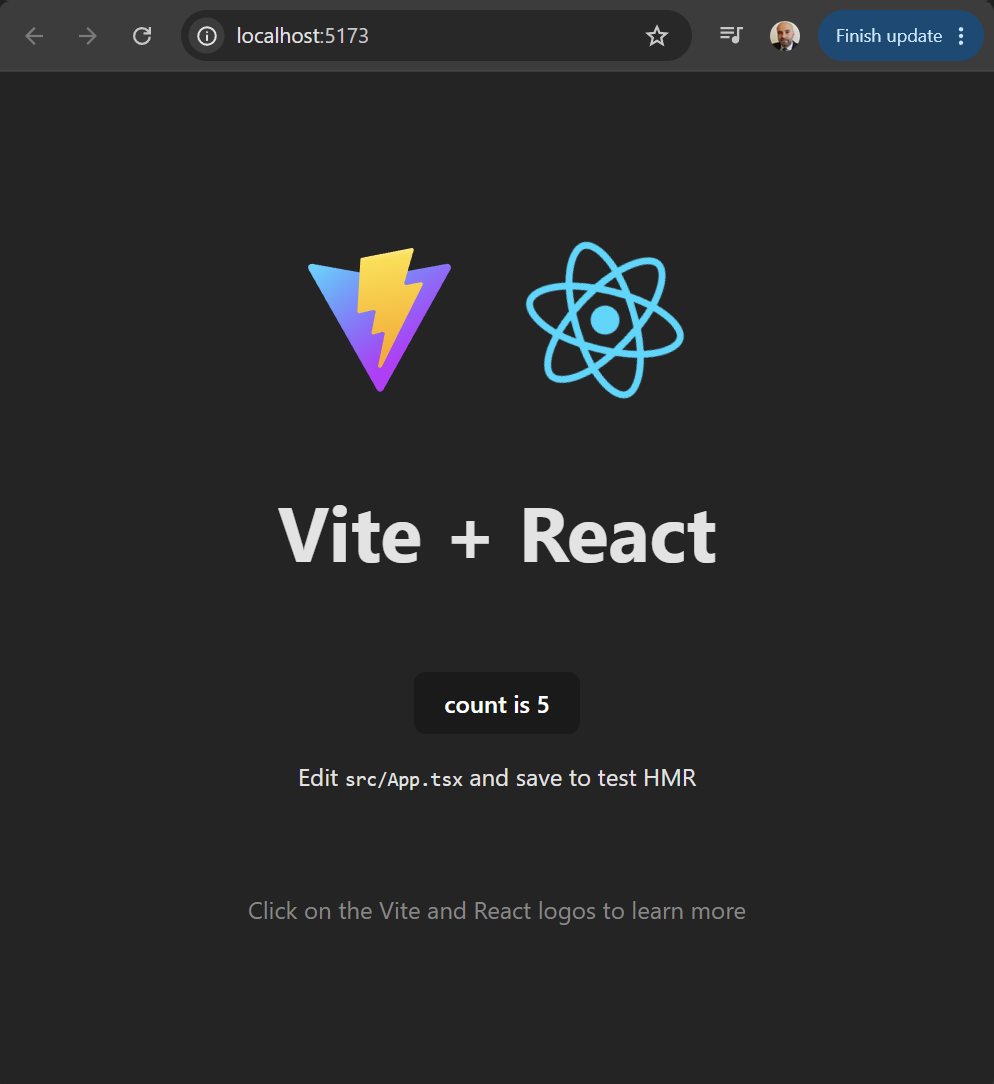
Click on the link to open the page in localhost if it doesn’t open automatically:
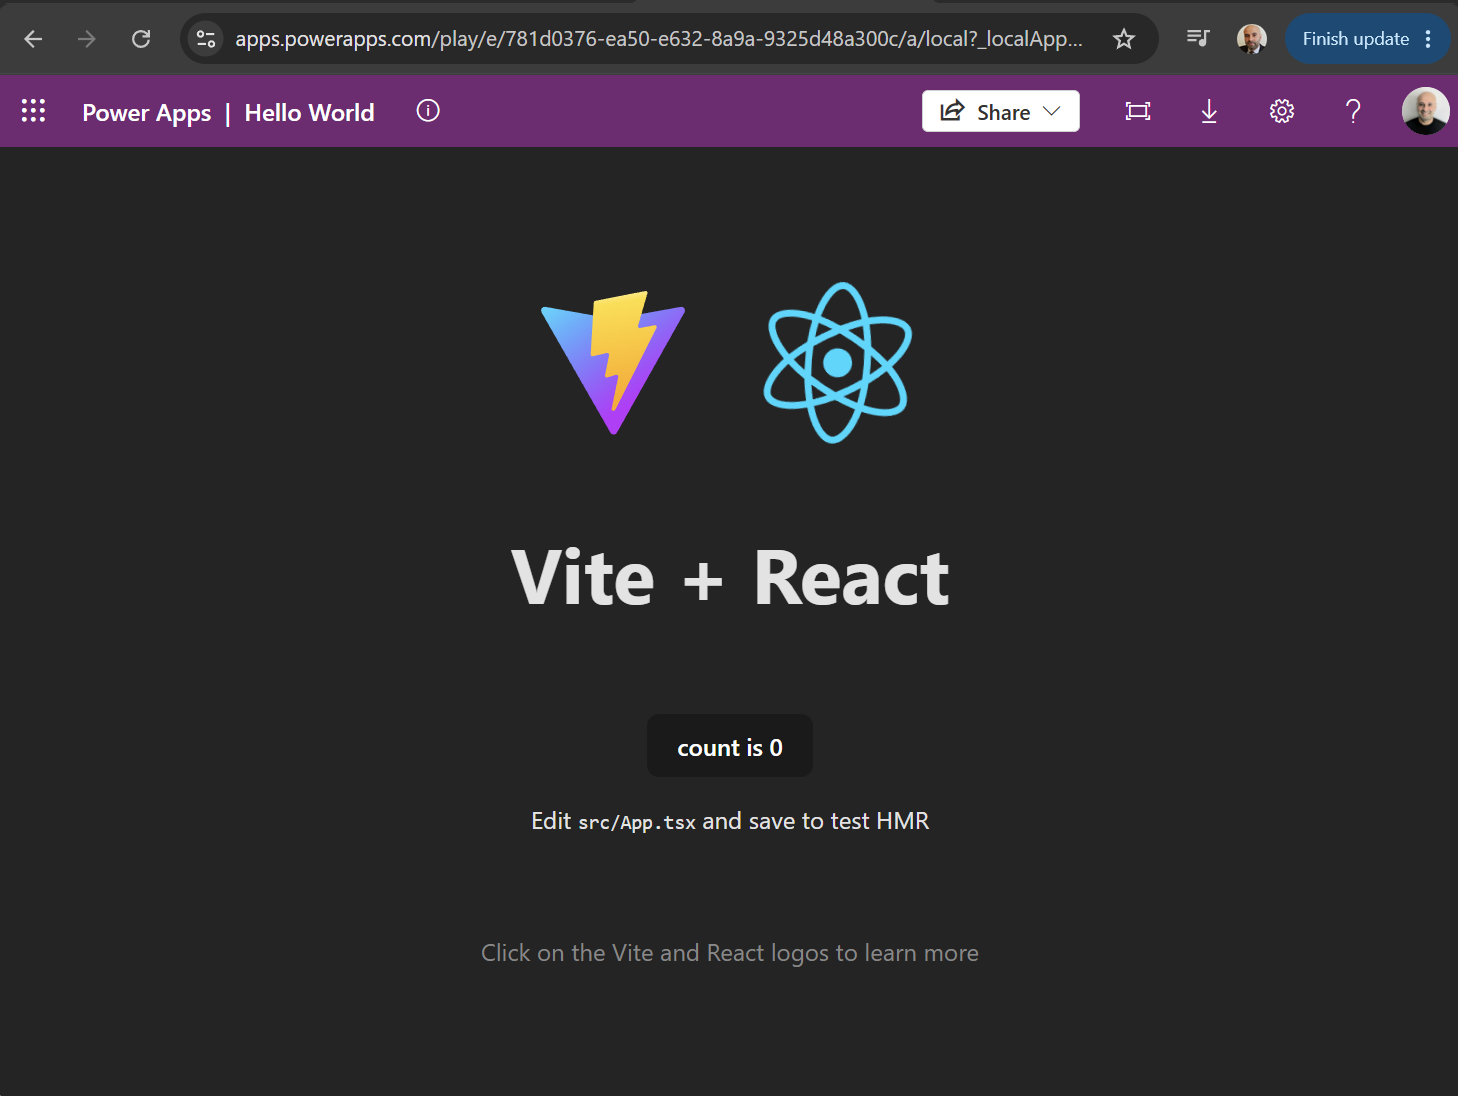
We see our new app:
Now, on the Power Platform GitHub located at https://github.com/microsoft/power-platform-skills, we have several Skills and Plugins that can help us with development. We’re going to use the code-apps plugin:
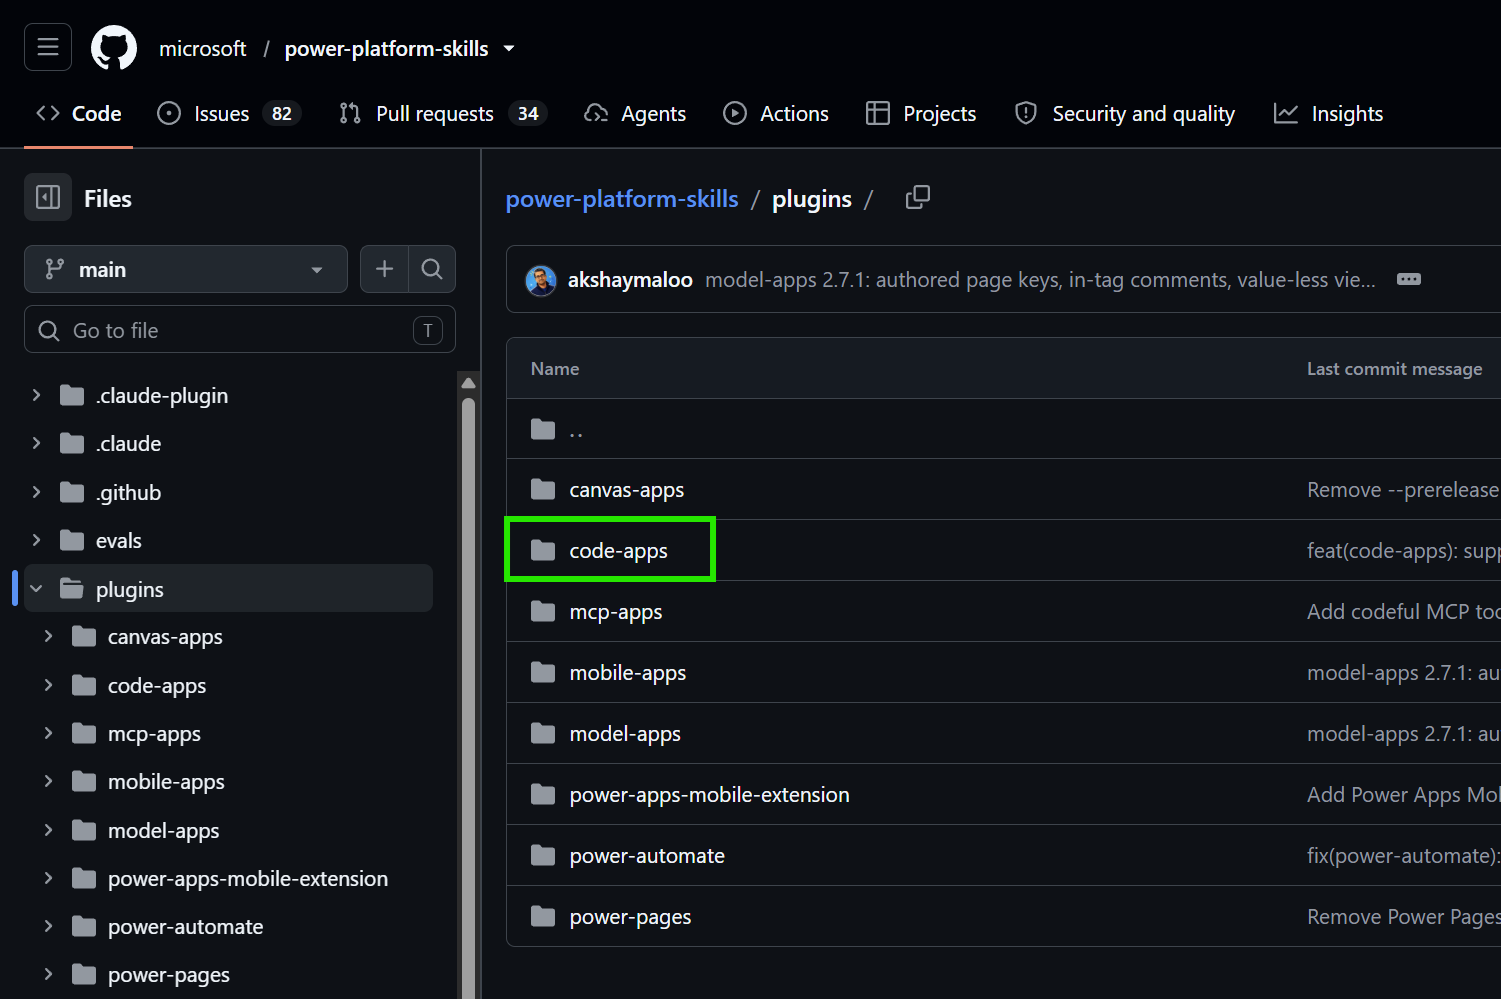
Now in VS Code, let’s go through the example of using Copilot CLI to build out our app. Go to the Terminal and type copilot, and the CLI will open (follow these steps to enable CLI if you haven’t already):
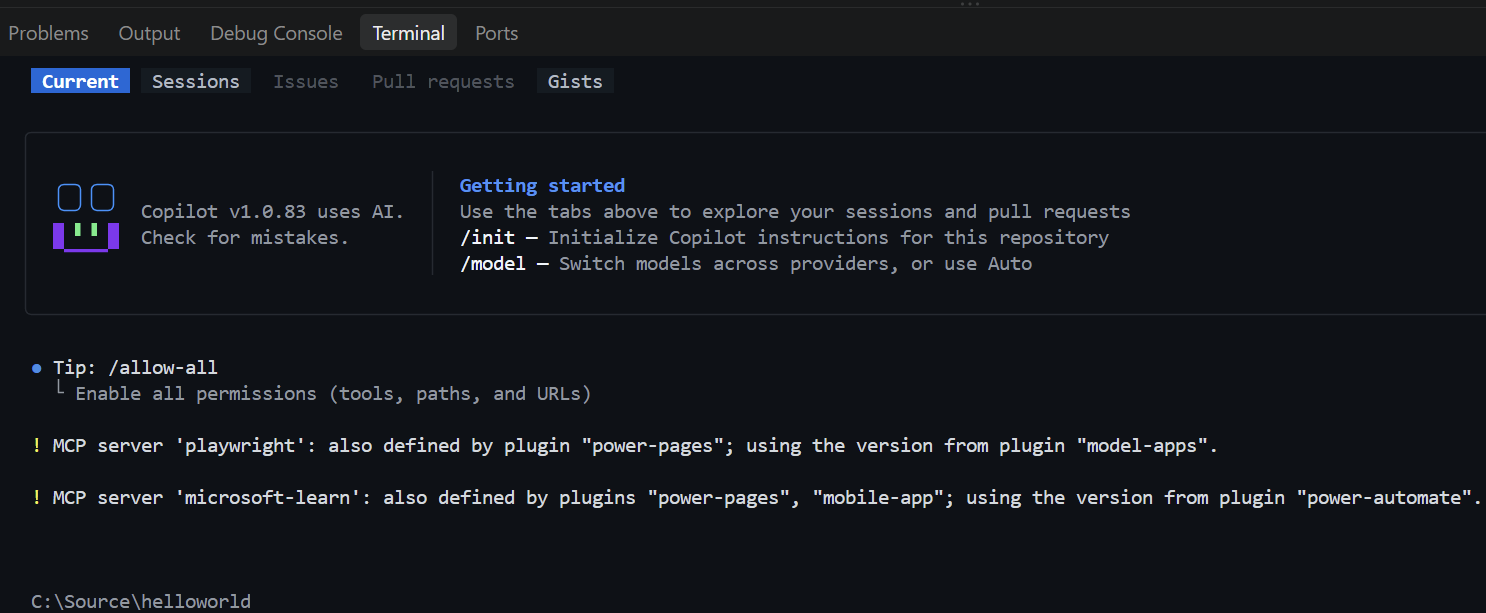
You should have the plugin installed through the instructions in the CLI link. Type /code-apps and you should see a list of the code-apps-preview skills:

Let’s create a code app that is an Event Explorer for conferences.
We start with:
/code-apps-preview:create-code-app

I’m prompted to sign into Azure:
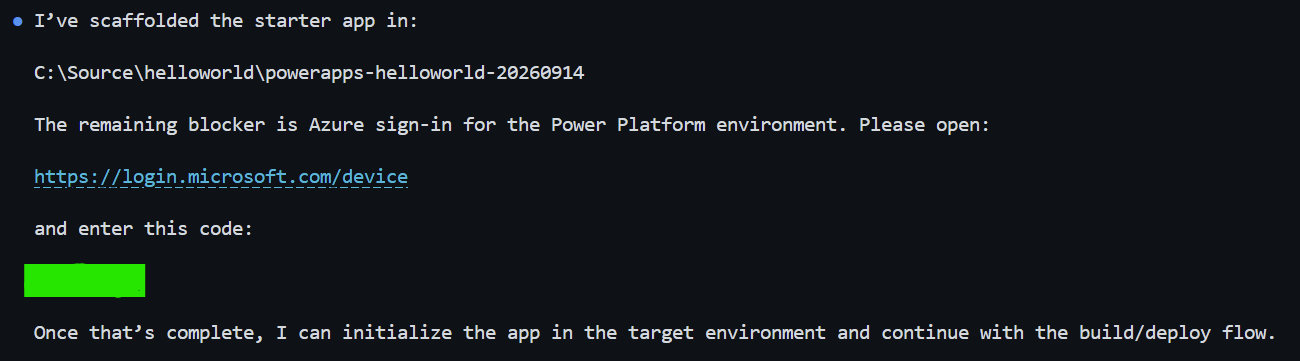
And we’re prompted to provide the Environment Id of the Power Apps org, which you can find in PPAC:

When prompted “What would you like to build?”, enter your prompt. In our case:
Build a polished React code app called Event Explorer. Use clearly labeled fictional conference data.
Include searchable session cards, topic filters, speaker profiles, a personal agenda with conflict detection,
and an interactive venue map. Use a vibrant, mobile-friendly design. Let users add and
remove sessions and remember their agenda locally.
Our app is created:
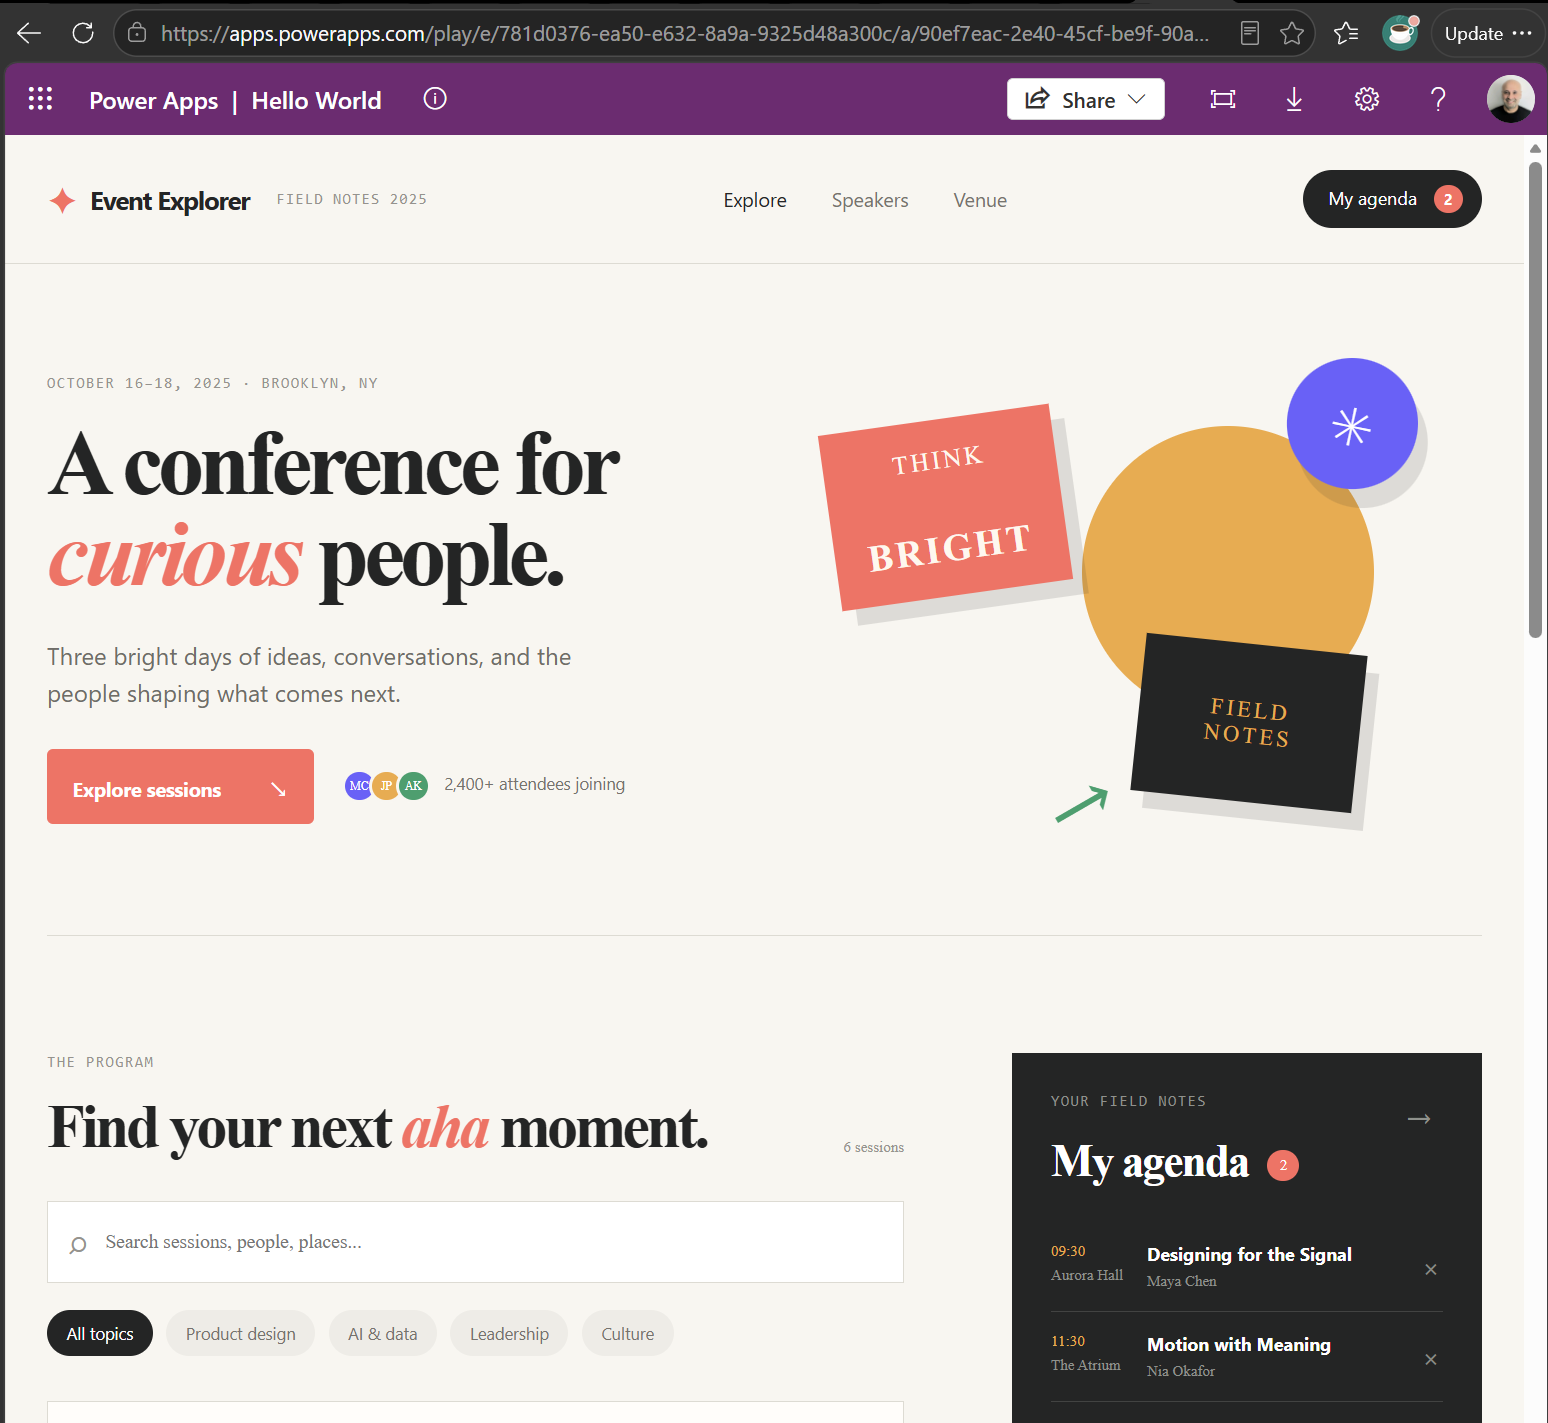
Right now, the app does not take advantage of Dataverse tables:

We can iterate to create tables:

It comes up with a schema:
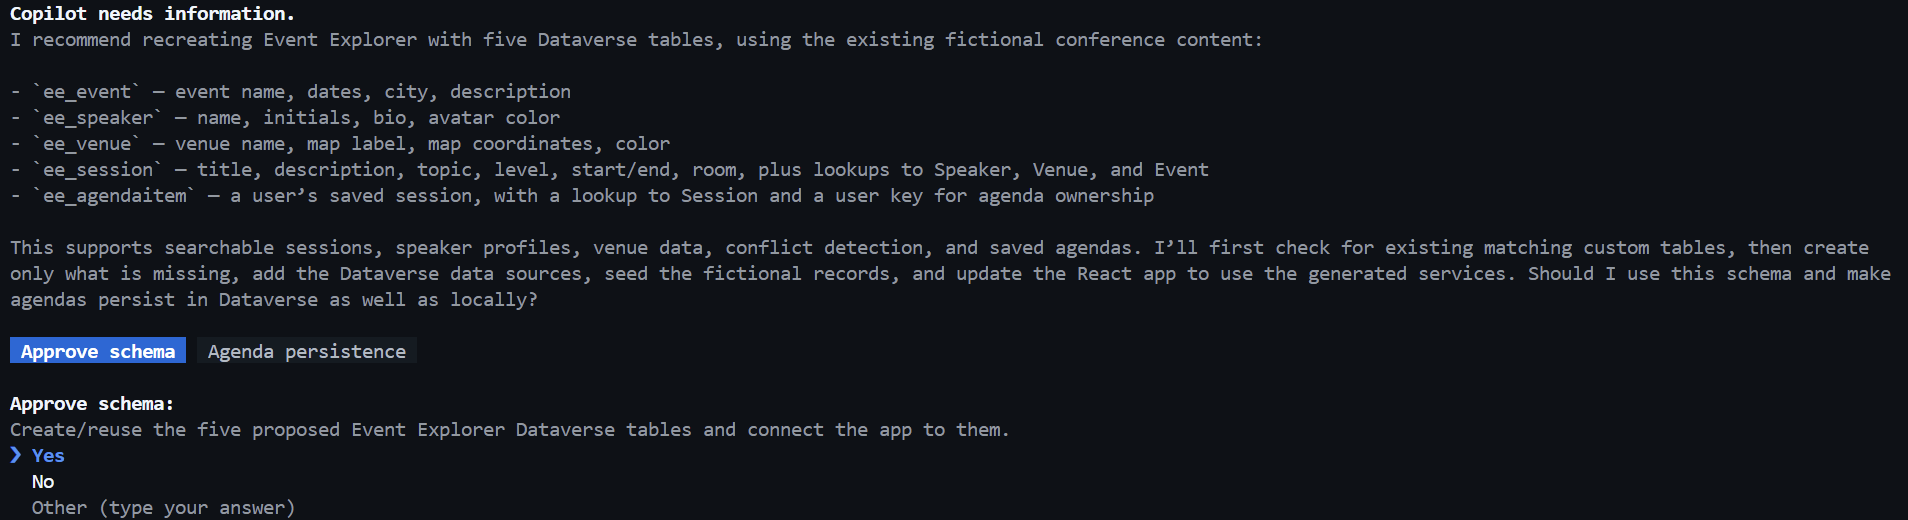


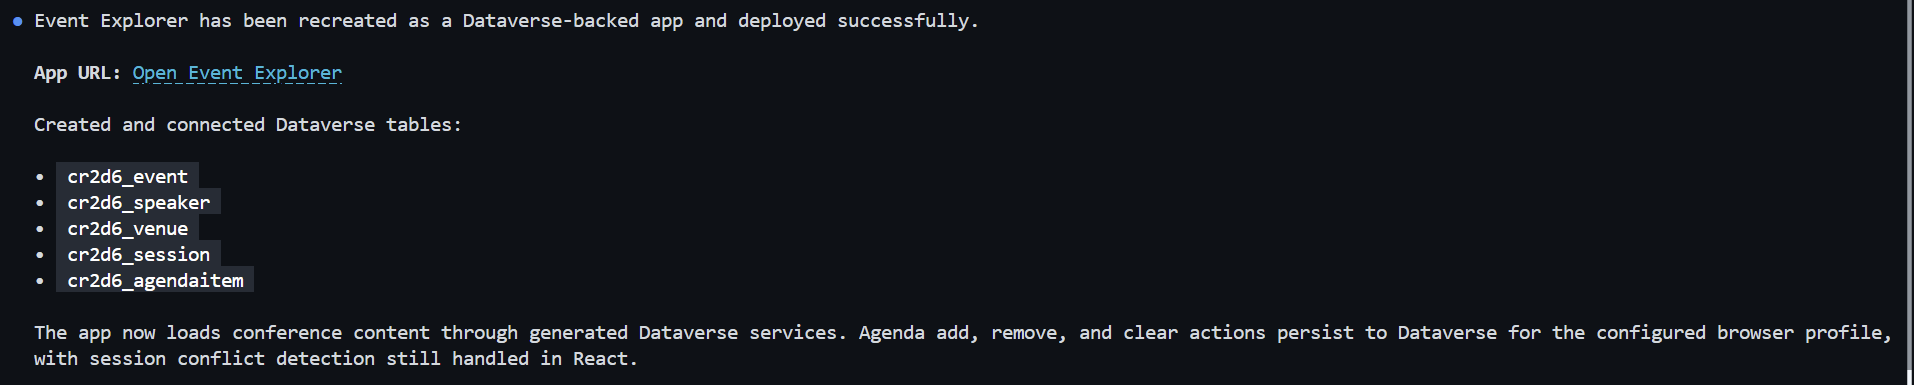
We see the tables now in Dataverse:
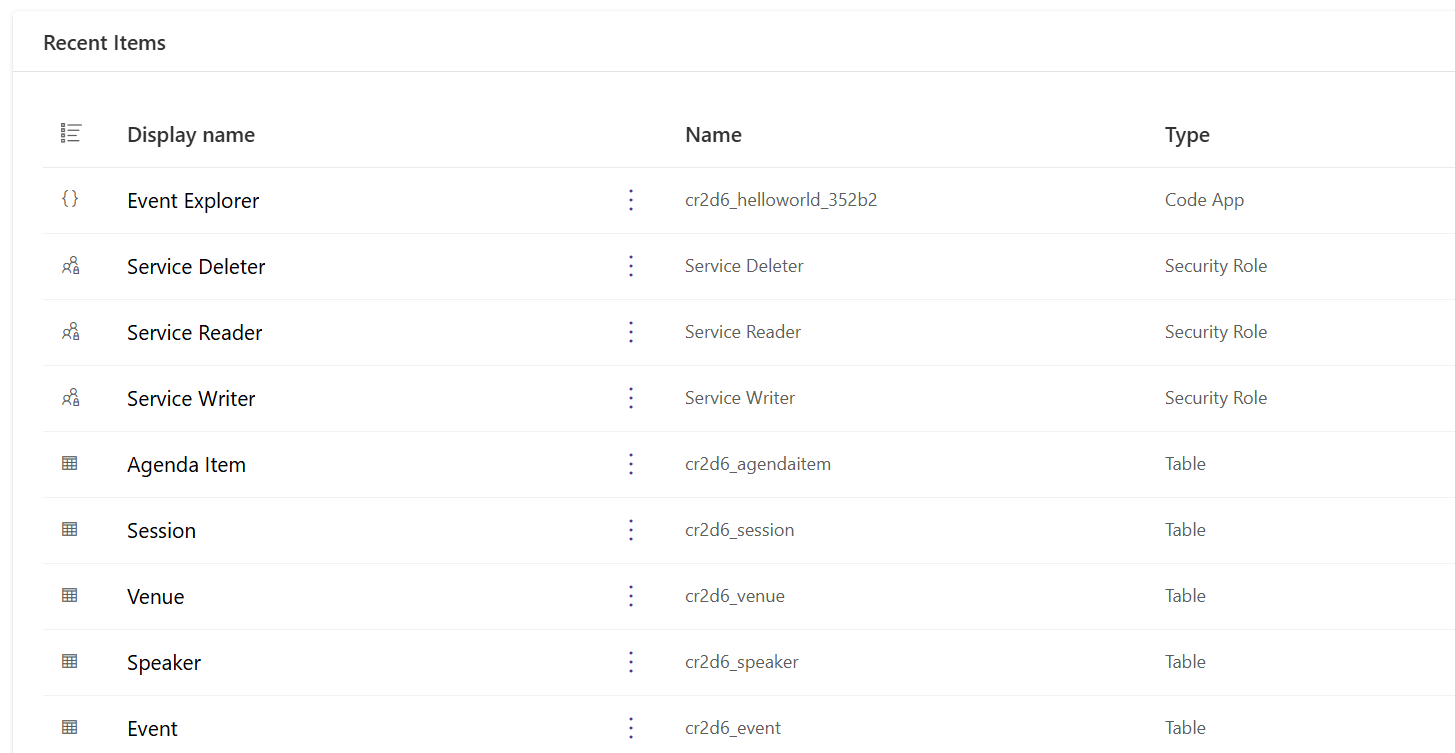
And our Code App is in Power Apps:

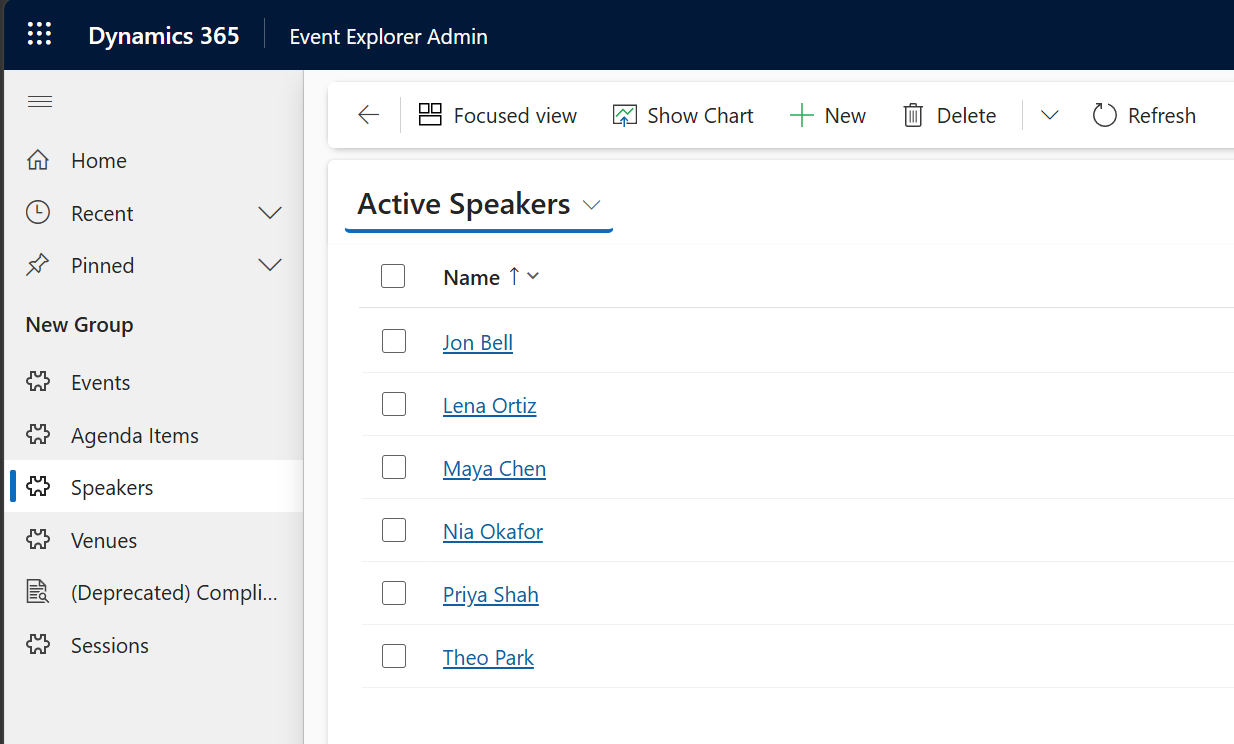
But how about an interface to manage everything? Our AI says that doesn’t exist but would be a good next step:

Let’s click Yes. In my case, a Playwright session opens and the AI navigates to the Power Apps Maker portal and builds an app:
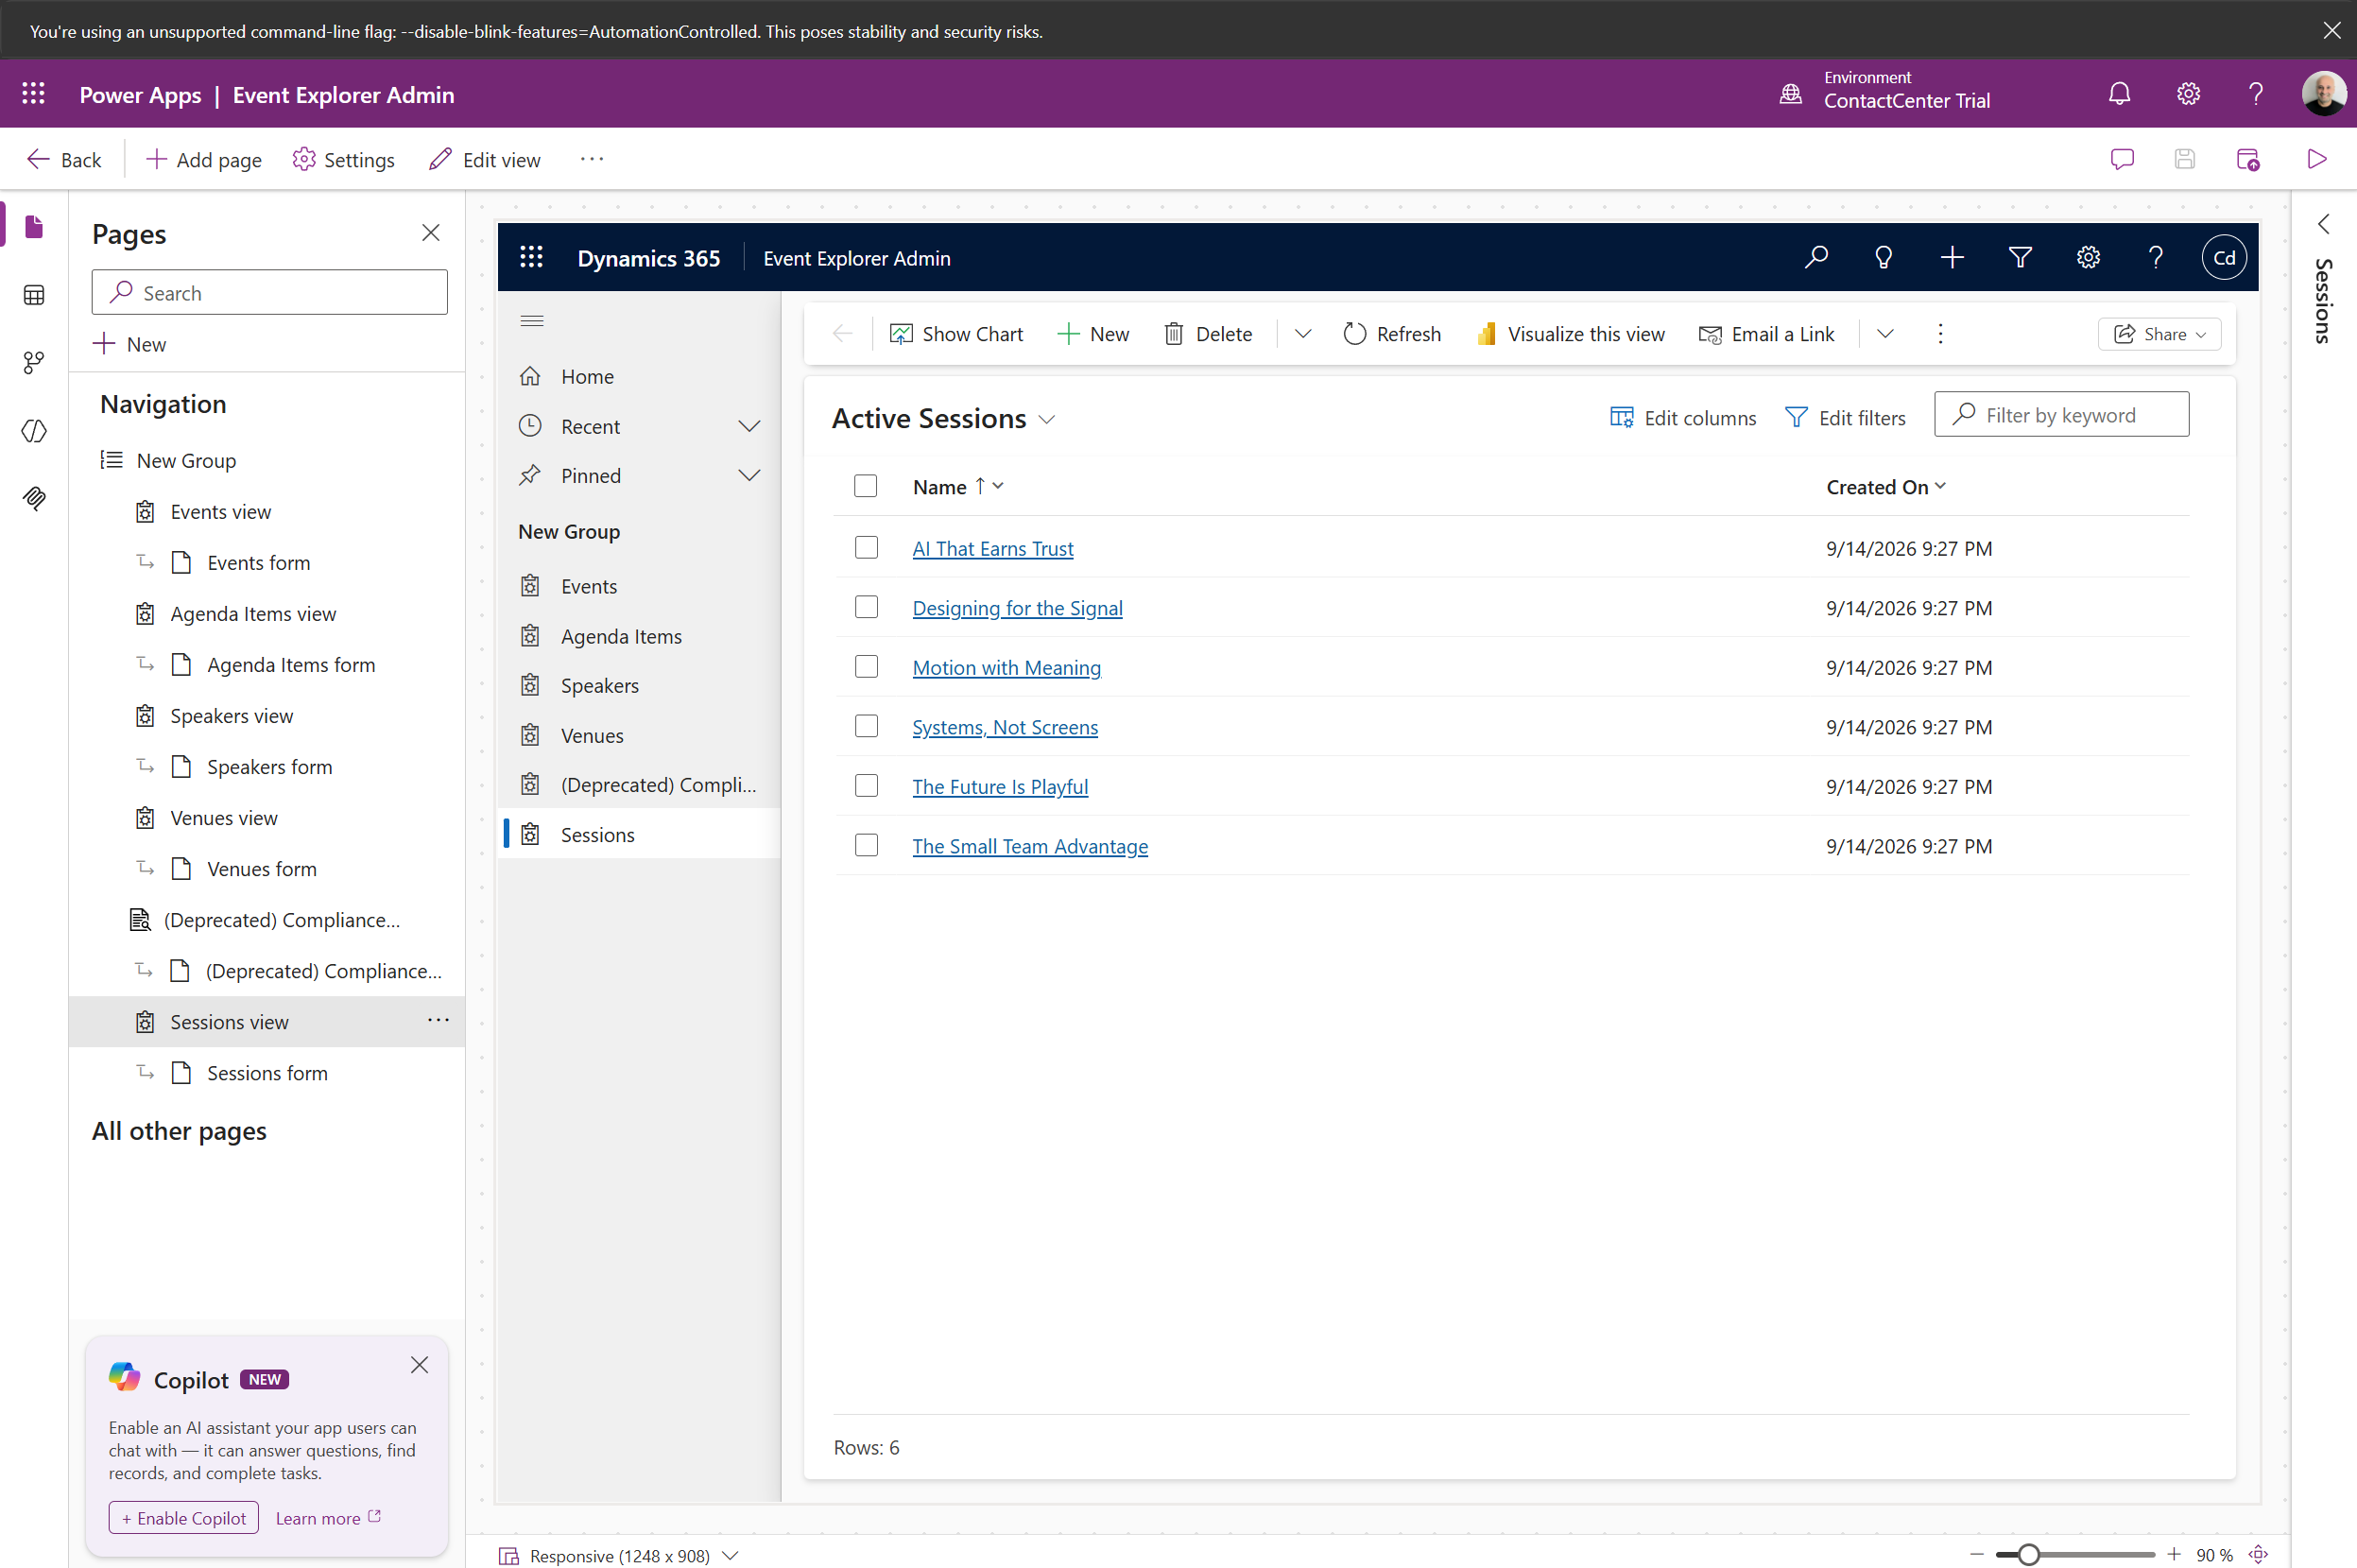
We have a pretty cool app that we can use to manage the code app:
But how about the reverse, have a data model already ready and then building the code app on top of it? Let’s do another example. I’m going to build an app called the a “Sales Opportunity Command Center”, which is a focused app that sits on top of the existing Sales Hub/Dataverse tables. The app will leverage OOTB tables:
- Opportunity — value, stage, estimated close date, probability
- Account — customer information and relationship
- Contact — key people involved
- Activity — calls, emails, appointments, tasks
- Opportunity Product — products/quantities/revenue
- Sales team/user — ownership and accountability
Let’s create a new folder,
The prompt:
Create a code app called Sales Opportunity Command Center that uses the existing Dynamics 365 Sales Hub / Dataverse tables and data. The purpose of the app is to help salespeople quickly identify which opportunities need attention and determine the next best action. Use the existing Sales Hub tables rather than creating duplicate tables. Primarily use:
Main screenCreate a modern sales dashboard with:
Visual designUse a professional Dynamics 365-inspired design. Use:
At the top of the dashboard show KPI cards for:
Important technical requirements
The final result should feel like an intelligent sales cockpit that sits on top of Dynamics 365 Sales and helps a salesperson answer three questions immediately: Which deals need my attention? |
We see the plan:

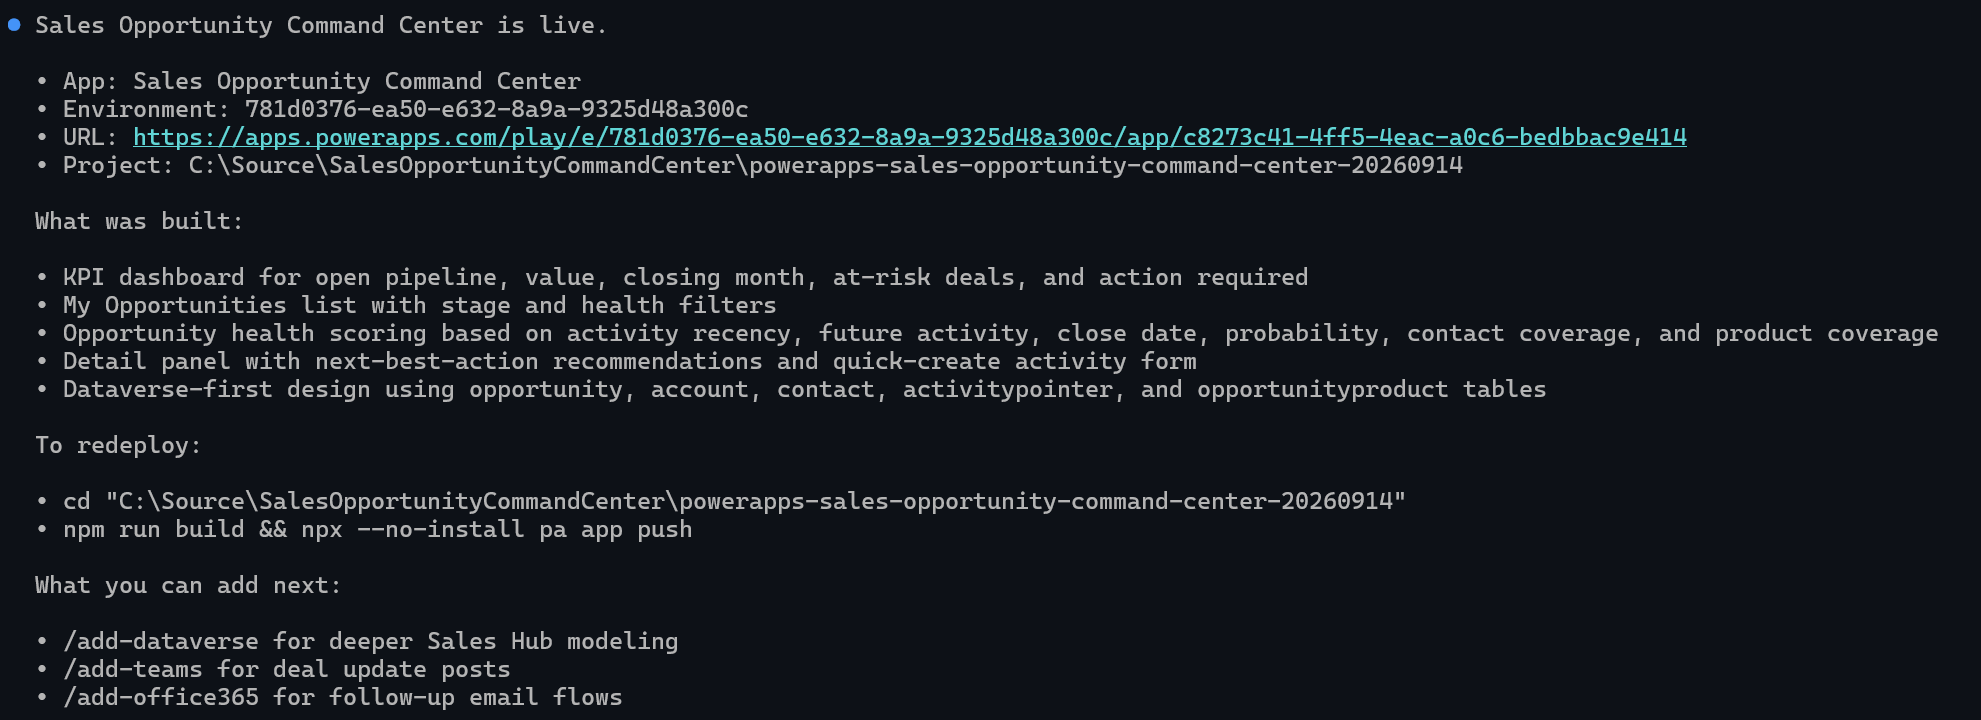
Our app is now live, and the AI is giving suggestions on further improvements:
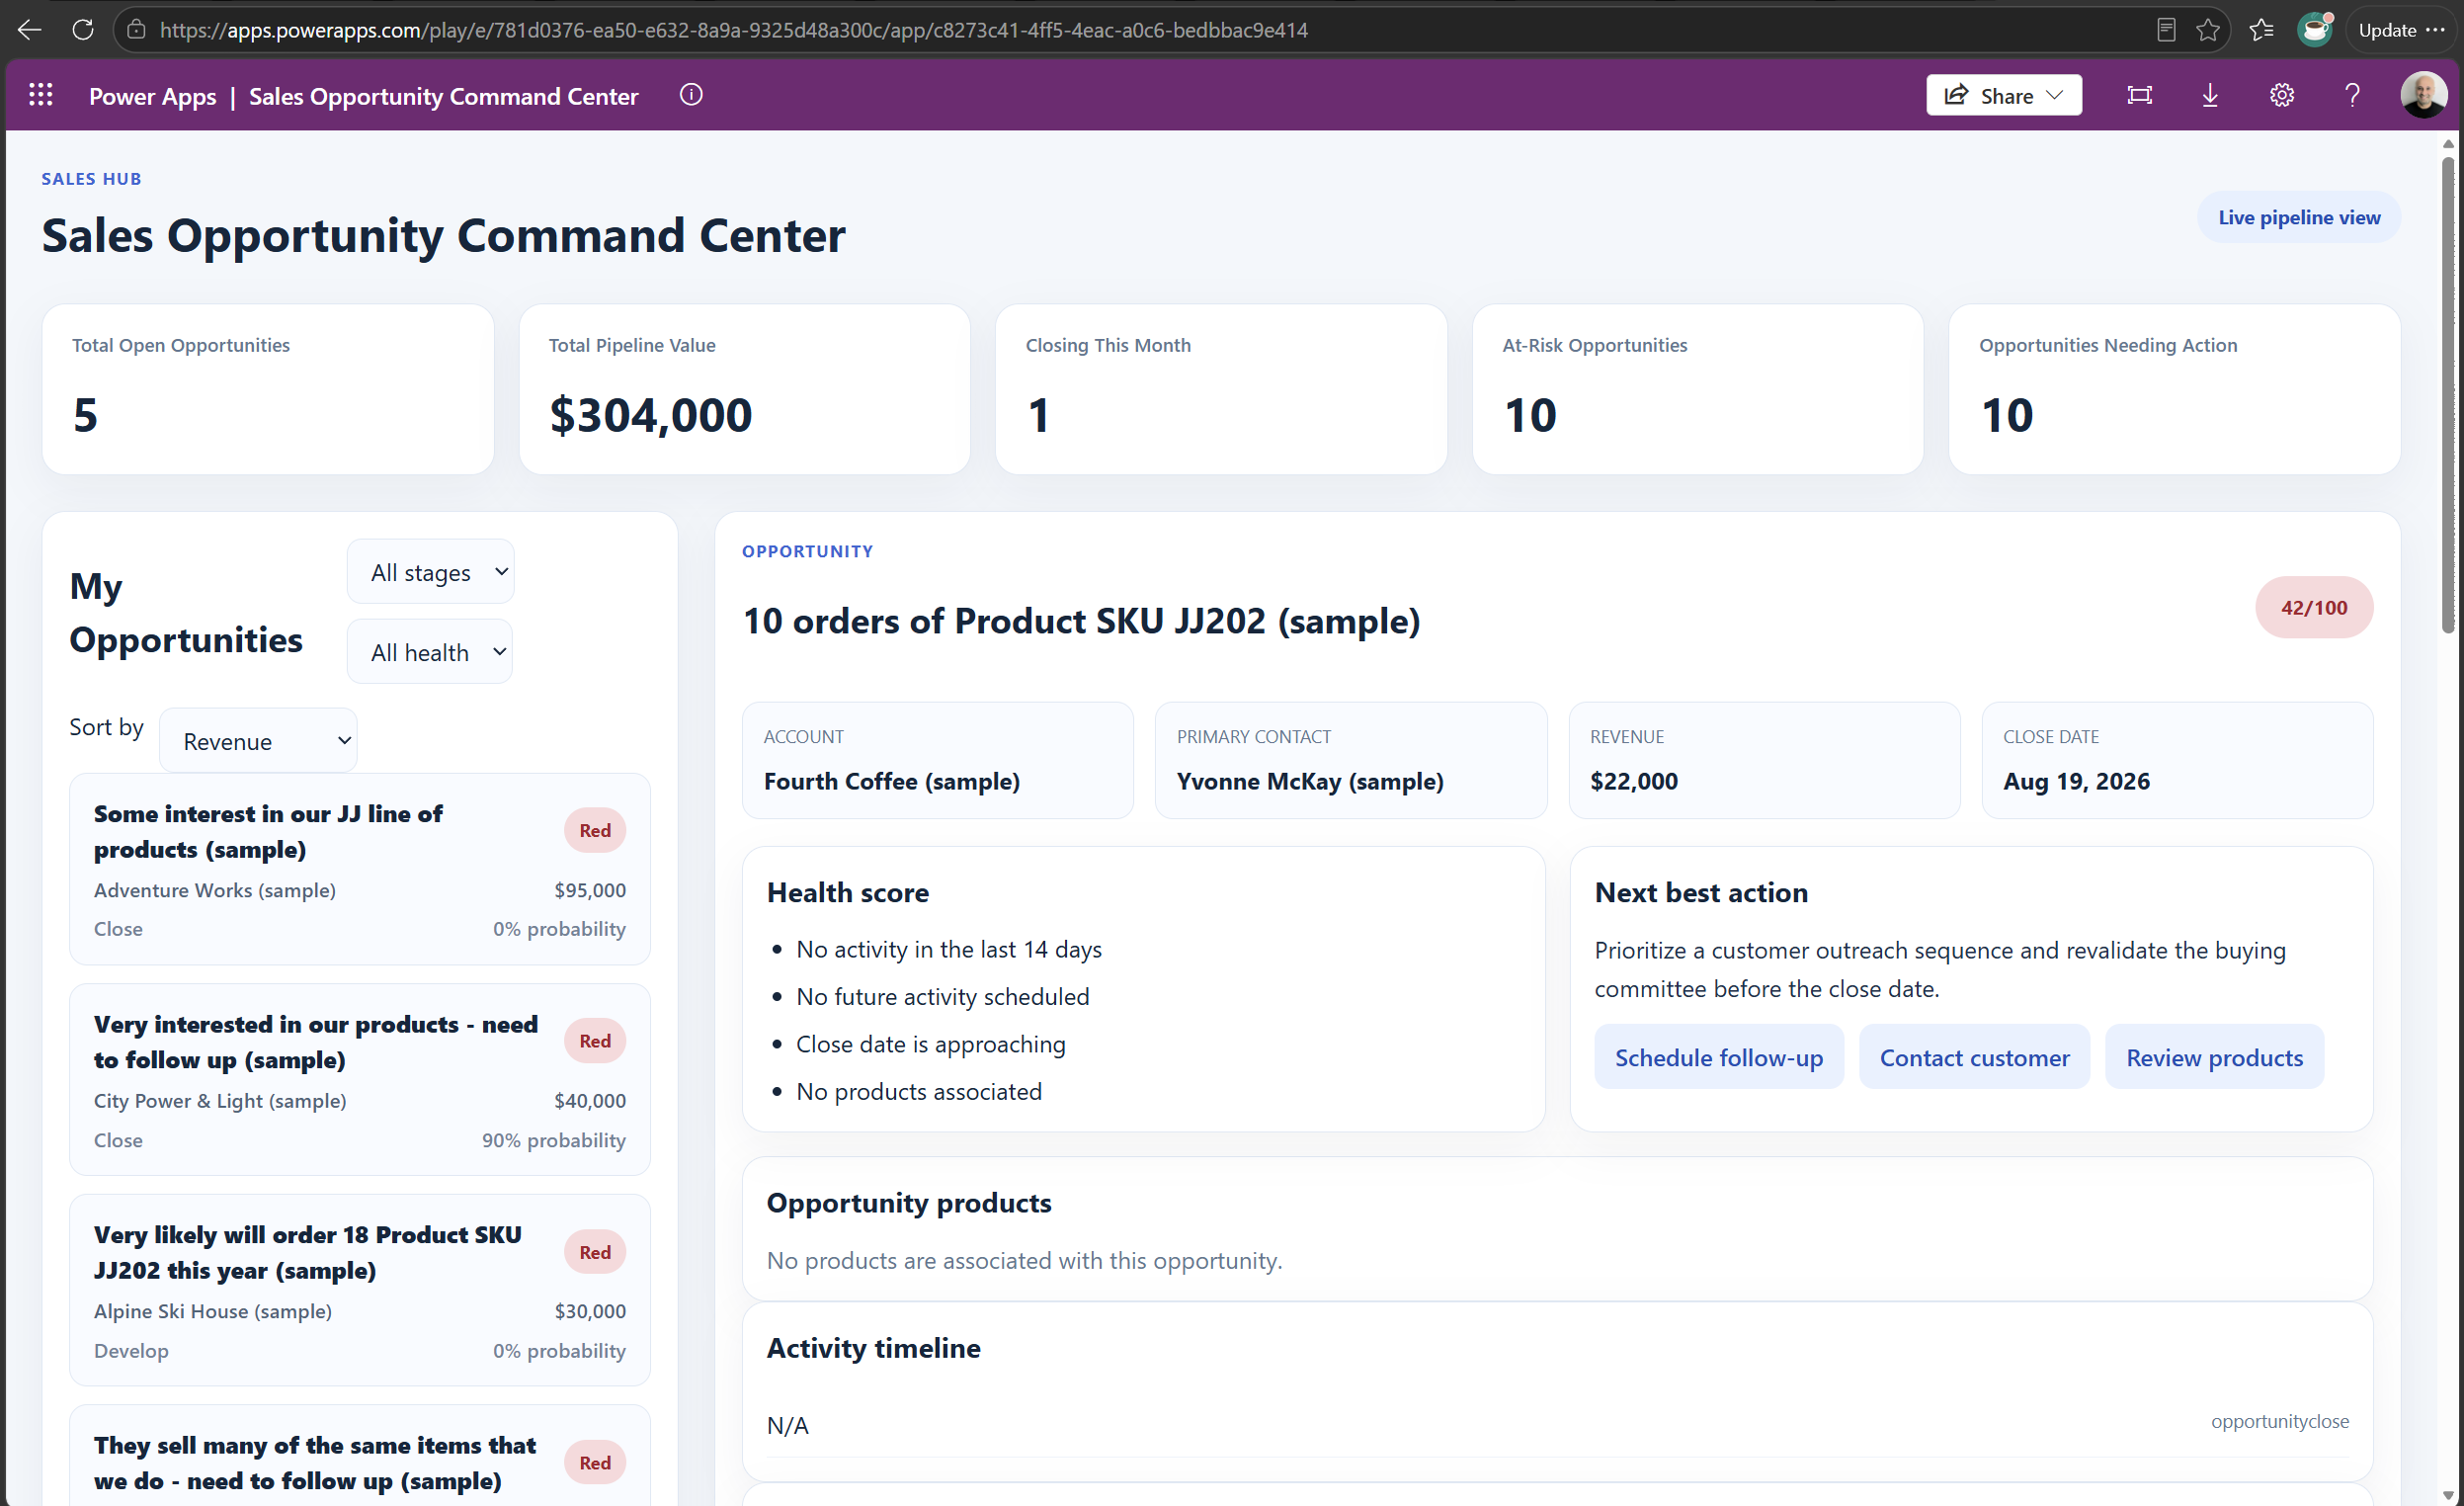
Let’s take a look at it. It looks great!
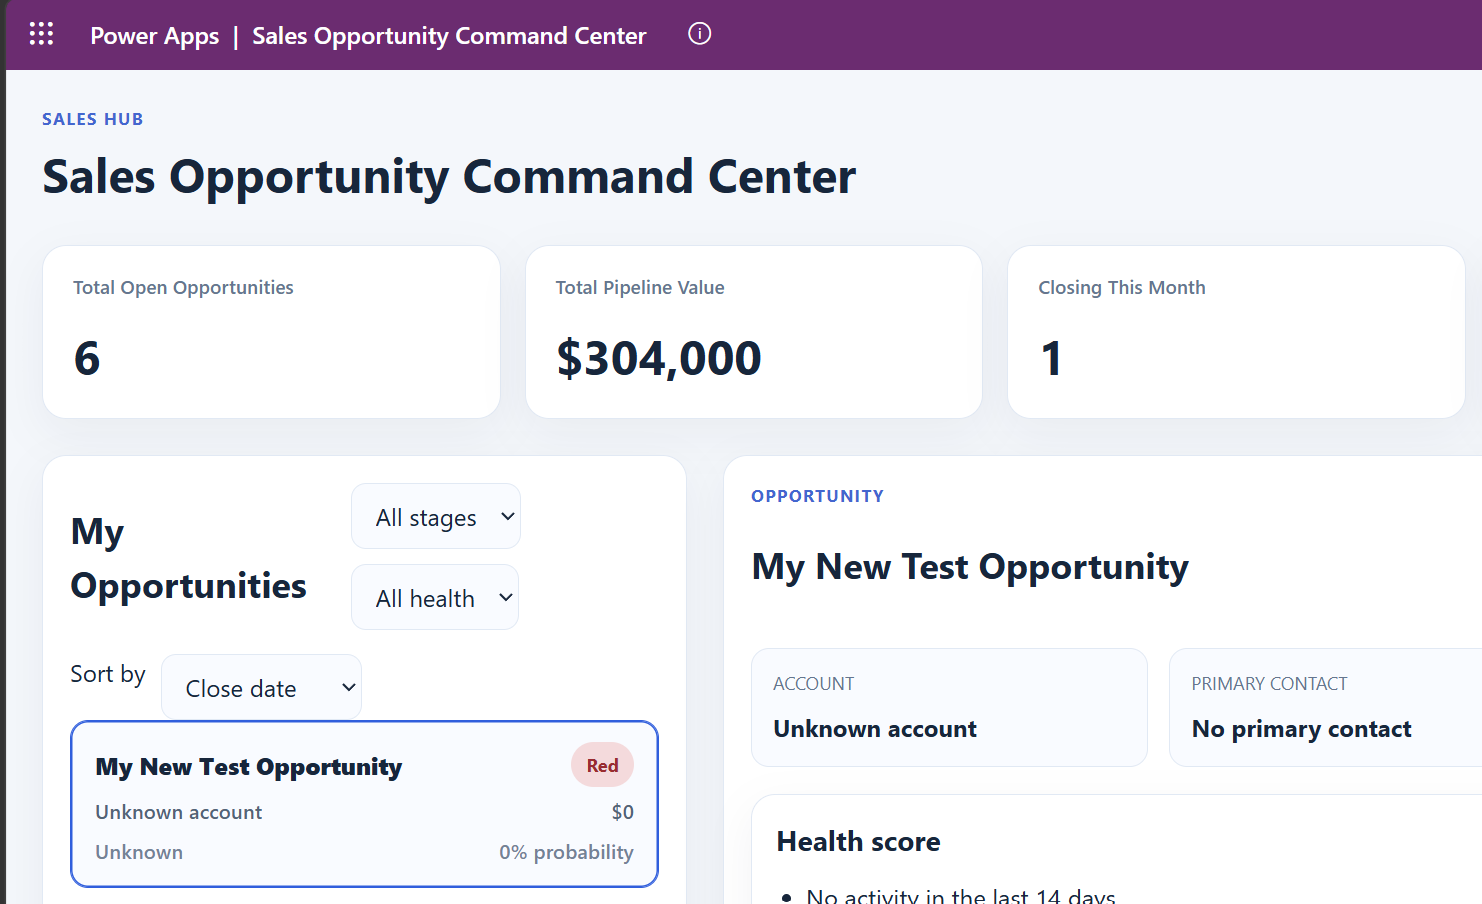
And if we add a new record called My New Test Opportunity:
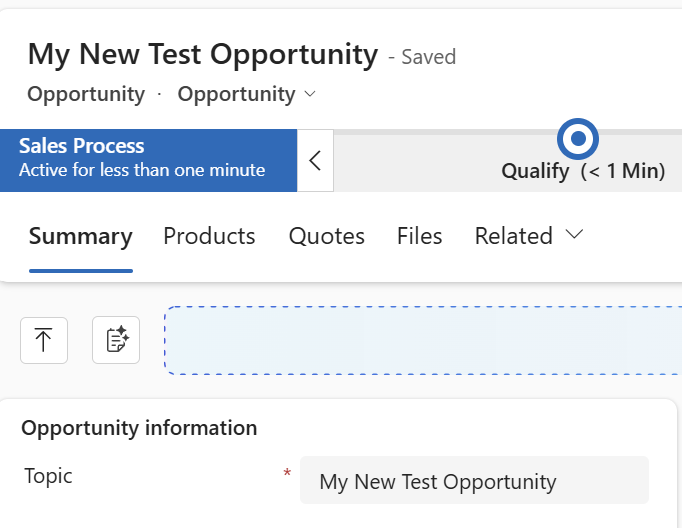
It appears in the app:
You could also start with custom tables and then build your app on top of that.
Code Apps bring a pro-code development model to Power Apps while still allowing developers to take advantage of the Power Platform and Dataverse.
In this walkthrough, we started with a basic React Code App, used AI to generate and iterate on an application, connected it to Dataverse, and then built a more sophisticated application on top of existing Dynamics 365 Sales data.
The interesting part is that we can build a developer-centric experience on top of the Power Platform and existing business data, without having to recreate the underlying platform capabilities. And with AI-assisted development, the distance between describing an application and having a working Code App is getting considerably smaller.
Happy coding!

Explore AI, agents & Microsoft technology.
I share practical ideas, tutorials, and videos about AI, AI agents, Microsoft technologies, and the Power Platform.
Subscribe on YouTube →