In this post, we will look at how to change the Omnichannel Chat widget location.
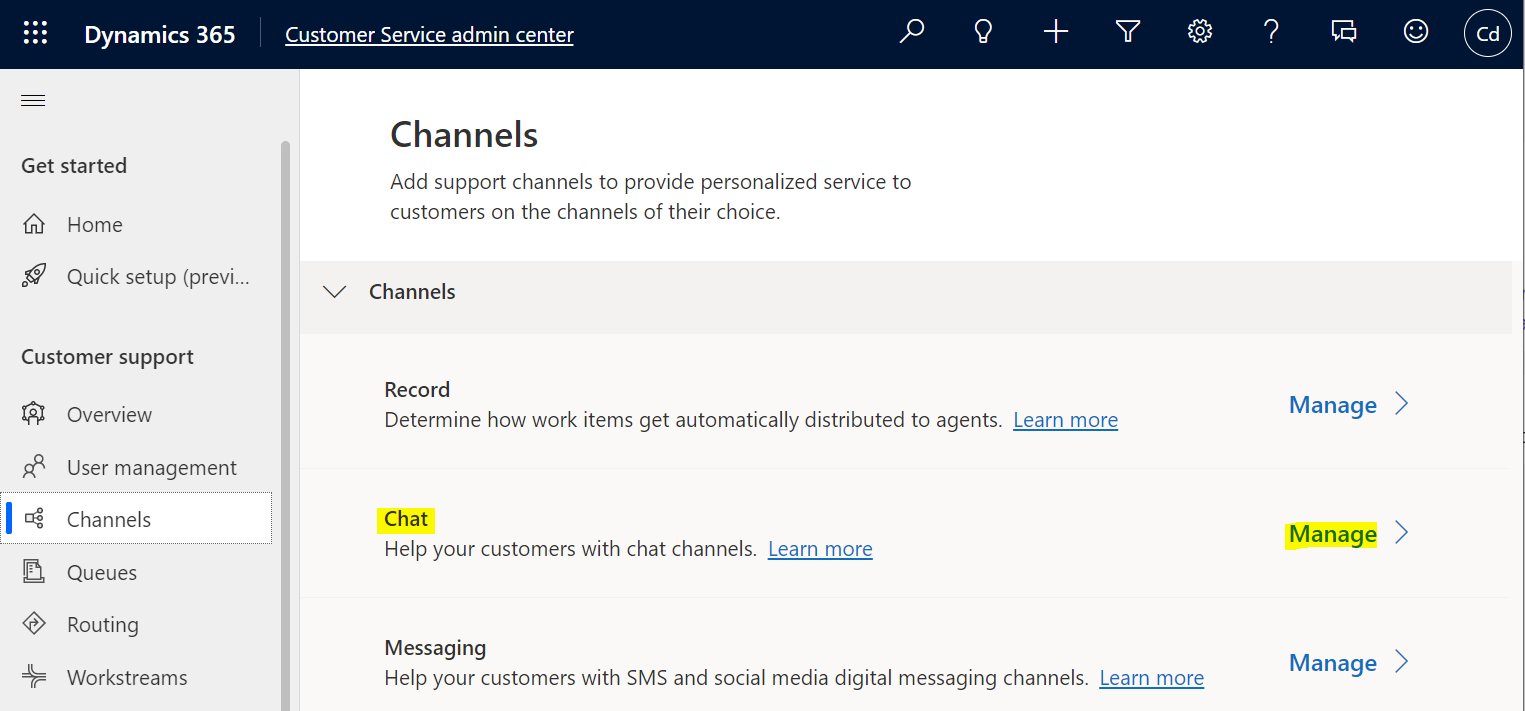
First, let’s create a new chat. Log into the Customer Service admin center app, then select Channels, Chat->Manage:
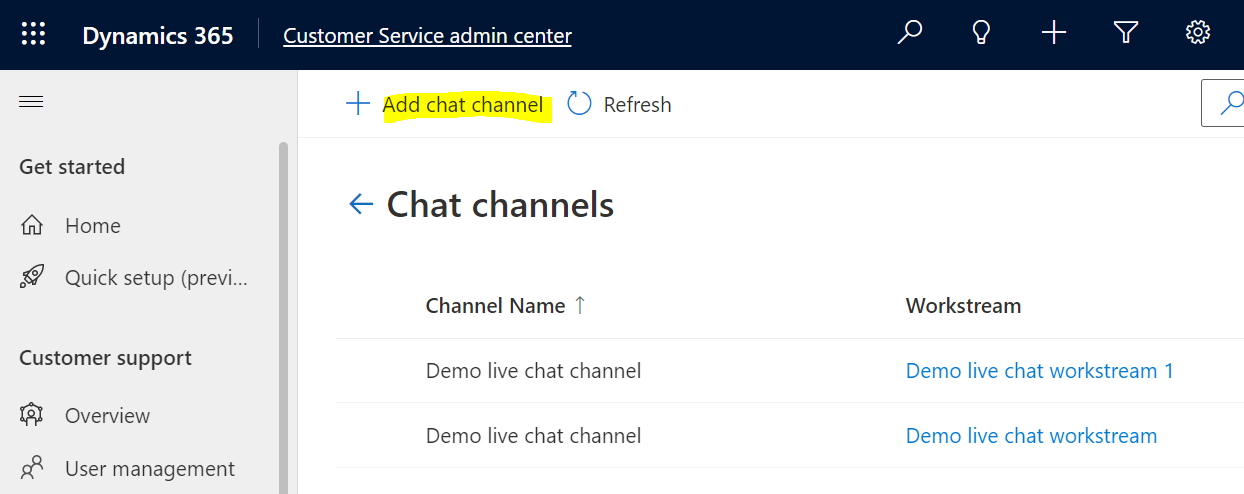
Let’s add a new chat channel:
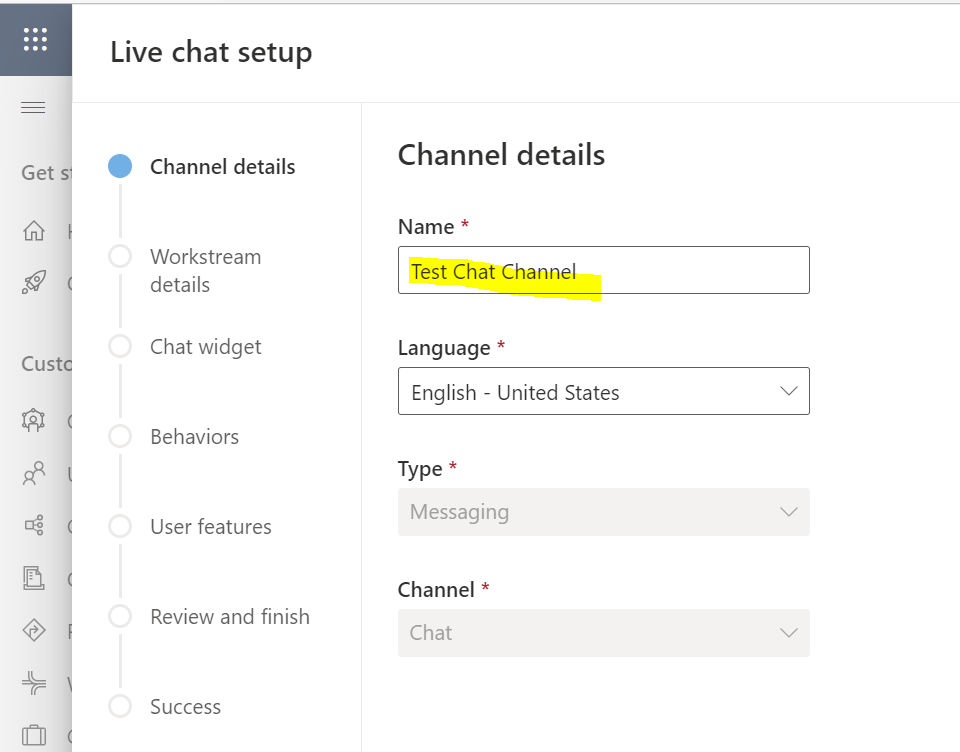
Enter a name and click Next:
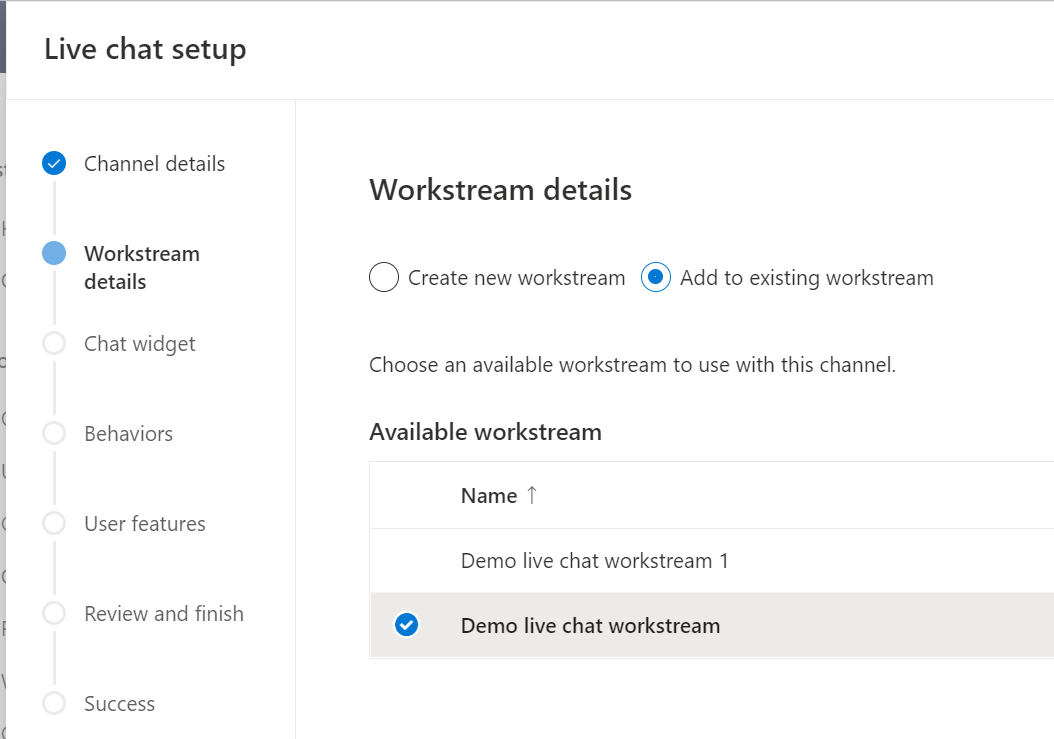
Select or create a Workstream. We will select an existing one:
In the Widget position, select Bottom Left. The other option is Bottom Right:
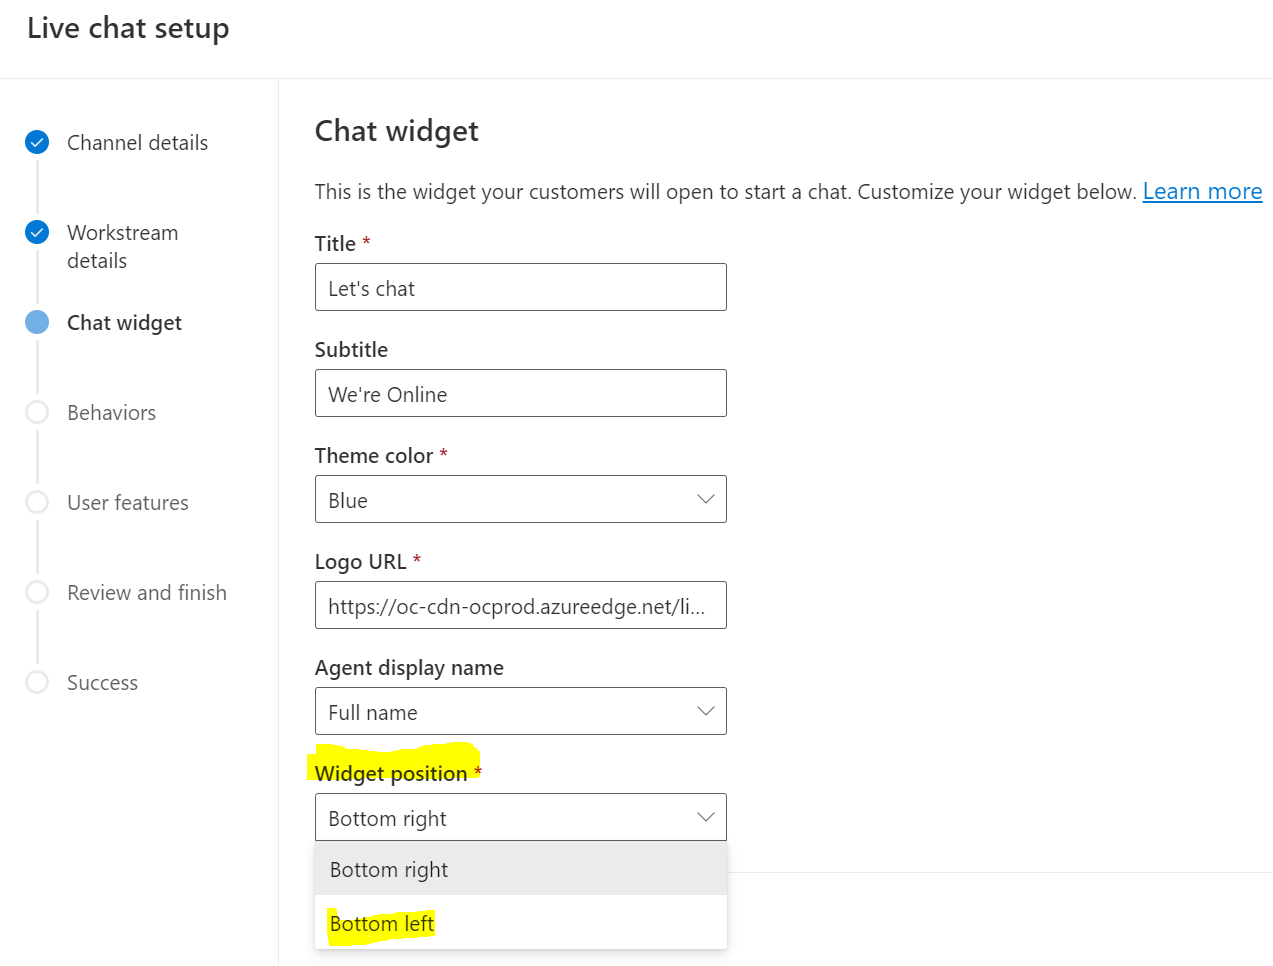
Select the remaining defaults and click Create channel.
Now, copy the code and add it to a webpage. When we open the page, we see the widget is positioned on the bottom left:

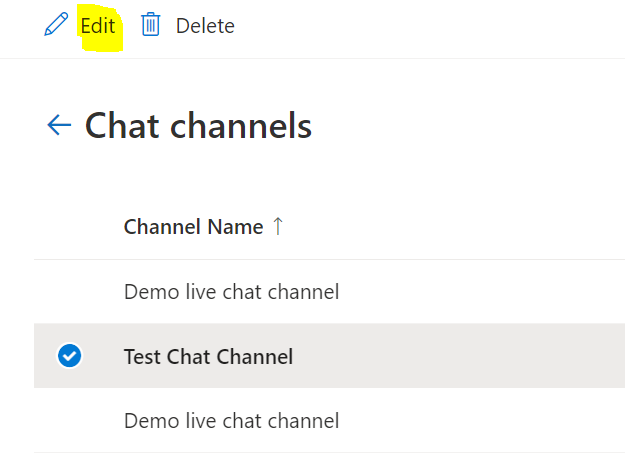
To change the position, edit the chat channel:
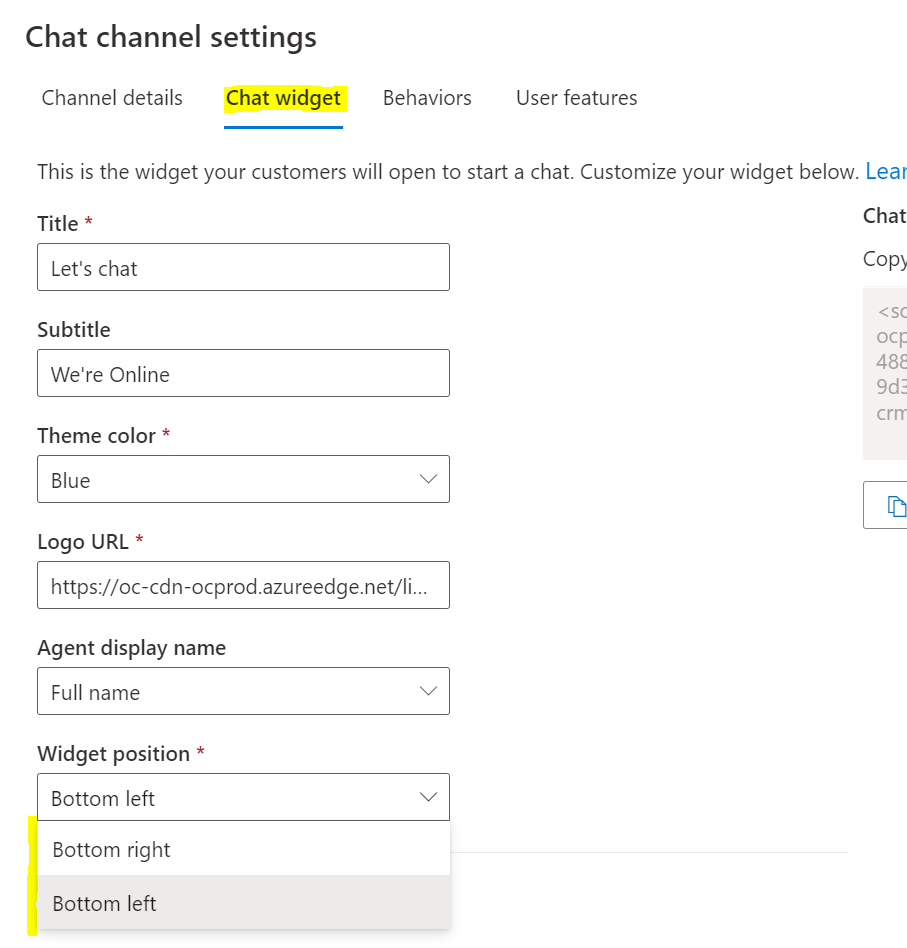
Select the Chat Widget tab and you can then change the position:

Explore AI, agents & Microsoft technology.
I share practical ideas, tutorials, and videos about AI, AI agents, Microsoft technologies, and the Power Platform.
Subscribe on YouTube →