In this post, we will look at how to change the Omnichannel Chat widget location.
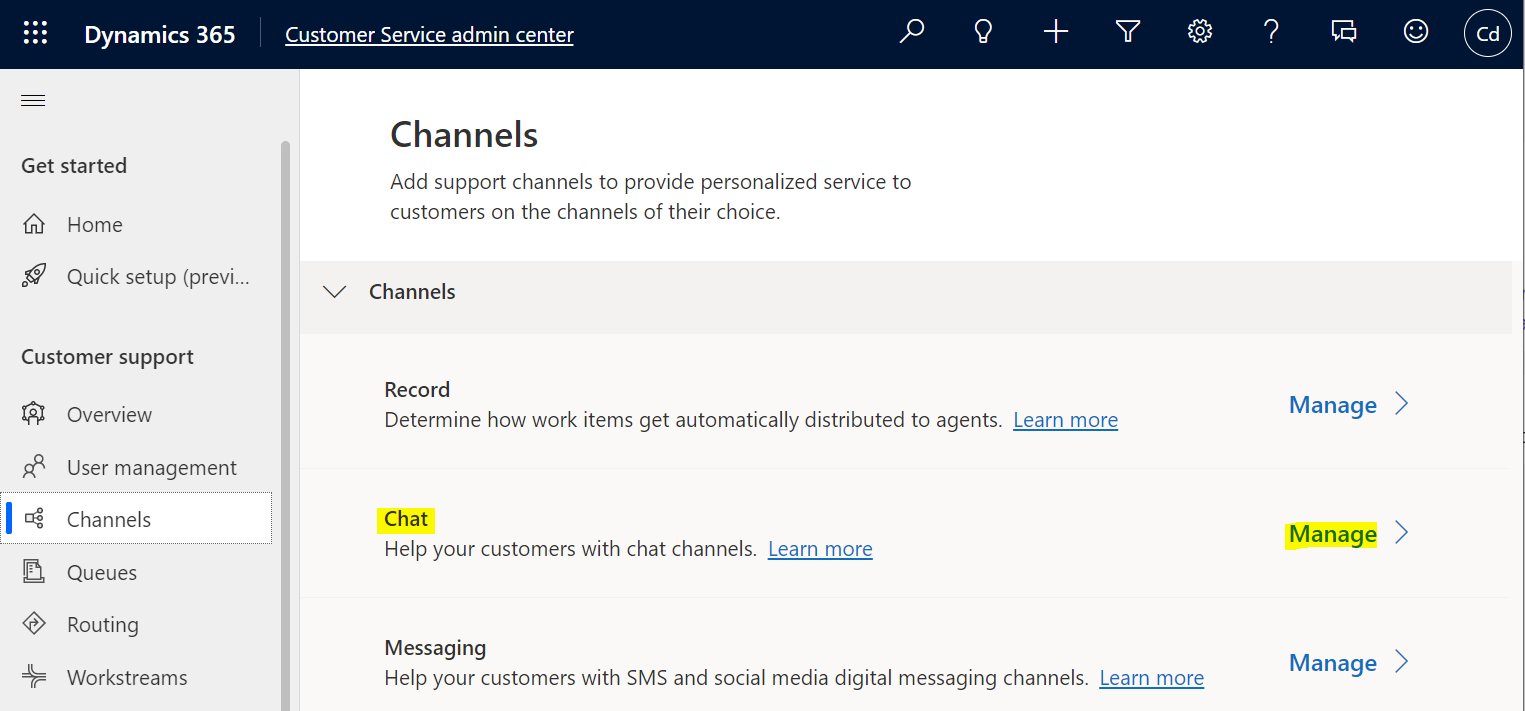
First, let’s create a new chat. Log into the Customer Service admin center app, then select Channels, Chat->Manage:
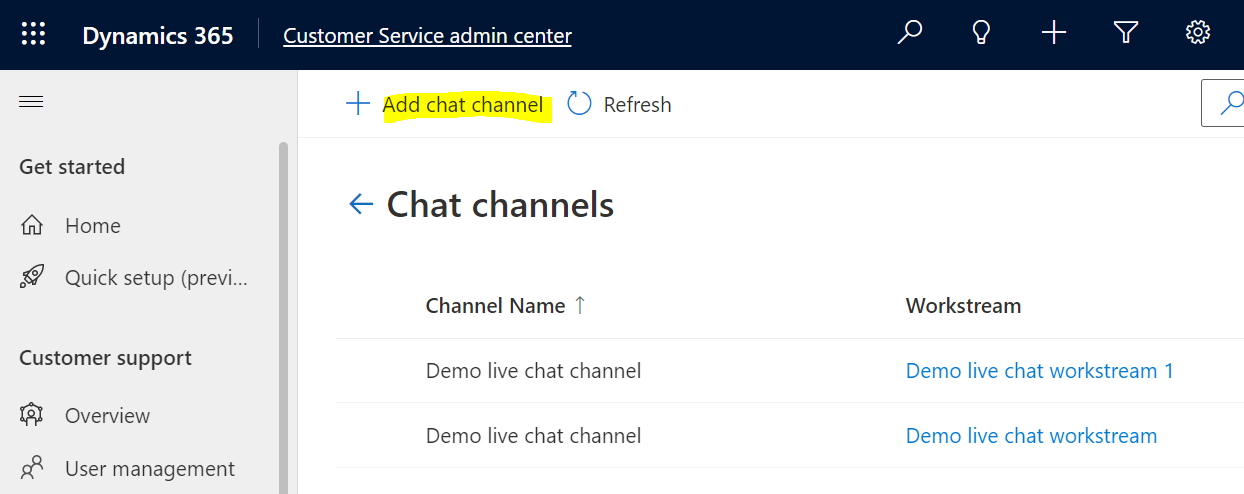
Let’s add a new chat channel:
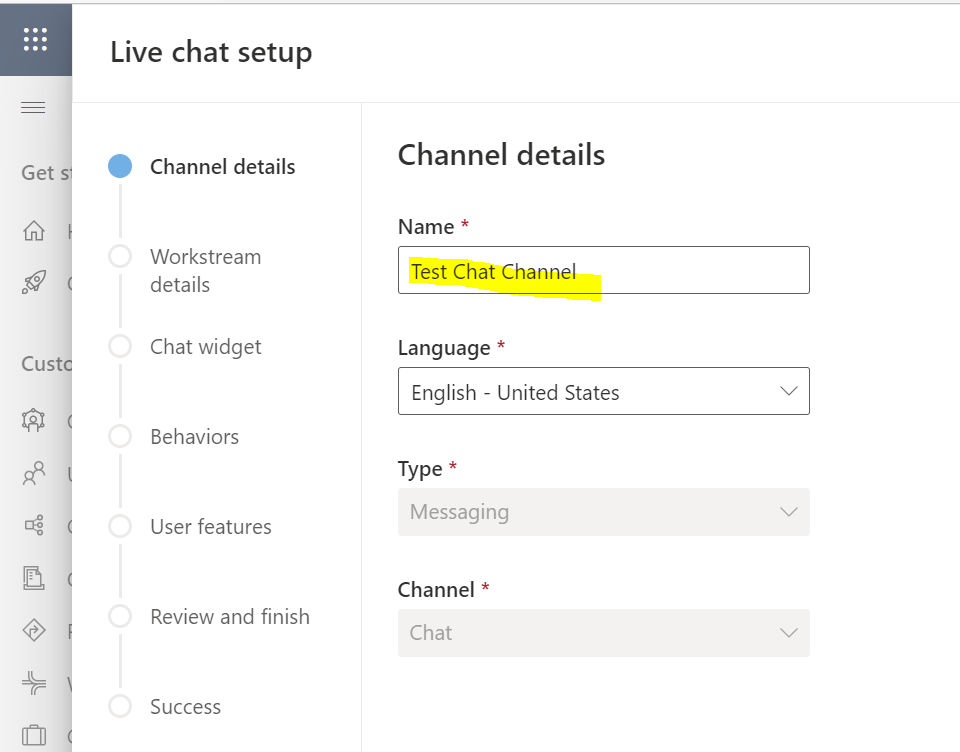
Enter a name and click Next:
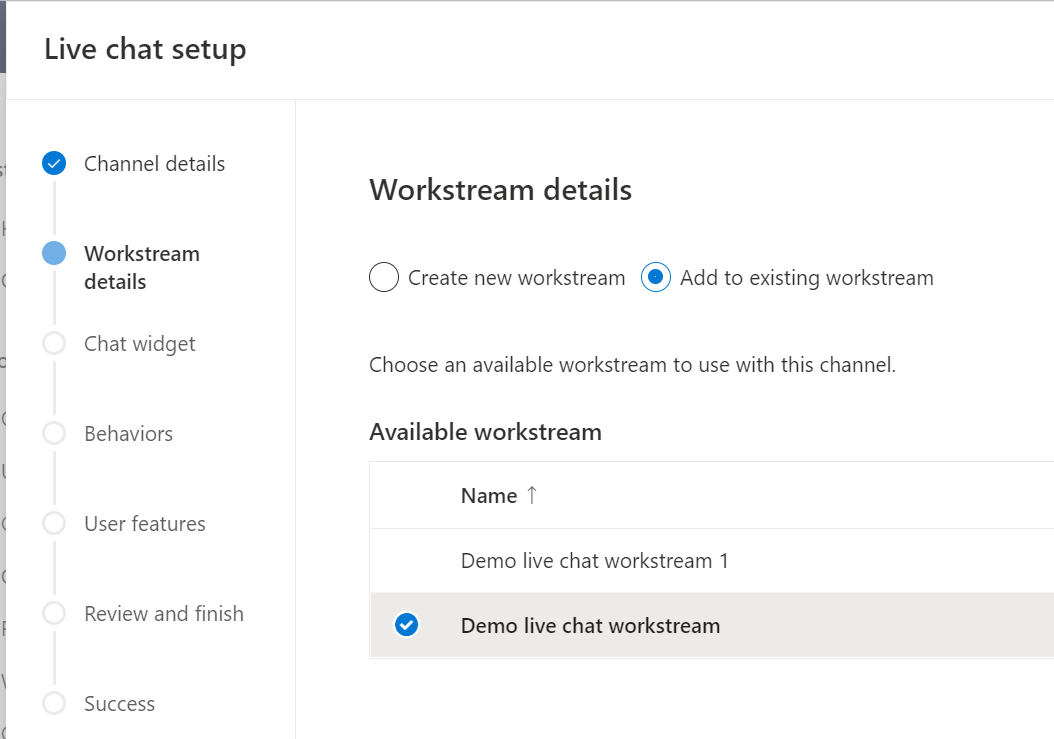
Select or create a Workstream. We will select an existing one:
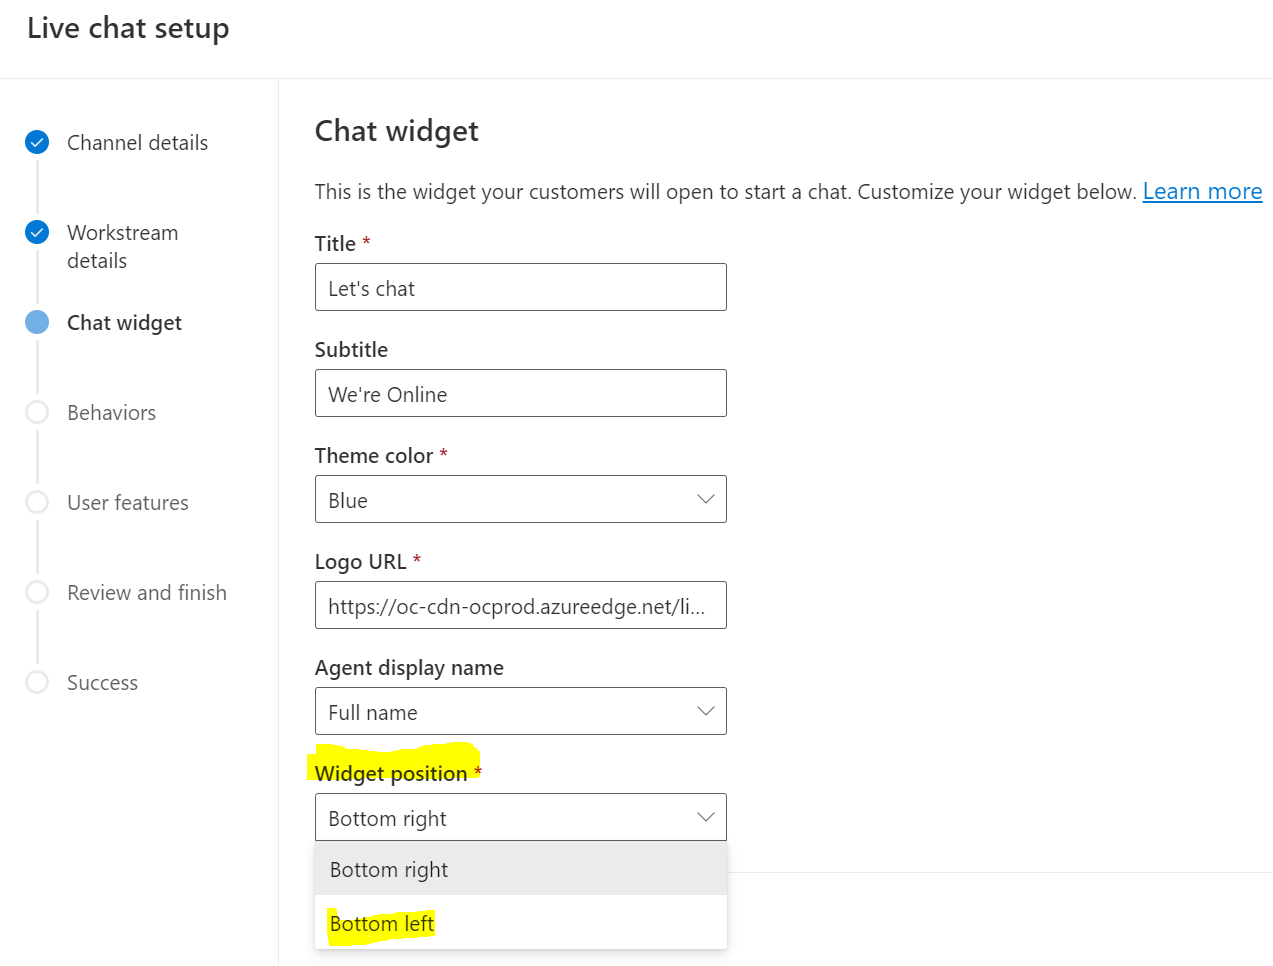
In the Widget position, select Bottom Left. The other option is Bottom Right:
Select the remaining defaults and click Create channel.
Now, copy the code and add it to a webpage. When we open the page, we see the widget is positioned on the bottom left:

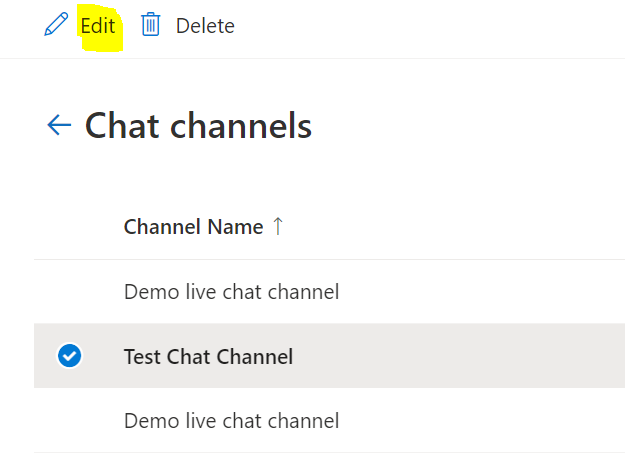
To change the position, edit the chat channel:
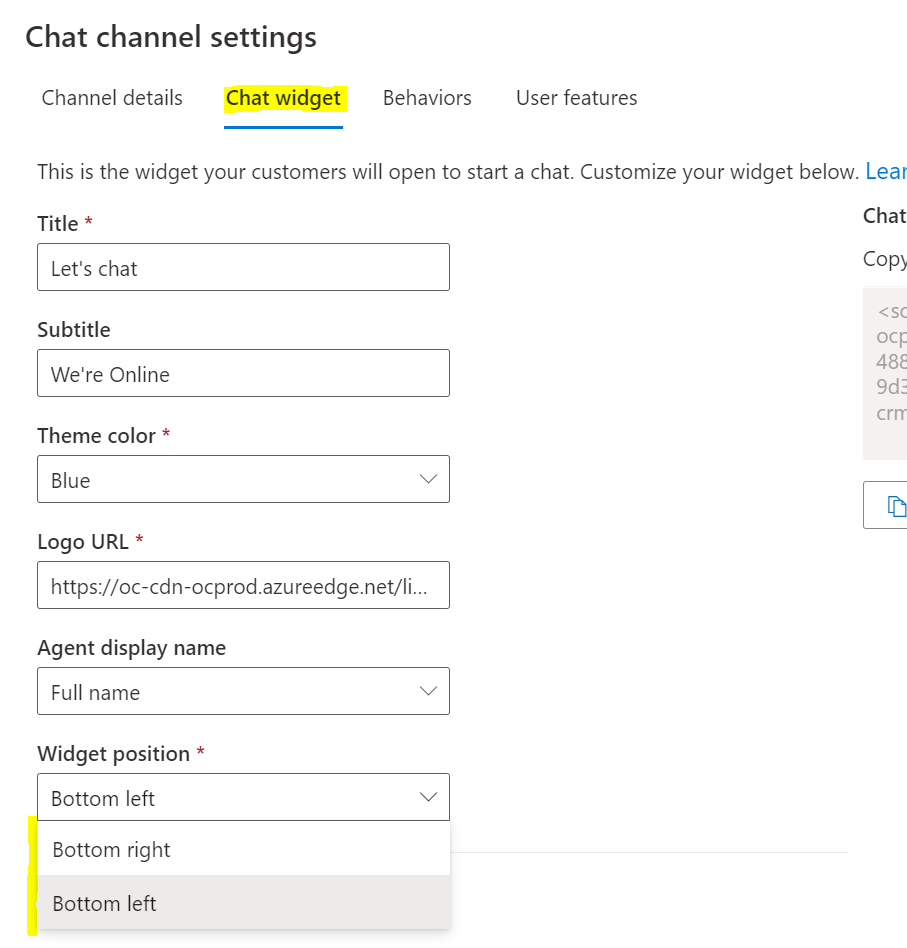
Select the Chat Widget tab and you can then change the position:
I AM SPENDING MORE TIME THESE DAYS CREATING YOUTUBE VIDEOS TO HELP PEOPLE LEARN THE MICROSOFT POWER PLATFORM.
IF YOU WOULD LIKE TO SEE HOW I BUILD APPS, OR FIND SOMETHING USEFUL READING MY BLOG, I WOULD REALLY APPRECIATE YOU SUBSCRIBING TO MY YOUTUBE CHANNEL.
THANK YOU, AND LET'S KEEP LEARNING TOGETHER.
CARL


