In this post, we will show how to process a return to a warehouse in Dynamics 365 Field Service. We will follow on from our previous post of managing inventory in Dynamics 365.
There are different ways to create a return in Dynamics 365, including a return to warehouse and return to vendor.
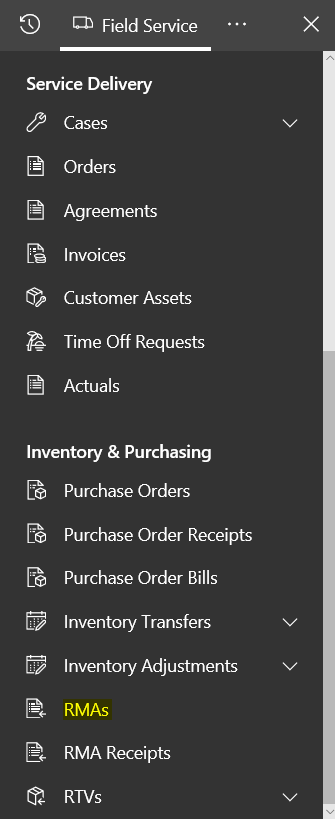
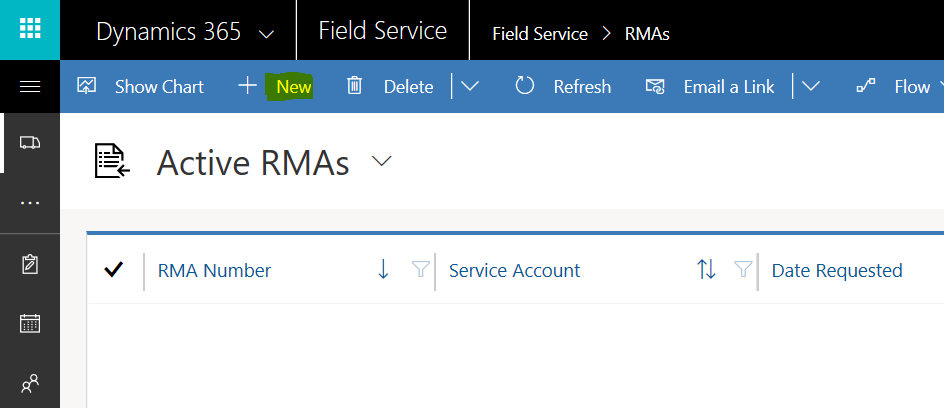
The first thing to do is to create a return merchandise authorization (RMA). Go to the Field Service menu and select RMAs:
Select New:
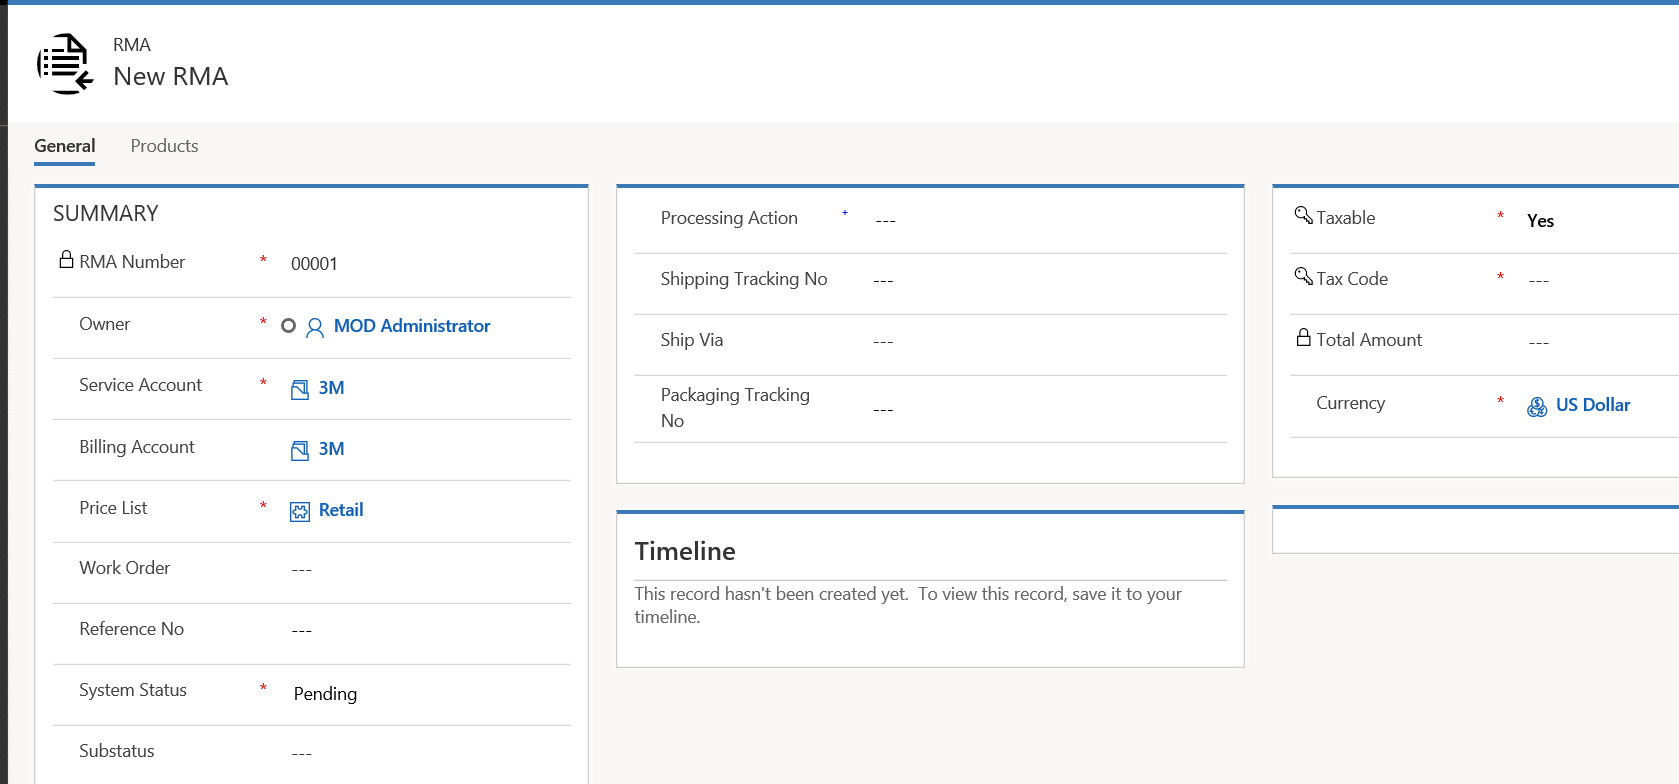
Enter fields, including the Service Account, Price List, if it’s taxable, etc. Click Save:
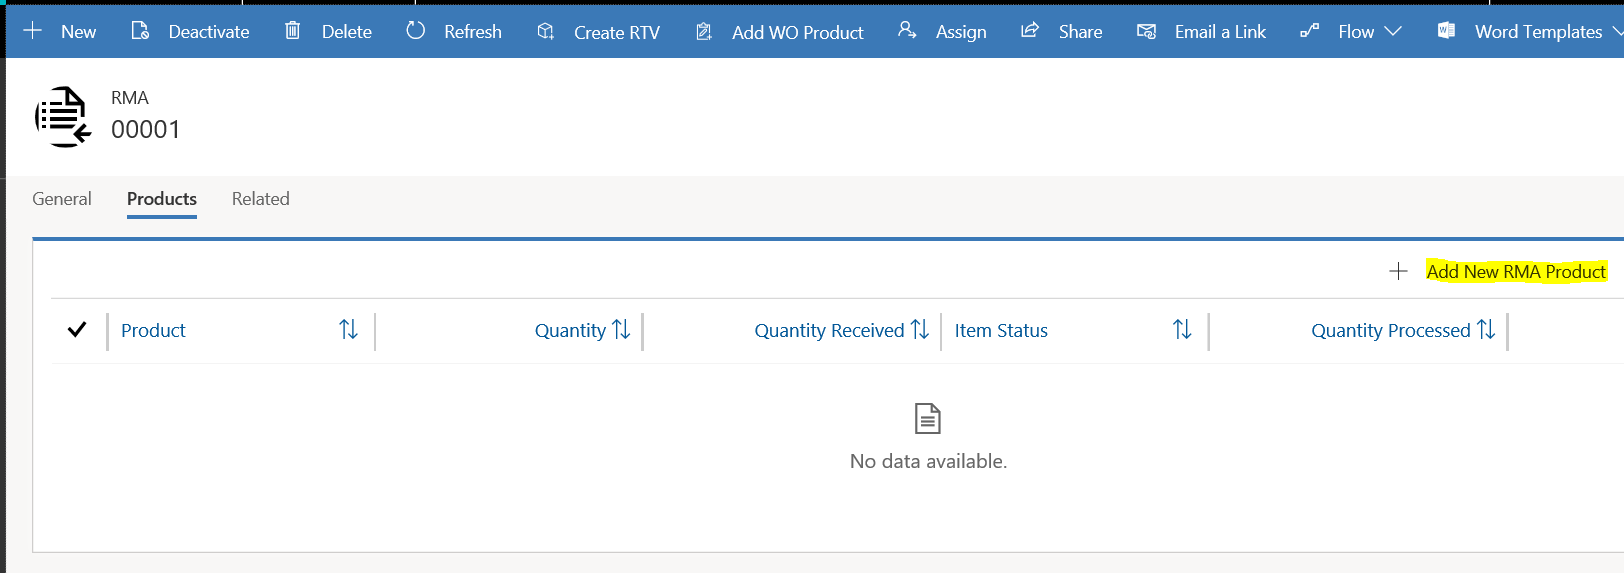
Next, add the products to be returned:
We will return 7 Universal Hard Drives:
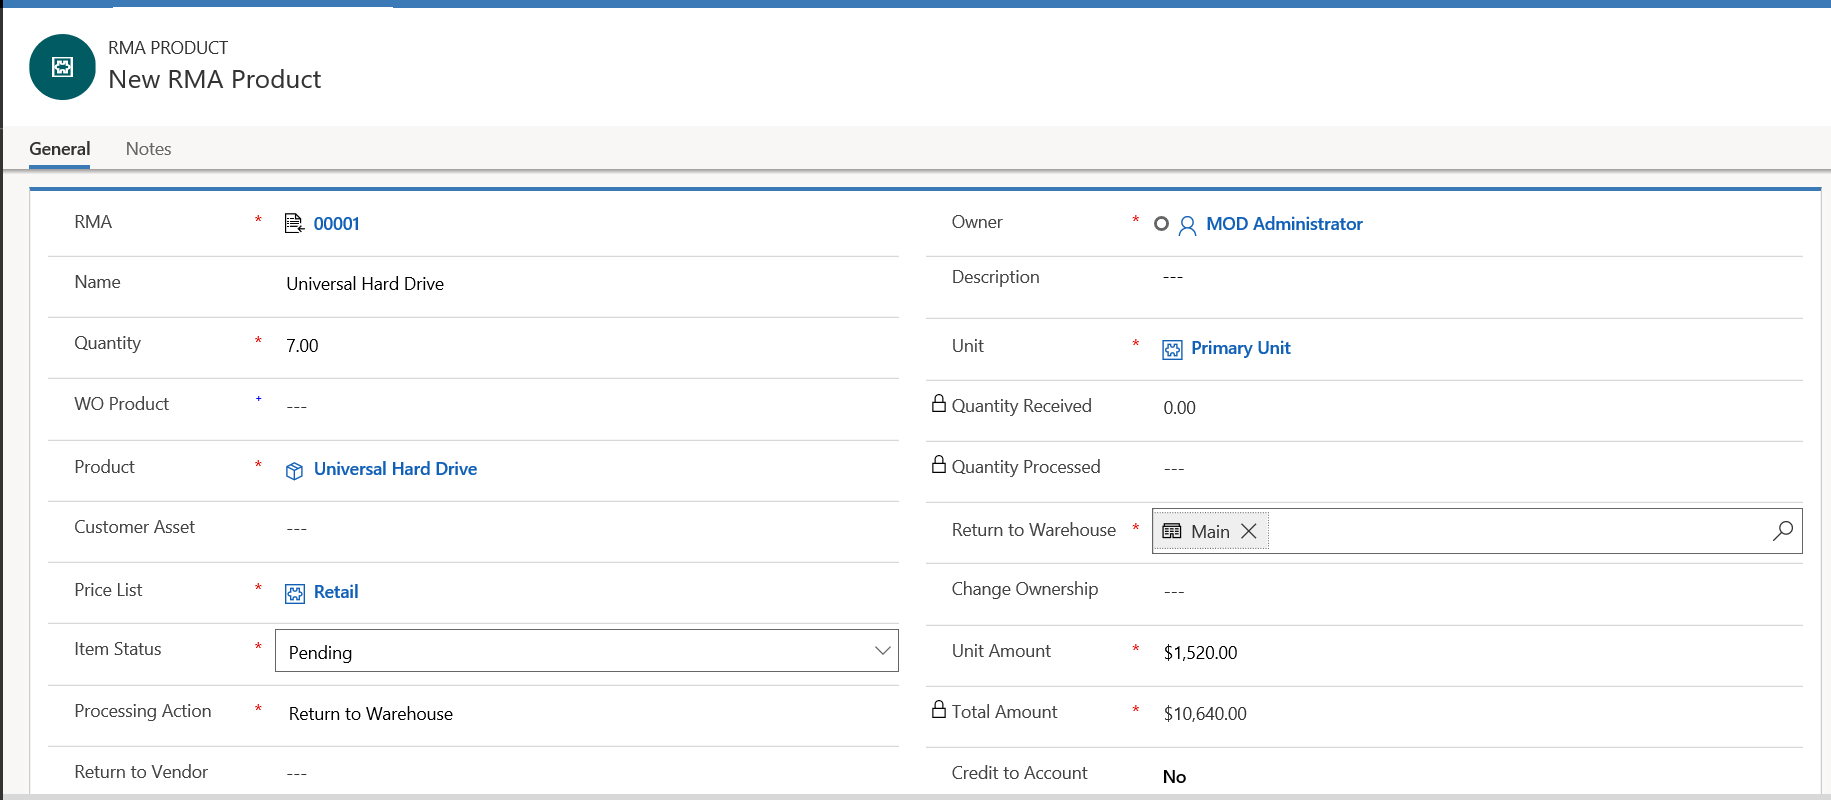
Select the type of return. We will select Return to Warehouse:

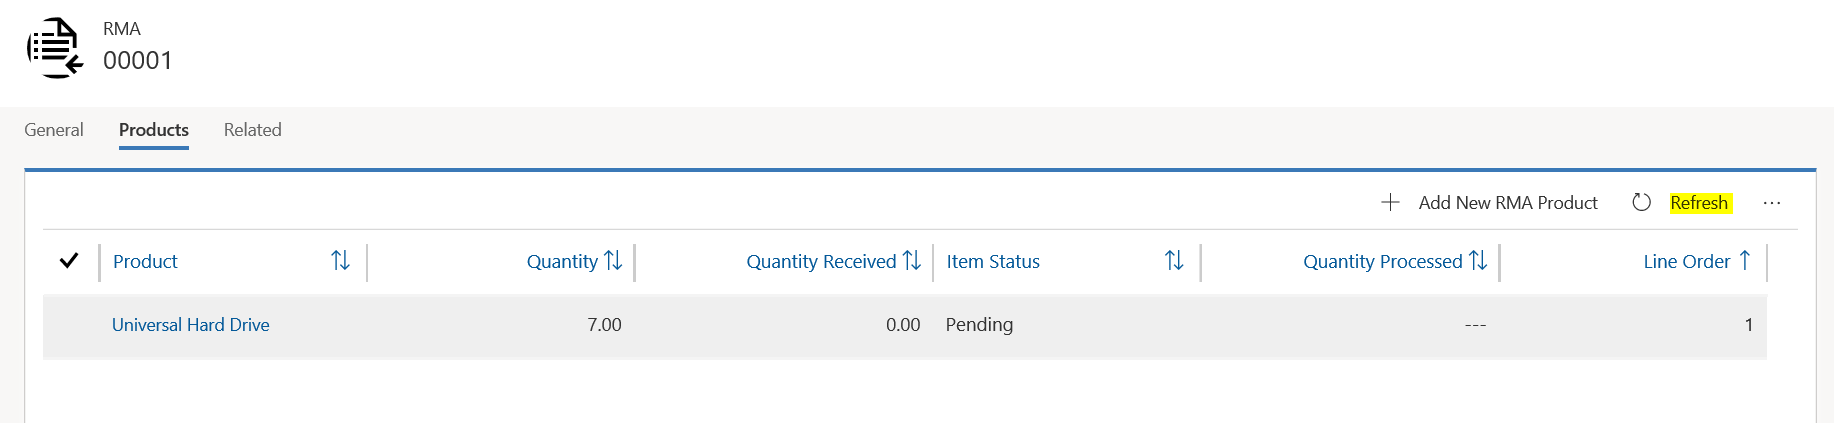
Once complete, press Save. Then click Refresh on the RMA to see the RMA product:
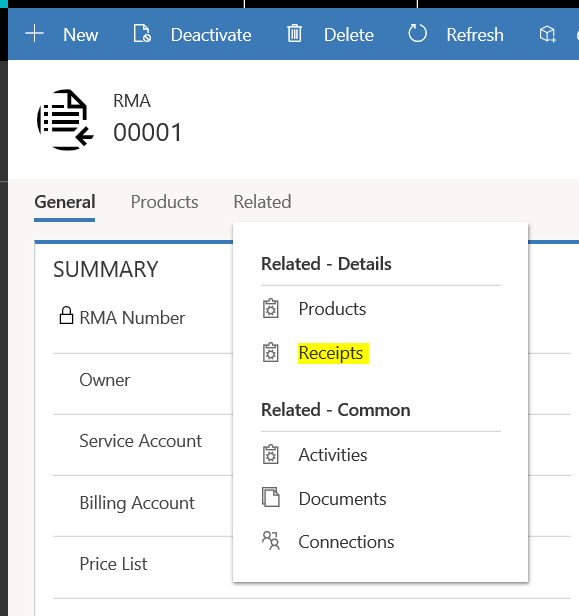
Next, approve the RMA. As an approver, open the RMA and change the status.
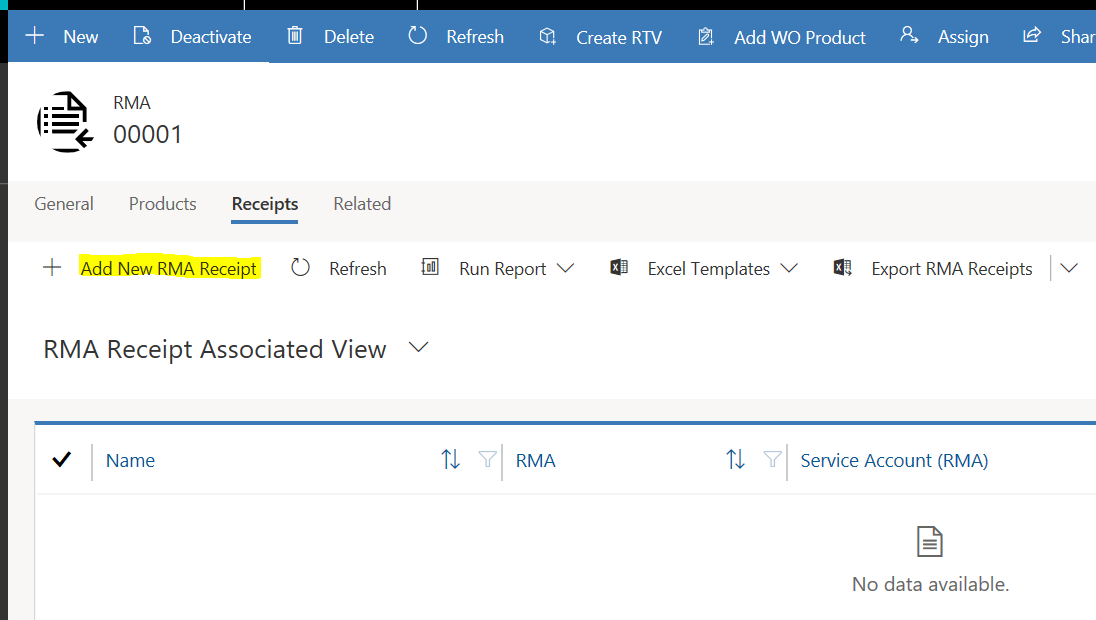
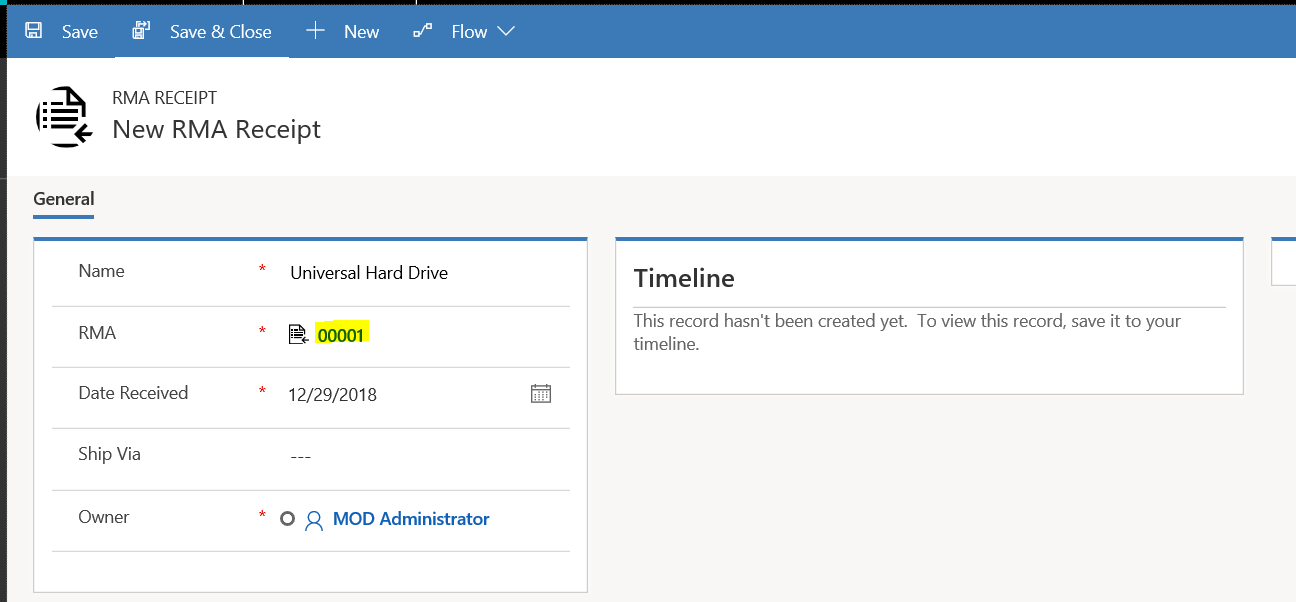
Next, create an RMA receipt.
Select Add New RMA Receipt:
Ensure the RMA is selected, and Save:
Next click Add New RMA Receipt Product:
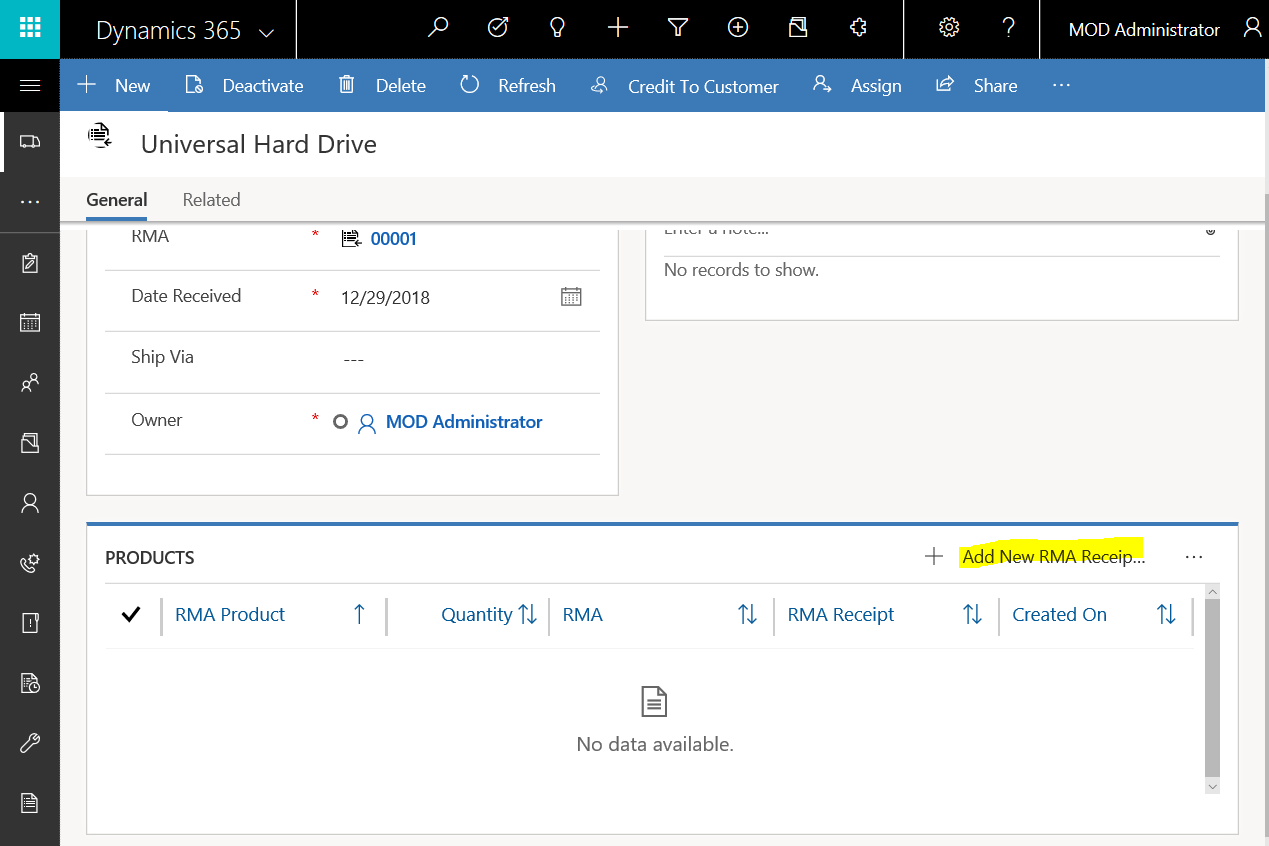
Enter the product and quantity and press Save:

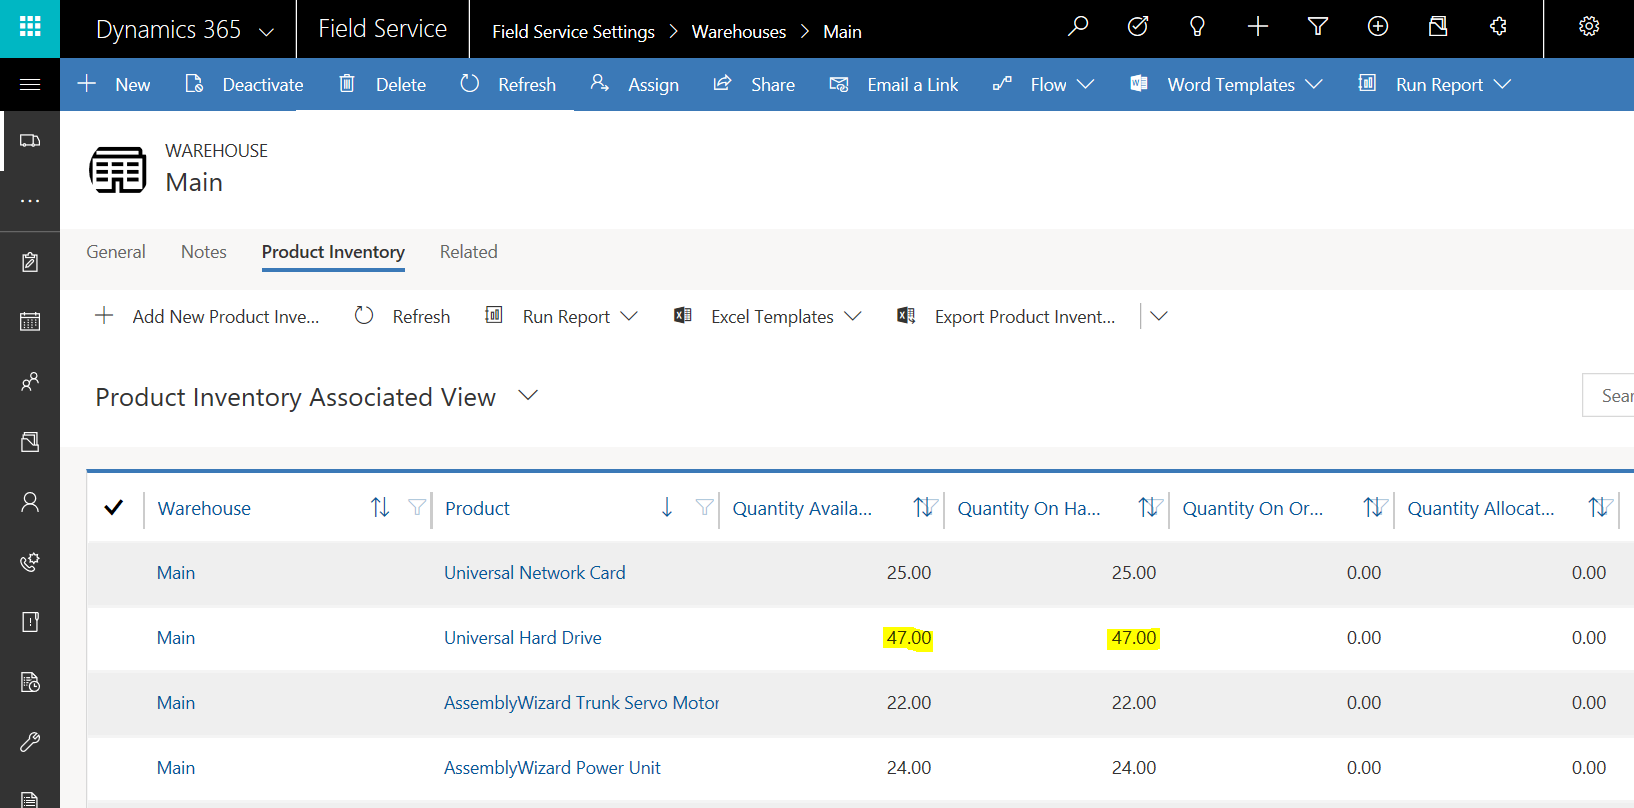
Once complete, the quantities will be updated in the Main warehouse, in our case changing from 40 to 47:
I AM SPENDING MORE TIME THESE DAYS CREATING YOUTUBE VIDEOS TO HELP PEOPLE LEARN THE MICROSOFT POWER PLATFORM.
IF YOU WOULD LIKE TO SEE HOW I BUILD APPS, OR FIND SOMETHING USEFUL READING MY BLOG, I WOULD REALLY APPRECIATE YOU SUBSCRIBING TO MY YOUTUBE CHANNEL.
THANK YOU, AND LET'S KEEP LEARNING TOGETHER.
CARL
