In this post, we will look at Power Apps Portals Web Roles and Table Permissions how they are used. We will go through an example of displaying a list of Dataverse records.
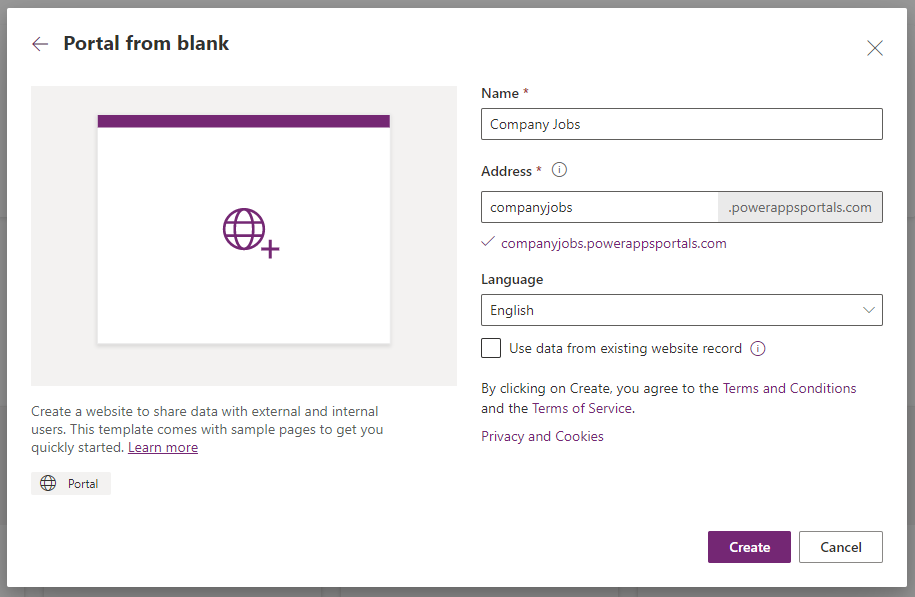
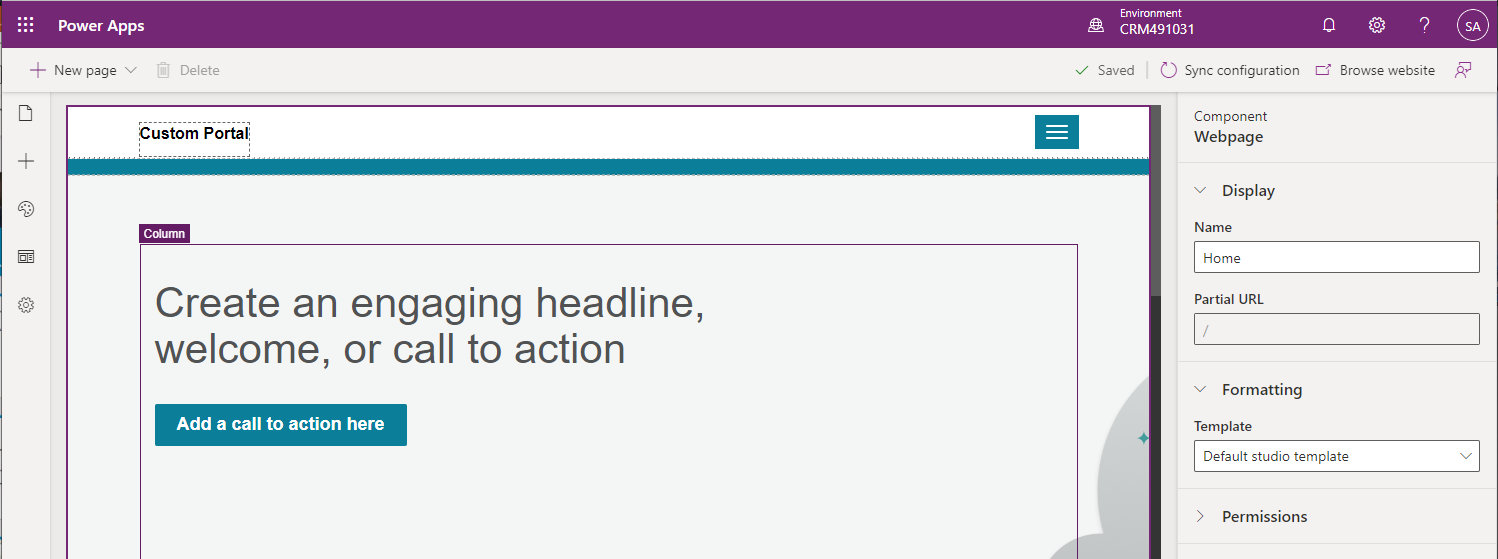
First, let’s create a new portal called Company Jobs. The goal of the website is to display content to both internal authenticated and external non-authenticated users. The difference is that internal people will see some more information on the role, whereas external people will see slightly less information.
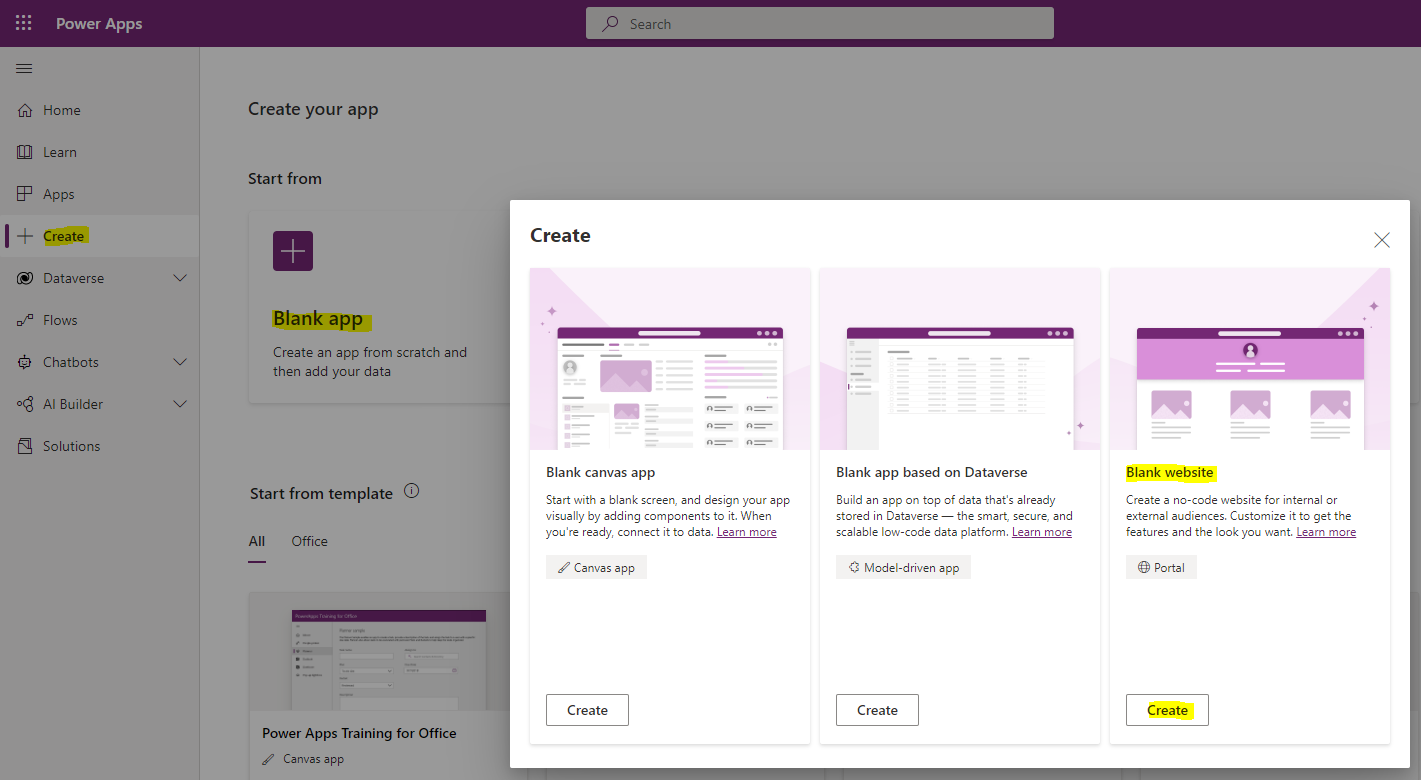
In https://make.powerapps.com, select Create->Blank Website->Create:
Enter the name and click Create:
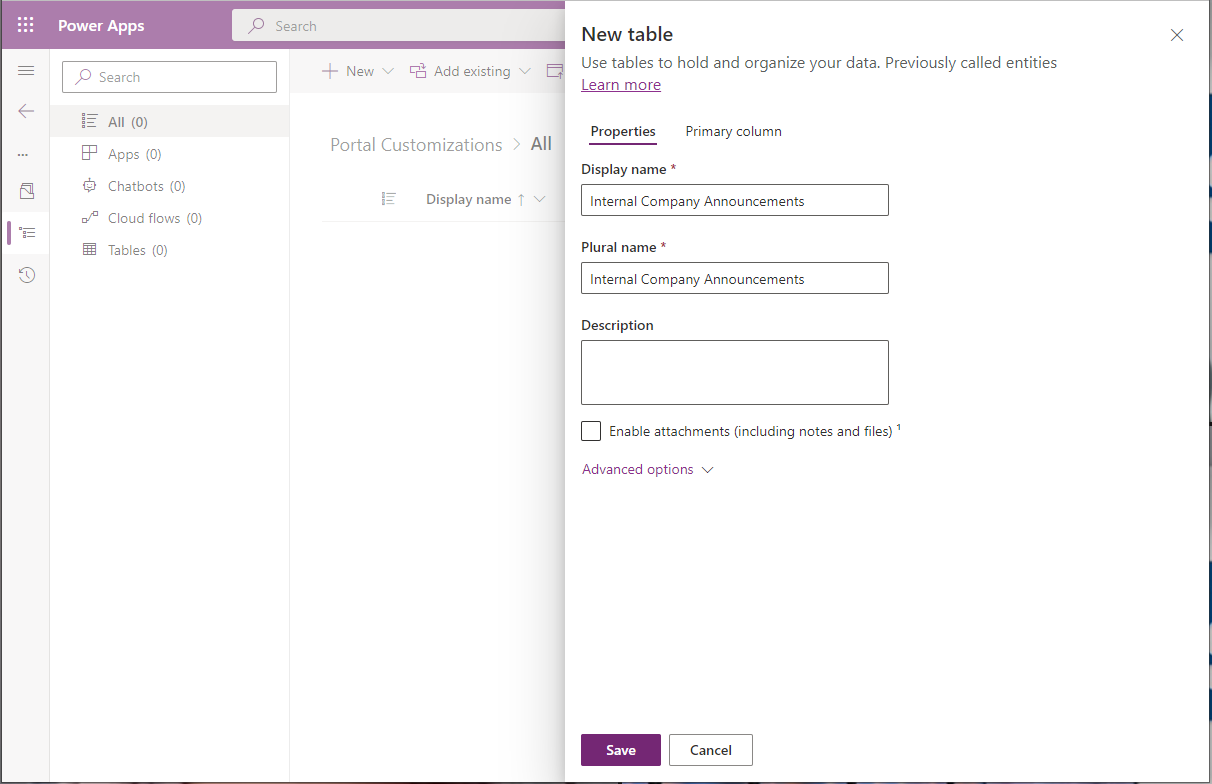
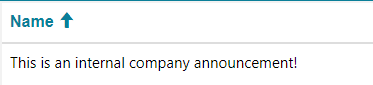
Let’s now create a new table called Internal Company Announcements:
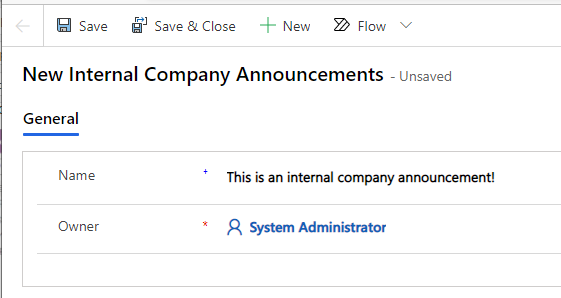
Publish the table, and let’s create a new record:
Now. let’s add this to our list to the portal. Go to the Power Apps Maker and edit the portal:
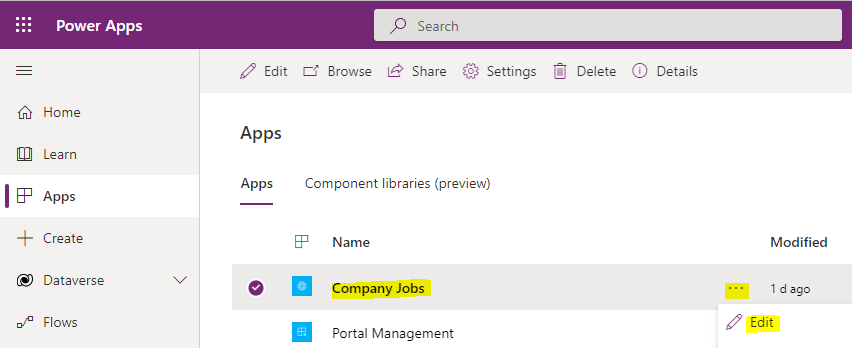
We see below:
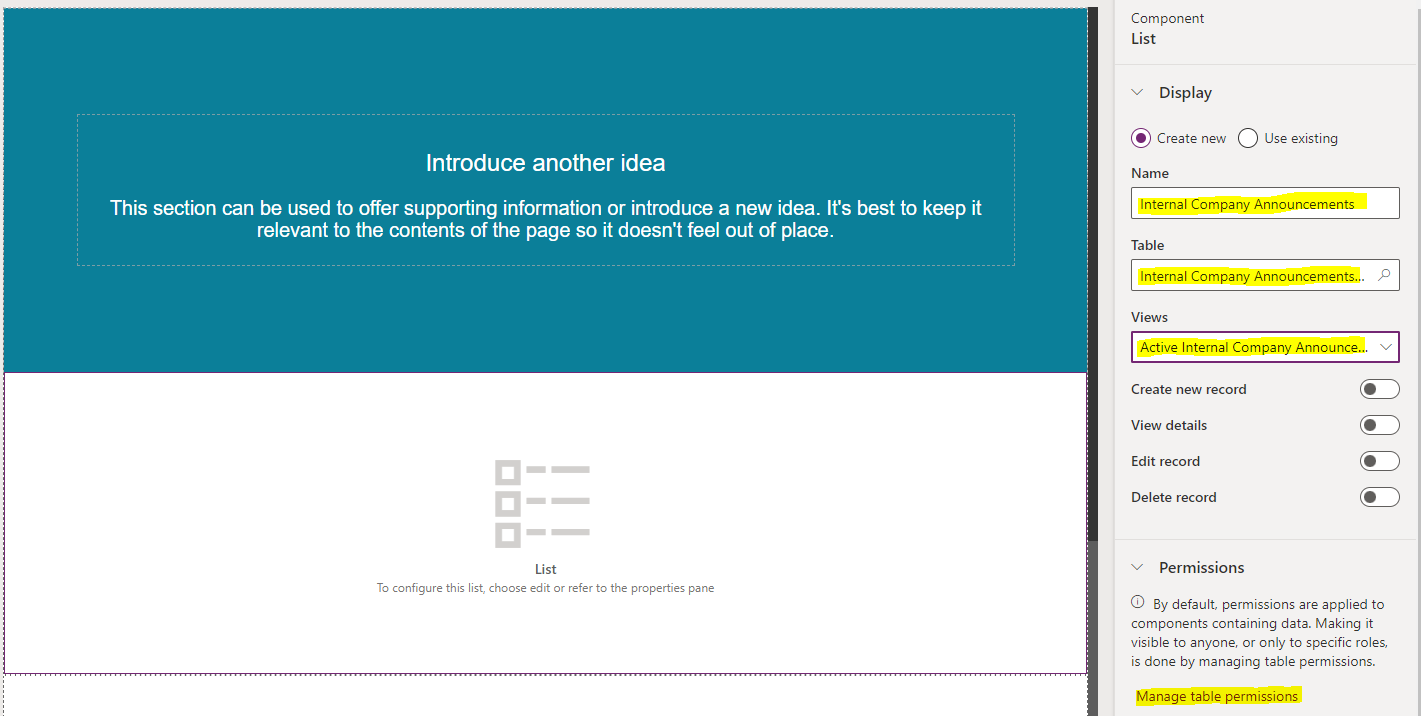
Click to add a new list:

On the right, select the table and view to display:
Click Sync configuration:
![]()
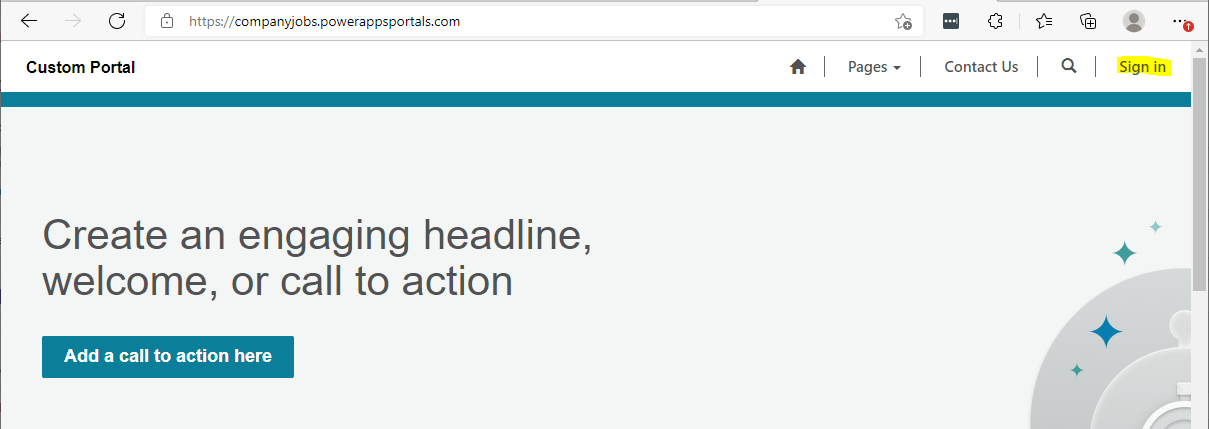
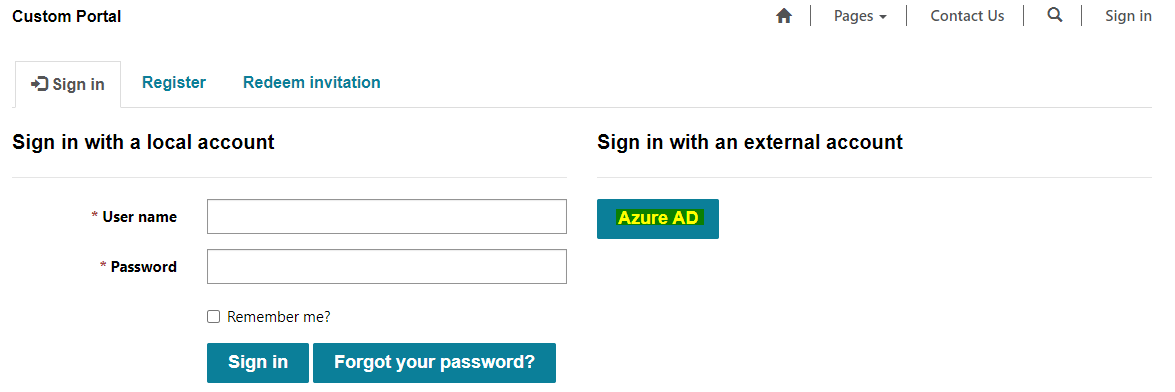
Now as a user, click on the Sign In button:
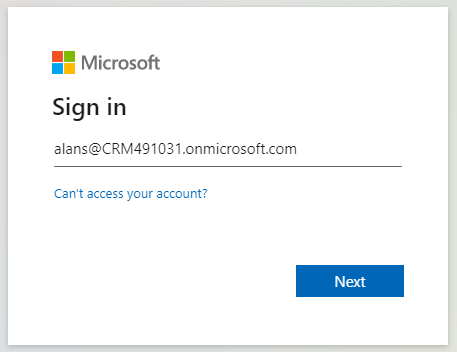
We will sign in with a user using Azure AD:
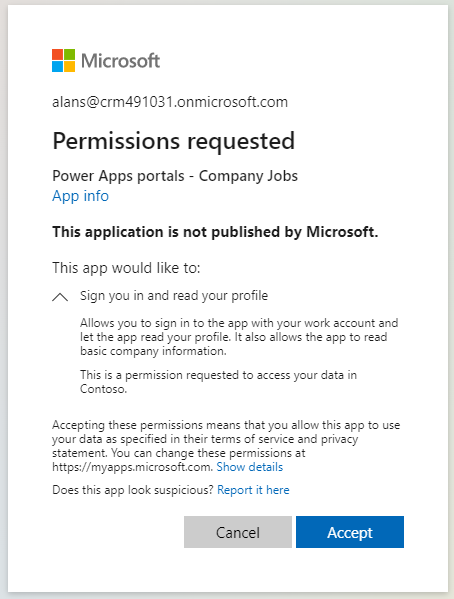
Click Accept:
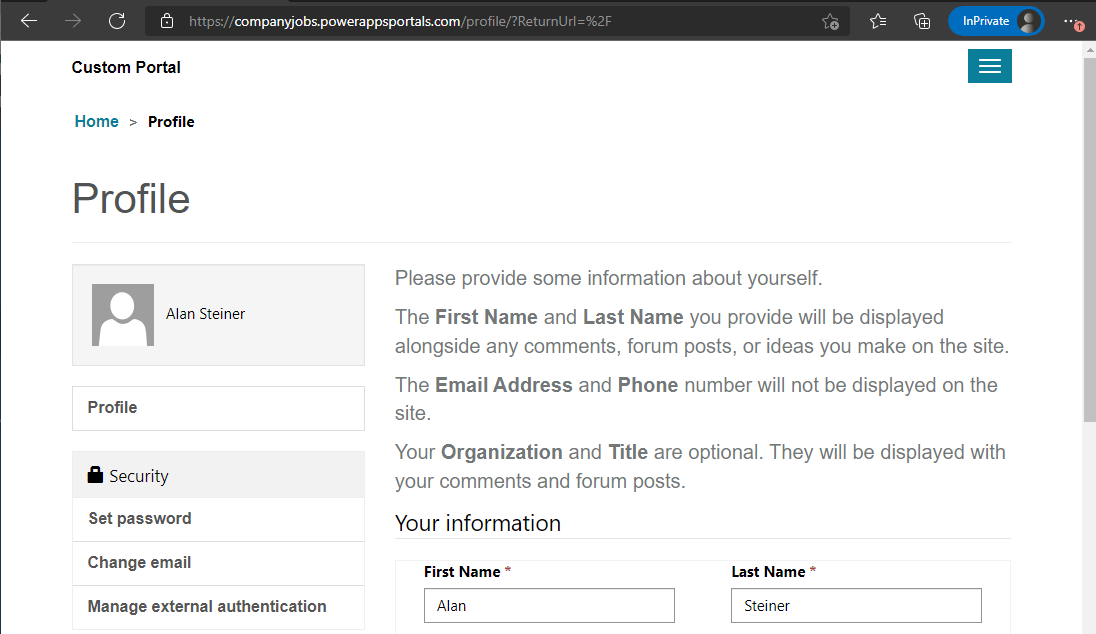
We are taken to the profile page:
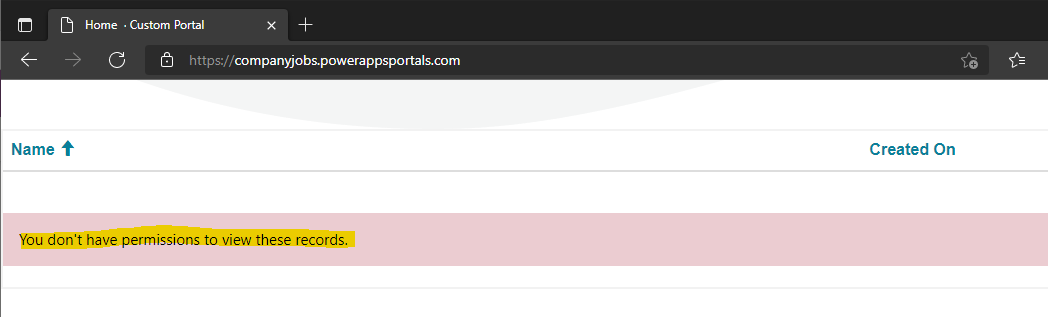
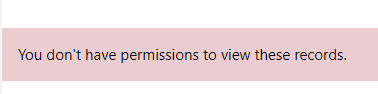
Browse to the homepage. We see the message “You don’t have permission to view these records”:
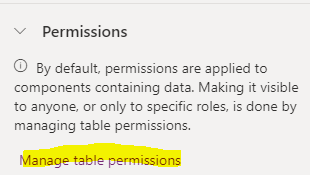
We need to set permissions to this entity. In the designer, on the list component, click on Manage Table Permissions:
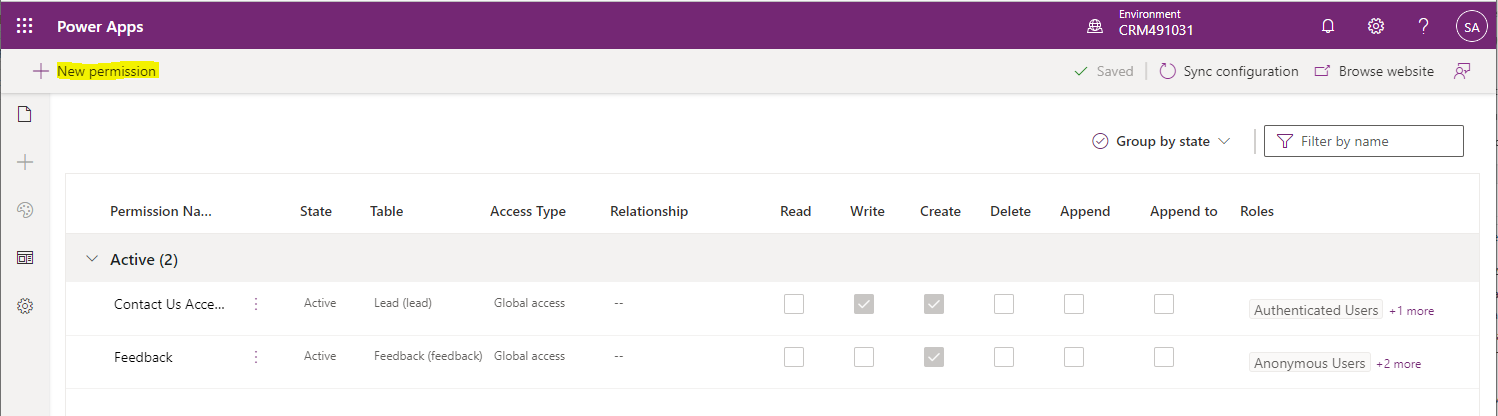
You will see below. Click on New permission:
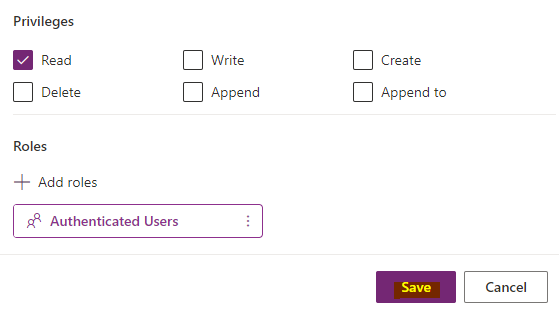
Give the permission a name, and select the table. For the access type, we will select Global:
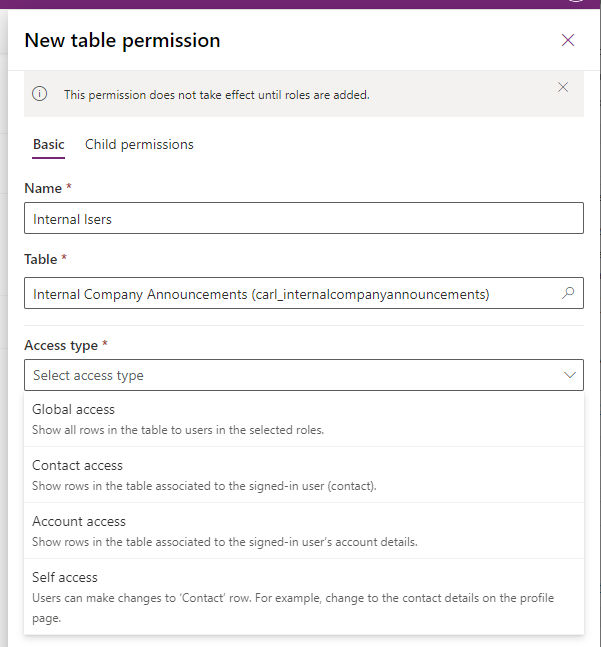
And for the privilege, we will select Read. Now click Save:
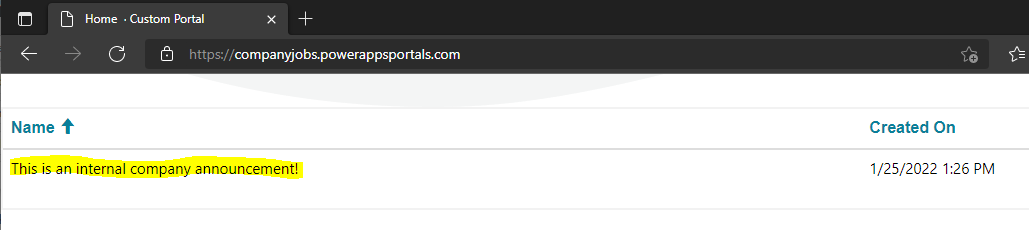
Click on Sync Configuration, and you will now see as an authenticated user the list data displayed:
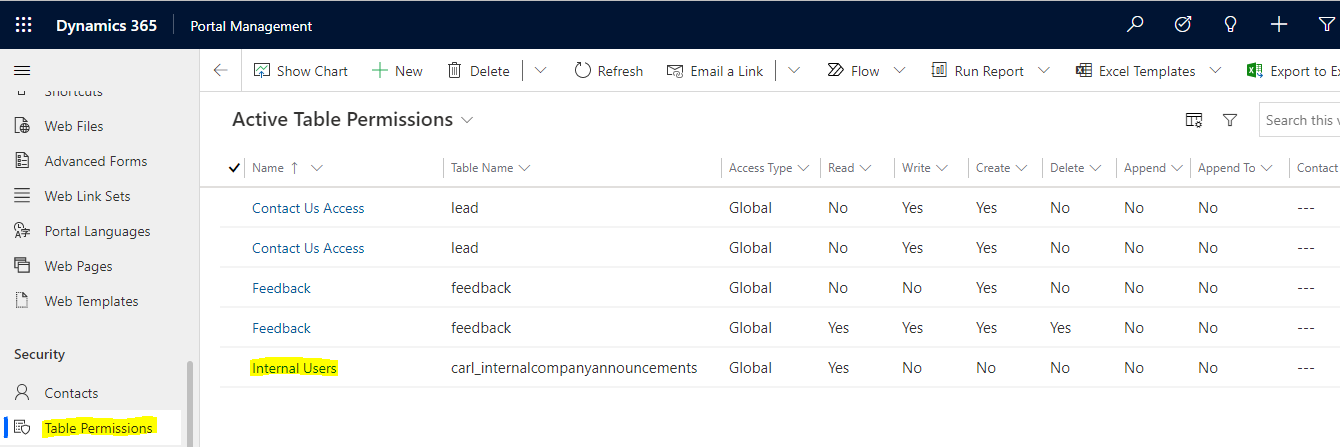
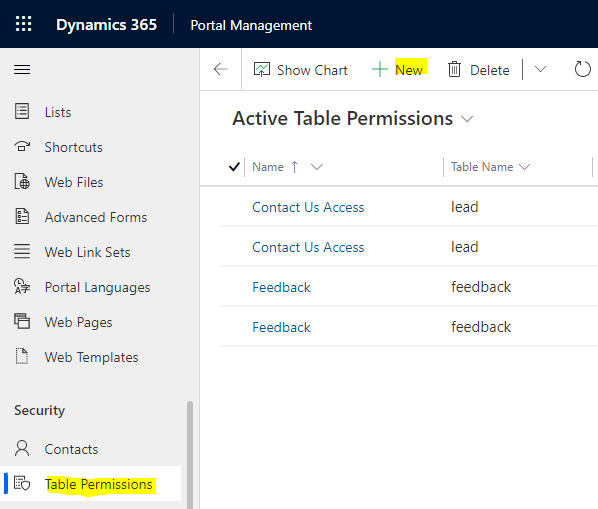
In the Portal Management app, we can see the Table Permission was added:
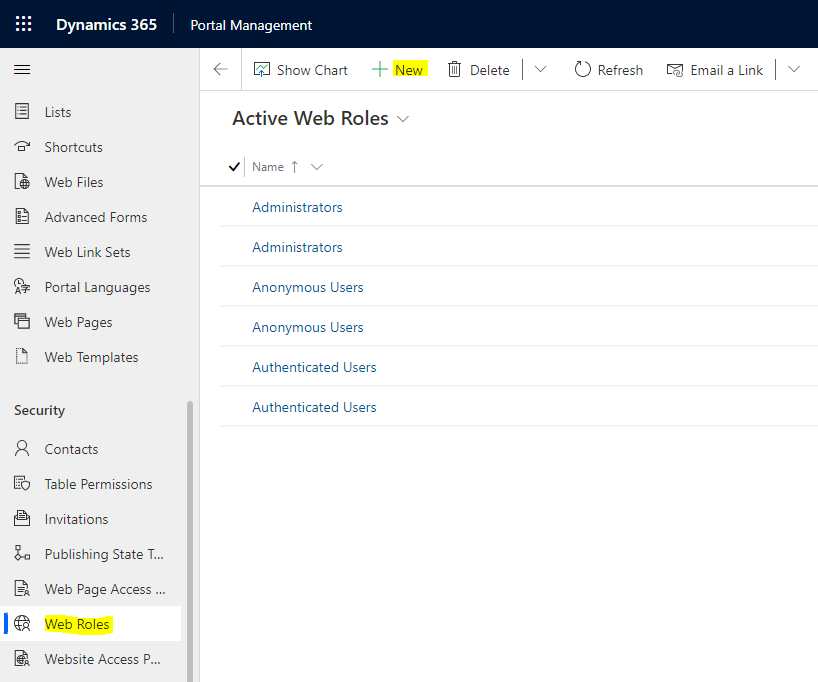
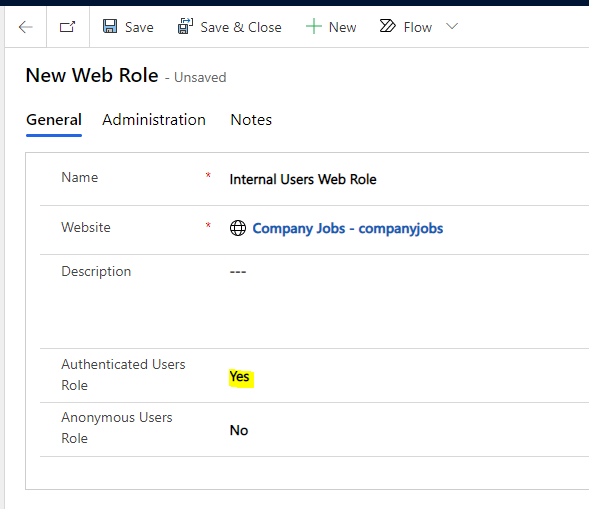
Now, let’s create its own Web Role instead. We will delete the table permission we created, and create a new Web Role called Internal Users:
We will assign it to the Company Jobs website, and set it to be authenticated users only:
At this point, our user does not have access to the list table once again:
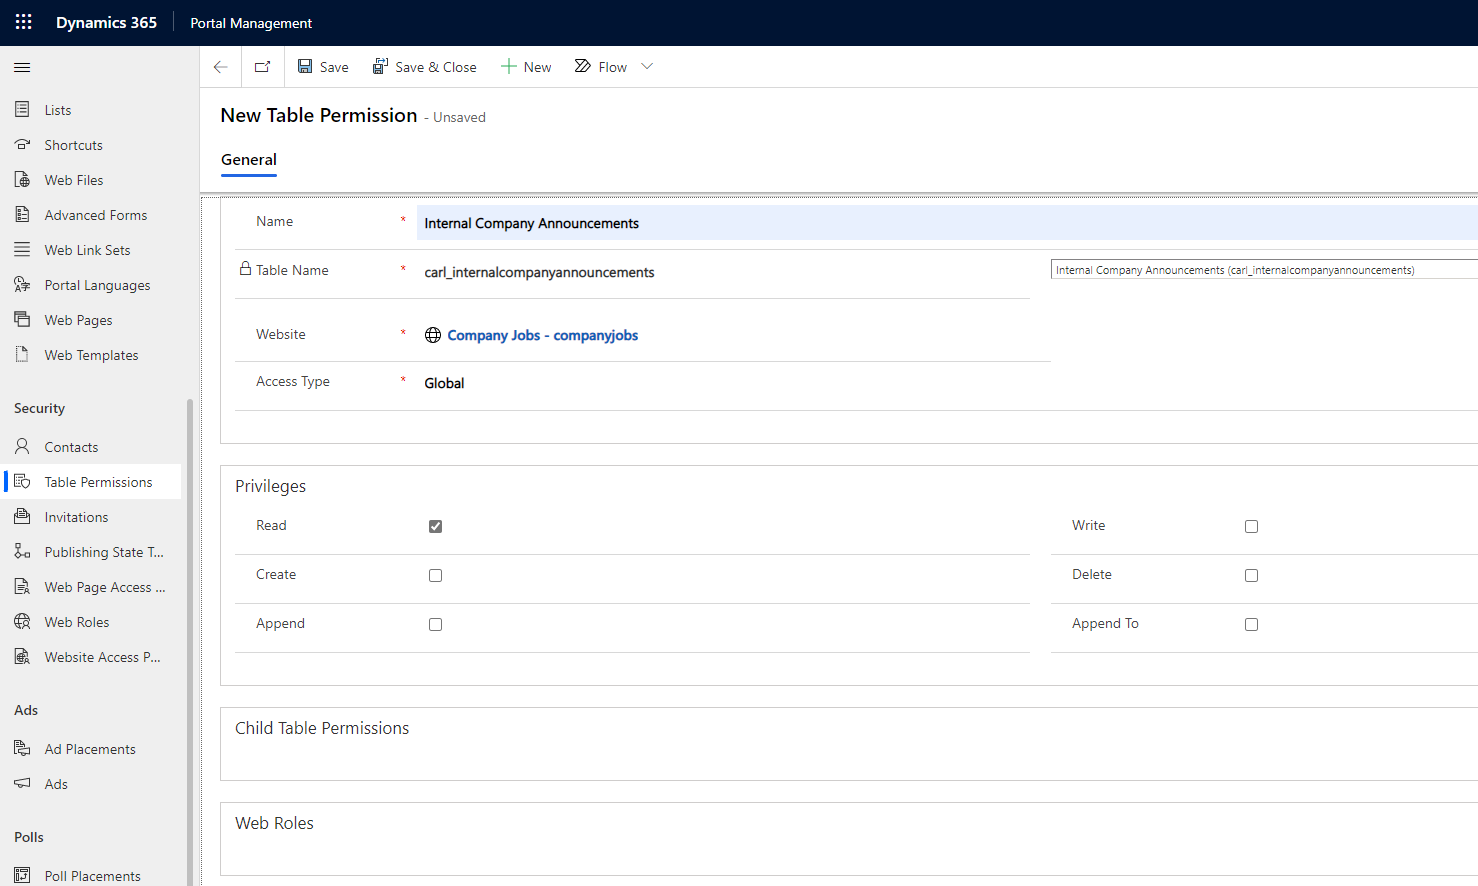
Now, let’s create a new Table Permission:
Enter like below and save. Note the web roles are unavailable until we save:
Our portal user still won’t see the entity list records.
Next, click on Add Existing Web Role:
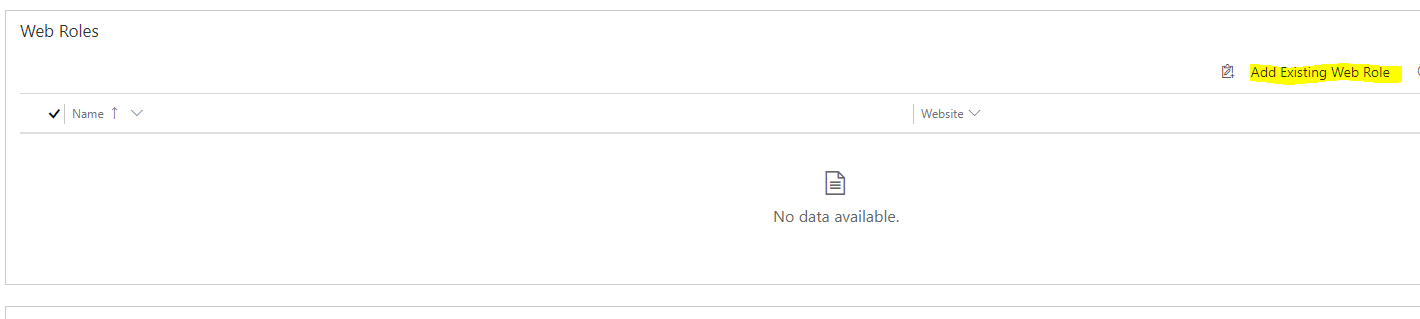
Select the web role we created:

Now refresh the configuration, and you will see the record.
In summary, for any table data you want to display:
- Create a web role for the website. Select Anonymous or Authenticated
- Create a table permission, select the table and its permissions
- Assign the web role to the table permission
I AM SPENDING MORE TIME THESE DAYS CREATING YOUTUBE VIDEOS TO HELP PEOPLE LEARN THE MICROSOFT POWER PLATFORM.
IF YOU WOULD LIKE TO SEE HOW I BUILD APPS, OR FIND SOMETHING USEFUL READING MY BLOG, I WOULD REALLY APPRECIATE YOU SUBSCRIBING TO MY YOUTUBE CHANNEL.
THANK YOU, AND LET'S KEEP LEARNING TOGETHER.
CARL

Hi,
Can we add B2B users into Web roles?
Scenario: I have set of users which are from another tenant. I have set up B2B access. Now I need to put them into one role. Can I do that by any chance?
Thanks in advance.