Omnichannel agent experiences can be improved by providing customized forms, layouts, and surfacing data quickly. With Dynamics 365 Omnichannel for Customer Service, there are several customization options available. Let’s take a look at these.
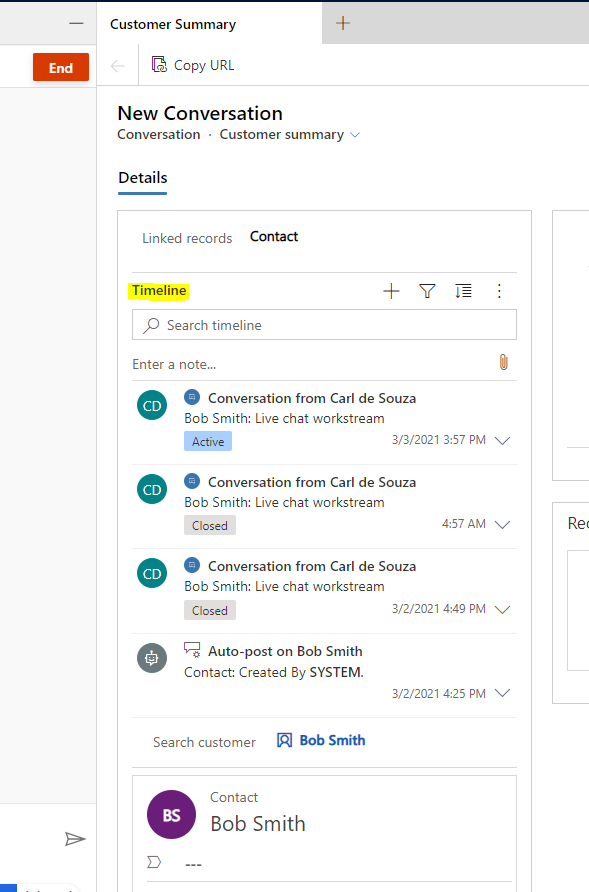
First, let’s look at the Omnichannel experience when a chat session is started. The agent sees below:
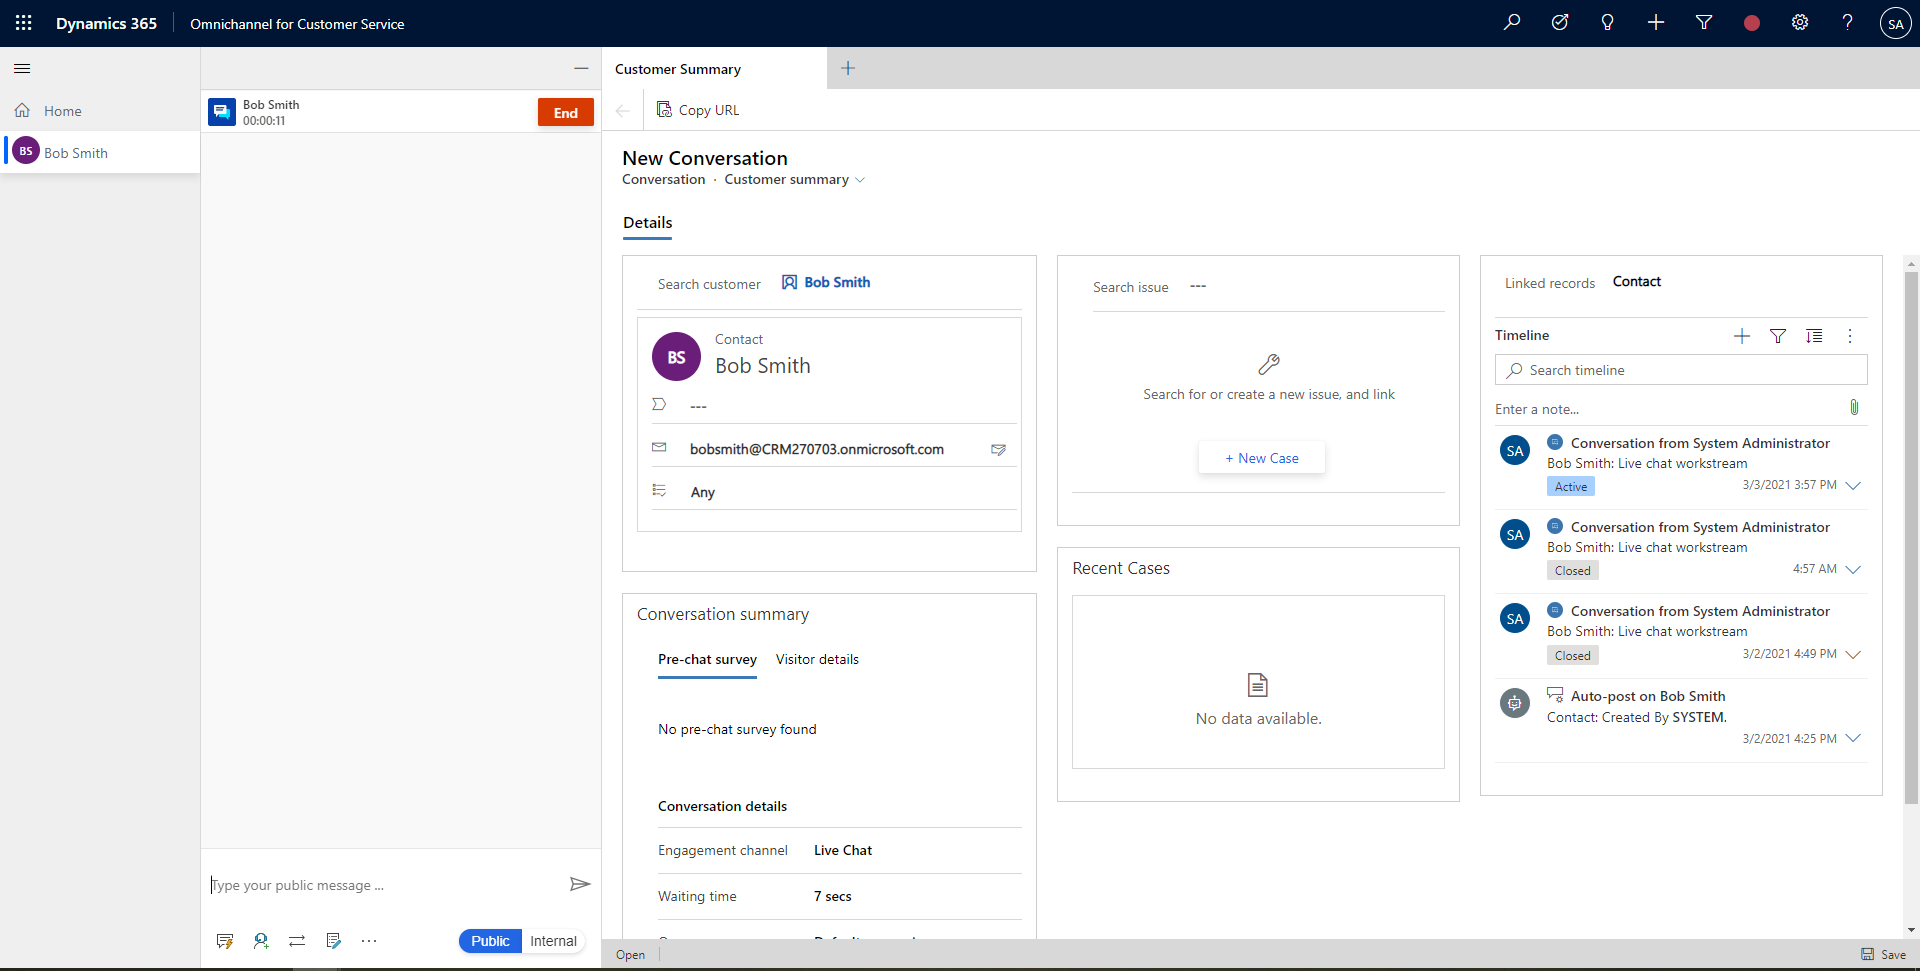
Breaking this down, we see:
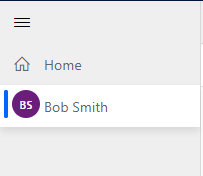
- The left navigation, which holds tabs to the sessions:
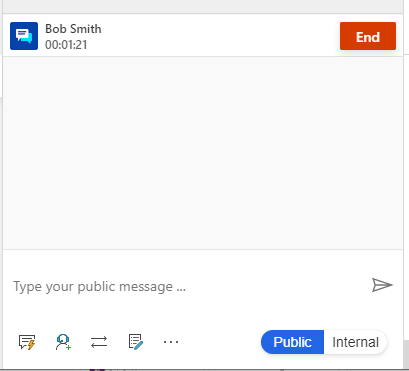
- The chat interface, where the agent types messages:
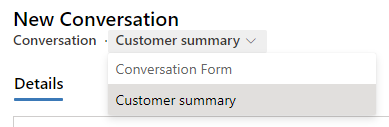
- Customer information, drive by the conversation entity and its forms:
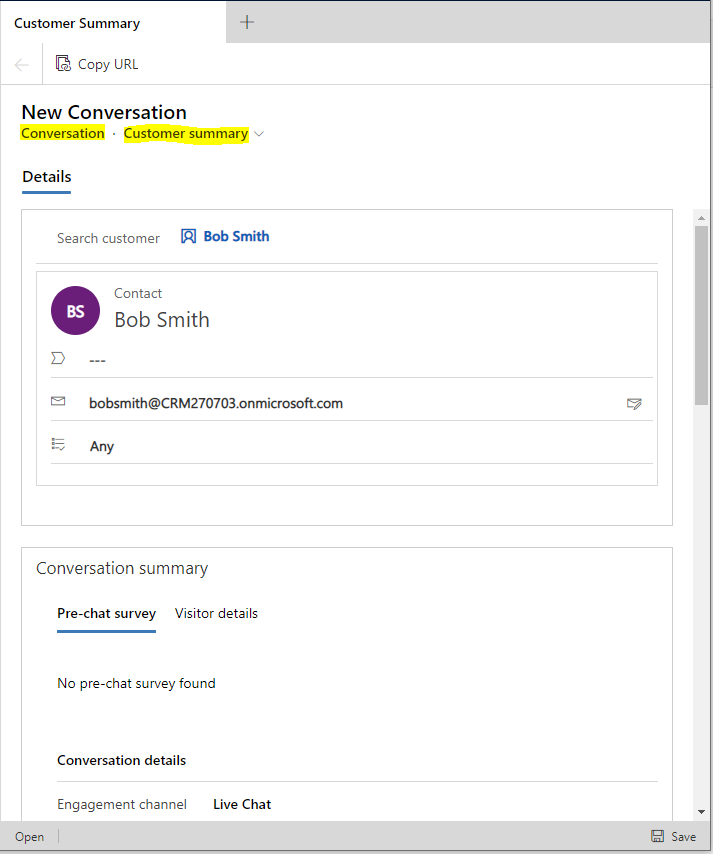
- There are 2 forms available here – Customer summary and Conversation Form:
Customizations to these screens can include:
- Modifying forms such as the Customer Summary form we see
- Customizing quick views to surface more information
- Applying Session Templates with replacement parameters for business logic
Customizing the Customer Summary Form
Let’s look at how we can customize the Customer summary form.
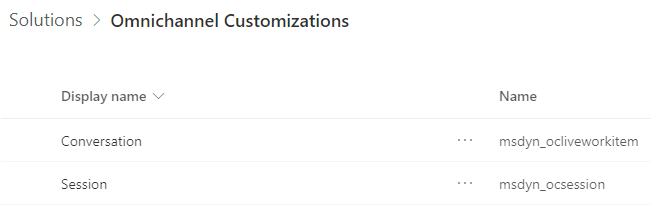
First, create a solution to hold our customizations. I will call it Omnichannel Customizations, and add the conversation and session tables / entities to it:
Now, let’s open the Conversation table and go to Forms.
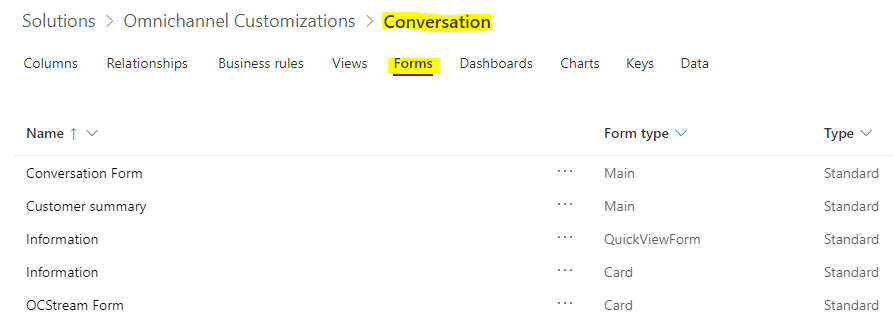
Then open the Customer summary form. We see the layout, which matches what our agent currently sees:
The easiest thing here is to move the layout around. Let’s say we want the timeline on the left instead of the right. We can also add or remove fields, add web resources etc. Let’s drag it over so it looks like below, then save and publish:

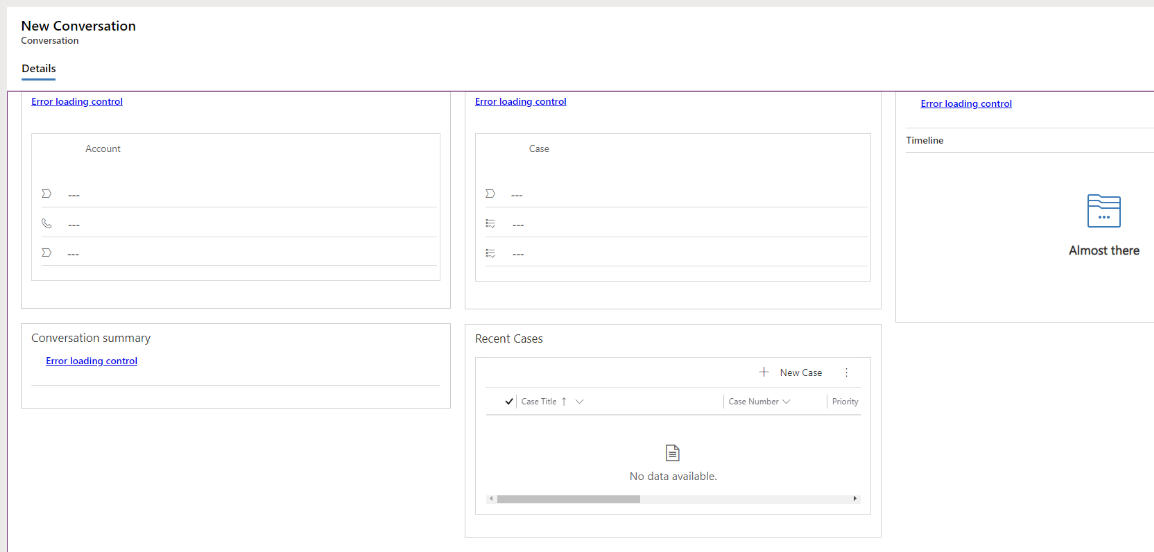
Now if we reopen the agent experience, we see the layout has been updated:
Customizing Quick Views
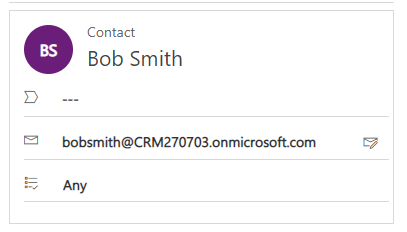
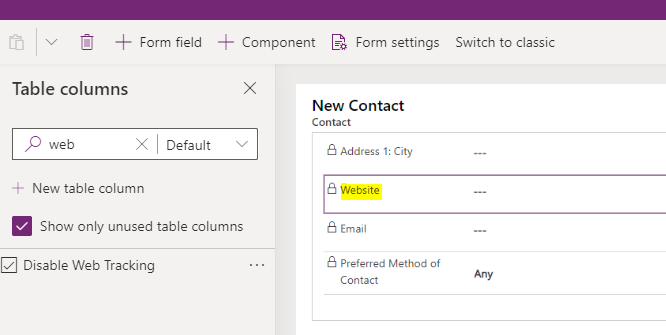
How about if we want to add some more fields to our contact, so the agent doesn’t need to drill further?
We see this is a quick view form:
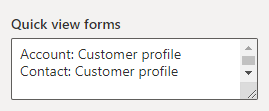
Let’s open the Customer profile quick view form, which is on the Contact entity:

Let’s add Website to the form, then save and publish:
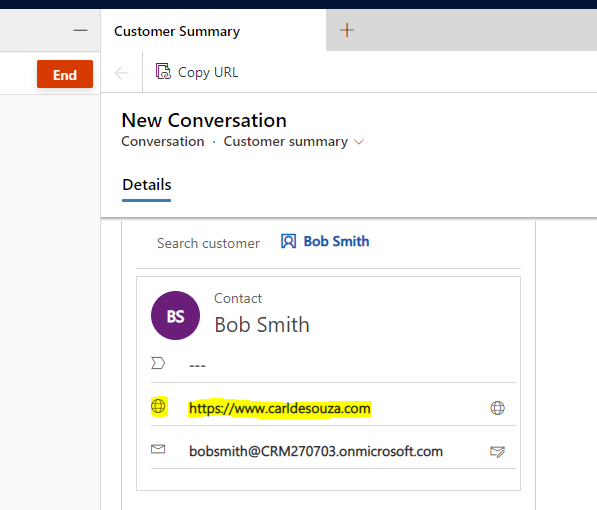
Now when the agent refreshes their session, we see the website is coming through for the caller:
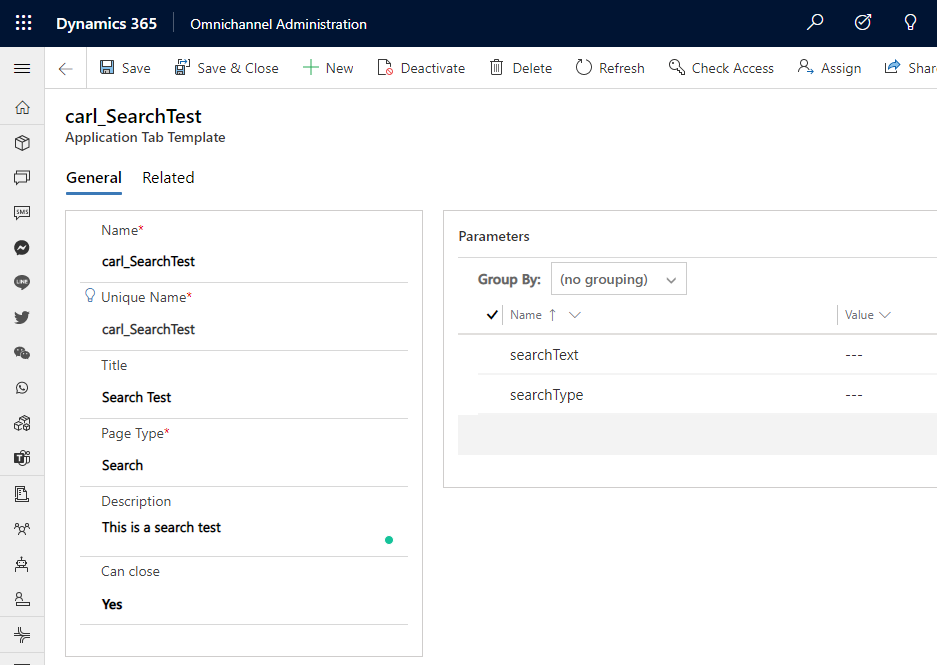
Session Templates
Next, let’s look at how we can apply different templates to the page itself.
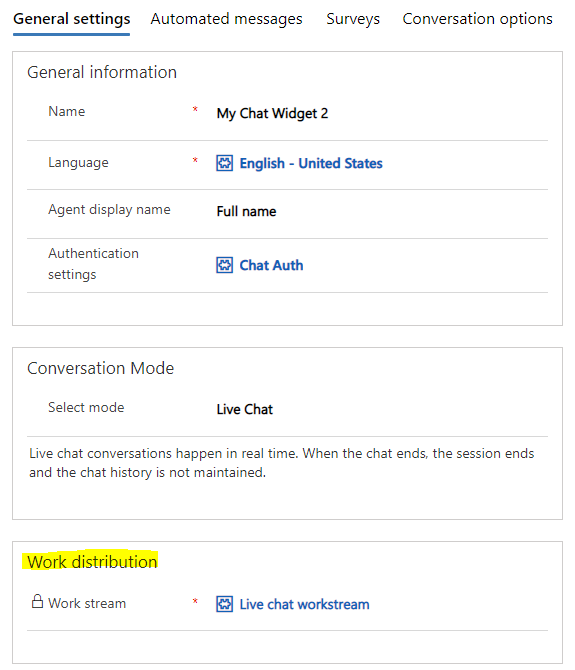
In our case, our chat widget is configured to use the Live chat workstream below:
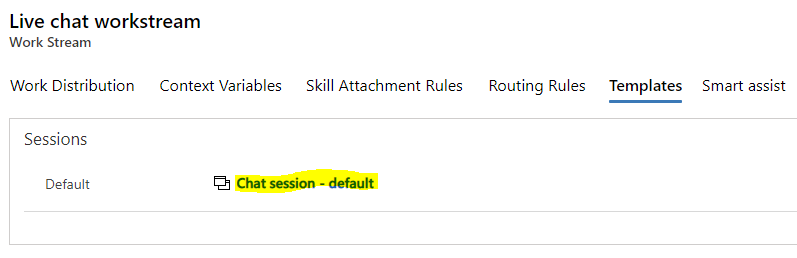
Which uses the session Chat session – default:
We can see some attributes to this session type, including the
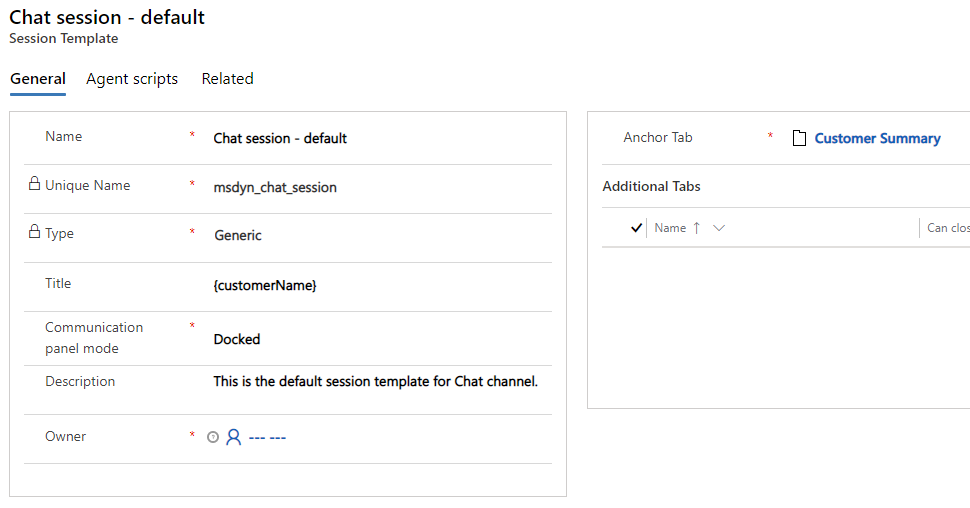
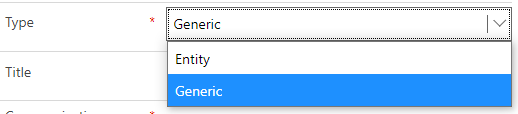
Note the types available are Generic and Entity:
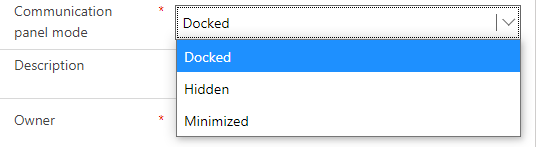
And the communication panel modes are Docked, Hidden, and Minimized:
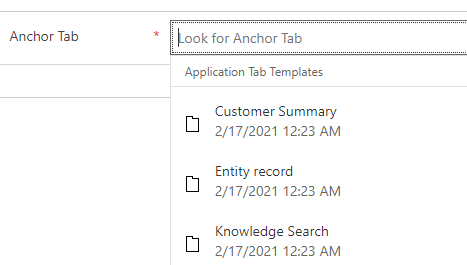
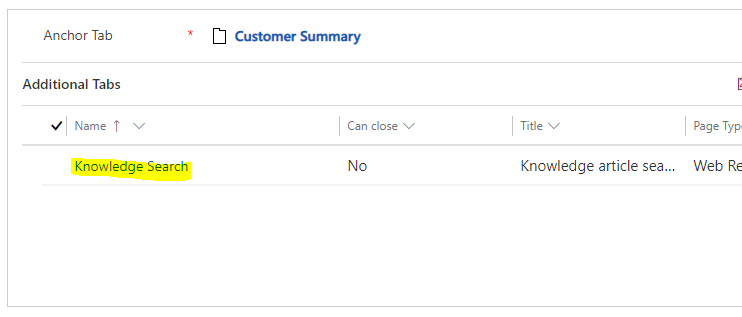
For the Anchor tab, we see options for anchor tab records. We will select the existing one first.
Let’s also add the Knowledge tab as an additional tab:
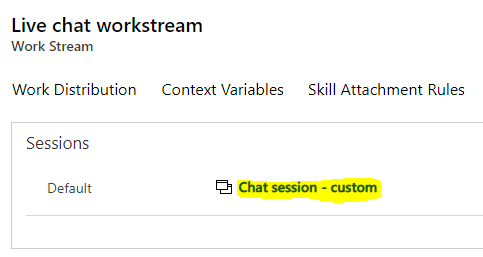
Finally, let’s assign this new custom Chat session to the Live chat workstream:
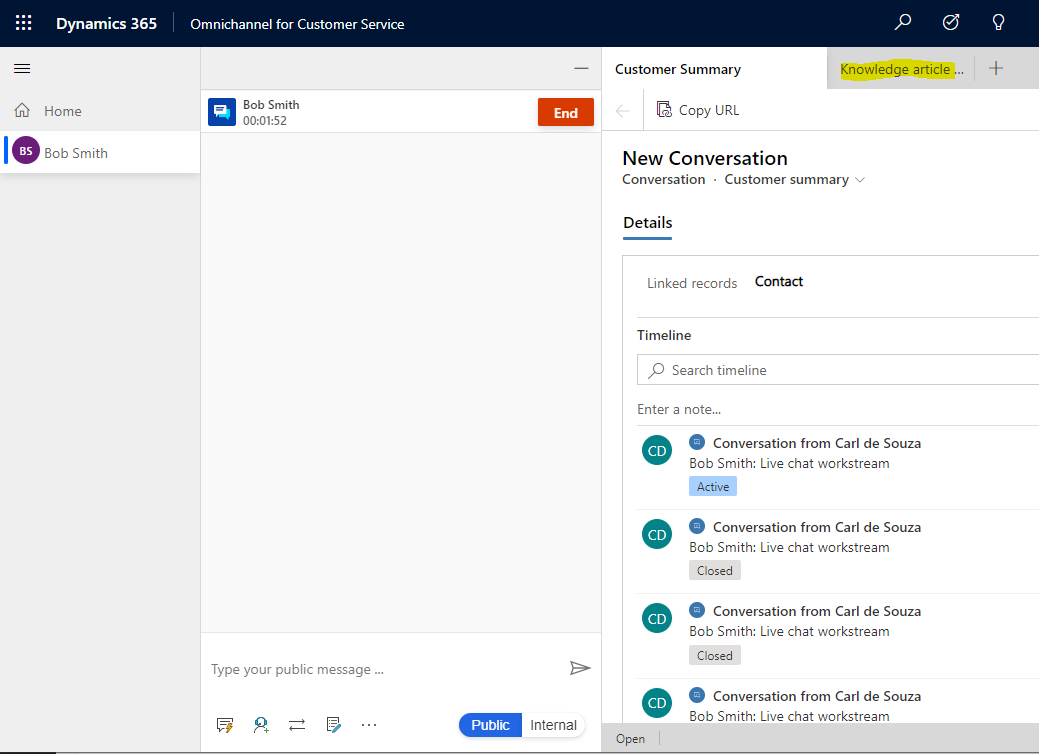
Now let’s see what the agent sees by going into a session. It looks similar to before, but this time with the Knowledge tab:
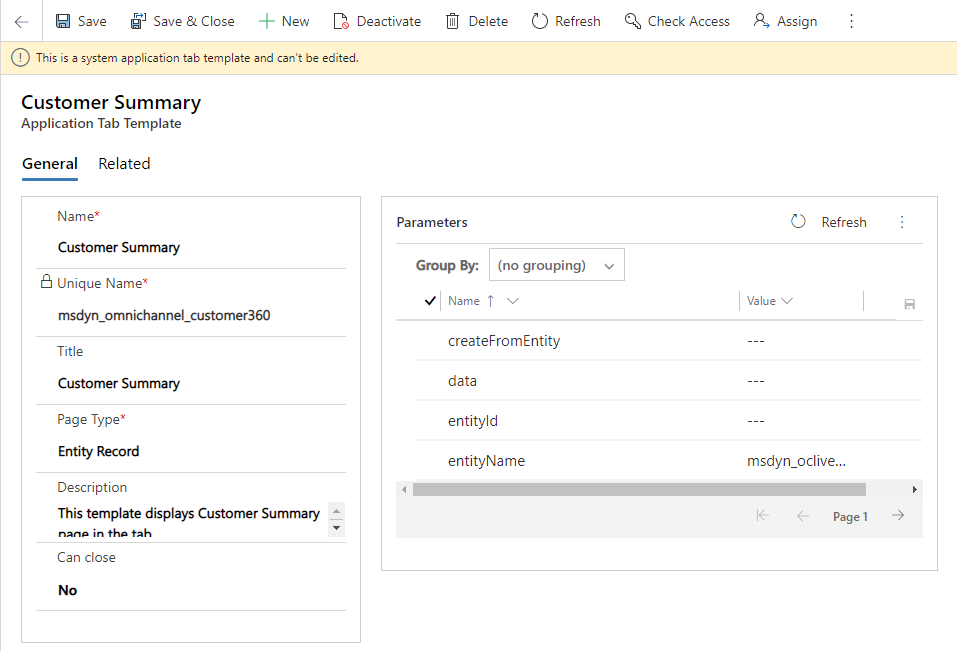
Let’s change the Anchor tab. If we take a look at the customer summary tab, we see it is a page type Entity Record:
The options for page type are:
- Entity List
- Entity Record
- Web Resource
- Control
- Dashboard
- Search
- Third Party Website

Let’s take a look at these.
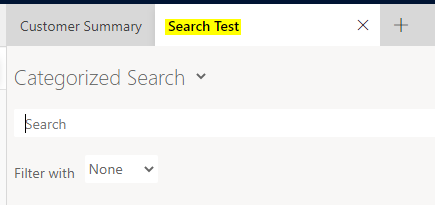
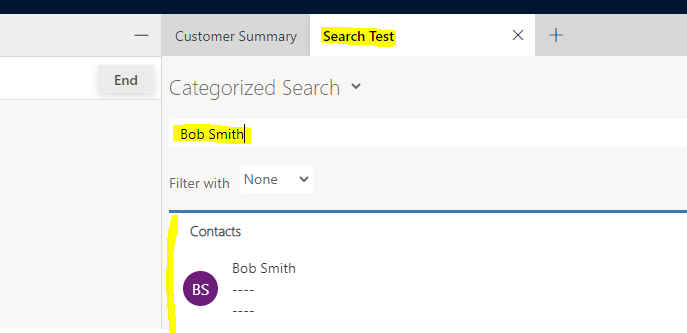
Search
The agent will see:
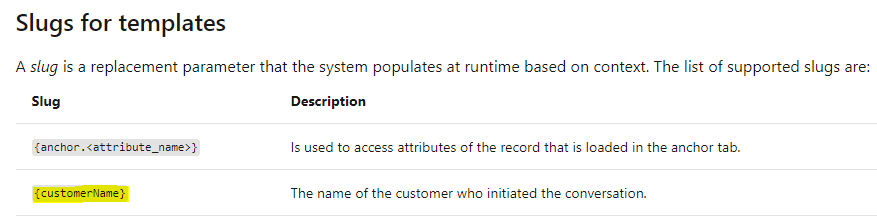
Now, to pass a dynamic value to the parameter, we can use slugs, or replacement parameters. You can read more about slugs here – https://docs.microsoft.com/en-us/dynamics365/app-profile-manager/automation-dictionary-keys.
In this case, we will use the {customerName}:
We will also see the searchType to 1 (CategorizedSearch) instead of 0 (RelevanceSearch):
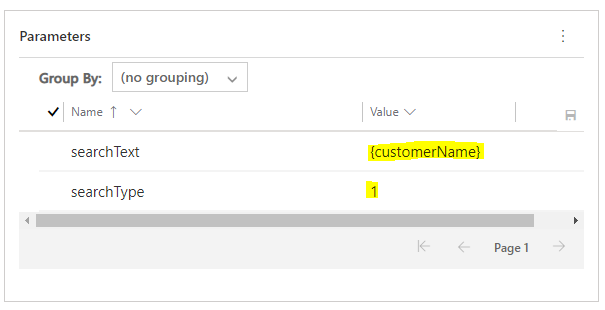
Now the agent sees the customer name being populated directly into the search:
Entity Record
This is useful if you want to open a specific record, say, the customer record directly in its own tab.
This time, we will use the {customerName} replacement parameter directly in the name of the entity record, so it will be the name of the tab the agent sees. We will also set the following parameters:
- entityId = {customerRecordId}
- entityName = {customerEntityName}
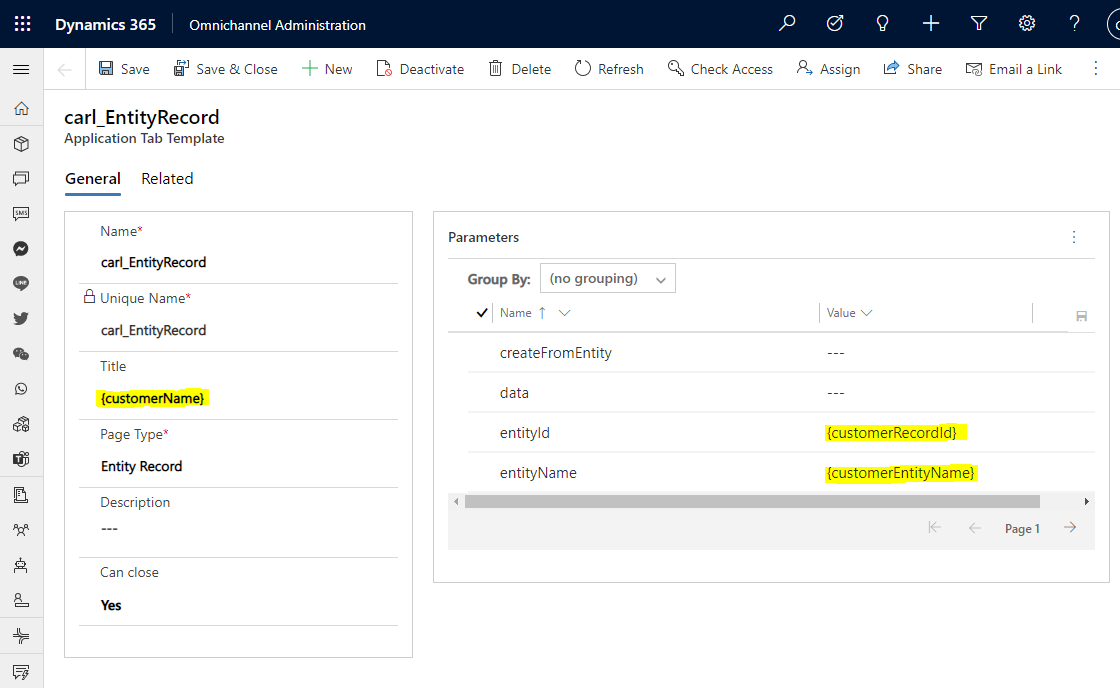
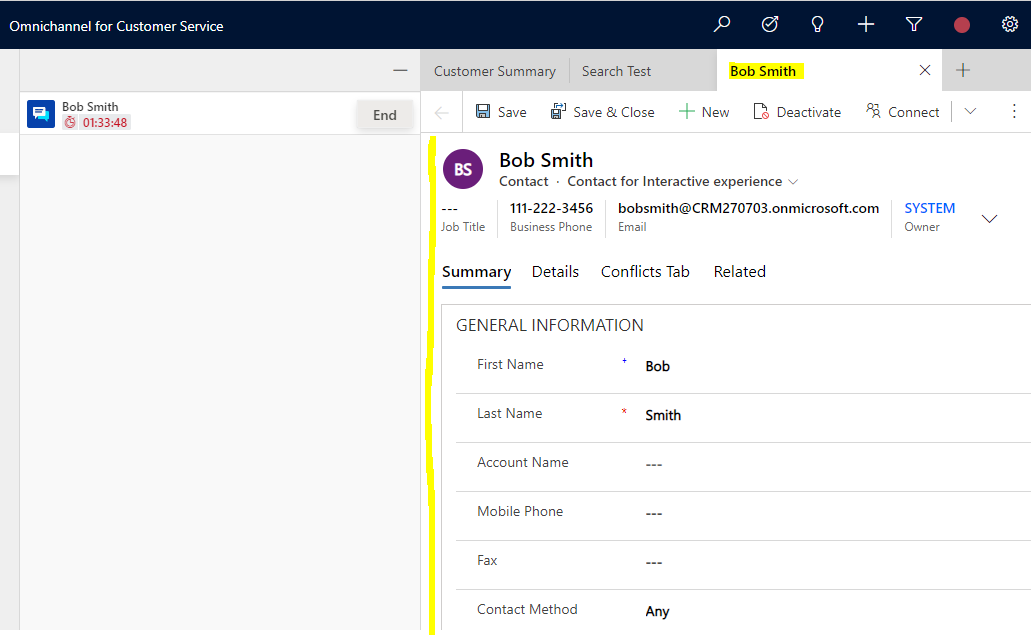
The agent now gets the customer tab, labeled as the customer name:
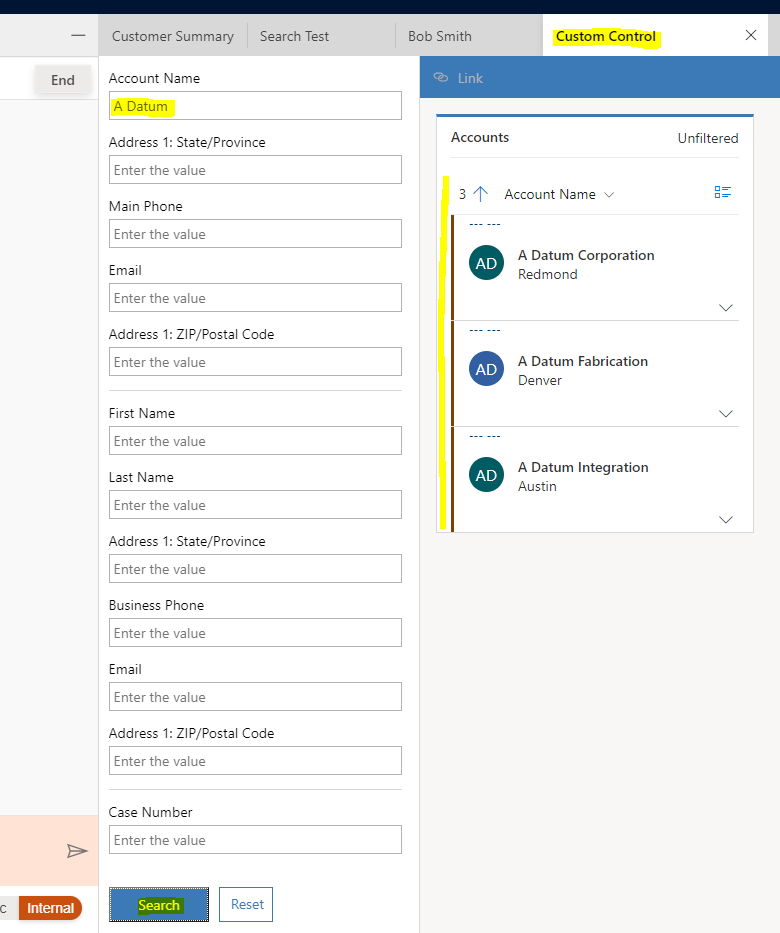
Custom Controls
Let’s use the MscrmControls.OCSearchRuntime.OCSearchRuntimeControl Omnichannel search control here:
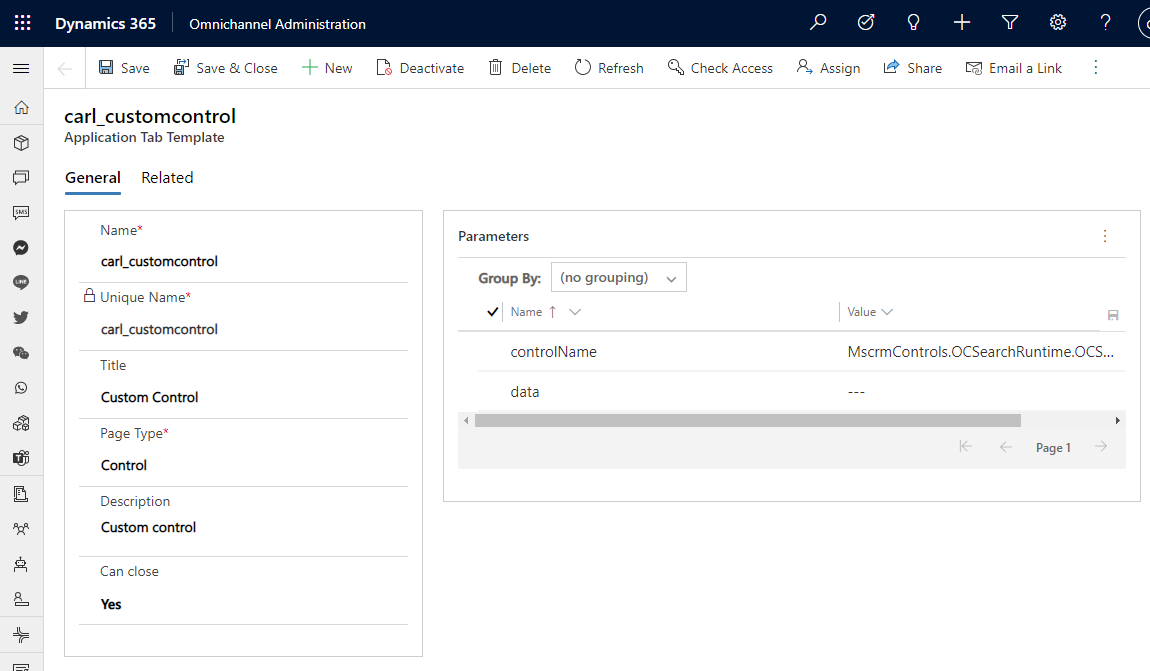
Now the agent sees the control and can search for accounts:
Other controls such as Entity List, Dashboard, Web Resources, Third Party Websites are pretty straight-foward to use. You can read more about them here.
That’s an overview of how to customize the agent experience in Omnichannel. Hopefully you can add some of these features to better help your agents.
I AM SPENDING MORE TIME THESE DAYS CREATING YOUTUBE VIDEOS TO HELP PEOPLE LEARN THE MICROSOFT POWER PLATFORM.
IF YOU WOULD LIKE TO SEE HOW I BUILD APPS, OR FIND SOMETHING USEFUL READING MY BLOG, I WOULD REALLY APPRECIATE YOU SUBSCRIBING TO MY YOUTUBE CHANNEL.
THANK YOU, AND LET'S KEEP LEARNING TOGETHER.
CARL


Hi, thank you this is really helpful!
Is there any way to change the width of the chat interface at the Omnichannel Agent experience?
Hi Carl,
Thank for the article. I wanted to know if the chat control’s message format can be changed?
For Example, for every incoming message wanted to hide the name of the customer to agents? I have tried masking rules but it only applies to the message data but the daytime and name of the customer are not hidden.
Is it possible edit the main View (adding new columns) at main Conversation form ?