In this post, we will look at how to call the Dynamics 365 WebApi from Power Apps Portals.
First, we can test the WebApi by browsing to it in the browser. The address is <portalurl>/_api/<entityname>. Let’s try the accounts entity, which would be the URL /_api/accounts and see if we can retrieve accounts:

We get the message:
{"error":{"code":"9004010C","message":"Resource not found for the segment account."}}Now, in the Portal Management app, if we go to Site Settings, there is currently no WebApi entries:
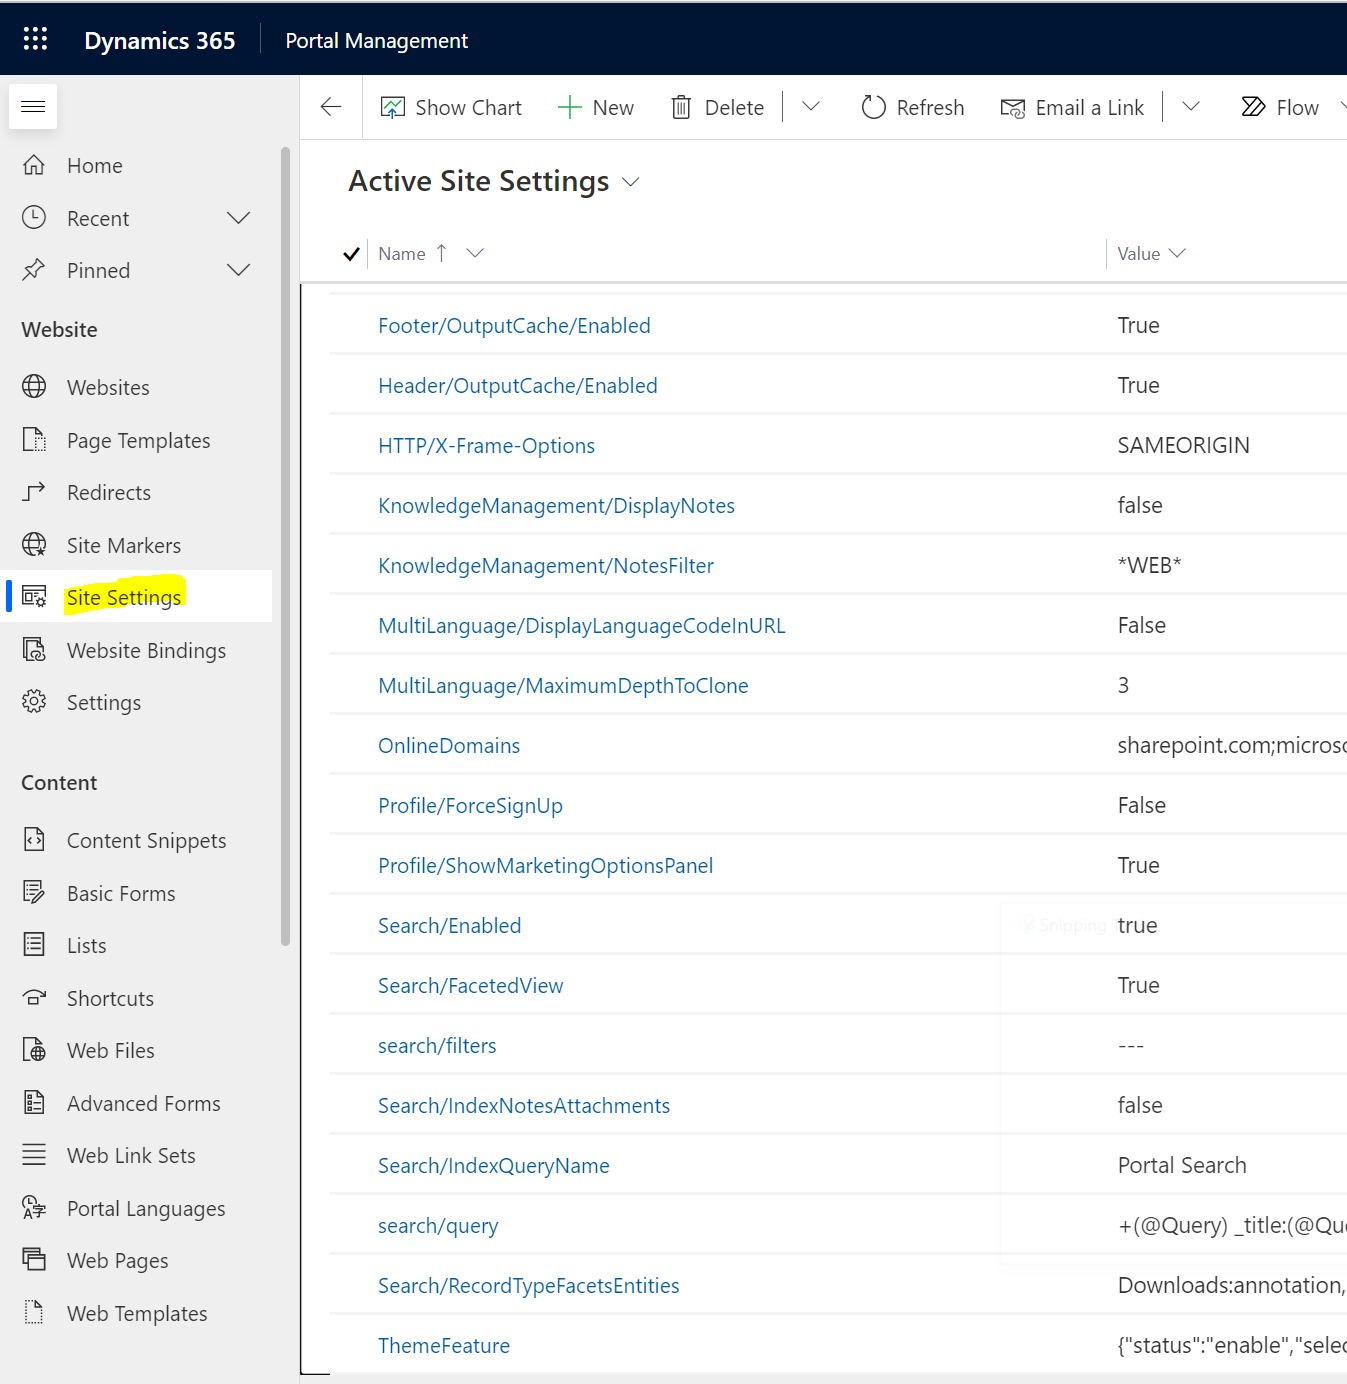
Let’s create a new entry, like below:
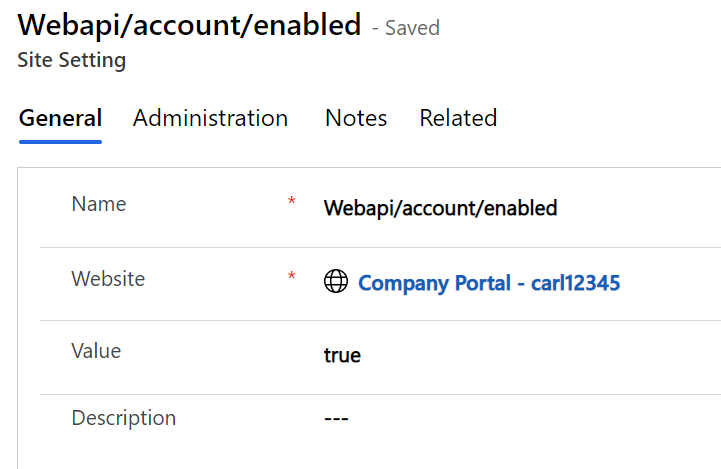
Now when we refresh the page, we see:
{"error":{"code":"90040120","message":"You don’t have permission to read the account table."}}
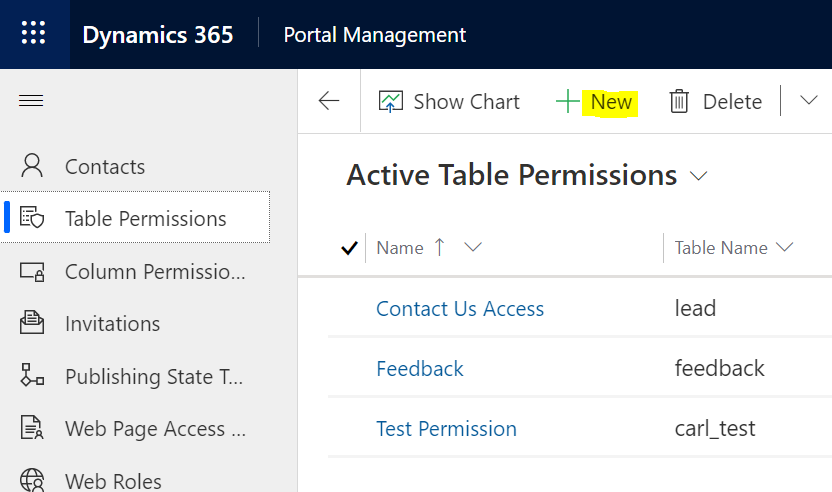
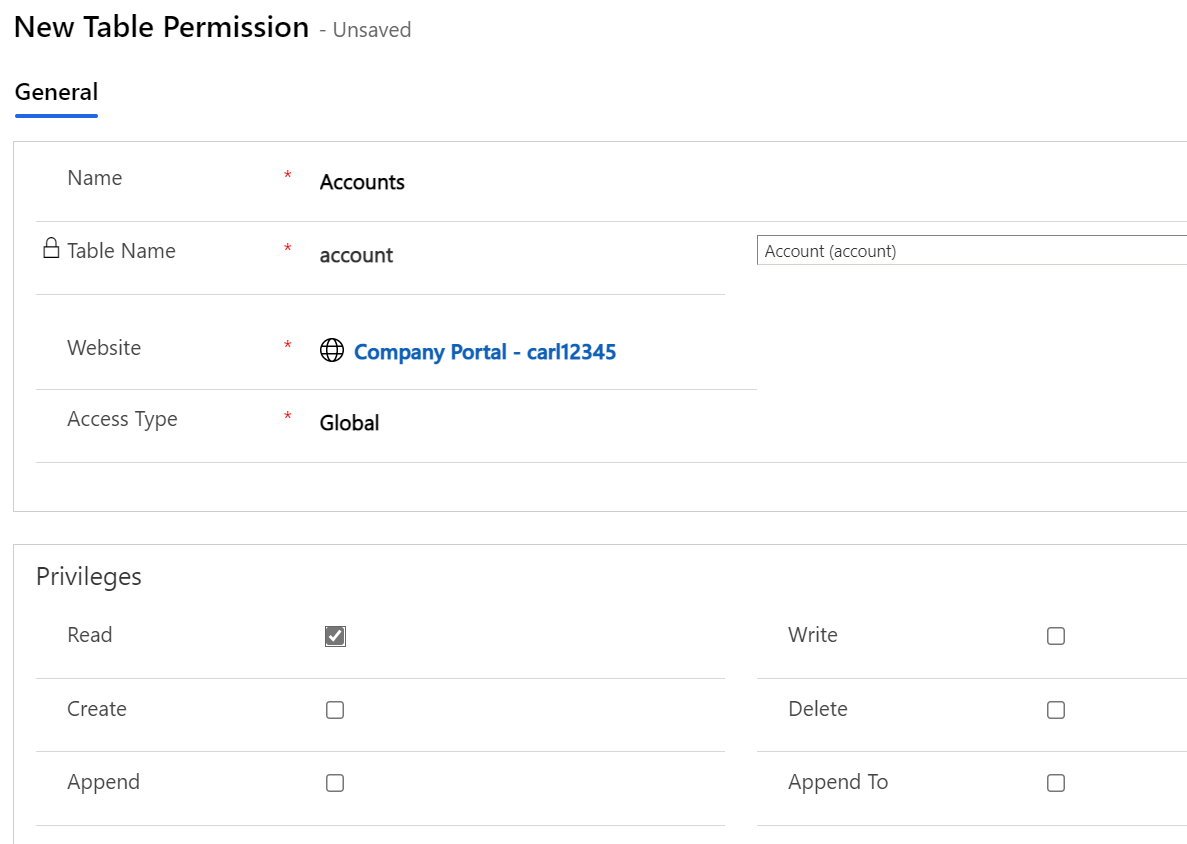
We don’t have a table permission for Accounts, so let’s add one:
We will start with Read permission:
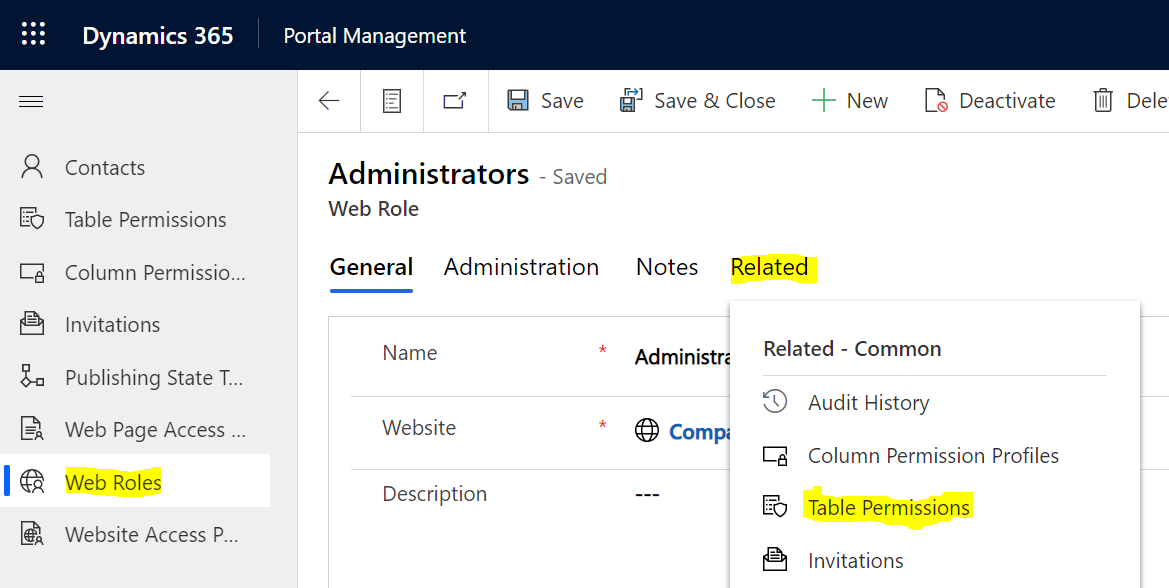
And now let’s go to Web Roles, select the Web Role for your user (I picked Administrators) and then go to Relates->Table Permissions:
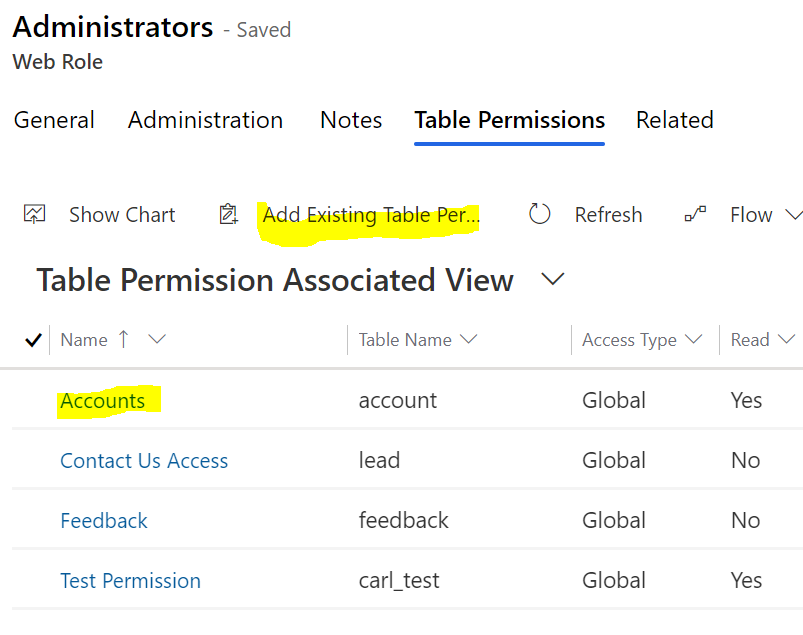
And Add Existing Table Permissions->Accounts:
Now restart the portal cache, then go to the API page. We now see:
{"error":{"code":"90040101","message":"Attribute * in table account is not enabled for Web Api."}}
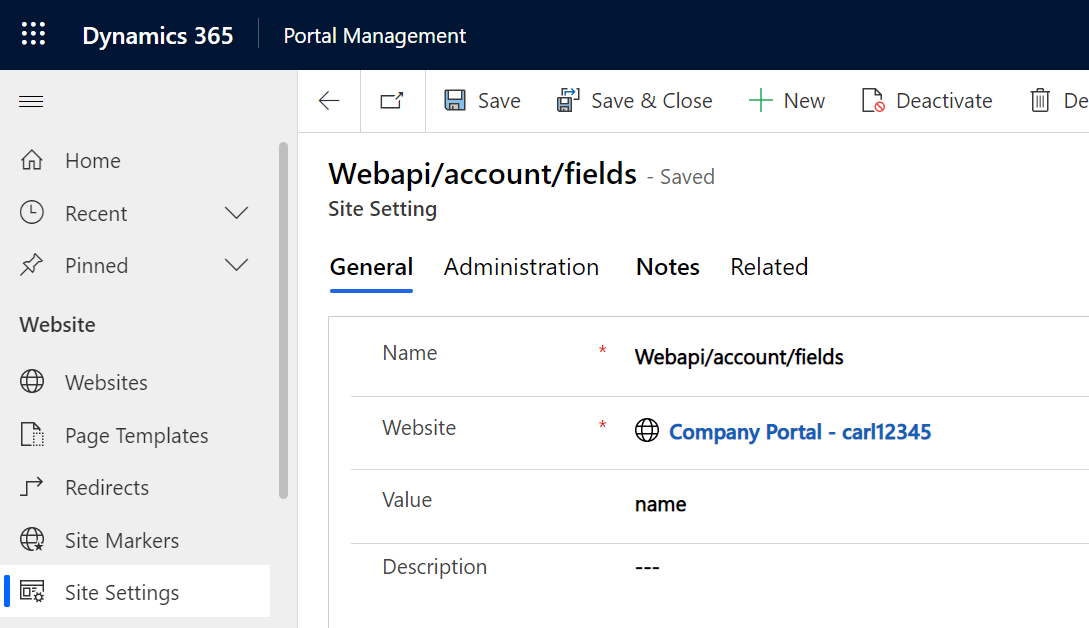
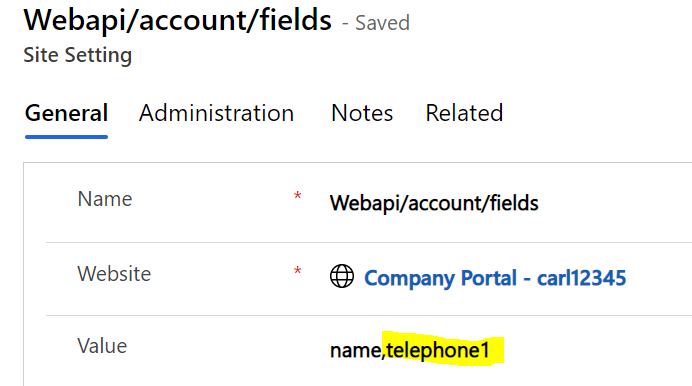
In Site Settings, we need to specify what fields will be available for the WebApi. Create a record like below. We will enable the name field:
Also create a record for errors:

After clearing cache and refreshing, we see the error:
{"error":{"code":"90040101","message":"Attribute * in table account is not enabled for Web Api.","innererror":{"code":"90040101","message":"Attribute * in table account is not enabled for Web Api.","type":"AttributePermissionIsMissing"}}}
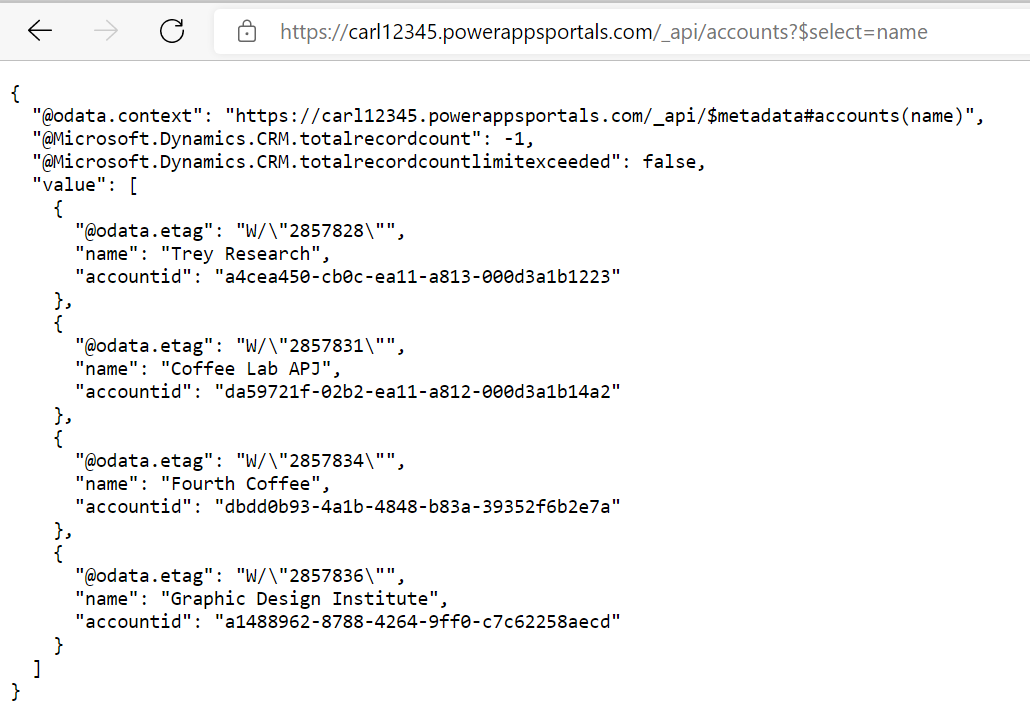
Now, we see it is trying to retrieve all columns and is throwing an error. Let’s specify the name column in the select statement like this: _api/accounts?$select=name. Now we see the accounts being returned:
Now let’s try to create an account. Note we did not enable this as a permission earlier.
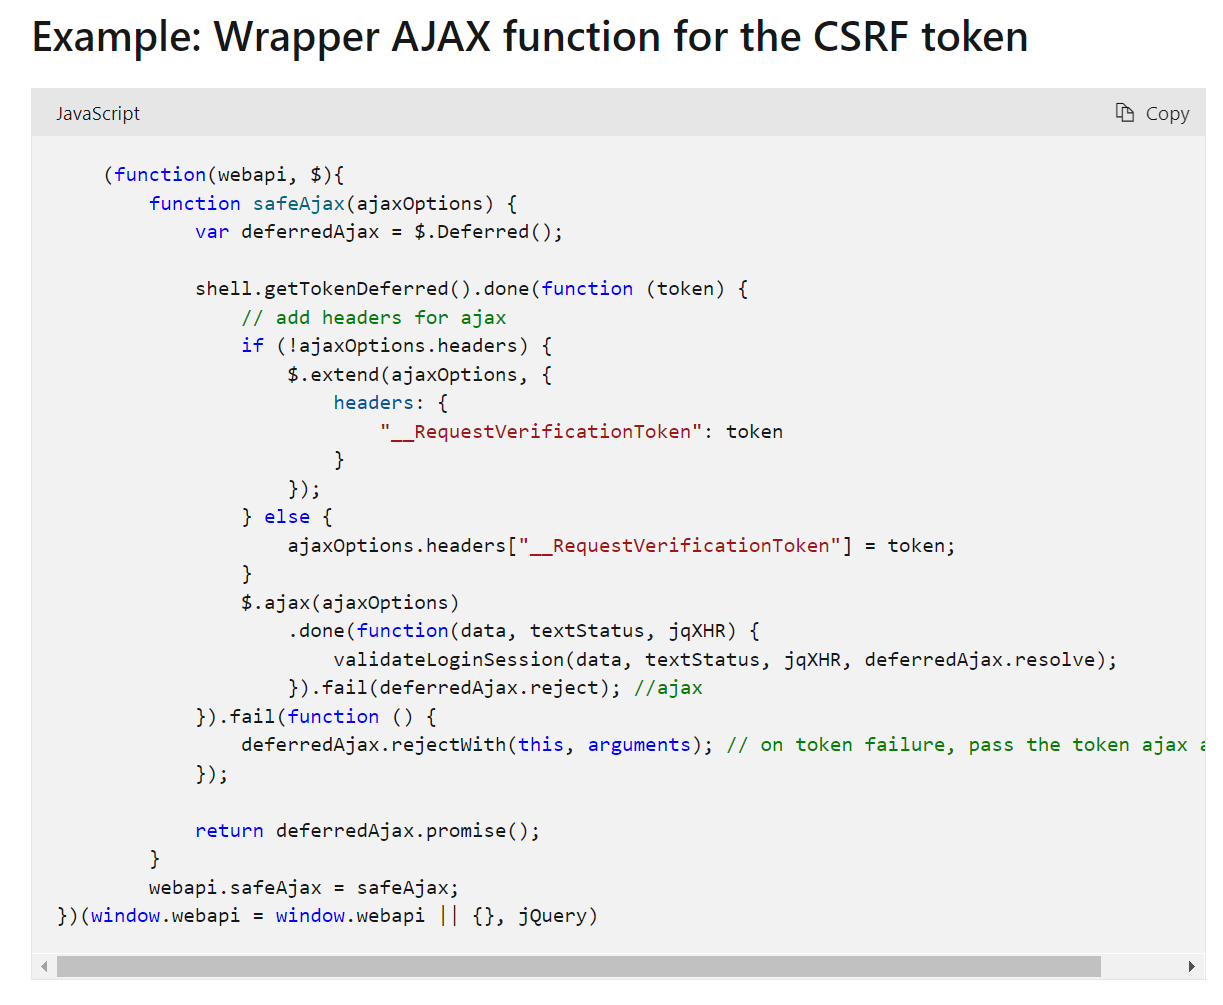
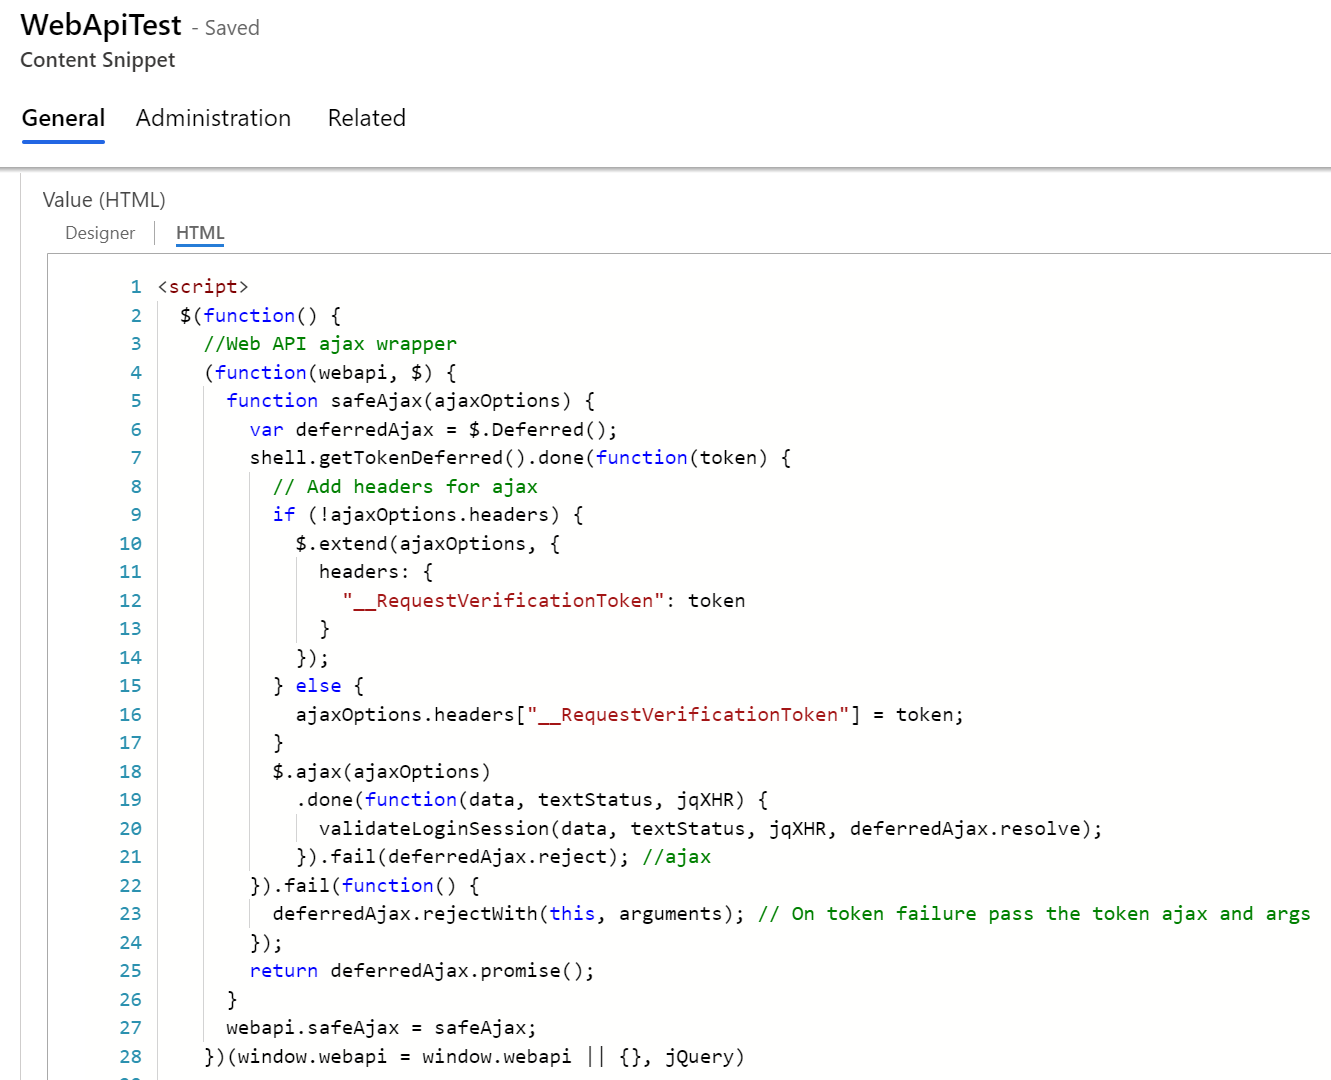
First, let’s generate a token which will be needed to run the code. The token code can be found here:
Now go to a Portal page, and run the code in the console:
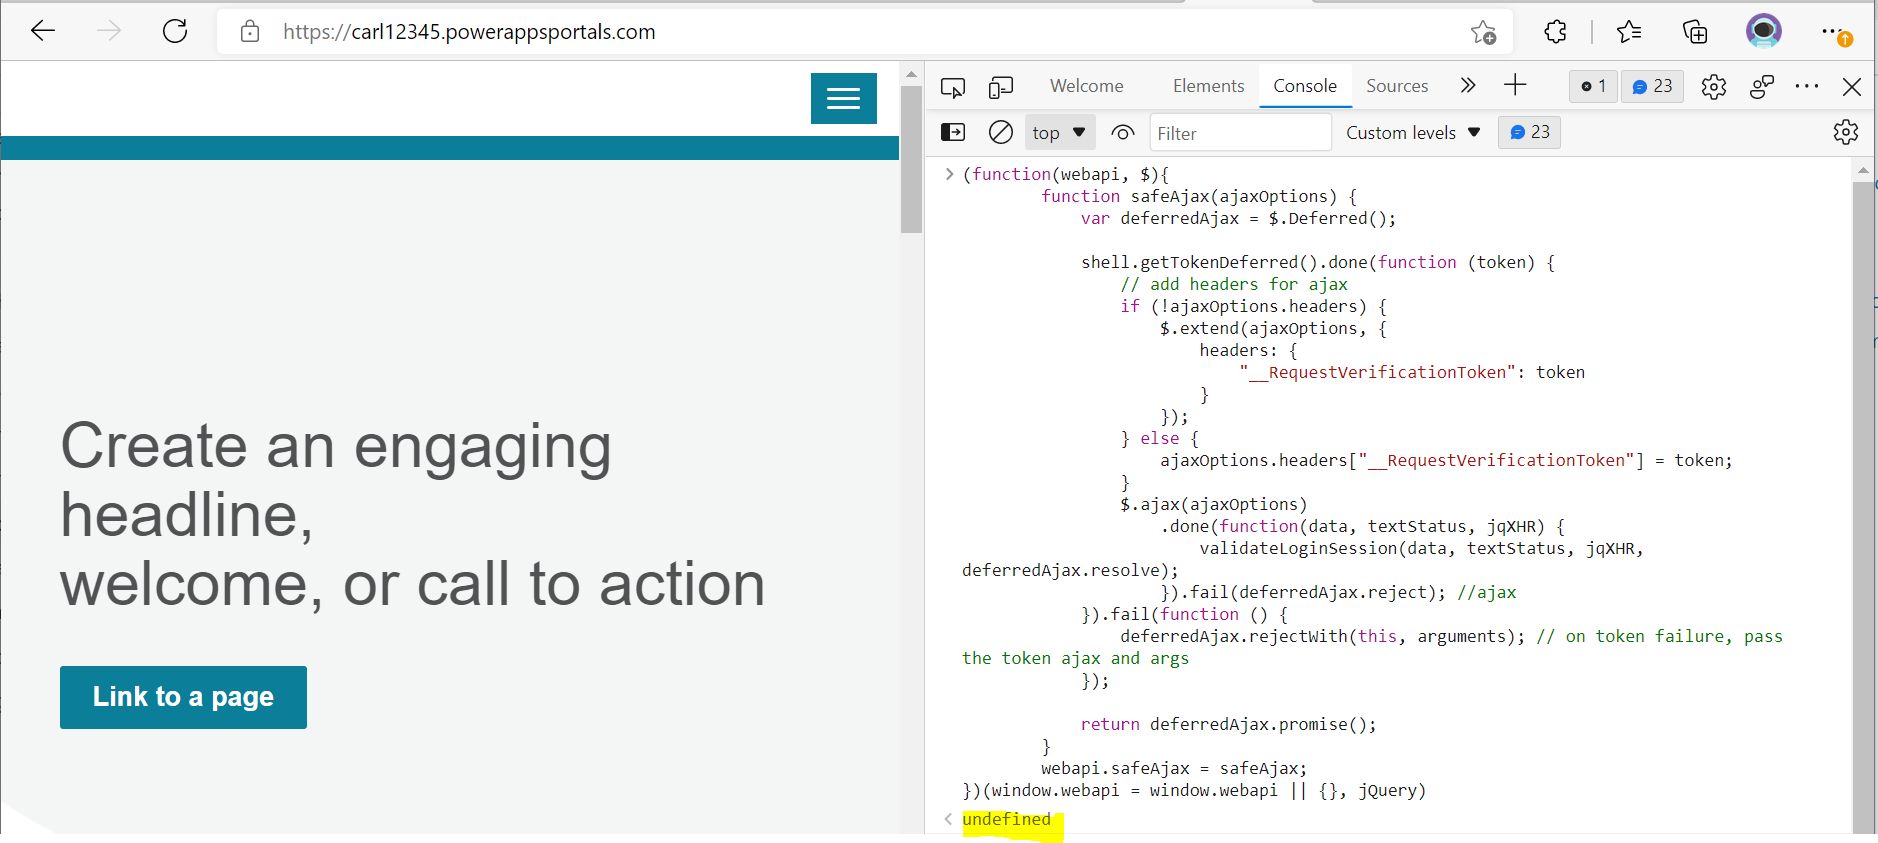 We get back an undefined, which is good. Now, copy the WebApi code to create an account, and run it in the same console. We get back a 403 forbidden:

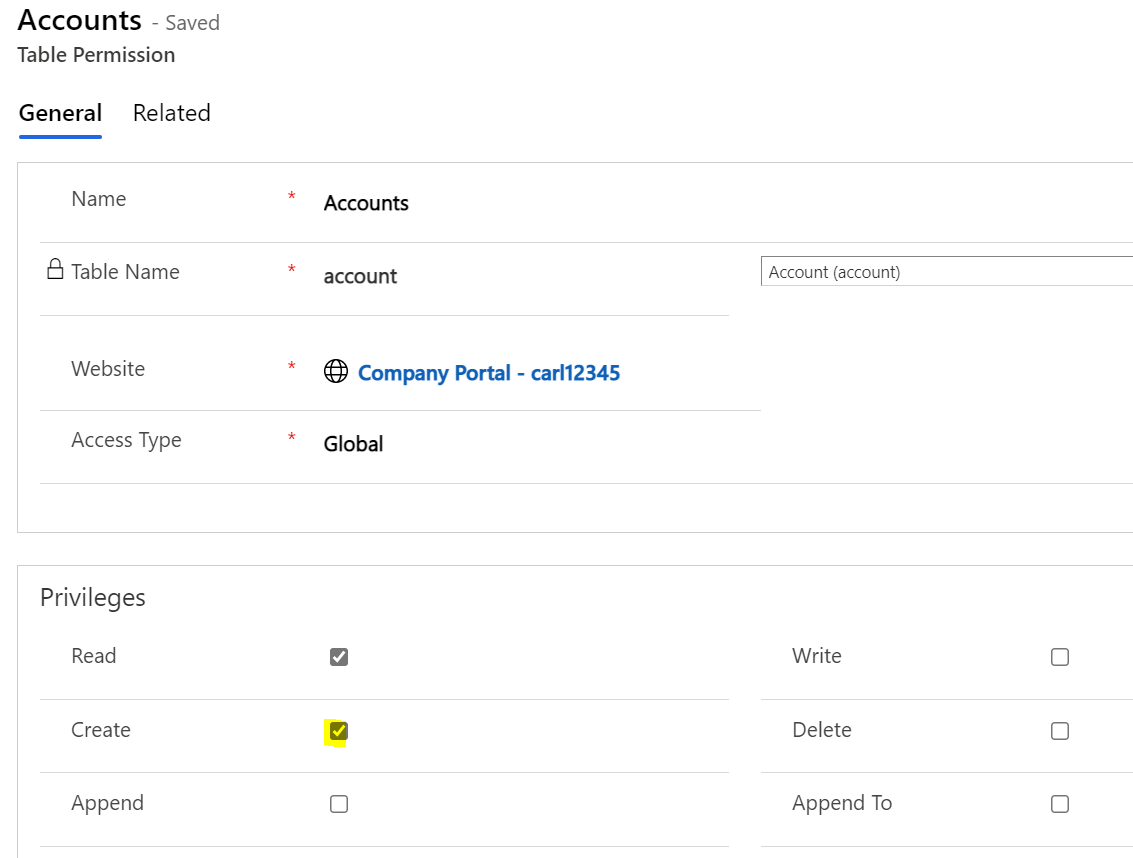
Go back to the Table Permissions, and add a Create:
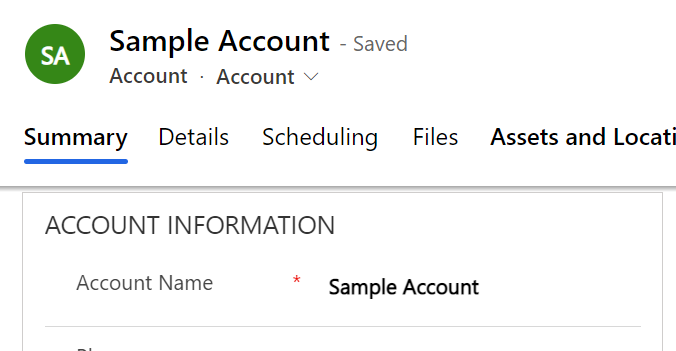
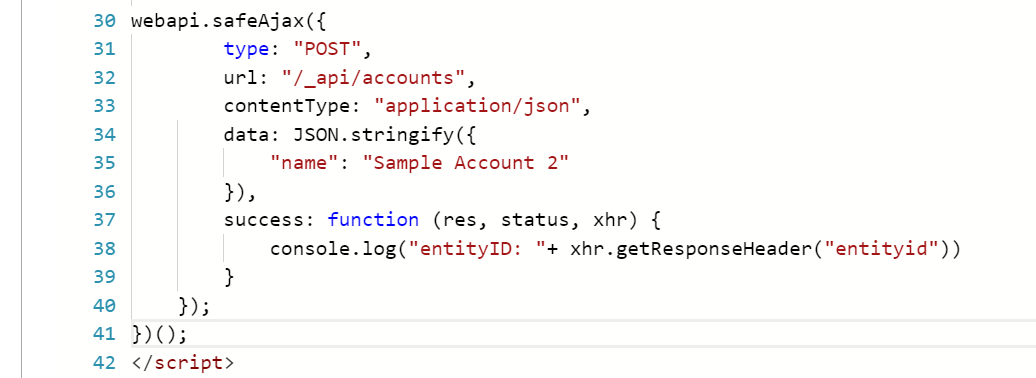
Rerun in the console, and we get back an entity guid, which means the account is created:

Same with Update, you will need to set the Write permission. And if you want to update a field such as telephone1, you will need to add it to the list of fields:
Now if we want to run this as a content snippet on the portal, let’s add the token code and the create code:
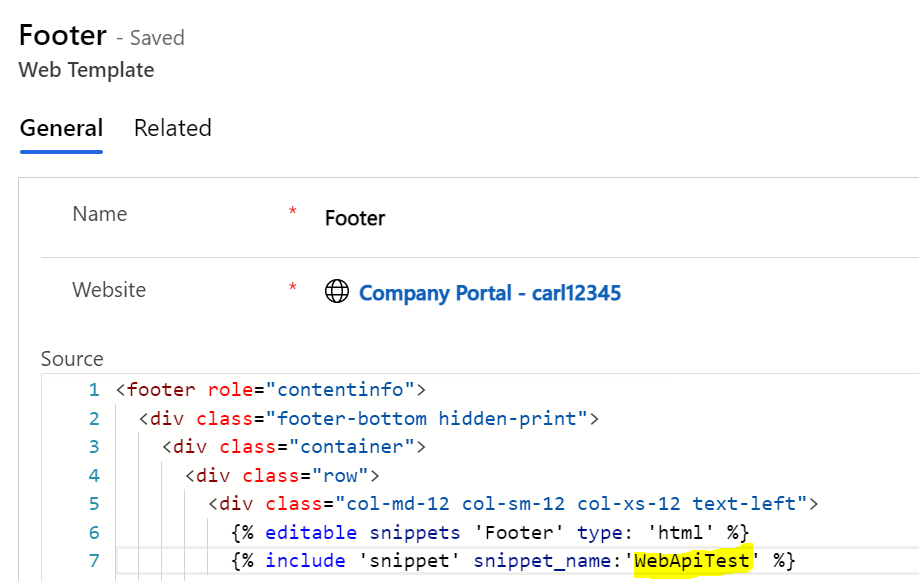
And we will add this to the footer:
When we rerun the page, our account is created:
I AM SPENDING MORE TIME THESE DAYS CREATING YOUTUBE VIDEOS TO HELP PEOPLE LEARN THE MICROSOFT POWER PLATFORM.
IF YOU WOULD LIKE TO SEE HOW I BUILD APPS, OR FIND SOMETHING USEFUL READING MY BLOG, I WOULD REALLY APPRECIATE YOU SUBSCRIBING TO MY YOUTUBE CHANNEL.
THANK YOU, AND LET'S KEEP LEARNING TOGETHER.
CARL

“error”:{“code”:”90040101″,”message”:”Attribute @odata.type in table cit_lookupentity is not enabled for Web Api.”,”innererror”:{“code”:”90040101″,”message”:”Attribute @odata.type in table cit_lookupentity is not enabled for Web Api.”,”type”:”AttributePermissionIsMissing”}}}
I’m having this problem also. I’ve triple checked all permissions on the dataverse table. Did you resolve your problem?
{“error”:{“code”:”9004010A”,”message”:”An unexpected error occurred while processing the request”,”innererror”:{“code”:”9004010A”,”message”:”An unexpected error occurred while processing the request”,”type”:”UnexpectedError”}}}