In Power BI you have the ability to implement row-level role-based security. What this means, is you can restrict data to certain users based on what role they are in.
Here, we will go through an example of implementing role-based security.
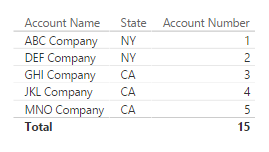
Let’s start with our data set. A simple Accounts table with a State field:
In Power BI Desktop, import the data. Then go to the Modelling tab and you will see under Security “Manage Roles”:

Here we can define roles:
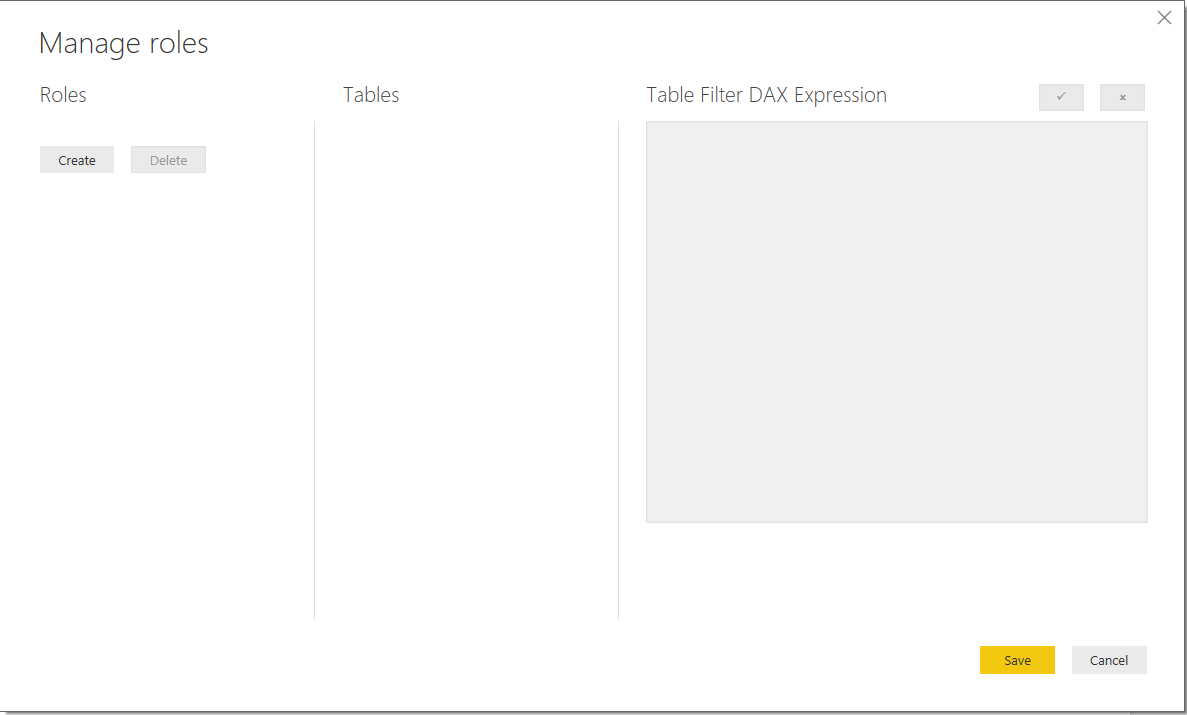
Create a new role called “New York Accounts”. Note the table selected is Accounts. The DAX expression is [State] = “NY”. Therefore any user with this role will be able to see accounts where the state is equal to NY:

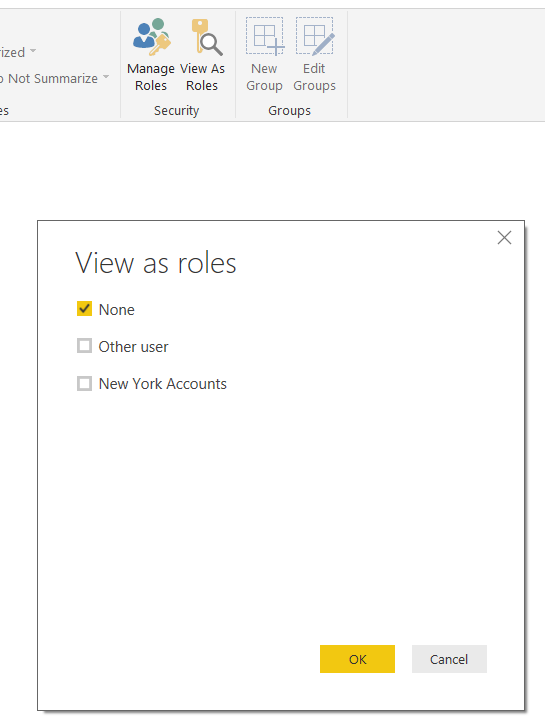
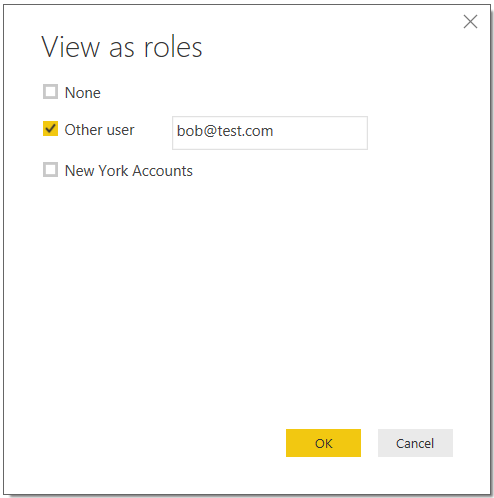
We can test how the role will look as one of these users within Power BI Desktop. Select View As Roles:
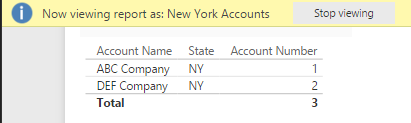
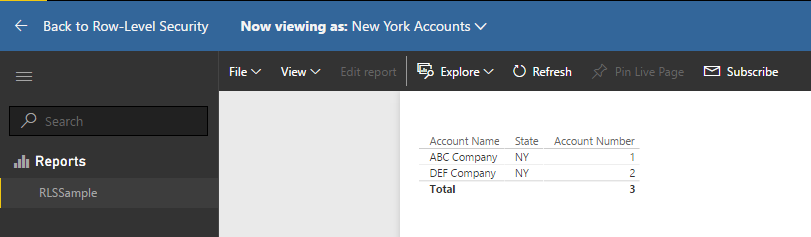
When you select New York Accounts, Power BI desktop will limit the data to only show these accounts.
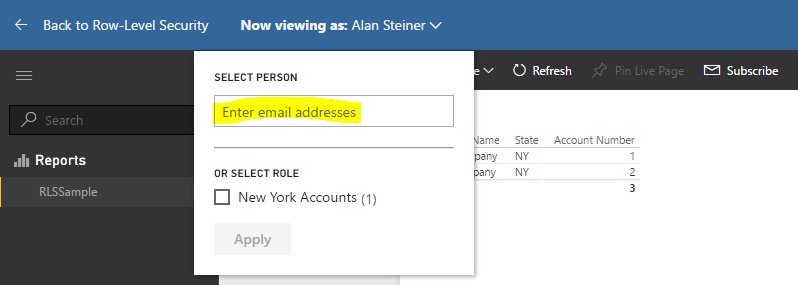
You can also enter a specific user to see how they would be able to view the data:
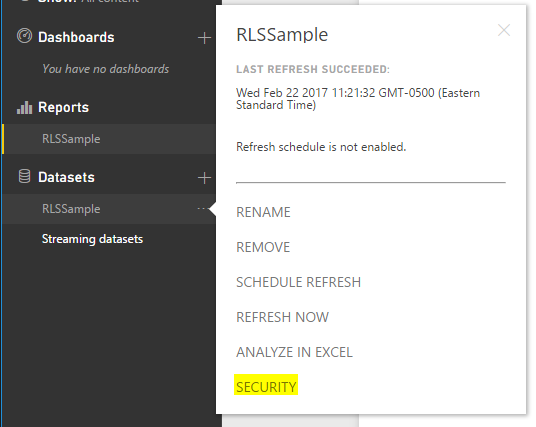
Save and publish to powerbi.com. We can then manage user security from there.
Under Datasets, select Security:
You will see the Roles defined in Power BI Desktop. Enter a member this role:
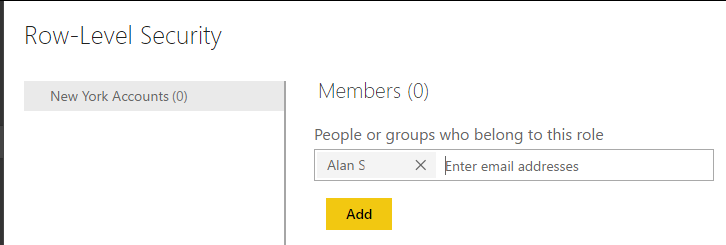
Click Save.
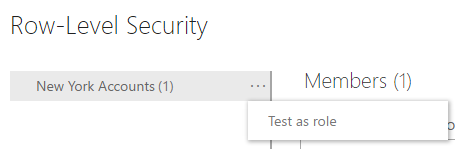
You can test how users will view the data by selecting the ellipse and Test as role:
And select an individual to see how they would view it:
I AM SPENDING MORE TIME THESE DAYS CREATING YOUTUBE VIDEOS TO HELP PEOPLE LEARN THE MICROSOFT POWER PLATFORM.
IF YOU WOULD LIKE TO SEE HOW I BUILD APPS, OR FIND SOMETHING USEFUL READING MY BLOG, I WOULD REALLY APPRECIATE YOU SUBSCRIBING TO MY YOUTUBE CHANNEL.
THANK YOU, AND LET'S KEEP LEARNING TOGETHER.
CARL


