Here we will create a WCF web service hosted as a windows service. We will go through step by step how to do this.
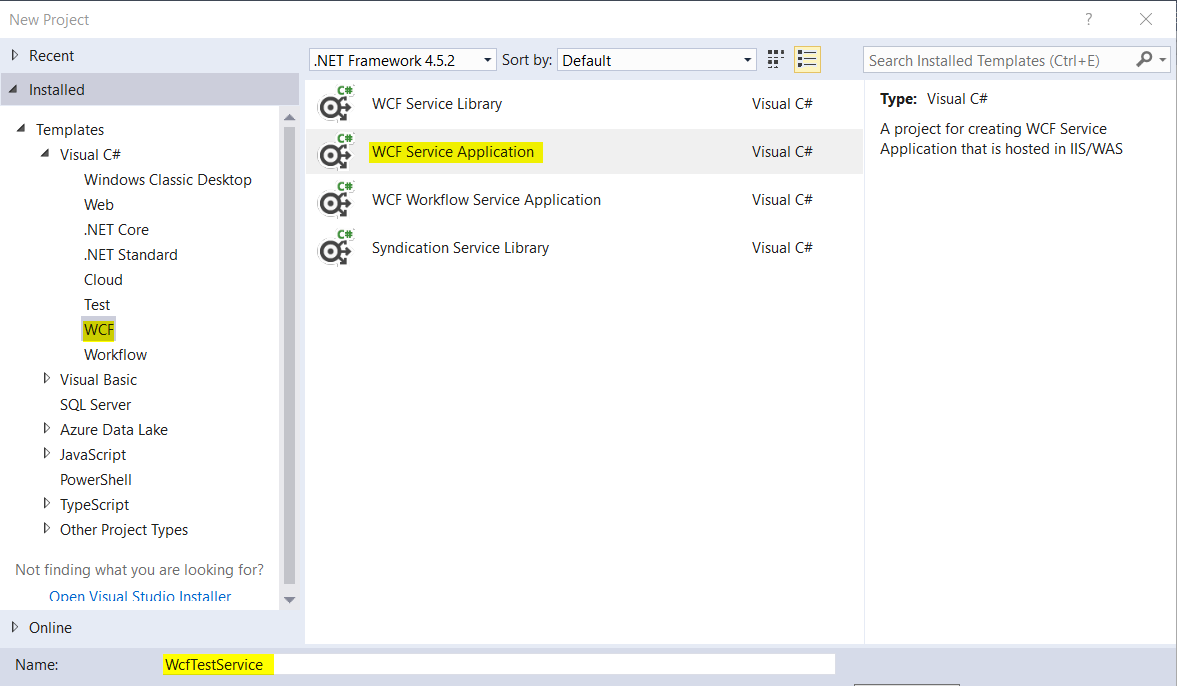
First, create a new WCF Service Application:
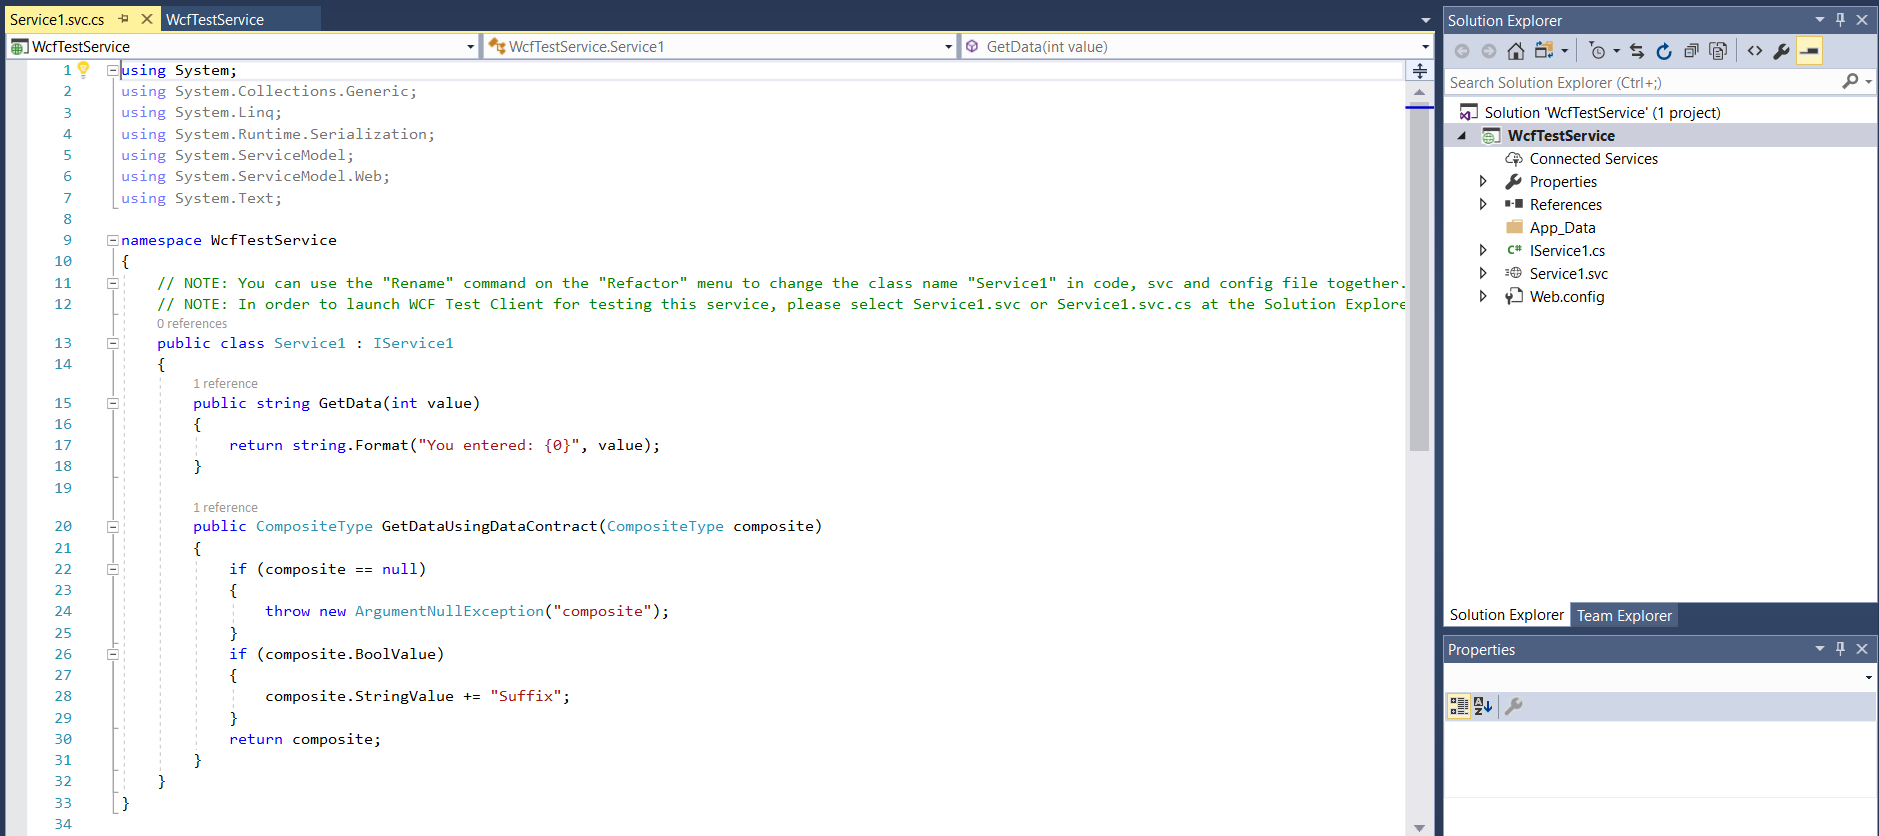
This will create the project:
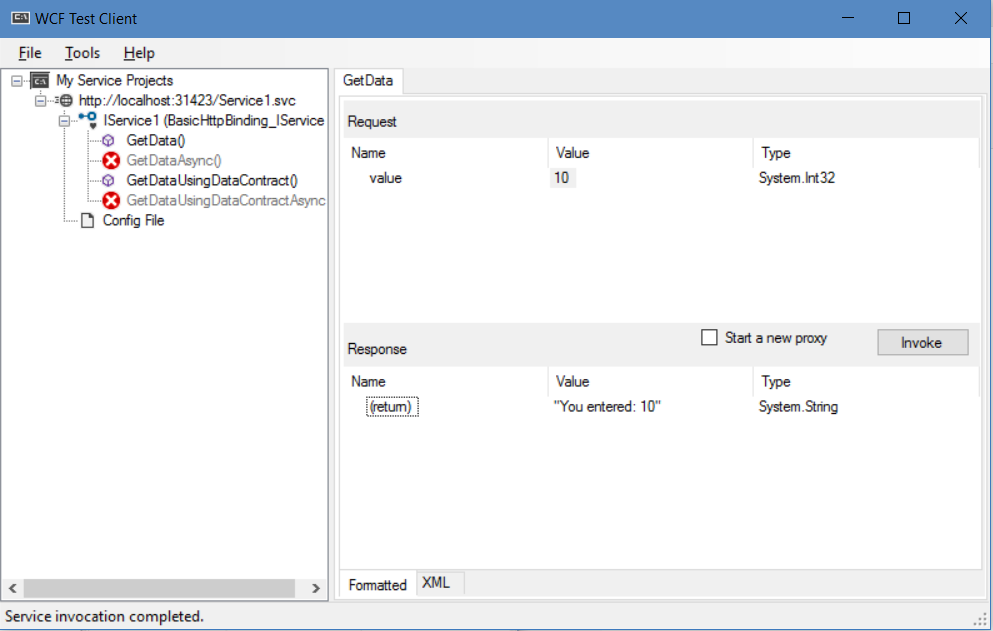
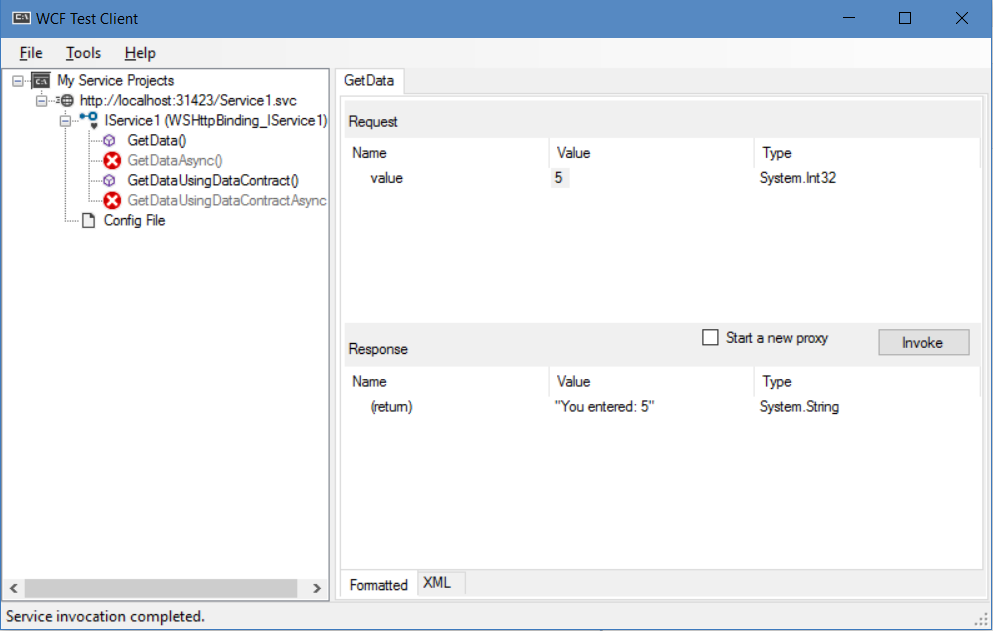
If we select the Service1.svc page and press F5 to run this, it will open the WCF Test Client. From here, we can select the GetData() method and enter a value. Invoking the method will then return the result, e.g. “You entered: 10”:
Notice the components of a WCF service. There is:
- The service contract. This is in the IService1.cs file and contains:
- ServiceContract. This is used to define what the Operations are
- OperationContract(s)
- DataContract. This is used to define data that will be sent back and forth
- Data Member(s)
- ServiceContract. This is used to define what the Operations are
Notice when in F5, the service is running and we can hit the URL of the service:

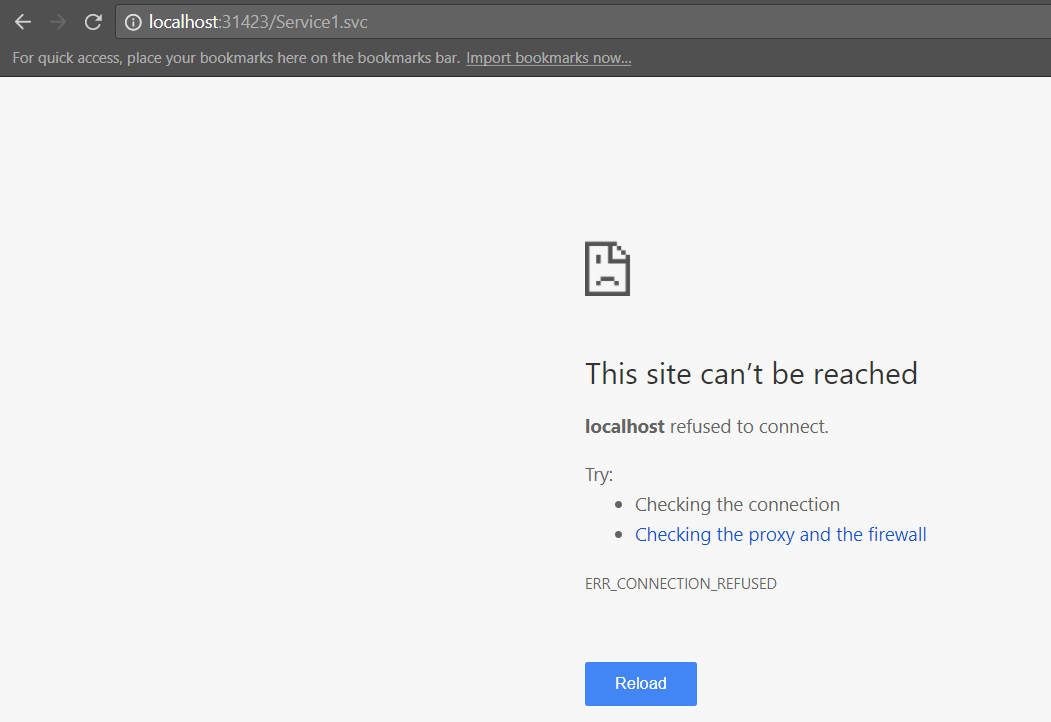
Stopping debugging prevents us from accessing that endpoint:
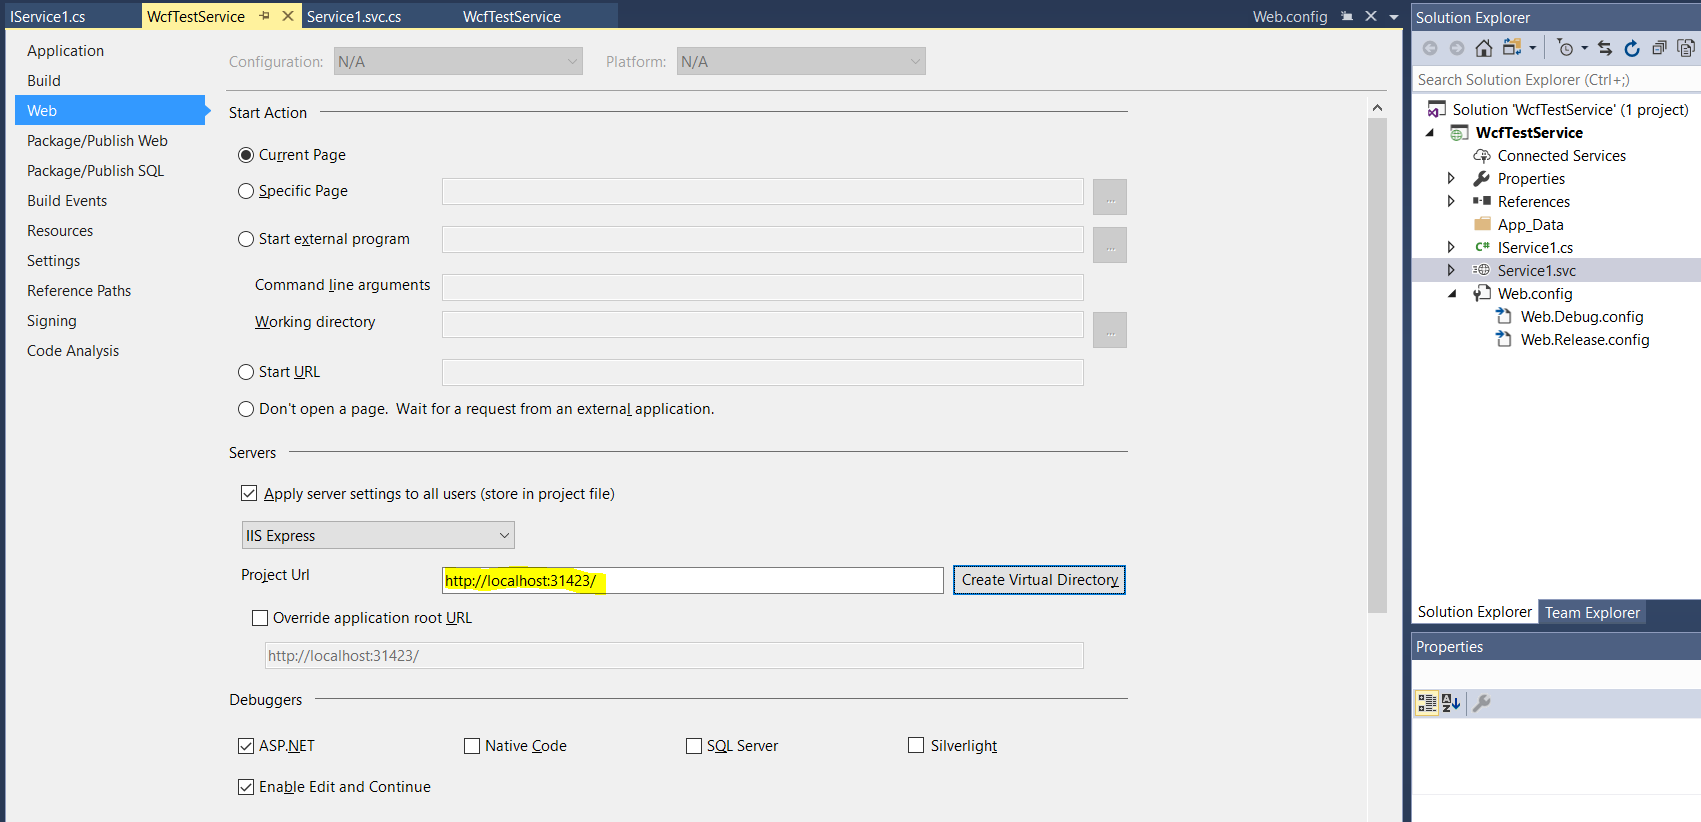
The endpoint settings can be found in the project properties:
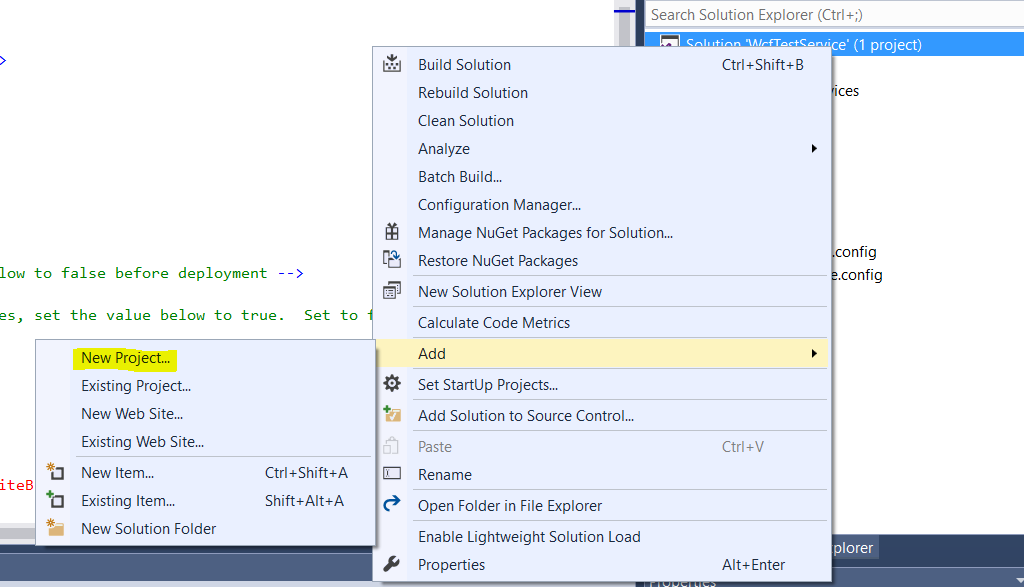
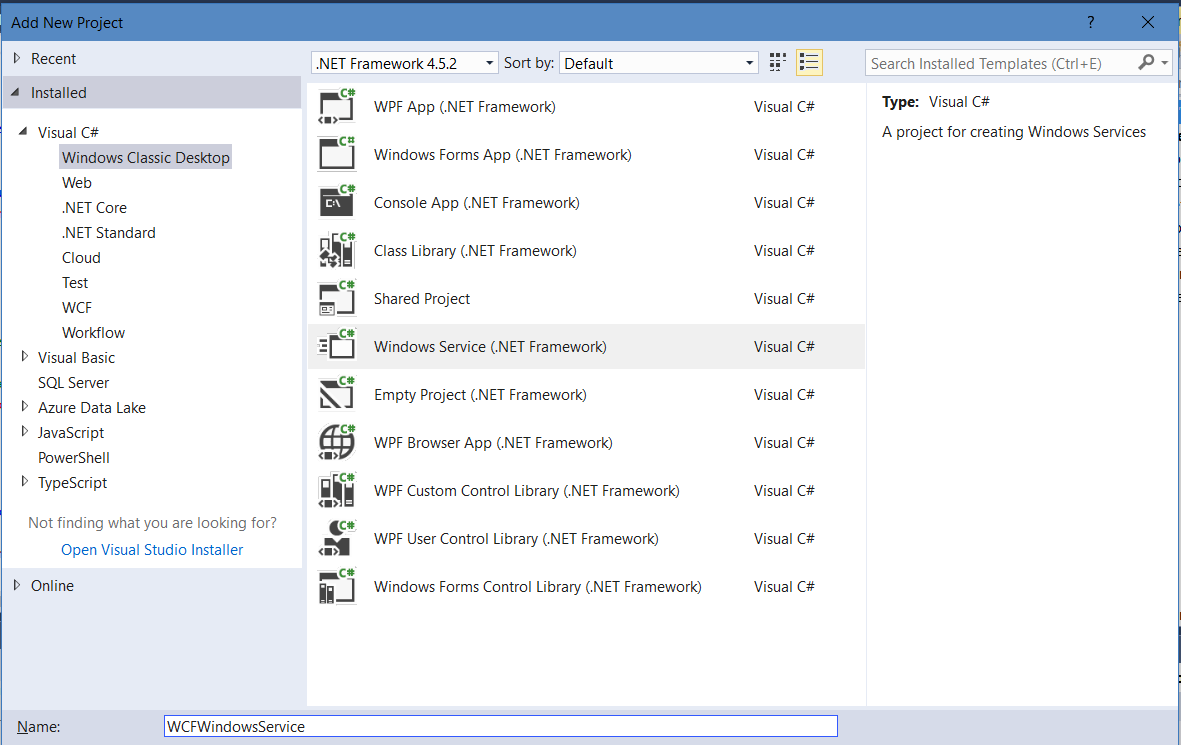
Now, right click the solution and click Add->New Project. We will add a Windows Service to host our new service:
Select Windows Service:
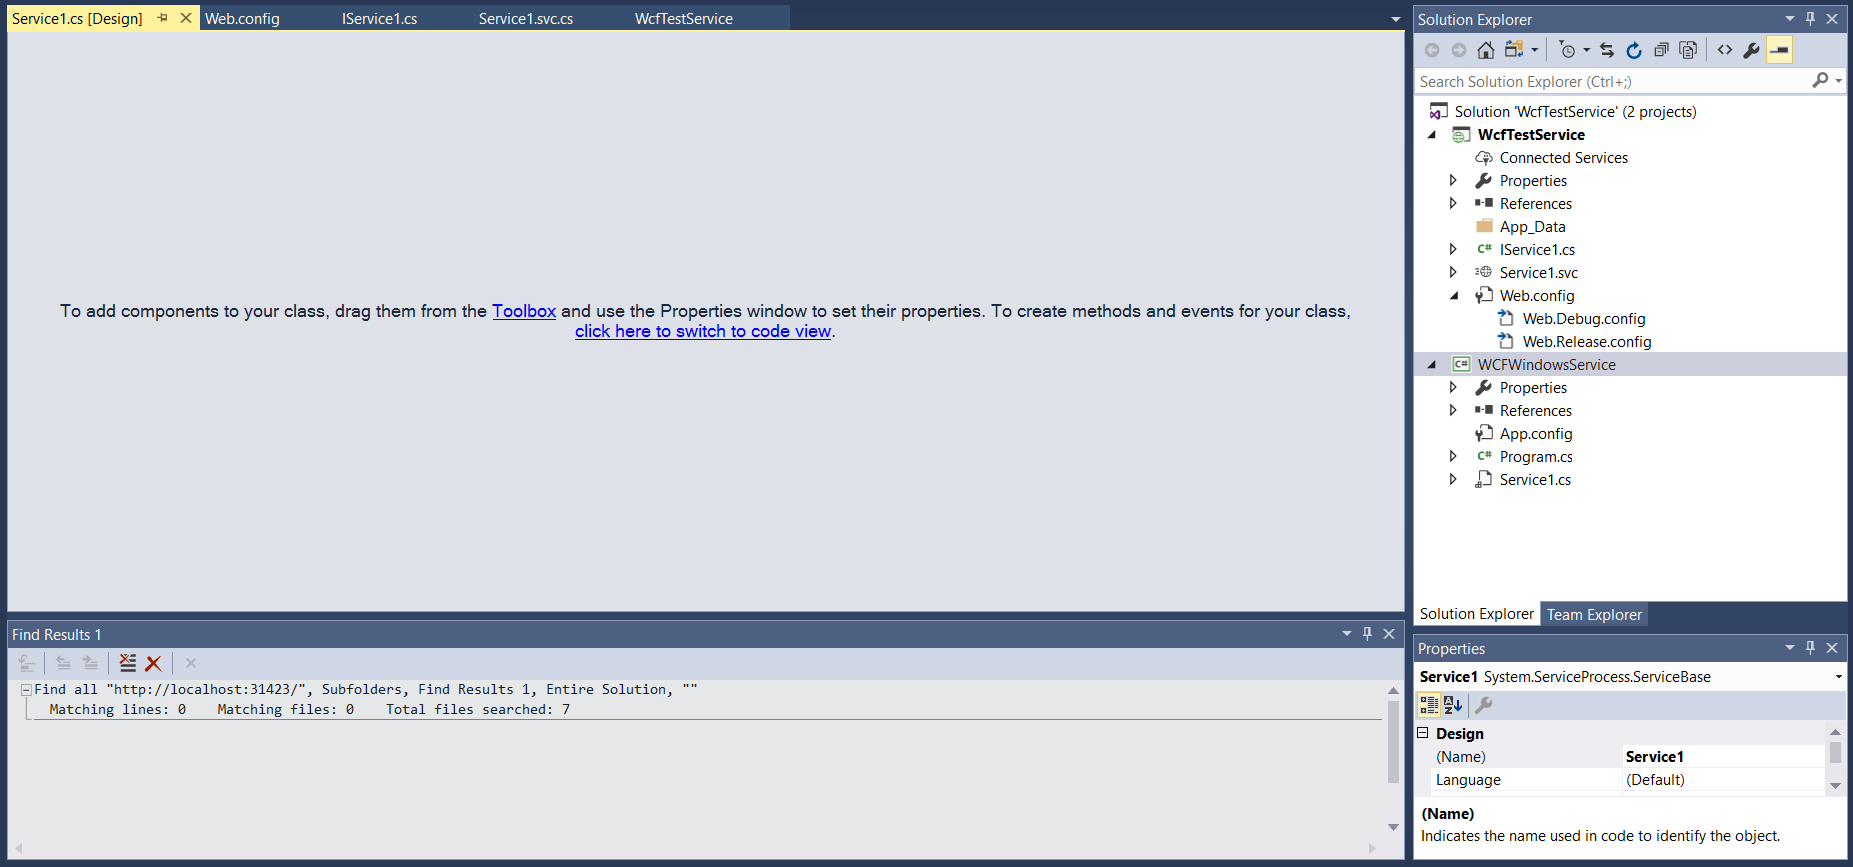
This will open the solution:
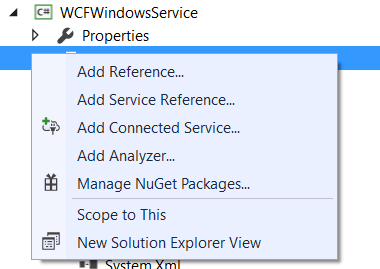
Click to add a new reference:
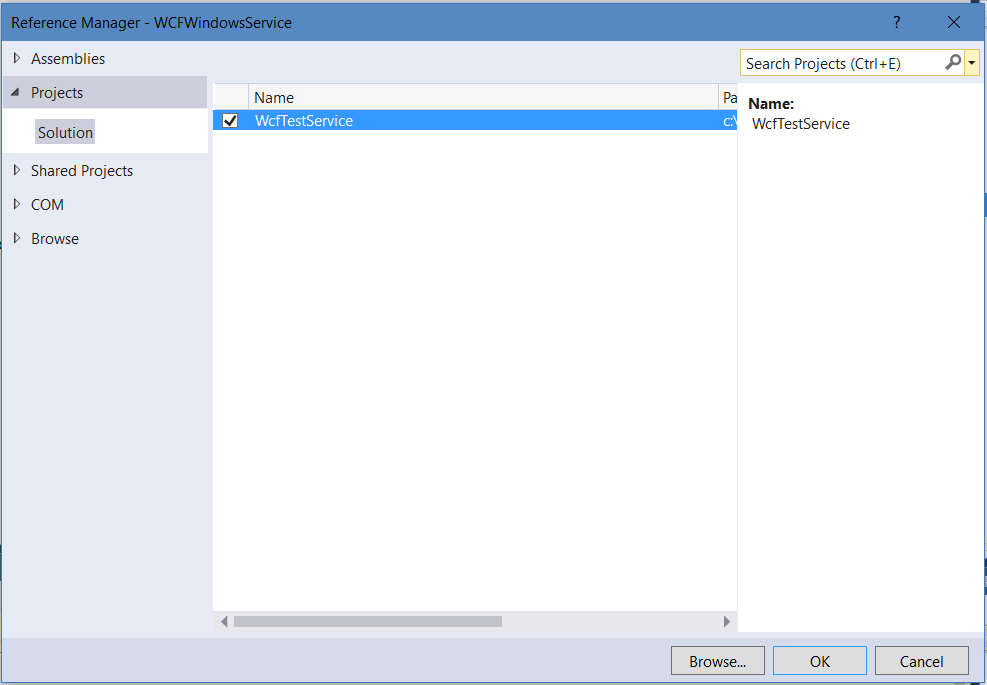
Select the reference of the project we just created:
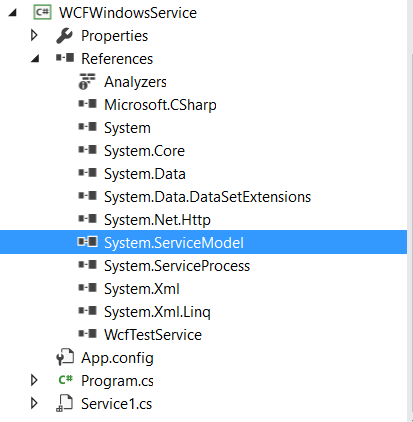
Now in the windows service, add a new reference to the System.ServiceModel dll:
Add the following code. You will need to add:
- using System.ServiceModel;
- using System.ServiceModel.Description;
To the OnStart method we are adding code to add a URI to our service. We will use the same URI as before.
using System;
using System.Collections.Generic;
using System.ComponentModel;
using System.Data;
using System.Diagnostics;
using System.Linq;
using System.ServiceProcess;
using System.Text;
using System.Threading.Tasks;
using System.ServiceModel;
using System.ServiceModel.Description;
using WcfTestService;

namespace WCFWindowsService
{
    public partial class Service1 : ServiceBase
    {
        ServiceHost s = null;

        public Service1()
        {
            InitializeComponent();
        }

        protected override void OnStart(string[] args)
        {
            if (s != null)
            {
                s.Close();
            }
            Uri httpUrl = new Uri("http://localhost:31423/Service1.svc");
            s = new ServiceHost(typeof(WcfTestService.Service1), httpUrl);
            s.AddServiceEndpoint(typeof(WcfTestService.IService1), new WSHttpBinding(), "");
            ServiceMetadataBehavior smb = new ServiceMetadataBehavior();
            smb.HttpGetEnabled = true;
            s.Description.Behaviors.Add(smb);
            s.Open();
        }

        protected override void OnStop()
        { if (s != null)
          {
             s.Close();
             s = null;
          }
        }
    }
}
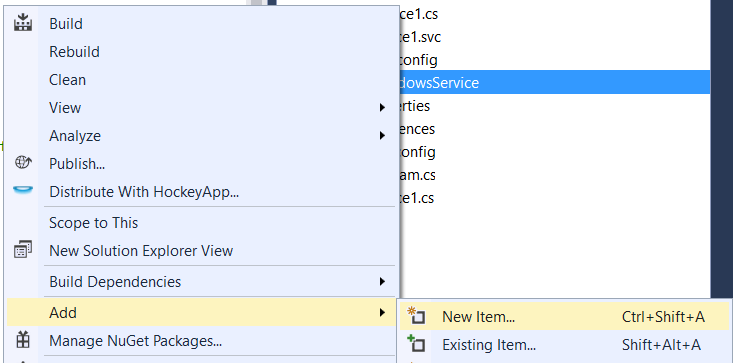
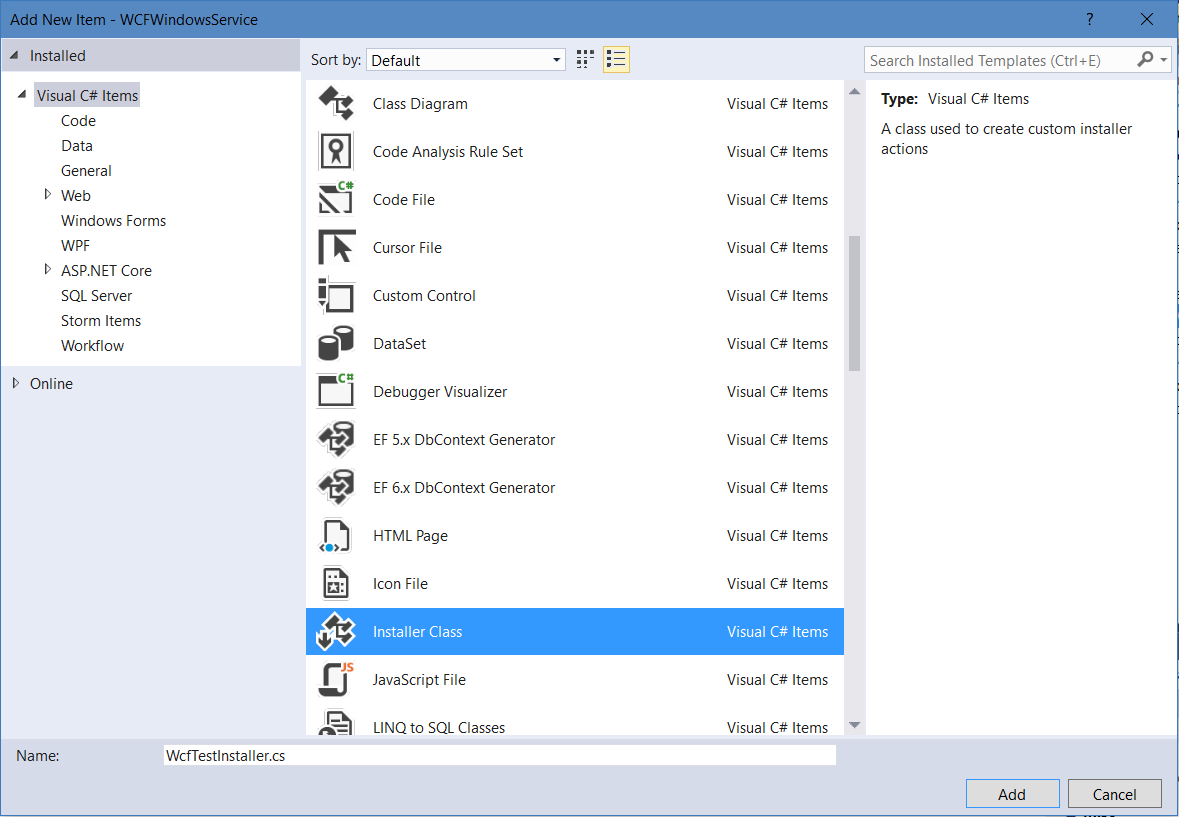
We now need to add the installer class:
Now, add the code for the installer. Add:
- using System.ServiceProcess
Add code to the WcfTestInstaller. Here we will name the windows service and set the account for it to run under:
using System;
using System.Collections;
using System.Collections.Generic;
using System.ComponentModel;
using System.Configuration.Install;
using System.Linq;
using System.Threading.Tasks;
using System.ServiceProcess;

namespace WCFWindowsService
{
    [RunInstaller(true)]
    public partial class WcfTestInstaller : System.Configuration.Install.Installer
    {
        public WcfTestInstaller()
        {
            //InitializeComponent();

            ServiceProcessInstaller process = new ServiceProcessInstaller();
            process.Account = ServiceAccount.NetworkService;
            ServiceInstaller service = new ServiceInstaller();
            service.ServiceName = "WcfTestWindowsService";
            service.DisplayName = "WcfTestWindowsService";
            service.Description = "WcfTestWindowsService.";
            service.StartType = ServiceStartMode.Automatic;

            Installers.Add(process);
            Installers.Add(service);
        }
    }
}
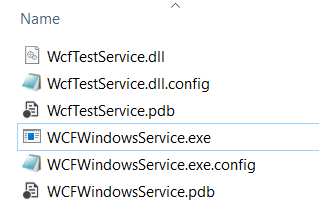
Compile the service. This creates the following files in our bin/debug directory:
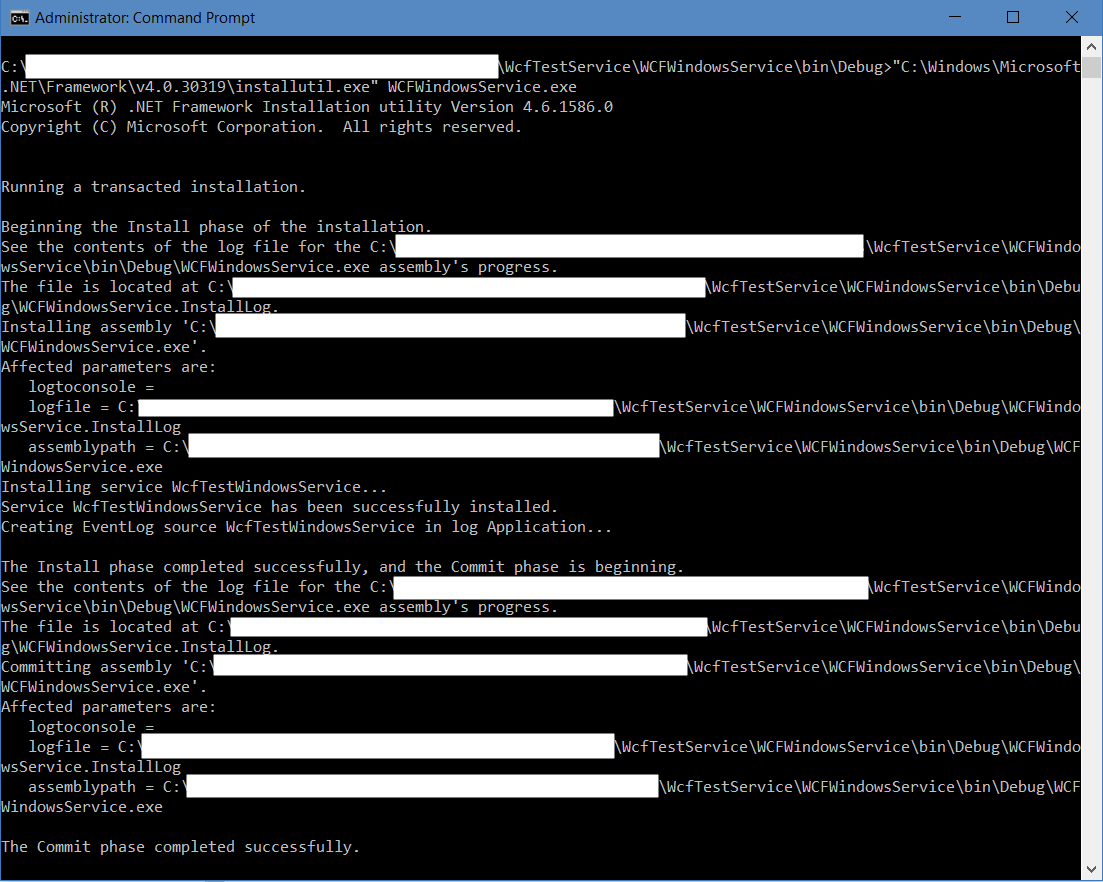
We can now install our service.
InstallUtil.exe is installed in this location:

Run a command prompt and run the command:
InstallUtil.exe WCFWindowsService.exe
You will now see the service in Windows Services:

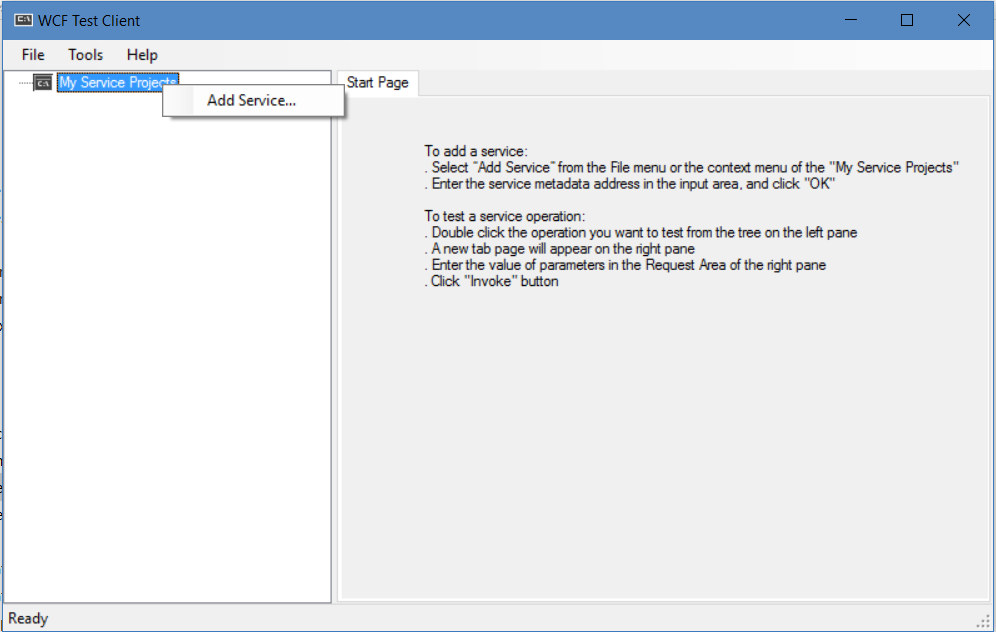
Let’s now try calling the service through the WCF Test Client that we used above. This is located in my environment at: C:\Program Files (x86)\Microsoft Visual Studio 14.0\Common7\IDE
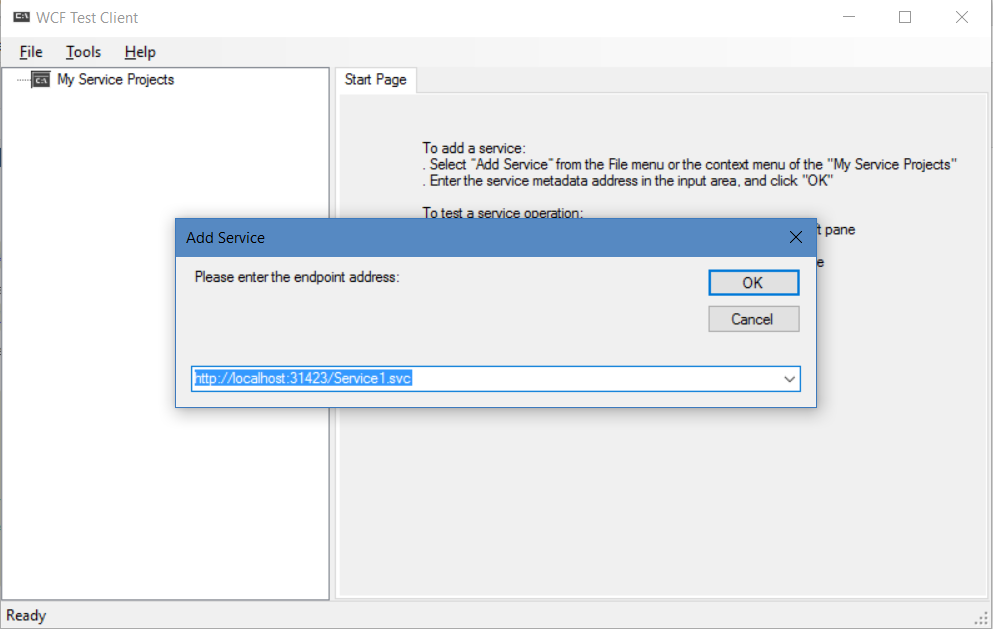
Right click to add a service:
Enter the endpoint URL:
The end point will be displayed. We can enter a value and get a result:
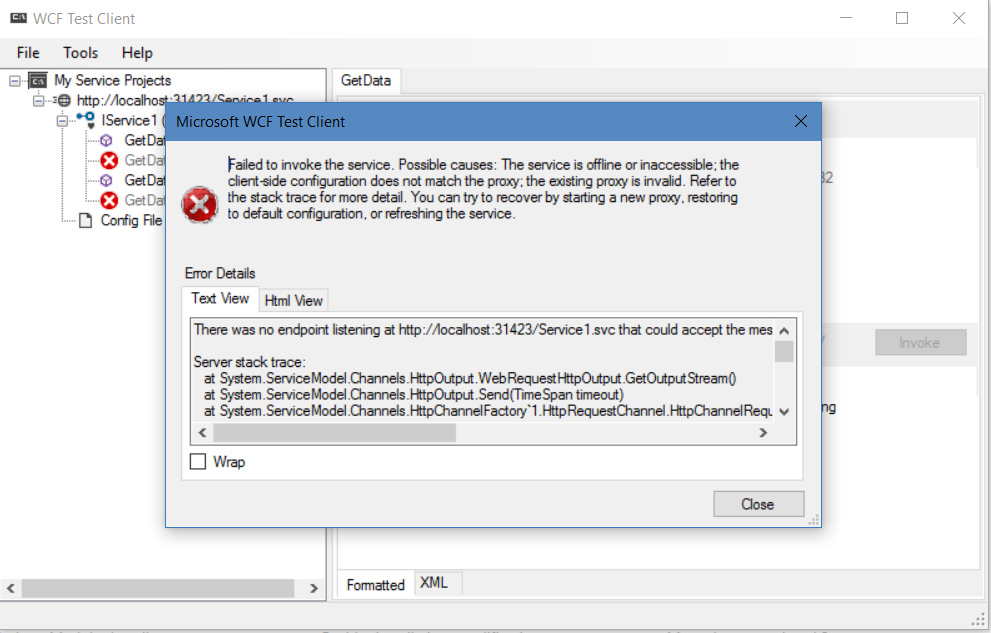
Now stop the service running in Windows. Try invoking the service again, and you will get this message:
I AM SPENDING MORE TIME THESE DAYS CREATING YOUTUBE VIDEOS TO HELP PEOPLE LEARN THE MICROSOFT POWER PLATFORM.
IF YOU WOULD LIKE TO SEE HOW I BUILD APPS, OR FIND SOMETHING USEFUL READING MY BLOG, I WOULD REALLY APPRECIATE YOU SUBSCRIBING TO MY YOUTUBE CHANNEL.
THANK YOU, AND LET'S KEEP LEARNING TOGETHER.
CARL


Super, thank You